
Subscribe to Our Youtube Channel
Related Manuals for tbs electronics TBS8510 Pro


Summary of Contents for tbs electronics TBS8510 Pro
- Page 1 Turbosight Tech Ltd TBS HD Video Transcoder Server User Guide TBS8510 Pro Edition: V3 (2024.12) Copyright © TBS Technologies 2005-2024 All Rights Reserved 1 / 80 TBS Transcoder User Guide...
- Page 2 Catalog /content 1. Product Overview ..............................4 1.1 Product Description ........................... 4 1.2 Product Specifications ..........................5 2. Quick Start ................................6 3. Home Page ................................7 4. Clients .................................. 8 4.1 General Setting ............................8 4.2 Clients ................................ 8 5.
- Page 3 6.1 Monitoring ............................... 62 6.2 Resources (Output Stream Address) ......................65 7. System Page ............................... 66 7.1 General Setting ............................66 7.1.1 Settings ............................66 7.1.2 Data Time ............................68 7.1.3 User Interface ..........................68 7.1.3 Notifications ..........................71 7.1.3 Tools .............................. 72 7.2 Users ................................
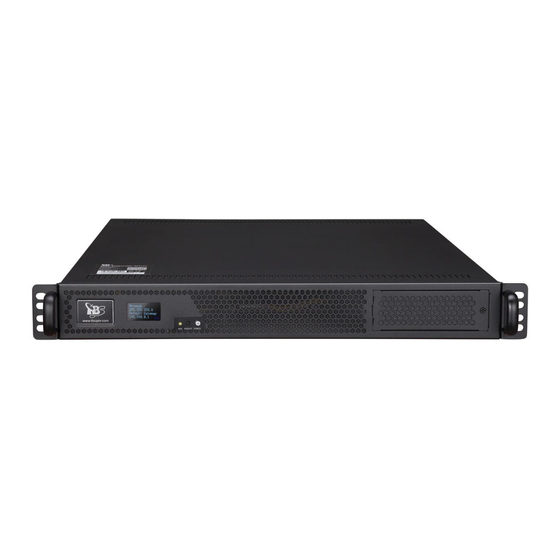
- Page 4 1. Product Overview 1.1 Product Description TBS8510 Pro multiple inputs H.264/H.265 IPTV transcoder is specially designed for our TBS TV tuner card customers. It’s a high-performance video server that features in high integration and reliable hardware transcoding server. The original data rate of DVB-S/S2 channels is very high, which will take up a lot of bandwidth if it is sent directly to the internet.
- Page 5 1.2 Product Specifications Item TBS8510 Pro Size 2xRJ45, 1000M Base-T2 Input interface 2xPCI-E slot Input Input Signal DVBS/S2, DVBT/T2, DVBC, ATSC, ISDBT, DTMB, HDMI, ASI Input Net Stream UDP, RTP, RTMP, HTTP, HLS, Media Files, SRT Video codecs MPEG-2, AVC / H.264, HEVC / H.265...
- Page 6 2. Quick Start When using the TBS transcoder for the first time, please connect the default Ethernet LAN1 and connect to a monitor with a HDMI cable. Power on the server, the following information will be displayed on the screen: The default IP and log in information are: Default IP: 10.47.48.1/255.255.240.0 User name: admin...
- Page 7 3. Home Page In Dashboard, the transcoder/system status are all in sight, including the transcoder’s CPU and Memory Usage status, Ethernet Input and Output status, and detailed transcode modules status. Utilization 3 days usage of the server is always showed in Utilization page: 7 / 80 TBS Transcoder User Guide...
- Page 8 4. Clients 4.1 General Setting Allow Remote Devices this option is used to enable or disable the streaming from TBS8510. If it is set to Yes, it allows to use VLC to play the stream from TBS8510. If transcoder is use RTMP to send the stream to a CDN, it is better to disable this option to protect the streams When the SAP is enabled, transcoder manager (Hereinafter referred to as Manager) will get the multicast stream list automatically.
- Page 9 5. Live Streams 5.1 General Setting 5.1.1 Summary In Summary page, it shows the status of all channels and the process profiles in use. Click any of them to enter the detail setting page. 9 / 80 TBS Transcoder User Guide...
- Page 10 5.1.2 Settings Engine Settings: TBS transcoder provides 4 Flow models: TS Processing (No PCR Lookup): We will process and check the TS stream TS Processing (High Precision): We will process and check the TS stream and recreate the PCR Monitoring and Relaying: Just receive and monitor the TS stream then restream Packet Relaying: Just Restream TS Processing (High Precision) is the default and recommended model because it includes PCR detecting and conducting.
- Page 11 5.1.3 Advanced Settings 11 / 80 TBS Transcoder User Guide...
- Page 12 Besides the Engine Setting and Output Options, there are following setting in Advanced setting: TS Processing Defaults: This is for setting the TS parameters. Electronic Program Guide: If there is third-party source of EPG for the programs, it can be set here. HTTP/HLS Input Options: It is for detect whether there is delay in the input.
- Page 13 Starting Program Numbers (LCN): To number the programs. 5.2 DVB Management 5.2.1 Transponders (DVBS/S2, DVBT/T2, DVB-C, ATSC…) It is for creating files to manage all the DVB-S/S2, DVB-T/T2, DVB-C, ISDB-T, ATSC transponders. ① Following is an example to scan a DVB-S2 transponder: Press New Record, follow dialog will be showed: 13 / 80 TBS Transcoder User Guide...
- Page 14 ➢ Enter the value for “Name” and “Frequency Hz”, click Save. Following dialog will be showed: ⚫ If using a TBS Multi Standard Tuner card such as TBS6590, TB6528, TBS6522, TBS6508 to catch the satellite channels, the Frontend Number should be set to 1. If using other TBS tuner cards, just leave the value as Default.
- Page 15 ➢ Fill in all necessary values, then press Save. Then go to section of SPTS Options, press Scan: ➢ After enter following page, please choose the tuner to scan this transponder. (Note, the selected Tuner should be not in used.) After successful scan, press OK.
- Page 16 ② Following is an example to scan DVB-C channels: ③ Following is an example to scan DVB-T/T2 channels: 16 / 80 TBS Transcoder User Guide...
- Page 17 ➢ Choose system DVB-T input the Frequency (Hz), Press Save and then Edit to input the else parameters: ④ Following is an example to scan ATSC channels: 17 / 80 TBS Transcoder User Guide...
- Page 18 ⑤ Following is an example to scan DTMB channels: 5.2.2 All Programs 18 / 80 TBS Transcoder User Guide...
- Page 19 ➢ Take CGTN channel as an example to check the properties of the channel. Press Edit to start configuration: The transcode profile can be set here. The channel PID information can be changed here, too. Program Display the program name and the transponder that this program comes from. Program Configuration LCN: If there is no modulation requirement, the LCN can use the default value.
- Page 20 CDN: Choose RTMP (push) to enable the RTMP streaming. After enable the RTMP, more configuration should be set in this page External Modules Preprocessing: Choose the soft decryption profile that want to use. For the detailed setting of the profile, please go to “External Modules”...
- Page 21 Note: For the NEW TP, make sure that it has been successfully scanned on the transponder page, then assign it to the tuner. Then press Save and go to “Commit” page to “Restart Streaming Engine”: 5.3 Import Stream Management 5.3.1 Unicast Stream Import Go to “Live Streams”...
- Page 22 Unicast Stream Service Name: The name of the unicast stream. Transport Protocol: The protocol of the stream Interface: Choose the interface we are receiving the unicast stream. Port Address 4001-4250: The Port number of the unicast stream. Program Configuration LCN: If there is no modulation requirement, the LCN can use the default value. Kind: TV or Radio.
- Page 23 Streaming Engine Configuration Initiation: Run Always or Run on-demand. Flow Model: TS Process mode Decryption Key: If the source is biss key you can put the key here Encryption: We are using DVB/CSA encryption Key: The encryption will auto create when you enable Encryption Additional Outputs Multicast: Multicast the stream here.
- Page 24 The setting is the same as Unicast. 5.3.3 HTTP Stream Import If input the HTTP stream, press New Recorder to create a new one here. 24 / 80 TBS Transcoder User Guide...
- Page 25 The setting is the same as Unicast. 5.3.4 RTSP input If input the RTSP stream here, press New Recorder to create a new one. 25 / 80 TBS Transcoder User Guide...
- Page 26 The setting is the same as Unicast. 5.3.5 HTTP Live Streams import (HLS Stream Acquisition) ① If input the HLS stream, press New Recorder to create a new one here. 26 / 80 TBS Transcoder User Guide...
- Page 27 HLS Playlist Name: Name the streams. Playlist Address: Enter the m3u8 list address. Current State: Enable or Disable Description: Add more description for the streams, if necessary. Actions LCN Preset: The LCN value Streaming Engine Configuration Initiation: Run Always or Run on-demand. Flow Model: TS Process mode Decryption Key: If the source is biss key you can put the key here Encryption: We are using DVB/CSA encryption...
- Page 28 Additional Outputs Multicast: Multicast the stream here. SRT: Stream the program in SRT, set here. CDN: Choose RTMP (push) to enable the RTMP streaming. After enable the RTMP, more configuration should be set in this page ② After click Save, it will go into following page. Click to fetch the playlist.
- Page 29 5.3.6 SRT streaming import If input the SRT stream, press New Recorder to create a new one here. 29 / 80 TBS Transcoder User Guide...
- Page 30 SRT Stream Service Name: Name the program. Connection Mode: Caller or Listener. The other setting is the same as Unicast import. 5.3.7 Multi-Program TS import ① Press New Recorder to create a new one. 30 / 80 TBS Transcoder User Guide...
- Page 31 MPTS Stream Display Name: Name the stream. Transmission: The stream protocol. Description: Add description if necessary. Current State: Active or disable. Streaming Engine Configuration Initiation: Run Always or Run on-demand. Flow Model: TS Process mode ② Press Save entering next setting page: ③...
- Page 32 ④ Wait a few seconds, it will automatically show the scan results like this: Press OK, then go to Program List -> View to configure every channel: 32 / 80 TBS Transcoder User Guide...
- Page 33 5.3.8 Local Files import ① Store TS files into the server: Open the server samba folder with transcoder IP address, for example: \\192.168.8.124 Either User name and Password is “kylone”. Go to “content” → “files” folder and put the TS file in it, as below: 33 / 80 TBS Transcoder User Guide...
- Page 34 ② Press New Recorder to create a new Local File. 34 / 80 TBS Transcoder User Guide...
- Page 35 Local File Service Name: Name the program. File Name: Select TS file from the folder of “files”. Loop: Local files loop stream The other setting is the same as Unicast import. 5.3.9 HDMI Encoder video Import It is for input video from TBS HDMI Encoding PCIe card. When the transcoder is loaded with TBS HDMI encoding cards like TBS6304X, TBS6304T and so on, the system will detect them automatically.
- Page 36 ① The system provides some default encoding profiles. After any of the profile is selected, it will be appointed to all the HDMI channels. ② If want to edit the profile, click to enter the setting page: 36 / 80 TBS Transcoder User Guide...
- Page 37 ③ If want to add new the profile, click to create new one. 37 / 80 TBS Transcoder User Guide...
- Page 38 ④ If want to appoint different profile to each single HDMI source, click enter the setting page and click Edit: 38 / 80 TBS Transcoder User Guide...
- Page 39 Program Configuration LCN: If there is no modulation requirement, the LCN can use the default value. Current State: xxxxxx Encoding Configuration Encoding Profile: Select the profile Streaming Engine Configuration Encryption: We are using DVB/CSA encryption Key: when you enable encryption the key will show here Additional Outputs Multicast: Multicast the stream here.
- Page 40 Output Profile (HLS): If output HLS/ABR streams, choose the profile that want to use. 5.3.10 Stream Capture Import It is for input TBS raw data capturing signal. Stream Capture Service Name: Name the stream. Video Input: Select the Video Device. Audio Input: Select the Audio Device.
- Page 41 Stream Service Name: Name the stream. Stream URL: URL for the RTMP stream. Number of Tracks The video and audio tracks must be configured with correct values. The other setting is the same as Unicast import. 41 / 80 TBS Transcoder User Guide...
- Page 42 5.3.12 Instances In the condition that need multiple output, setting here to copy the input stream. This new record you can use with different profile and output. When save you will see like this: 42 / 80 TBS Transcoder User Guide...
- Page 43 5.4 TS Submission 5.4.1 Multicast All channels are listed here, for setting multicast output. Click any channel, entering the setting page: 43 / 80 TBS Transcoder User Guide...
- Page 44 5.4.3 SRT output Similar setting to the one of Multicast output. 5.4.3 CDN (RTMP Output) 44 / 80 TBS Transcoder User Guide...
- Page 45 ① Go to "Live Streams” → “All Programs”, select the channel that to be pushed in RTMP. Take the channel Dragon TV as a sample: ② Click the channel to enter following page: 45 / 80 TBS Transcoder User Guide...
- Page 46 ③ Edit the channel configuration to active RTMP push: ④ Click Save and go to “TS Submission” → “CDN”. The Egress status of channel “Dragon TV” is Active. 46 / 80 TBS Transcoder User Guide...
- Page 47 ⑤ Click Profiles to create the RTMP upload profile and Save: ⑥ Go back to “Dragon TV” page: When use RTMP upload please take care about the transcode profile, need choose the audio track, as rtmp do not support multiple audio like this : 47 / 80 TBS Transcoder User Guide...
- Page 48 Defaults: Select the RTMP profile that just be created. Stream Name for FLV: Name for the stream. Profile: Select the transcoding profile. ⑦ The status of each stream is showed in the status page, as below: ⑧ Go to “Commit” to Update Streaming Engine 5.4.4 MPTS Multiplexing ①...
- Page 49 ② In output Configuration, click View to enter the TS information setting, and click Edit. 49 / 80 TBS Transcoder User Guide...
- Page 50 ③ Go to Commit page and press Commit to take effect, you can check the status on the status page after a while: 5.4.5 DVB/ASI Modulators ① Go to "Live Streams” → “TS Submission” → “Modulators”. If the transcoder is loaded with a TBS modulator card, it will show as bellowed picture, which can see there is a TBS6032 DVB-C 16 QAM modulator PCIe card.
- Page 51 51 / 80 TBS Transcoder User Guide...
- Page 52 5.5 External Modules 5.5.1 Post-processing Profile (Transcode Profile) Some default profiles has been pre-installed in the system. Check them in “Live Streams” → “External Modules” → “Post-processing” as bellowed: TBS8510Pro we add new profile IG HD/SD **, this is for Intel quick sync profile ,we can use when the GPU full load.
- Page 53 Hardware Acceleration: you can use any value, as it will auto choose the process Node. Video Decoder Codec: The input video codec information. if you don’t know the codec data, you can set “Auto”. Acceleration: If you need to use hardware Decode, set “Yes”. If you set “No”, it will use the CPU. Deinterlacing: Recommend to use Adaptive.
- Page 54 Video Encoder Acceleration: Please setup to “Yes”. It set “No”, it will use CPU to encode. Codec: The output video codec. Track: The track of the video. Profile H.264/H.265 only: Compress profile 54 / 80 TBS Transcoder User Guide...
- Page 55 Preset NQ: Video process mode high quality use more resource, High performance support more channels Tune LL: High quality need more time process Level: Choose the compress level Scale: Here you can scale the video size you want, otherwise it will keep original one scale. Bitrate control: CBR/VBR.
- Page 56 Video Effects Picture: It is for adjusting the attribute of the video, like Contrast, Brightness and so on. Area Blur x,y,w,h: set the position of the Watermark. Watermark, File, Denoise, Invert, Flip, these are all for setting the attribute of the insert logo or Watermark picture.
- Page 57 5.5.2 HLS Output This is the HLS Output Module Profiles setting, we have already pre-installed some profile: TBS8510 Pro we add new profile IG HD/SD **, this is for Intel quick sync profile, we can use when the GPU full load.
- Page 58 Let’s choose one profile to check: Hardware Acceleration: you can use any value for this option, it will auto choose the process Node. Video Decoder Codec: The input video codec information, if you do not know it, you can setup to Auto. Acceleration: If you need to use hardware Decode setup to Yes, if you setup to No, it will use CPU.
- Page 59 Chunk Duration: How long the file is. Sequence Source: We can use number or data or time stamp Allow Caching: This option used for time shift. You can enable more profiles as needed, but enable at least 1 profile. Video Encoder Codec: The output video codec.
- Page 60 Audio Encoder Codec: The output audio codec. Track: The track of the audio. Sampling Rate 44.1 KHz: Set the audio sample rate Channels: Set the audio channels Upmix FL,FR,FC,LFE,BL,BR: set the audio Upmix Bitrate 192kb/s: Set the audio bit rate Sync to Timestamp: Set the audio sync option Volume +%: Adjust the volume of the video Advanced: We can put more parameters here...
- Page 61 Video Effects Picture: It is for adjusting the attribute of the video, like Contrast, Brightness and so on. Area Blur x,y,w,h: set the position of the Watermark. Watermark, File, Denoise, Invert, Flip, these are all for setting the attribute of the insert logo or Watermark picture.
- Page 62 Speed: when audio has sync problem, the process will be auto restarted. Drops: If the drops number continue we will restart the stream HLS PUSH Stream ID: The HLS server side stream ID Event Name: Stream name Publishing Host: Server address Delivery Host: Server address 6.
- Page 63 Transponder: You will have the transponder status here: Strength, SNR, and Bitrate. You can restart or stop the transponder with the option button. Restart: Stop: Preprocessing: Soft decryption Status: You can monitor all channels’ status here. If any channel is not working well, you can use restart button to restart it separately.
- Page 64 Here you can check the RTMP uploading status. You can check its working time and the upload bit rate. You can also restart it separately. Post-Processing (Transcoding Status): Here you can see the output bit rate of the transcoded channel and how long the channels have been transcoded.
- Page 65 Here you can see the users’ IP and ports connected to the transcoder. You can also check the channel being used, its output data rate, its connected time, and status. For more configuration of the states, please go to page Media Players. 6.2 Resources (Output Stream Address) Stream URLs Click to download the playlist, you will get the whole channels list like this:...
- Page 66 Channel URL is the URL of each channel such as: http://192.168.0.188:4750/6021/0/base/stream.ts If you set the channel output as multicast, it will show the multicast URL like this: 7. System Page 7.1 General Setting 7.1.1 Settings 66 / 80 TBS Transcoder User Guide...
- Page 67 Version Information You can find the kylone version number and other information here. You can click Upload to update the system to the latest version, such as using upg-entp-tbs-v3.4.2-2023090800-r8-x86_64-4.18.0-425.13.1.dat package. Media Server Status You can Stop or Start the Media server. When you click Stop, all channels will be stopped streaming. If you want them to run again, just click Start.
- Page 68 Update: This option will update the linux system package Kernel: The kernel version information Media Driver: The TBS DVB cards driver information Central Management If the remote service is enabled, it will show the remote status. If you need remote support, you can send the IP to us.
- Page 69 Here you can setup the web interface. System Console The default output is as belowed: 69 / 80 TBS Transcoder User Guide...
- Page 70 When you set Show Summary Information to No, it will not show this information. Media Portal It supports web playing support, like following picture: You can setup the title logo and Info picture. 70 / 80 TBS Transcoder User Guide...
- Page 71 7.1.3 Notifications The receiver email and sender email server information are set here. If there is any change in the system, the receiver’s email will get a notification as bellowed: 71 / 80 TBS Transcoder User Guide...
- Page 72 7.1.3 Tools This page is to Backup or Restore the system configuration, as well as the License key. 7.2 Users New users can be created here. 72 / 80 TBS Transcoder User Guide...
- Page 73 7.3 Services 7.3.1 HTTP 7.3.2 SNMP For more information about SNMP, please send an email to support@tbsdtv.com. We can customize it for you. 73 / 80 TBS Transcoder User Guide...
- Page 74 7.3.3 Firewall Sometimes the multicast output need disable the multicast, which can be setup here. 7.3.4 Sharing As to Kylone default folder, we enable the samba service. After you put the files in kylone, you can disable the service. 74 / 80 TBS Transcoder User Guide...
- Page 75 7.4 Network 7.4.1 Interface If the default interface has more than 1 interface (with Internet), please follow the steps below to set it. Set the Metric value to 0, and setup the right Gateway and DNS. For the use of other ports LAN, please setup as bellowed. The Metric value should be bigger than 0. Gateway and DNS both should be 0.0.0.0.
- Page 76 After finishing all the settings, don’t forget to press Commit to make it work. 7.4.2 Routing 7.4.3 Diagnostics 76 / 80 TBS Transcoder User Guide...
- Page 77 In some case, you might want to check the server status with Ping, DNS, HTTP. Here let us take a sample with Ping: Click Apply enter following page: Press Ping and wait a few seconds, then you will get the following result: 77 / 80 TBS Transcoder User Guide...
- Page 78 7.5 Third-Party Plugins 7.5.1 External Modules Our transcode and software decryption modules will install from here 7.5.1 EPG Sources We support third part EPG source 78 / 80 TBS Transcoder User Guide...
- Page 79 8. Commit. No matter what changes you make to the transcoder, you need to click Commit to make it work. It will take a few seconds to restart all streams. 79 / 80 TBS Transcoder User Guide...
- Page 80 Update Streaming Engine: This will not interrupt the running streams, just update the changed channels that have been made. Restart Streaming Engine: This will restart all stream and use the new settings. If there is any question about TBS8510 Transcoder, please send an email to support@tbsdtv.com, we will provide professional support as soon as possible.
Need help?
Do you have a question about the TBS8510 Pro and is the answer not in the manual?
Questions and answers