Advertisement
Quick Links
Advertisement

Related Manuals for Bosch HBF011BA1I


Summary of Contents for Bosch HBF011BA1I
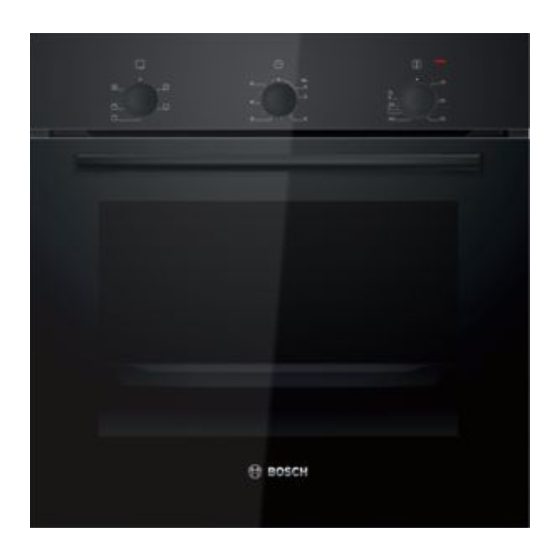
- Page 1 Oven HBF011BA1I User manual and installation instructions [en]...
- Page 2 en Safety Further information and explanations are available online: Table of contents Only a licensed professional may connect ap- pliances without plugs. Damage caused by in- correct connection is not covered under the INFORMATION FOR USE warranty. Safety .............. 2 Only use this appliance: ¡...
- Page 3 Safety en Loose food remnants, fat and meat juices If there is water in the cooking compartment may catch fire. when it is hot, this may create hot steam. ▶ Before using the appliance, remove the ▶ Never pour water into the cooking compart- worst of the food residues and remnants ment when the cooking compartment is from the cooking compartment, heating ele-...
- Page 4 en Preventing material damage If the appliance or the power cord is dam- Children may breathe in or swallow small aged, this is dangerous. parts, causing them to suffocate. ▶ Never operate a damaged appliance. ▶ Keep small parts away from children. ▶...
- Page 5 Environmental protection and saving energy en Environmental protection and saving energy 3 Environmental protection and saving energy 3.1 Disposing of packaging The packaging materials are environmentally compat- ible and can be recycled. Sort the individual components by type and dispose ▶ of them separately. 3.2 Saving energy If you follow these instructions, your appliance will use less power.
- Page 6 en Familiarising yourself with your appliance Familiarising yourself with your appliance 4 Familiarising yourself with your appliance 4.1 Control panels Timer You can use the timer to set a cooking time. You can use the control panel to configure all functions → "Timer", Page 7 of your appliance and to obtain information about the Function selector operating status.
- Page 7 Familiarising yourself with your appliance en Symbol Function Zero setting The appliance does not heat up. 50–275 Temperature range Set the temperature in the cooking compartment in °C. 1, 2, 3 Grill settings Depending on the appliance type, set the grill settings for the grill, for the large area and grill, or for the small area.
- Page 8 You will find a comprehensive range of products for Wire rack Insert the wire rack with the open your appliance in our brochures and online: side facing the appliance door and www.bosch-home.com the curved lip facing downwards. Accessories are appliance-specific. When purchasing Tray...
- Page 9 Time-setting options en Changing the type of heating 6.3 Types of heating and temperature You can change the type of heating at any time. Use the function selector to set the type of heating. Use the function selector to set the required type of ▶...
- Page 10 en Cleaning and servicing Appliance cover Area Suitable cleaning agents Information Door panels ¡ Hot soapy water Do not use a glass scraper or steel wool. Tip: Remove the door panels in order to clean them thoroughly. → "Appliance door", Page 12 Door cover ¡...
- Page 11 Cleaning aid en Clean using a sponge cloth and hot soapy water in Apply a thin layer of the stainless steel cleaning the direction of the finish. product with a soft cloth. Dry with a soft cloth. Tip: You can obtain stainless steel cleaning products from after-sales service or the online shop.
- Page 12 en Appliance door Pull the entire shelf support downwards first and ATTENTION! then pull it forwards and remove it. Incorrect assembly Never move the rail before the two hooks are se- ▶ cured fully in the upper holes. Otherwise the enamelled coating may be damaged and break. 10.2 Attaching the rails Place the two hooks at the top of the rail into the up- Both hooks must be inserted fully into the upper...
- Page 13 Appliance door en The oven door hinges each have a locking lever. Close the oven door as far as the limit stop. Grip When the locking levers are closed, the oven door the left and right hand sides of the door with both is secured in place.
- Page 14 en Appliance door Lift the panel up and out. WARNING ‒ Risk of injury! The oven door might accidentally fall or a hinge may suddenly snap shut. In this case, do not hold onto the hinge. Call cus- ▶ tomer service. When attaching the oven door, ensure that both hinges are inserted in the opening direction.
- Page 15 Troubleshooting en Troubleshooting 12 Troubleshooting You can rectify minor faults on your appliance yourself. WARNING ‒ Risk of electric shock! Read the troubleshooting information before contacting Improper repairs are dangerous. after-sales service. This will avoid unnecessary costs. Repairs to the appliance should only be carried out ▶...
- Page 16 Do not hold the appliance by the door handle or the ¡ Please visit our website https:// connections on the rear, as these could be dam- www.bosch-home.in/metapages/e- aged. waste-management to find out Do not place any heavy objects on the appliance.
- Page 17 Helpline no.: 1800-266-1880 (Monday to Saturday – open the appliance door. 8 am to 8 pm) Email ID: service.in@bosch-home.com Chat with us (WhatsApp): +91-8451000555 Make a note of your appliance's details and the Cus- tomer Service telephone number to find them again quickly.
- Page 18 en How it works 15.4 List of foods Food Accessories/cook- Shelf posi- Type of Temperature Cooking ware tion heating in °C/grill time in mins setting Sponge cake, simple Vienna ring tin/loaf tin 2 160–180 50–60 Fruit tart or cheesecake with shortcrust Springform cake tin, 160–180 70–90 pastry base...
- Page 19 Installation instructions en Yoghurt Meal Accessory/cookware Shelf position Type of Temperature Cooking heating/ in °C time, function minutes Yoghurt Cup/jar Cooking compartment 4–5 hours floor Installation instructions 16 Installation instructions Observe this information when installing the appliance. 16.2 Appliance dimensions You can find the appliance dimensions here. 16.1 Important information This appliance is designed for use up to a maximum height of 4000 metres above sea level.
- Page 20 en Installation instructions 16.3 Installing the appliance below a 16.6 Electrical connection worktop In order to safely connect the appliance to the elec- trical system, follow these instructions. ¡ Before using the appliance for the first time, you must ensure that your domestic power supply is earthed and complies with the effective safety re- quirements.
- Page 21 Installation instructions en Provide a separator in the phases in the fixed electrical installation in accordance with the construction instruc- tions. Identify the phase conductor and the neutral con- ductor (zero conductor) in the socket. An incorrect con- nection may damage the appliance. Only connect in accordance with the connection dia- gram.
- Page 24 Expert advice for your Bosch home appliances, help with problems or a repair from Bosch experts. Find out everything about the many ways Bosch can support you: www.bosch-home.com/service Contact data of all countries are listed in the attached service directory.
Need help?
Do you have a question about the HBF011BA1I and is the answer not in the manual?
Questions and answers