
Related Manuals for saro KEA


Summary of Contents for saro KEA
- Page 1 Seite 1 von 29 Betriebsanleitung Milchkühler / Milchkühler mit Glasvolltür Modell KEA / DELOS / PAROS 10/24 SvN...
-
Page 2: Table Of Contents
Seite 2 von 29 INHALT Lieferumfang ................................3 Normen und Richtlinien ............................3 Technische Übersicht ............................3/4 Symbolerklärungen ..............................4 Allgemeine Hinweise ............................... 5 Sicherheitshinweise ............................... 6 Geräteaufstellung ................................7 Geräteanschluss ..............................7 Struktur und Teile ..............................8 Erste Inbetriebnahme ............................. 8 Bedienung –... -
Page 3: Lieferumfang
Restaurants, um Milchprodukte kühl zu lagern und gleichzeitig eine ansprechende Präsentation zu ermöglichen. Es handelt sich um ein Beistellgerät für Kaffeeautomaten zur kontinuierlichen Milchkühlung. Bitte lesen Sie sich die Betriebsanleitung, vor der Inbetriebnahme, aufmerksam durch. Wir wünschen Ihnen viel Spaß mit Ihrem neuen SARO-Produkt. LIEFERUMFANG • 1 Milchkühler •... -
Page 4: Symbolerklärungen
Seite 4 von 29 Temperatureinstellung/-kontrolle Digital Separater Kondensatorlüfter Automatische Abtauung Füße 325-2177 + 325-21701: 4, justierbar 325-21751: 4, justierbar + 4 Tauschfüße mit H 45 mm Getestet bei / Geeignet für Bis 40 °C / Klimaklasse N / T Geräuschemission Klasse 325-2177: ca. -
Page 5: Allgemeine Hinweise
Seite 5 von 29 ALLGEMEINE HINWEISE • Bewahren Sie diese Betriebsanleitung griffbereit in der Nähe des Gerätes auf. • Der Hersteller/Händler kann nicht verantwortlich gemacht werden für Schäden, die durch Nichtbeachtung dieser Bedienungsanleitung entstehen. • Bei Nichtbeachtung dieser Bedienungsanleitung ist die Sicherheit des Gerätes nicht mehr gewährleistet. •... -
Page 6: Sicherheitshinweise
Seite 6 von 29 SICHERHEITSHINWEISE • Falsche Bedienung und unsachgemäße Behandlung können zu Störungen am Gerät und zu Verletzungen des Benutzers führen. • Das Gerät ist weder geeignet noch vorgesehen für die Lagerung von Medikamenten oder leicht entzündlichen, brenn-baren oder explosiven Stoffen. •... -
Page 7: Geräteaufstellung
Seite 7 von 29 GERÄTEAUFSTELLUNG Stellen Sie das Gerät in einem trockenen und ausreichend belüfteten Raum auf. Sorgen Sie dabei für einen sicheren Stand auf einem trockenen und rutschfesten Untergrund. Stellen Sie das Gerät mit der Rückseite mindestens 10 cm von der Wand entfernt auf, um jederzeit für genügend Luftzirkulation zu sorgen. -
Page 8: Struktur Und Teile
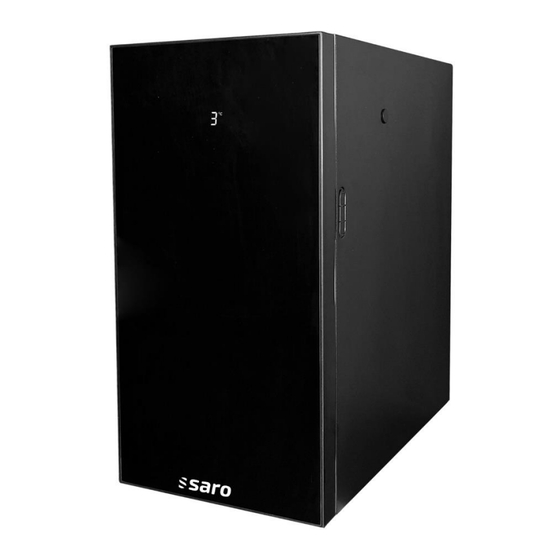
Seite 8 von 29 STRUKTUR UND TEILE Modellbeispiel: 325-21701 ERSTE INBETRIEBNAHME Vor der ersten Nutzung: Packen Sie das Gerät aus, überprüfen es auf Vollständigkeit und stellen Sie es auf (Siehe Geräteaufstellung). Säubern Sie das Gerät (siehe Reinigung). Schließen Sie das gesäuberte Kühlgerät (Siehe Geräteanschluss) an eine 230 V Steckdose an. Erst wenn die gewünschte Temperatur erreicht ist, legen Sie Ihre Ware in das Gerät ein. - Page 9 Seite 9 von 29 2. Einstelltaste Tippen Sie einmal leicht auf die SET-Taste. Die untere Reihe der Temperaturanzeige beginnt zu blinken und zeigt die eingestellte Temperatur an. Verwenden Sie die Tasten oder , um die Temperatur anzupassen. Der Temperaturbereich des Gerätes liegt zwischen 0 und 4 Grad, mit einer Werkseinstellung von 3 Grad.
-
Page 10: Reinigung
Seite 10 von 29 4. Empfohlene Einstellungen Wir empfehlen, keine Anpassungen an der Temperatureinstellung vorzunehmen. Eine zu kalte Einstellung kann das Einfrieren der Produkte verursachen. 5. Optimale Kühlleistung Die beste Kühlleistung wird erzielt, wenn das Gerät optimal gefüllt ist und die Luftzirkulation im Inneren des Geräts nicht durch Produkte im Kühlschrank behindert wird. -
Page 11: Stromlaufplan
Seite 11 von 29 Starke Geräusche Das Gerät ist nicht richtig nivelliert. Das Gerät berührt die Wand oder andere Gegenstände. Am Gerät ist irgendwas lose. Korrigieren Sie den sicheren, geraden Stand und/oder entfernen Sie die Berührungen. Fehlfunktion des Temperatursensors im inneren. Fehlfunktion des Milchtemperatursensors. -
Page 12: Explosionszeichnungen Mit Legende
Seite 12 von 29 EXPLOSIONSZEICHNUNG MIT LEGENDE: 325-2177 Tür komplett Kompressor Türdichtung Schlüssel Deckel für Milchbehälter Gehäuse Milchbehälter Kondensator komplett Platte für Verdampfer Lüfter Kondensator Lüfter Sensor Rückwand Infrarot-Empfängertafel Filter Verdampfer-Lüfter Halterung Infrarot emittierende Tafel Steckdose Verdampfer komplett Steuerung Abdeckung für Milchöffnung Montageplatte für Steuerung Unteres Scharnier Zuleitung... - Page 13 Seite 13 von 29 EXPLOSIONSZEICHNUNG MIT LEGENDE: 325-21701 Tür komplett Halterung für Steckdose Türdichtung Zuleitung Platte für Verdampfer Lüfter Temperatur Sensor Verdampfer Lüfter Kompressor Verdampfer komplett Bodenplatte Touch-Panel für Temperatur Einstellung Gewelltes Rohr Display Fuß Canopy Ø 7 mm Milch Öffnung Abdeckung Gehäuse Ø...
- Page 14 Seite 14 von 29 EXPLOSIONSZEICHNUNG MIT LEGENDE: 325-21751 Tür komplett Halterung für Steckdose Türdichtung Kondensator komplett Milchbehälter Steckdose für Zuleitung Deckel für Milchbehälter Kondensator Lüfter Platte für Verdampfer Lüfter Rückwand Abdeckung Verdampfer Lüfter Steuerung Verdampfer komplett Montageplatte für Steuerung Abdeckung für Öffnung Rechte Wand für Abdeckung Obere Scharnierabdeckung Prozessrohr...
-
Page 15: Verpackungs-Entsorgung
Falls vorhanden (Name des Händlers) E-Mail-Adresse des Verkäufers Eventuell Weitere Notizen Name des Verkäufers Made in P.R.C for: SARO Gastro-Products GmbH Abt. Einkauf Sandbahn 6, 46446 Emmerich am Rhein, Germany Tel. +49 (0) 2822 9258-0 +49 (0) 2822 18192 E-Mail info@saro.de... - Page 16 Seite 16 von 29 Operating instructions Milk cooler / Milk cooler with full glass door Model KEA / DELOS / PAROS 10/24 SvN...
- Page 17 Seite 17 von 29 CONTENTS Scope of delivery ..............................18 Standards and guidelines ............................ 18 Technical overview ............................18/19 Explanation of symbols ............................19 General notes ................................20 Safety instructions ..............................20/21 Installation ..................................21 Connection ................................21 Structure and parts ............................... 22 First commissioning ..............................
-
Page 18: Scope Of Delivery
It is a companion device for coffee machines, designed for continuous milk cooling. Please carefully read the operating instructions before putting the Minibar into operation. We hope you enjoy your new SARO product. SCOPE OF DELIVERY •... -
Page 19: Explanation Of Symbols
Seite 19 von 29 Automatic defrost Feet 325-2177 + 325-21701: 4 adjustable feet 325-21751: 4 adjustable feet + 4 replacement feet with 45 mm height Noise emission class 325-2177: approx. 41.9 dB 325-21701: approx. 42 dB 325-21751: approx. 40.6 dB Tested at / Suitable for 40 °C / climate class 5 Temperature range... -
Page 20: General Notes
Seite 20 von 29 GENERAL NOTES • Keep this operating manual easily accessible near the device. • The manufacturer/supplier cannot be held responsible for damages resulting from failure to observe this operating manual. • If this operating manual is not followed, the safety of the device can no longer be guaranteed. •... -
Page 21: Installation
Seite 21 von 29 • Always unplug the power cable by pulling from the plug housing, not the cable itself. • Ensure the device does not tip while being moved, as this could cause injury. • After moving the device, wait 2 hours before using it again. •... -
Page 22: Structure And Parts
Seite 22 von 29 STRUCTURE AND PARTS Model example: 325-21701 FIRST COMMISSIONING Before first use: Unpack the appliance, check for completeness, and place it in the designated location (See Appliance Placement). Clean the appliance (See Cleaning). Connect the cleaned refrigeration unit (See Device Connection) to a 230 V power outlet. Only place your goods in the appliance once the desired temperature has been reached. - Page 23 Seite 23 von 29 1. Boot Mode To turn off the device, press and hold the button for 3 seconds. In standby mode, you can turn on the device by pressing and holding the button for 1 second. After shutdown, only the power button indicator light will remain lit. 2.
-
Page 24: Cleaning
Seite 24 von 29 5. Optimal Cooling Performance The best cooling performance is achieved when the device is optimally filled and the air circulation inside the device is not obstructed by products in the refrigerator. CLEANING Wipe the exterior and interior surfaces with a damp, soft cloth. Mild dish soap can be used if necessary. Then, wipe again without any cleaning additive, and finally, dry thoroughly. -
Page 25: Circuit Diagram
Seite 25 von 29 CIRCUIT DIAGRAM 325-2177 + 325-21751: 325-21701: 10/24 SvN... -
Page 26: Exploded View With Legend
Seite 26 von 29 EXPLOSION DRAWING: 325-2177 EXPLOSION MARK - Legend 325-2177 Door assembly Compressor Door gasket Milk container lid Cabinet Milk container Condenser assembly Evaporator fan plate Condenser fan Sensor Back panel Infrared receiver panel Filter Evaporator fan Socket fix plate Infrared emitting panel Socket Evaporator assembly... - Page 27 Seite 27 von 29 EXPLOSION DRAWING: 325-21701 EXPLOSION MARK – 325-21701 Door assembly Socket Door gasket Socket fix plate Evaporator fan plate Power cable Evaporator fan Temperature sensor Evaporator assembly Compressor Touching panel for temperature Compressor bottom plate Display Corrugated pipe Canopy Foot Cabinet...
- Page 28 Seite 28 von 29 EXPLOSION MARK – 325-21751 Door assembly Socket fix plate Door gasket Condenser assemby Milk container Socket Milk container lid Condenser fan Evaporator fan plate Back panel Evaporator fan Controller Evaporator assembly Controller fix plate Hole cover Right panel Upper hinge cover Process tube...
-
Page 29: Packaging Disposal
E-mail address of the seller Optionallay More notes Name of the seller Made in P.R.C for: SARO Gastro-Products GmbH Department: Purchasing Sandbahn 6, 46446 Emmerich am Rhein, G e r m a n y Tel. +49 (0) 2822 9258-0 +49 (0) 2822 18192 E-mail info@saro.de...
Need help?
Do you have a question about the KEA and is the answer not in the manual?
Questions and answers