Advertisement
Quick Links
Item# 1005 052 036
Model# A208024100
USE AND CARE GUIDE
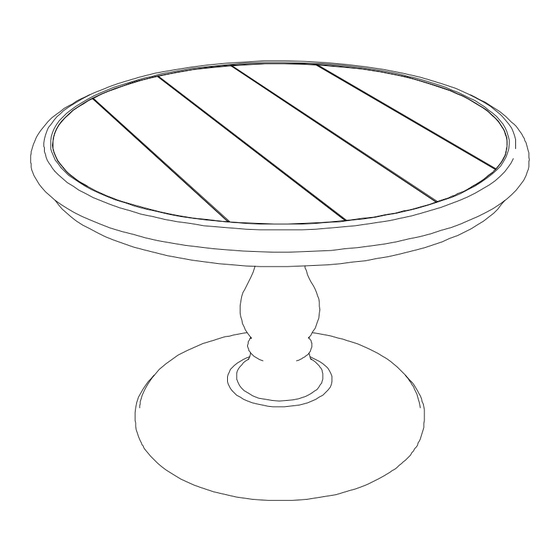
WINDSOR ROUND DINING TABLE – BROWN
Questions, problems, missing parts? Before returning to the store,
call Hampton Bay Customer Service
8 a.m. - 7 p.m., EST, Monday-Friday, 9 a.m. - 6 p.m., EST, Saturday
1-800-841-1350
HAMPTONBAY.COM
THANK YOU
We appreciate the trust and confidence you have placed in Hampton Bay through the purchase of this table. We strive to continually create quality products
designed to enhance your home. Visit us online to see our full line of products available for your home improvement needs. Thank you for choosing Hampton
Bay!
Advertisement

Subscribe to Our Youtube Channel
Related Manuals for HAMPTON BAY WINDSOR A208024100


Summary of Contents for HAMPTON BAY WINDSOR A208024100
- Page 1 THANK YOU We appreciate the trust and confidence you have placed in Hampton Bay through the purchase of this table. We strive to continually create quality products designed to enhance your home. Visit us online to see our full line of products available for your home improvement needs. Thank you for choosing Hampton...
- Page 2 Table of Contents Table of Contents ............2 Hardware Included ..............3 Important Safety Instructions ........2 Package Contents ..............3 Warranty ................. 2 Assembly ............... 5 Pre-Assembly ..............3 Care and Cleaning ............7 Planning assembly ..............3 Important Safety Instructions SAVE THESE INSTRUCTIONS Examine occasionally to ensure that there are no loose parts.
- Page 3 Pre-Assembly PLANNING ASSEMBLY Before beginning assembly of this product, make sure all parts are present. Compare parts with the Hardware Included and Package Contents lists. If any part is missing or damaged, do not attempt to assemble the product. Contact customer service for replacement parts.
- Page 4 Pre-Assembly (continued) OPTIONAL TOOLS TO AID ASSEMBLY (NOT INCLUDED) IMPORTANT This assembly requires one to two person. Approximate assembly time: 30 minutes. HAMPTONBAY.COM Please contact 1-800-841-1350 for further assistance.
- Page 5 Assembly Attaching the Table Top and Leg □ Attach the leg (B) to the table top (A) using 8 bolts (BB). Use wrench (DD) or rachet wrench (FF) to loosely tighten the bolts. NOTE: Do not fully tighten the bolts. Attaching the Support Bar □...
- Page 6 Assembly (continued) Attaching the Base □ Attach the base (C) to the leg (B) using 8 bolts (CC). Use wrench (EE) or rachet wrench (FF) to fully tighten all the bolts. NOTE: To preserve the finish, place parts on a soft surface. HAMPTONBAY.COM Please contact 1-800-841-1350 for further assistance.
- Page 7 Care and Cleaning □ Before using, clean the table completely with a soft dry towel. □ Do not use harsh abrasives or cleaners. □ When not in use, store in a cool, dry area. HAMPTONBAY.COM Please contact 1-800-841-1350 for further assistance.
- Page 8 Questions, problems, missing parts? Before returning to the store, call Hampton Bay Customer Service 8 a.m. - 7 p.m., EST, Monday-Friday, 9 a.m. - 6 p.m., EST, Saturday 1-800-841-1350 HAMPTONBAY.COM Retain this manual for future use. For certification use only...
- Page 9 THANK YOU We appreciate the trust and confidence you have placed in Hampton Bay through the purchase of this chair. We strive to continually create quality products designed to enhance your home. Visit us online to see our full line of products available for your home improvement needs. Thank you for choosing Hampton...
- Page 10 Table of Contents Hardware Included ..............3 Table of Contents ............2 Important Safety Instructions ........2 Package Contents ..............3 Warranty ................. 2 Assembly ............... 5 Pre-Assembly ..............3 Care and Cleaning ............7 Planning assembly ..............3 Important Safety Instructions SAVE THESE INSTRUCTIONS Examine occasionally to ensure that there are no loose parts.
- Page 11 Pre-Assembly PLANNING ASSEMBLY Before beginning assembly of this product, make sure all parts are present. Compare parts with the Hardware Included and Package Contents lists. If any part is missing or damaged, do not attempt to assemble the product. Contact customer service for replacement parts.
- Page 12 Pre-Assembly (continued) OPTIONAL TOOLS TO AID ASSEMBLY (NOT INCLUDED) IMPORTANT This assembly requires one to two person. Approximate assembly time: 30 minutes. HAMPTONBAY.COM Please contact 1-800-841-1350 for further assistance.
- Page 13 Assembly Attaching the Back and Leg (Left) □ Attach the leg (B) to the back (A) using 2 bolts (BB). Use wrench (CC) or rachet wrench (DD) to loosely tighten the bolts. NOTE: Do not fully tighten the bolts. Attaching the Leg (Right) □...
- Page 14 Assembly (continued) Attaching the Seat □ Attach the seat (D) to the back (A) and legs (C) using bolts (AA/BB). Use wrench (CC) or rachet wrench (DD) to loosely tighten the bolts. NOTE: To preserve the finish, place parts on a soft surface. Attaching the Seat □...
- Page 15 Assembly (continued) Placing the Cushion □ Place the cushion (E) on the seat (D) to complete the assembly. □ If the chair does not sit flat on the floor, slightly loosen the bolts, and push down on the seat to realign and adjust the legs, then carefully retighten the bolts.
- Page 16 Questions, problems, missing parts? Before returning to the store, call Hampton Bay Customer Service 8 a.m. - 7 p.m., EST, Monday-Friday, 9 a.m. - 6 p.m., EST, Saturday 1-800-841-1350 HAMPTONBAY.COM Retain this manual for future use. For certification use only...
Need help?
Do you have a question about the WINDSOR A208024100 and is the answer not in the manual?
Questions and answers