Advertisement
Quick Links
Advertisement

Related Manuals for Lorex LNZ44P4B


Summary of Contents for Lorex LNZ44P4B
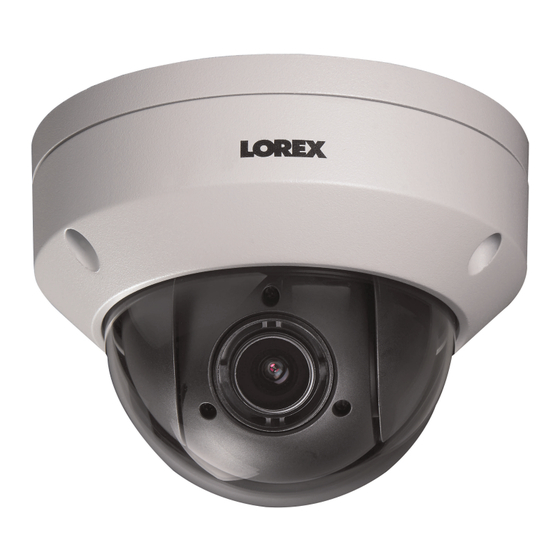
- Page 1 Instruction Manual LNZ44P4 SERIES 4x IP PTZ DOME CAMERA...
- Page 3 Instruction Manual LNZ44P4 SERIES 4x IP PTZ DOME CAMERA #LX400075; r.45773/45962; en-US...
- Page 4 Thank you for purchasing this product. Lorex is committed to providing our customers with a high quality, reliable security solution. This manual refers to the following model: LNZ44P4 For the latest online manual, downloads and product updates, and to learn about our complete line of accessory products, please visit our website at: lorextechnology.com...
- Page 5 Table of contents Safety Instructions ................1 Getting Started..................2 Connecting the Camera................3 OPTION 1: Connecting Cameras to an NVR ........3 OPTION 2: Connecting Cameras to the Local Area Network (LAN) ..................3 Adding the PTZ Camera to the LNR / NR Series NVRs......5 Adding the PTZ camera to the LNK Series NVRs .......
- Page 7 Safety Instructions • Read this guide carefully and keep it for future reference. • Follow all instructions for safe use of the product and handle with care. • Use the camera within given temperature, humidity, and voltage levels noted in the Technical Specifications.
- Page 8 Getting Started The system comes with the following components: 100ft (30.5m) Ethernet Extension Cable Allen Key (x2) IP PTZ Dome Camera Mounting Screws (x3) Wall Mounting Bracket & Anchors (x3) Mounting Template (For camera) Mounting Screws ST4 (x4) Hex Bolt M4x10 (x3) &...
- Page 9 Connecting the Camera It is recommended to connect the camera to your NVR and test the PTZ controls before permanent installation. For instructions on how to setup PTZ controls, see 5 Controlling the PTZ Camera with an NVR, page 14. 3.1 OPTION 1: Connecting Cameras to an NVR 1.
- Page 10 Connecting the Camera Step 1 of 2 — OPTION A: Connecting the camera to your local network using an op- tional PoE switch: 1. Connect an Ethernet cable of up to 300ft (91m) rated CAT5e or higher (not included) from the LAN port on an external PoE switch (sold separately on lorextechnology.com) to your router.
- Page 11 Connecting the Camera 1. Connect the camera to a power adapter (not included). NOTE For power requirement specification, see 8 Technical Specifications. 2. Connect the camera to a router in the same network as your NVR using the included Ethernet cable (or an Ethernet cable of up to 300ft (91m) rated CAT5e or higher). Step 2 of 2: Add the camera to your NVR: •...
- Page 12 Connecting the Camera 5. Click Add. The Status indicator turns green to show the camera is successfully connected. 6. Click OK to save changes. NOTE You can also add a camera to a specific channel by hovering the mouse over an empty channel in split- screen view and clicking .
- Page 13 Connecting the Camera 2. Click Search. The NVR scans the network for compatible cameras. A list of compati- ble cameras appear on the left-side of the screen. 3. Click the camera you would like to add. The selected camera’s attributes appear on the right-side of the screen.
- Page 14 Installation 4.1 Installation Tips and Warnings • Camera is rated for outdoor use. It is recommended to install the camera in a sheltered area, such as under the eaves on a roof. • Use the included wall mounting bracket for wall installation. Otherwise, the camera im- age will be sideways.
- Page 15 Installation To wall mount the camera: 1. Use the Allen key (S3.0) included with the wall mounting bracket kit to loosen the hex lock on the bottom of the wall mounting bracket. Once loose, remove the back plate of the mounting bracket. 1.
- Page 16 Installation 4. Ensure that the cable notch on the dome camera base is aligned with the cable notch on the wall mounting bracket. Align the 3 mounting holes on the dome camera base with the 3 corresponding mounting holes on the wall mounting bracket. 1: Cable Notch 2: Mounting Holes NOTE...
- Page 17 Installation 7. Attach the back plate to the mounting surface using the mounting screws ST4 (x4) in- cluded with the wall mounting bracket kit. NOTE Use the drywall anchors included with the wall mounting bracket kit if installing on a drywall surface. 8.
- Page 18 Installation 9. Lower the wall mounting bracket onto the back plate. Ensure that the 2 metal flaps on the back plate lock into the 2 grooves in the wall mounting plate. 10. Use the included Allen key (S3.0) to tighten the hex lock on the bottom of the wall mounting bracket.
- Page 19 Installation 4.2.2 Ceiling Mounting To ceiling mount the camera: 1. Use the mounting template included with the camera mounting kit to mark holes for the mounting screws (x3) and camera cable. 1. Mounting screw holes; 2. Camera cable hole (Optional) 2.
- Page 20 Controlling the PTZ Camera with an NVR The camera can accept PTZ commands directly through the Ethernet cable. There is no need to run special wiring to control the movement of the PTZ camera. LNZ44P4 camera is compatible with LNR / NR / LNK Series NVRs, excluding the LNR200 and LNR300 Series NVRs.
- Page 21 Controlling the PTZ camera with LNR / NR Series NVRs The following instructions are based on the LNR400 Series NVR. See your NVR’s instruc- tion manual for instructions on controlling the PTZ camera with your system. For the latest list of compatible NVRs, please visit lorextechnology.com/compatibility. To connect the PTZ camera to the system: 1.
- Page 22 Controlling the PTZ camera with LNR / NR Series NVRs PTZ Controls 1. Direction keys: Click to pan and tilt the camera. Click SIT to stop the current action. 2. PTZ Trace: Click to activate mouse PTZ Trace mode. You can do the following: •...
- Page 23 Controlling the PTZ camera with LNR / NR Series NVRs 1. No.: Click to select the number of the action you want to perform. 2. Not supported. 3. Not supported. 4. Preset: Click to call the selected preset. 5. Not supported. 6.
- Page 24 Controlling the PTZ camera with LNR / NR Series NVRs 2. Click the Tour tab. 3. Under Patrol No., select the tour you would like to configure. 4. Under Preset, select a preset you would like to add to the tour. 5.
- Page 25 Controlling the PTZ camera with LNR / NR Series NVRs 5. Move the camera into the desired end position and click End. 6. Right-click to return to the advanced PTZ controls window. To run a pattern: • Under No., select the number of the pattern you would like to go to and click NOTE •...
- Page 26 Controlling the PTZ camera with LNK Series NVRs The following instructions are based on the LNK7000 Series NVR. See your NVR’s in- struction manual for instructions on controlling the PTZ camera with your system. For the latest list of compatible NVRs, please visit lorextechnology.com/compatibility. To connect the PTZ camera to the system: 1.
- Page 27 Controlling the PTZ camera with LNK Series NVRs To use the PTZ controls: 1. Channel: Select the channel of the PTZ camera you want to control. 2. Navigation Controls: Click the directional arrows to move the PTZ camera. Click to begin autopan (PTZ camera pans around automatically). 3.
- Page 28 Controlling the PTZ camera with LNK Series NVRs 7.1.1 Setting PTZ Presets Access the PTZ control menu to set preset viewing points for the PTZ. This is helpful for saving frequently-monitored areas for quick viewing. Once you have saved a few preset viewing points, you can start a PTZ cruise to switch between preset points automatically by clicking To set PTZ presets:...
- Page 29 Technical Specifications Image Sensor 1/3", CMOS 4 MP Video Format NTSC / PAL Effective Pixels 2592 (H) x 1520 (V) Resolution Up to 4MP Range 0°~355° Pan; 0°~90° Tilt Pan/Tilt Speed Manual Speed — Max 100°/Sec Pan; Max 60°/Sec Tilt Preset Speed —...
- Page 30 Technical Specifications 8.1 Dimensions Camera Alone: Camera and Wall Mount: #LX400075; r.45773/45962; en-US...
- Page 31 Troubleshooting There is no picture at night. • Camera is capable of seeing in extremely low light conditions (0.2 Lux), but it cannot see in total darkness. It is recommended to install the camera where there is some ambient light (e.g. street lighting, starlight, moonlight, etc.) or leave a light on in the area where the camera is installed.
- Page 32 Resetting the Camera The camera features a hard reset button that is used to reset all camera settings back to the default values. This is useful in case you want to revert camera image settings back to the default values. To reset the camera: 1.
- Page 33 Notices This product has been certified and found to comply with the limits regulated by FCC, EMC, and LVD. Therefore, it is designated to provide reasonable protection against inter- ference and will not cause interference with other appliance usage. However, it is impera- tive that the user follows the guidelines in this manual to avoid improper usage, which may result in damage to the product, electrical shock and fire hazard injury.
- Page 34 #LX400075; r.45773/45962; en-US...
- Page 36 Legal disclaimer As our product is subject to continuous improvement, Lorex Corporation & subsidiaries reserve the right to modify product design, specifications & prices without notice and without incurring any obligation.E&OE.
Need help?
Do you have a question about the LNZ44P4B and is the answer not in the manual?
Questions and answers