Advertisement
Quick Links
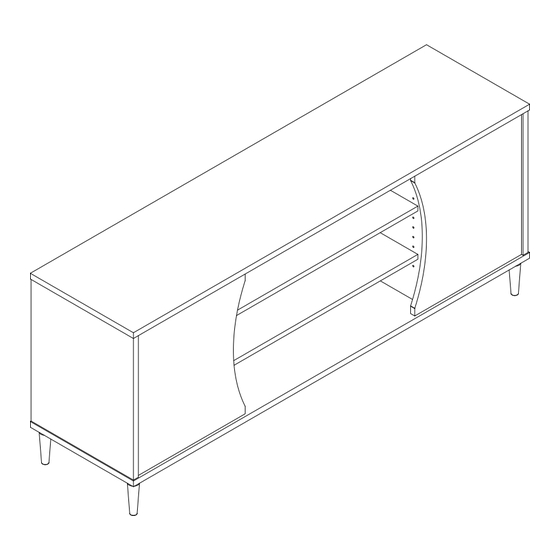
6740500COM
Retro Console
Date of Purchase ___ / ___ / ___
Lot Number:
THIS INSTRUCTION BOOKLET CONTAINS IMPORTANT SAFETY INFORMATION. PLEASE READ AND KEEP FOR FUTURE REFERENCE.
Secure Your Furniture
Keep your home and family safe
with the wall anchor kit that is
included with the product.
Serious or fatal crushing injuries can
occur from tipping furniture.
WARNING: Manufacturer assumes no liability
for improper installation or excessive loads
placed on screws or bracket. This wall anchor
is not a substitute for proper adult supervision.
Do Not Return This Product!
Contact our customer service team for help first.
Call: 1-800-489-3351 (toll free)
Monday-Friday
Visit: www.ameriwoodhome.com
Easy
Assembly Difficulty Meter
Follow Ameriwood Home
B346740500COM0
Tough
You
Tube
Advertisement

Subscribe to Our Youtube Channel
Related Manuals for Ameriwood HOME 6740500COM


Summary of Contents for Ameriwood HOME 6740500COM
- Page 1 Easy Tough Assembly Difficulty Meter Serious or fatal crushing injuries can occur from tipping furniture. Follow Ameriwood Home WARNING: Manufacturer assumes no liability for improper installation or excessive loads placed on screws or bracket. This wall anchor Tube is not a substitute for proper adult supervision.
- Page 2 Contact Us! Do NOT return this product! Contact our friendly customer service team first for help. Assembly Tips Call us! 1-800-489-3351 Monday-Friday Tube Visit ameriwoodhome.com to view the limited warranty valid in the U.S. and Canada. Helpful Hints PEOPLE NEEDED FOR ASSEMBLY: 1-2 - Open your item in the area you plan to keep it to avoid excessive heavy lifting.
- Page 3 Before You Start Read through each step carefully and follow the proper order Separate and count all your parts and hardware Parts are labeled on the surface or edge of the part Give yourself enough room for the assembly process Have the following tools: #2 Phillips Head Screwdriver and Hammer Caution: If using a power drill or power screwdriver for screwing,...
- Page 4 Before You Start Please Note: You may need to lightly tap the wood dowels into the holes during your assembly process. ameriwoodhome.com...
- Page 5 Board Identification Not actual size Left Side Right Side 36740056010 36740056020 36740056030 Bottom Left Partition Right Partition 36740348040 36740348050 36740348060 Center Shelf Outer Shelf 36740348070 36740348080 Door 36740056090 Back 36740348100 ameriwoodhome.com...
- Page 6 Board Identification Not actual size ameriwoodhome.com...
- Page 7 Note: Your unit may contain extra hardware. Part List Actual Size (x16) (x12) (x12) (x6) (x8) (x4) (x8) (x20) #A22700 #A21670 #A23030 #A89370 #A11070 #A80250 #A22710 #A14220 cam lock dowel screw door bumper euro screw shelf spoon cam bolt screw Apply TV Warning label to your unit for future reference.
- Page 8 STEP 1 (x2) (x2) (x1) Insert two cam locks (1), two cam bolts (2), and one dowel (3) into the Left Panel (A). Proper orientation of cam lock finished edge ameriwoodhome.com...
- Page 9 STEP 2 (x2) (x2) (x1) Insert two cam locks (1), two cam bolts (2), and one dowel (3) into the Right Panel (B). Proper orientation of cam lock finished edge ameriwoodhome.com...
- Page 10 STEP 3 (x8) Insert eight cam bolts (2) into the Top (C). ameriwoodhome.com...
- Page 11 STEP 4 (x20) (x5) Attach five metal feet (11) using four screws (7) per foot onto the Bottom (D). ameriwoodhome.com...
- Page 12 STEP 5 (x2) (x1) Insert two cam locks (1) and one dowel (3) into the Left Partition (E). Proper orientation of cam lock ameriwoodhome.com...
- Page 13 STEP 6 (x2) (x1) Insert two cam locks (1) and one dowel (3) into the Right Partition (F). Proper orientation of cam lock ameriwoodhome.com...
- Page 14 STEP 7 (x4) (x4) Assemble hinge by hooking the euro hinge (10) onto euro hinge plate (9) and rotate down until you hear a click locking both together. To separate the hinge assembly push button noted as "release". Release ameriwoodhome.com...
- Page 15 STEP 8 (x4) (x4) (x8) Insert two door bumpers (5) into each Door (I). Securely attach assembled hinges (9) & (10) using four euro screws (6) into each Door (I). Tighten screws. ameriwoodhome.com...
- Page 16 STEP 9 (x4) (x2) (x4) Insert four cam locks (1), two dowels (3) and four grommets (12) into the Back (J). Proper orientation of cam lock Proper orientation of cam lock ameriwoodhome.com...
- Page 17 STEP 10 Engage two cam bolts (2) from the Top Panel (C) into two cam locks (1) in the Left Side (A). Turn the cam locks clockwise to lock boards in place. Finished Edges Face Up finished edge finished edge ameriwoodhome.com...
- Page 18 STEP 11 Engage two cam bolts (2) from the Left Side (A) into two cam locks (1) in the Back (J). Turn the cam locks clockwise to lock boards in place. Finished Edges Face Up ameriwoodhome.com...
- Page 19 STEP 12 Engage six cam bolts (2) from the Top (C) into six cam locks (1) in the Left Partion (E), Right Partition (F), and the Right Side (B). Turn the cam locks clockwise to lock boards in place. Finished Edges Face Up finished edge finished edge finished edge...
- Page 20 STEP 13 (x8) Insert and tighten eight screws (4) through holes in Bottom (D) engaging Left Side (A), Left Partition (E), Right Partition (F), and Right Side (B). Finished Edges Face Up finished edge ameriwoodhome.com...
- Page 21 STEP 14 (x16) Insert sixteen shelf spoons (8) in holes in Left Side (A), Left Partition (E), Right Partition (F) and Right Side (B). Insert shelves (H) and (G). ameriwoodhome.com...
- Page 22 STEP 15 With hinge in the open position attach Doors (I) by aligning the hinge screws with the holes on Left Panel (A) and Right Panel (B). Fully tighten two screws on each hinge. ameriwoodhome.com...
- Page 23 STEP 16 Door Adjustment To adjust the vertical height: Loosen the screws "A" on both hinges. Turn screw "D" on both hinges clockwise or counter clockwise to move hinge up or down. Re-tighten screws "A". To adjust side to side: Loosen the screw "C"...
- Page 24 Maximum Loads This unit has been designed to support the maximum loads shown. Exceeding these load limits could cause sagging, instability, product collapse, and/or serious injury. Apply TV Warning label to your unit for future reference. Notice: Once you apply this label to your unit, you cannot remove it. 60 lbs 27.3 kg 20 lbs...
- Page 25 Visit your local retailer's website, rate your purchased product and leave us some feedback! We would like to extend a big "Thank You" to all of our customers for taking the time to assemble this Ameriwood Home product, and to give us your valuable feedback. ameriwoodhome.com...
- Page 26 Espa ol Cubierta Delantera Este libro de instrucciones contiene informaci n IMPORTANTE de seguridad. Por favor lea y mant ngalo para referencia en el futuro. No Regrese este producto! Comuniquese con nuestro amistoso equipo de servicio al cliente para obtener ayuda.
- Page 27 Espa ol P gina 7 Atenci n: Su unidad puede incluir material adicional. Lista de piezas / Tama o real / No todos los tama os reales Coloque la etiqueta de precauci n del televisor a su unidad para futura referencia. Nota: Una vez que aplique esta etiqueta a su unidad, no puede retirarla.
- Page 28 Espa ol P gina 19 Enganche seis pernos de la leva de fijaci n (2) de la Parte superior (C) en las seis levas de fijaci n (1) de la Partici n izquierda (E), Partici n derecha (F) y el Lado derecho (B). Gire las levas de fijaci n en sentido horario para asegurar las tablas en su lugar.
- Page 29 Visite el sitio web de su tienda local, califique su comprado y denos sus comentarios! Nos gustar a enviar un gran "Agradecimiento" a todos nuestros clientes por tomarse el tiempo de ensamblar este producto de Ameriwood Home, y por darnos sus valiosos comentarios. Gracias ameriwoodhome.com...
- Page 30 Fran ais Couverture Avant CE LIVRET D'INSTRUCTION CONTIENT DES INFORMATIONS IMPORTANTES SUR LA S CURIT . VEUILLEZ LIRE ET GARDER POUR UNE R F RENCE FUTURE Ne retournez pas ce produit! Contactez notre quipe de service la client le amicale d'abord pour obtenir de l'aide.
- Page 31 Fran ais Page 7 Note : Votre appareil peut contenir du mat riel suppl mentaire. Liste des pi ces / Taille r elle / Pas toutes les tailles r elles Apposez l' tiquette d'avertissement TV sur votre appareil pour r f rence ult rieure. Avis : Une fois que vous avez appos cette tiquette sur votre appareil, vous ne pouvez plus la retirer.
- Page 32 Fran ais Page 19 Engagez les six boulons came (2) du haut (C) dans les six verrous came (1) de la partition gauche (E), de la partition droite (F) et du c t droit (B). (F) et du c t droit (B). Tournez les verrous came dans le sens des aiguilles d'une montre pour verrouiller les panneaux en place.
- Page 33 Visitez le site Web de votre d taillant local, valuez votre produit achet et laissez-nous quelques commentaires ! Nous tenons offrir un grand "Merci" tous nos clients pour avoir pris le temps d'assembler ce produit "Ameriwood Home", et de nous donner vos commentaires pr cieux. Merci ameriwoodhome.com...
- Page 34 Visitez le site Web de votre d taillant local, valuez votre produit achet et laissez-nous quelques commentaires ! Nous tenons offrir un grand "Merci" tous nos clients pour avoir pris le temps d'assembler ce produit "Ameriwood Home", et de nous donner vos commentaires pr cieux. Merci ameriwoodhome.com...
Need help?
Do you have a question about the 6740500COM and is the answer not in the manual?
Questions and answers