Vinotemp WINE-MATE WM-3500HZD Installation, Use & Care Manual
Self-contained wine cooling units
Hide thumbs
Also See for WINE-MATE WM-3500HZD:
- Installation, use & care manual (27 pages) ,
- Installation, use & care manual (31 pages) ,
- Service manual (27 pages)
Advertisement
Quick Links
Installation, Use, & Care Manual
Self-contained Wine Cooling Units
WM-3500HZD, WM-4500HZD
WM-6500HZD, WM-8500HZD
Features & Specifications
Cellar Construction Guide
Installation Instructions
Temperature and Humidity
Care Guide
Troubleshootings
Electrical Wiring Diagrams
Customer Support
Warranty
Read and save these instructions
1
Advertisement

Related Manuals for Vinotemp WINE-MATE WM-3500HZD


Summary of Contents for Vinotemp WINE-MATE WM-3500HZD
- Page 1 Installation, Use, & Care Manual Self-contained Wine Cooling Units WM-3500HZD, WM-4500HZD WM-6500HZD, WM-8500HZD Features & Specifications Cellar Construction Guide Installation Instructions Temperature and Humidity Care Guide Troubleshootings Electrical Wiring Diagrams Customer Support Warranty Read and save these instructions...
- Page 2 SAFETY INSTRUCTIONS Electrical Safety Improper use of the power cord plug can result in the risk of electrical shock, property damage and personal injury or death. DANGER Unplug the unit or disconnect power before performing any maintenance. Upon receipt and inspection of the unit the power cord must be replaced if it is damaged.
- Page 3 Cellar Construction Guide This is only a guide and shall be considered as the minimum requirements. All interior walls, ceilings and floors shall have a vapor barrier and a minimum of R13 insulation. All exterior walls and ceiling shall have a vapor barrier and a minimum of R19 insulation.
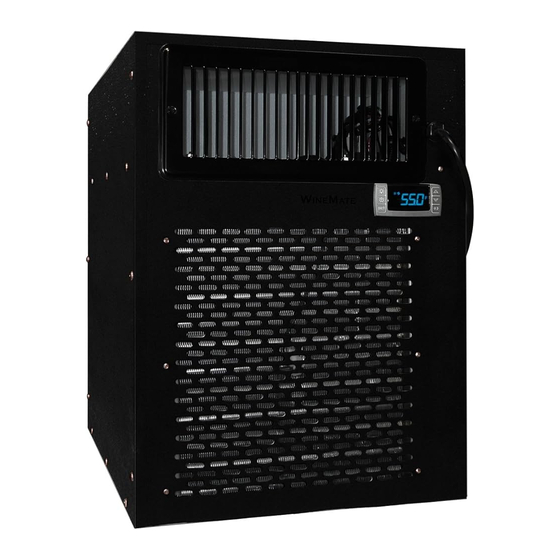
- Page 4 Features and Specifications WM-3500, 4500, 6500, 8500HZD cooling units are designed to provide a subtle temperature between 50~65 °F for a properly insulated wine cellar. The refrigerated space will maintain humidity range within 50~70% RH. These temperature and humidity ranges are optimized for long term storage of ...
- Page 5 Unit Dimensions The specifications are listed as follows: Dim (in) Airflow Cellar Size Electrical Weight Model No Exhaust W x D x H (CFM) (cu ft) Rating (lb) WM-3500HZD Rear 14-1/4 X 21-1/4 X 19-3/4 115V-60Hz-5.5A WM-4500HZD Rear 14-1/4 X 21-1/4 X 19-3/4 1000 115V-60Hz-7.5A WM-6500HZD...
- Page 6 Installation Instructions NOTE Do not install any ducts onto the air supply, return, intake and exhaust. A dedicated 30 AMP circuit is required. NOTE Do not plug the unit into power until 24 hours after delivery. Because of potential safety hazards under a certain condition, we strongly recommend against the use of an extension cord.
- Page 7 Seal the gaps between the cooling unit and opening with a high quality weather stripping, polyurethane spray foam, or foam tape. Cover the seal with molding and attach the molding to the wall not the cooling unit. If it is a top exhaust installation, place another gaskets along the top air exhaust at ...
- Page 8 Through-wall Installation (inside flush) Top Exhaust Gasket...
- Page 9 3. Wall Grille Installation Install a wall grille on the cellar exterior wall for an outside flush installation. ...
- Page 10 4. Exhaust Grille (Cover) Installation Install an exhaust grille on the back of the cooling unit for an inside flush installation. Or install an exhaust cover on the back of the cooling unit for a top exhaust installation.
- Page 11 5. Additional Drain Line Installation HZD cooling units are equipped with an additional drain fitting. In case of extreme humidity there is a drain line needed, remove the drain plug on the bottom left at the rear, then remove the connection plug and fit a 0.375” OD hard tube into the drain connection.
- Page 12 Temperature and Humidity Control The controller Temperature Controller 1.1 Keypad : To turn on/off the power to the unit. SET: To display set-point; to select a parameter or confirms an operation in programming mode. : To browse the parameter codes or increase the displayed values in the programming mode.
- Page 13 MESSAGE CAUSE FUNCTION Room probe faulty Compressor switching to Con and CoF Room probe temperature higher than Outputs unchanged the set- point + ALU Room probe temperature lower than Outputs unchanged the set-point - ALL External alarm All outputs off Probe alarms P1”...
- Page 14 2.4. How to calibrate the room probe If the actual cellar temperature differs from the setting temperature, set parameter ot = actual cellar temperature minus set-point. 2.5. How to use bottle probe Enable bottle probe: PARAMETER DESCRIPTION VALUE Third probe presence Third probe calibration Controller display Disable bottle probe:...
- Page 15 2) After the dial LED flashes twice, enter the phone number to call. 3) To finish, press 4) When the auto dialer is activated to dial, the red will stay on. 2.8.3 Wiring Diagram 2.9 How to set the anti-freezing heater The heater turns on at the set-point SAA minus Shy;...
- Page 16 4) Press the “SET” key once to display its value. 5) Press key to change its value within 10 sec. 6) Press SET key once to store the new value and the display will flash 3 times. 7) Press SET + to exit or wait 15sec without pressing a key.
- Page 17 temperature unit (°F/ °C) C: Celsius display resolution in: integer temperature display delay (min) probe calibration (°) minimum set-point (°) maximum set-point (°) defrost cycle interval time (hour) defrost cycle endurance time (min) temperature alarm type rE: relative to set-point high temperature alarm (°) low temperature alarm...
- Page 18 Care Guide 1. Cleaning Condenser 1) Clean the condenser regularly at least every 6 months. 2) Condenser is located on the ambient air intake side of the cooling unit. 3) Use a condenser brush or a vacuum cleaner with an extended attachment to clean the condenser.
- Page 19 Troubleshootings This Troubleshooting Chart is not prepared to replace the training required for a professional refrigeration service person, not is it comprehensive Complaint Possible Causes Response 1. Unit not Power cord not plugged Check power cord No power from supply Check receptacle and fuses running Incorrect or loose wirings...
- Page 20 high or not Cellar too large Check for excessive size Ambient temperature too high Check installation location cooling and Exhaust restricted Leave minimum 3 feet clearance for the hot air running exhaust side and leave minimum 1 foot continually clearance for the fresh air intake side Malfunctioning fans Check for both evaporator and condenser fans Check for air restrictions, air short-circulation,...
- Page 21 Low ambient temperature Move to another location Air probe fault Change a new one Temperature controller fault Change a new one 13.Evaporator Evaporator air flow restriction Check for fans and air flow Low temperature setting Check for set-point freezing up Low ambient temperature Change defrost cycle Defective controller or probe...
- Page 22 Electrical Wiring Diagrams XR30CX Self-contained Wiring Diagram 2. XR50CX Bottle Probe Wiring Diagram...
- Page 23 3. XR50CX Alarm Wiring Diagram 4. XR50CX Heater Wiring Diagram...
- Page 24 5. XR70CX Heater and Caller Wiring Diagram...
- Page 25 Customer Support If you need further assistance, please contact Vinotemp at: Email: info@vinotemp.com...
- Page 26 VINOTEMP, in the original shipping carton, shipping prepaid, VINOTEMP will at its option, repair or replace the product free of charge.
- Page 27 VINOTEMP will not accept COD shipments. If the unit is determined to be faulty and is within the twelve month warranty period VINOTEMP will, at its discretion, repair or replace the unit and return it free of charge to the original retail customer. If the unit is found to be in good working order, or beyond the initial twelve month period, it will be returned freight collect.
Need help?
Do you have a question about the WINE-MATE WM-3500HZD and is the answer not in the manual?
Questions and answers