
Related Manuals for TP-Link tapo C121


Summary of Contents for TP-Link tapo C121
- Page 1 User Guide Indoor/Outdoor Home Security Wi-Fi Camera ©2024 TP-Link 1910013843 REV1.0.0...
-
Page 2: Table Of Contents
Contents About This Guide ······················································································································· 1 Introduction ·································································································································· 2 Appearance ·································································································································· 3 Before You Start ························································································································· 5 Set Up Your Camera ················································································································· 6 Set Up Using Amazon Frustration-Free Setup ·························································· 7 Install Your Camera ················································································································ 11 Power Up Your Camera ········································································································ 13 Authentication ··························································································································... -
Page 3: About This Guide
About This Guide This guide provides a brief introduction to the Indoor/Outdoor Home Security Wi-Fi Camera and the Tapo app, as well as regulatory information. Please note that features available in Tapo may vary by model and software version. Tapo availability may also vary by region. All images, steps, and descriptions in this guide are only examples and may not reflect your actual Tapo Camera experience. -
Page 4: Introduction
Introduction With an integrated starlight sensor, the Indoor/Outdoor Home Security Wi-Fi Camera captures low light images in incredible colorful detail. Place it in your living room, bedroom, baby's room, backyard, or front door for round-the-clock coverage and IP66 weatherproof construction: day, night, rain, or shine. -
Page 5: Appearance
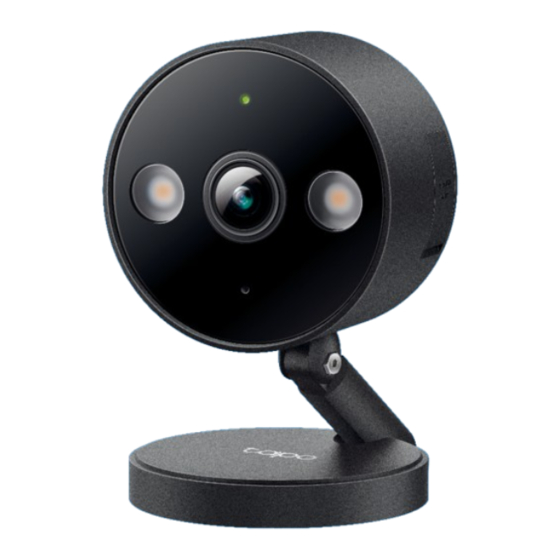
Appearance Front Back Side microSD Adjust View Tilt and rotate the camera and stand for your desired viewing angle. microSD Card Slot System LED Lens Speaker Open the cover. Insert a microSD card (not included) and initialize it on the Tapo app for local recording. Microphone White Light LEDs USB Type-C Power Port... - Page 6 System LED Indication Solid red Starting up Blinking red and green Ready for setup Blinking red slowly Connecting to Wi-Fi Solid amber Connected to Wi-Fi Connected to the cloud Solid green Blinking red quickly Camera resetting Blinking green quickly Camera updating...
-
Page 7: Before You Start
Before You Start Position your camera’s adjustable stand for setup. Note: Peel off film from the camera before use. -
Page 8: Set Up Your Camera
Step 3. Add Your Camera Get the Tapo app from the App Store or Open the app, and log in with your TP-Link ID. Tap the button in the app and search for Google Play, or by scanning the QR code If you don't have an account, create one first. -
Page 9: Set Up Using Amazon Frustration-Free Setup
Set Up Using Amazon Frustration-Free Setup What is Amazon Frustration-Free Setup? Amazon Frustration-Free Setup can help connect and set up Tapo smart devices in fewer steps, without having to remember and re-enter your Wi-Fi password on each device. To use this feature, confirm the following: ●... - Page 10 How to use Amazon Frustration-Free Setup with Tapo devices 1. Open the Amazon Alexa app. Then tap More and select Skills & 2. Enter Tapo in the search bar and choose Tapo. Games.
- Page 11 3. Tap the ENABLE TO USE button. 4. Log in with your TP-Link ID that has bound to your Tapo device, and tap Authorize. After authorized successfully, the message Tapo has been successfully linked will come up.
- Page 12 5. Plug in your Tapo device and the setup will complete automatically in two minutes. For setting up more Tapo devices, just plug in and enjoy! Done! If this device displays on the Home page in the Tapo app, it indicates this device has been successfully associated with your Amazon account and joined your Wi-Fi network automatically.
-
Page 13: Install Your Camera
Install Your Camera When you finish adding your camera in the Tapo app, you can set it on a table or shelf. You can also mount it using its versatile magnetic base. Follow the steps below to install your new camera. Option 1: Set on a table or shelf Option 2: Mount to metallic surfaces Option 3: Stick to a clean wall... - Page 14 Option 4. Mount to the wall (with or without the metal plate) 1. Stick the mounting template to the desired mounting place. Drill 1. Drill one hole in the desired mounting two holes according to the template. place. 6 mm (15/64 in.) 6 mm (15/64 in.) 2.
-
Page 15: Power Up Your Camera
Power Up Your Camera After installing your camera, follow the steps below to power up your camera. 1. Firmly plug in the power connector to the power port of the camera, and ensure no gap exists. Note: When plugging in the power connector, you may feel the resistance from the silicon cork inside the power port because of the waterproof design. It is necessary to plug in firmly until there is no gap between them. -
Page 16: Authentication
Authentication FCC compliance information statement Product Name: Indoor/Outdoor Home Security Wi-Fi Camera Model Number: Tapo C121 Component Name Model I. T .E. Power Supply A8-501000 Responsible Party: TP-Link Systems Inc. Address: 10 Mauchly, Irvine, CA 92618 Website: http://www.tp-link.com/us/ Tel: +1 626 333 0234 Fax: +1 909 527 6804 E-mail: sales.usa@tp-link.com... - Page 17 We, TP-Link Systems Inc., has determined that the equipment shown as above has been shown to comply with the applicable technical standards, FCC part 15. There is no unauthorized change is made in the equipment and the equipment is properly maintained and operated., has determined that the equipment shown as above has been shown to comply with the applicable technical standards, FCC part 15.
- Page 18 We, TP-Link Systems Inc., has determined that the equipment shown as above has been shown to comply with the applicable technical standards, FCC part 15. There is no unauthorized change is made in the equipment and the equipment is properly maintained and operated., has determined that the equipment shown as above has been shown to comply with the applicable technical standards, FCC part 15.
- Page 19 Safety Information • Do not use damaged charger or USB cable to charge the device. • Do not use any other chargers than those recommended. • Do not use the device where wireless devices are not allowed. • Adapter shall be easily accessible. •...
- Page 20 Please read and follow the above safety information when operating the device. We cannot guarantee that no accidents or damage will occur due to improper use of the device. Please use this product with care and operate at your own risk.
- Page 21 Explanation of the symbols on the product label Note: The product label is on the bottom of the product and its power supply. Symbols may vary from products. Symbol Explanation Class II equipment Class II equipment with functional earthing Alternating current DC voltage Polarity of output terminals Indoor use only...
- Page 22 Symbol Explanation Functional earthing Caution, hot surface Caution Operator’s manual Stand-by “ON”/”OFF” (push-push) Fuse Fuse is used in neutral N RECYCLING This product bears the selective sorting symbol for Waste electrical and electronic equipment (WEEE). This means that this product must be handled pursuant to European directive 2012/19/EU in order to be recycled or dismantled to minimize its impact on the environment.
- Page 23 Symbol Explanation Switch of mini-gap construction Switch of micro-gap construction (for US version) µ Switch of micro-gap / micro-disconnection construction (for other versions except US) ε Switch without contact gap (Semiconductor switching device)
Need help?
Do you have a question about the tapo C121 and is the answer not in the manual?
Questions and answers