Advertisement
Quick Links
ASSEMBLY INSTRUCTION FOR ACME FURNITURE
Thank you for purchasing the quality product.Be sure to check all packing material carefully for small parts which may
have come loose inside the carton during shipment.Separate,indentify and count all parts and metal hardware. Compare
with all parts list to be sure all parts are present.If any part(s) are missing or damaged, please contact your local furniture
dealer. For efficient and speedy service,please indicate the model number and code letter of parts(s) needed.
DESCRIPTION
1
2
3
4
5
6
7
8
HARDWARE REQUIRED(BOX OF HEADBOARD)
A
B
C
D
E
F
Attention:
*** Some number parts listed in the instruction sheet may not be in parts bags as they already be assembled.
Carefully check parts and packing materials prior to ordering replacements.
MODEL # 27680Q
***Do not fully tighten screws until fully assembled***
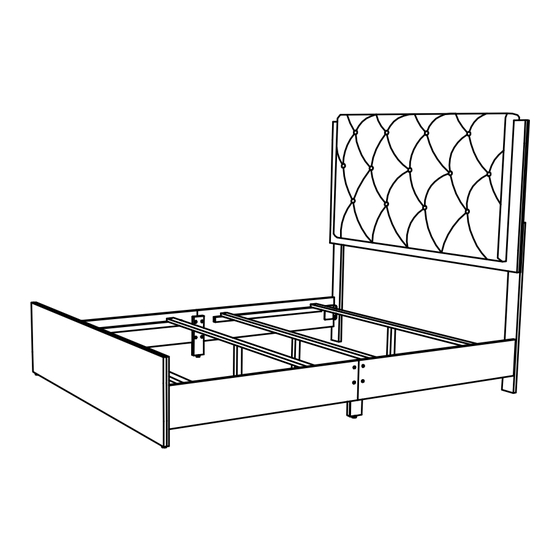
COMPONENT PARTS
PART NAME
HEADBOARD
FOOTBOARD
HEADBOARD LEG
BED SLAT
BED SLAT SUPPORT
SIDE RAIL LEFT
SIDE RAIL RIGHT
BED SIDE RAIL LEG
BOLT 1/4" x 1 3/16" - 12 PCS
SPRING WASHER 1/4"- 12 PCS
FLAT WASHER 1/4"- 12 PCS
ALLEN KEY M4 - 1 PC
ALLEN KEY M5 - 1 PC
FLATHEAD CHIPBOARD SCREW 5/32" x 1 2/8"- 16 PCS
L
Left Sticker
Right Sticker
R
Q'TY (PCS)
1
1
2
4
4
2
2
2
PAGE 1/2
Advertisement

Subscribe to Our Youtube Channel
Related Manuals for Acme Furniture 27680Q


Summary of Contents for Acme Furniture 27680Q
- Page 1 ASSEMBLY INSTRUCTION FOR ACME FURNITURE MODEL # 27680Q Thank you for purchasing the quality product.Be sure to check all packing material carefully for small parts which may have come loose inside the carton during shipment.Separate,indentify and count all parts and metal hardware. Compare with all parts list to be sure all parts are present.If any part(s) are missing or damaged, please contact your local furniture...
- Page 2 How to assemble: Step 1: Step 2: STEP 2.1 Step 1: STEP 1.2 : STEP 1.1 : DO NOT FULLY TIGHTEN SCREW IN THIS STEP BEFORE ALIGN THE SIDE RAIL AS SHOWN. ALIGN BEFORE TIGHTEN SIDE VIEW FRONT VIEW Left Sticker Right Sticker BACK VIEW STEP 2.2...
Need help?
Do you have a question about the 27680Q and is the answer not in the manual?
Questions and answers