Advertisement
Quick Links
Advertisement

Related Manuals for Vortex VOLT 8


Summary of Contents for Vortex VOLT 8
- Page 1 VOLT 8 User Manual...
- Page 2 *PRECAUTIONS On the Road Using a device while driving is illegal in many countries. Please refrain from using your mobile while driving. Near Sensitive Electronics or Medical Equipment Don’t use your device near sensitive electronic equipment – particularly medical devices such as pacemakers – as it could cause them to malfunction. It can also interfere with the operation of fire detectors and other automatic-control equipment.
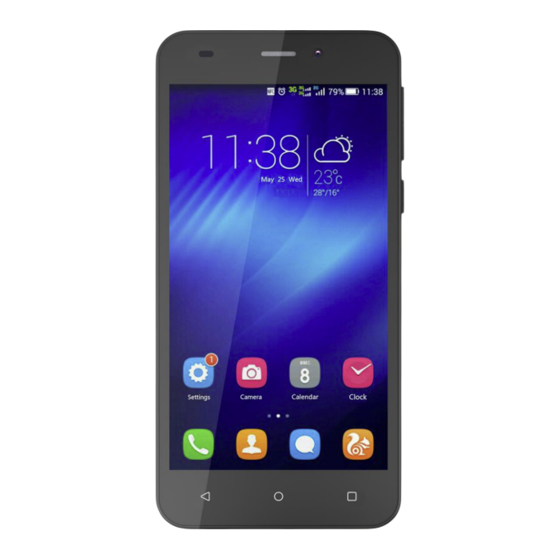
- Page 3 1. PARTS AND BUTTONS OF THE DEVICE 1 .Front camera Receiver 3. light distance sensor 4. Touchscreen 5. Volume button 6. Power button 7. Back button 8. Home button App switch button 10. Micro USB and charging port 11. Earphone jack 12.
- Page 4 15. Microphone 2. TOUCH BUTTONS button moves back one step to the previous menu/page. button returns immediately to the main screen. button displays a menu of recently opened applications.(This interface adds a “CLEAR ALL” button) button will launch the applications and settings menu. 3.
- Page 5 WARNING! To avoid damage to the phone, do not use any other kind of SIM card, or any non-standard micro-SIM card cut from a SIM card. You can get a standard micro-SIM card from your service provider. Insert the battery by aligning the metal contacts on the battery with themetal contacts in the battery compartment.
- Page 6 widgets. The status bar displays system information, such as current time, wireless connectivity and battery charge status. 5.QUICK NOTIFICATION PANEL When you receive a notification you can quickly view it by following the below instructions. Slide your finger from the top of the screen down to the center to access Notification Panel to see your notifications.
- Page 7 Through this menu, it is possible to modify the functions such as brightness, auto rotation, Wi-Fi, Bluetooth and more. 6. SETTINGS MENU The settings menu allows you to adjust Tablet cellphone System Configuration. To Change Settings: 1. Touch the “Settings” menu icon on the Application menu.
- Page 8 (note: this function is available only on devices supplied with 3G card functionality) • Bluetooth – Connect or disconnect Bluetooth devices • Display – Adjust display settings • Notifications – Adjust different notification settings • Sound – Adjust the different audio settings such as ringtones •...
- Page 9 2. After inserting a SIM card, turn on the phone and wait a few minutes for your phone to display Network information. Inserting and Removing TF Card NB: Please ensure when inserting an SD card your phone is powered “OFF” 1.
- Page 10 9. ANSWERING AND REJECTING CALLS To answer a call – Slide your finger to the green Call Answer key. To reject a Call – Slide your finger to the Red Call End key. 10.SEND MESSAGE Touch the Messaging icon to other mobile phone users to send SMS or MMS, enter the name or phone number in the "Type name or number"...
- Page 11 or select one from the contacts. Enter the information content and select send. 11. SOFTWARE KEYBOARD The phone has a software keyboard which automatically displays when you tap the place on screen where you want text or numbers to be entered, then simply start typing.
- Page 12 Touchscreen The touchscreen responds to finger touch. Note: • Don’t place any object on the touchscreen for it may damage or crush the screen. Single Click: Single click one icon to choose the icon or option you want. Long Press: Press and hold an icon to delete or move an icon or app. Drag: Press the icon and drag it to a different screen.
- Page 13 2. A notification will pop up on the screen displaying USB connected, select the desired USB operation. 3. The USB connection has been successful. 13. CONNECTION TO INTERNET Wireless: 1. Select “Settings”. 2. Select “Wi-Fi” and slide OFF to ON status. 3.
- Page 14 Connect to the Internet and launch the browser. Type in the desired browsing URL. 15.BLUETOOTH Select “Settings”, select Bluetooth from “OFF” to “ON”. Search for the device you would like to pair with and select “PAIR”. You will see a message “Connected Successfully”. 16.
- Page 15 1. Touch the icon to take a photo. 2. Touch the icon to start camera recording. 3. Touch the icon on the top right to see the previous picture and to delete, share or set it as a wallpaper. Click the return button to exit camera interface.
- Page 16 interface. Select the Application Running and the interface is Tap the application you want to close. A pop-up window will be displayed. Tap “Stop” to close that application. Power “OFF” / Restart / Reset the Phone 1. Press and hold the power button for 5 seconds and the device will be powered down.
- Page 17 SPECIFICATIONS CPU/PCB SOLUTION: Quad-core MTK 6580 5"FWVGA(480*854)TN Capacitive DISPLAY: SIM CARD SUPPORT: SINGLE SIM RAM: 512MB ROM: GSM/GPRS/WAP/EDGE: 850/900/1800/1900MHz WCDMA: 1900/850MHz WI-FI: YES/802.11b/g/n FRONT CAMERA: 0.3MP REAR CAMERA: FM RADIO: BLUETOOTH: Version 4.0 GPS: MICRO SD CARD SUPPORT: Up to 32GB - Not Included CHARGER: DC 5V-700mA USB:...
Need help?
Do you have a question about the VOLT 8 and is the answer not in the manual?
Questions and answers