Advertisement
INTRODUCTION
Experience hard-hitting performance with our lightest mouse ever created — a lean, ultra-lightweight build that makes control effortless. Featuring cutting-edge optical mouse switches, a precise 8,500 DPI sensor and RazerTM Speedflex Cable for supreme accuracy and speed.
WHAT'S INSIDE
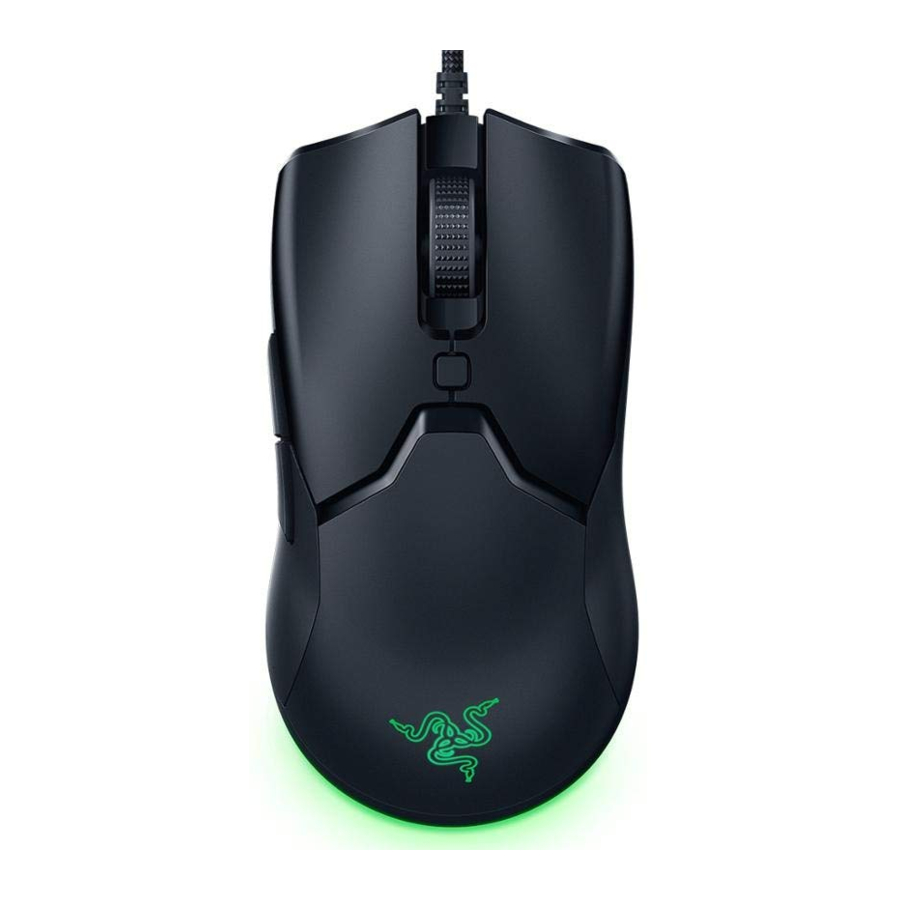
RAZER VIPER MINI

- RazerTM Speedflex Cable
- Left mouse button
- Right mouse button
- Scroll wheel/scroll click
- DPI cycle button
- Mouse button 5
- Mouse button 4
- Razer Chroma underglow lighting
- Ultraslick mouse feet
- True 8,500 DPI optical sensor
 DPI stages are as follows: 400, 800, 1600 (Default),3200, and 6400 The DPI stages can be customized using Razer Synapse 3,
WHAT'S NEEDED
PRODUCT REQUIREMENTS
- PC with a free USB port
RAZER SYNAPSE REQUIREMENTS
- Windows®7 64-bit (or higher)
- Internet connection
- 500 MB of free hard disk space
Note: Install Razer Synapse when prompted or download the installer from razer.com/synapse
LET'S GET YOU COVERED
You've got a great device in your hands complete with a 2-year limited warranty coverage. Now maximize its potential and score exclusive Razer benefits by registering at razerid.razer.com

TECHNICAL SPECIFICATIONS
TECHNICAL SPECIFICATIONS
- True 8500 DPI high-precision optical sensor
- Up to 300 inches per second (IPS)/35G max. acceleration
- Razer Viper derived ambidextrous design optimized for small hand sizes
- RazerTM Optical Mouse Switches rated for 50 million clicks
- Large 100% PTFE mouse feet (0.8mm thick).
- Gaming-grade tactile scroll wheel
- On-The-Fly Sensitivity Adjustment (Default stages: 400/800/1600/3200/6400)
- On-board Memory Profile
- Razer ChromaTM RGB lighting with true 16.8 million customizable color options
- Six independently programmable Hyperesponse buttons
- Razer Synapse 3 enabled
- 1.8 m/6 ft Speedflex cable
APPROXIMATE SIZE & WEIGHT
- Length: 118.3 mm/4.66 in
- Width: 53.5 mm/2.11 in
- Height: 38.3 mm/1.51 in
- Weight: 61 g/0.131 lbs*
* Excluding cable
INSTALLING RAZER SYNAPSE 3 FOR YOUR RAZER VIPER MINI

- Connect your Razer device to the USB port of your computer.
- Install Razer Synapse 3 when prompted* or download either the Razer Synapse 3 or Razer Synapse installer from razer.com/synapse
- Create your Razer ID or log into Razer Synapse 3 with an existing account.
* Applicable for Windows 8 or higher.
CONFIGURING YOUR RAZER VIPER MINI
Disclaimer: The, features listed here require you to log into Razer Synapse 3. These features are also subject to change based on the current software version and your Operating System.
SYNAPSE TAB
The Synapse tab is your default tab when you first launch Razer Synapse 3. This tab allows you to navigate the Dashboard subtab.
Dashboard
The Dashboard subtab is an overview of your Razer Synapse 3 where you can access all your Razer devices, modules, and online services.

MOUSE TAB
The Mouse tab is the main tab for your Razer Viper Mini. From here, you can change your device's settings such as button assignment, DPI sensitivity, and lighting. Changes made under this tab are automatically saved to your system and cloud.
Customize
The Customize subtab is for modifying your mouse's button assignments.

Profile
Profile is a data storage for keeping all your Razer peripheral's settings. By default, the profile name is based on your system's name. To add, rename, duplicate, or delete a profile, simply press the Miscellaneous button ( ).
).
Hvpershift
Hypershift mode is a secondary set of button assignments that is activated when the Hypershift key is held down. By default, the Hypershift key is assigned to the FN key of your Razer Synapse 3 supported keyboard however, you can also assign any mouse button as a Hypershift key.
Sidebar
Clicking the Sidebar button ( ) will reveal all current button assignments for your Razer Viper Mini.

Alternatively, you can skip to a specific button assignment by selecting it on the Customize tab.

Upon selecting a button assignment, you may then change it to one of the following functions:
 Default
This option enables you to return the mouse button to its original setting.
 Keyboard Function
This option changes the button assignment into a keyboard function. You can also choose enable Turbo mode which allows you to emulate repeatedly pressing the keyboard function while the button is held down.
 Mouse Function
This option substitutes the current button assignment into another mouse function. Listed below are the functions which you can choose from:
- Left Click - Performs a left mouse click using the assigned button.
- Right Click - Performs a right mouse click using the assigned button.
- Scroll Click - Activates the universal scrolling function.
- Double Click - Performs a double left click using the assigned button.
- Mouse Button 4 - Performs a "Backward" command for most internet browsers.
- Mouse Button 5 - Performs a "Forward" command for most internet browsers.
- Scroll Up - Performs a "Scroll Up" command using the assigned button.
- Scroll Down - Performs a "Scroll Down" command using the assigned button.
- Scroll Left - Performs a "Scroll Left" command using the assigned button.
- Scroll Right - Performs a "Scroll Right" command using the assigned button.
- Repeat Scroll Up - Continuously performs a "Scroll Up" command while the assigned button is pressed.
- Repeat Scroll Down - Continuously performs a "Scroll Down" command while the assigned button is pressed.
You can also choose to enable Turbo mode in some of the mouse functions which allow you to emulate repeatedly pressing and releasing said function while the button is held down.
 Sensitivity
This function allows you to manipulate the DPI setting of your Razer Viper Mini with a touch of a button. Listed below are the Sensitivity options and their description:
- Sensitivity Clutch - Changes the sensitivity to a predefined DPI while the designated button is held down. Releasing the button will return it to the previous sensitivity.
- Sensitivity Stage Up - Increases the current sensitivity by one stage.
- Sensitivity Stage Down - Decreases the current sensitivity by one stage.
- On-The-Fly Sensitivity - Pressing the designated button and moving the scroll wheel either up or down will increase or decrease the current DPI respectively.
- Cycle Up Sensitivity Stages - Increases the current sensitivity stage by one. Once it reaches the highest sensitivity stage, it will return to stage 1 when the button is pressed again.
- Cycle Down Sensitivity Stages - Decreases the current sensitivity stage by one. Once it reaches stage 1, it will return to the highest sensitivity stage when the button is pressed again.
 Macro
Macro
A Macro is a prerecorded sequence of keystrokes and button presses that is executed with precise timing. By setting the button function to Macro, you can conveniently execute a chain of commands.
 Switch Profile
Switch Profile enables you to quickly change profiles and load a new set of button assignments. An on-screen notification will appear whenever you switch profiles.
 Switch Lighting
Switch Lighting allows you to easily switch between the current lighting effect to a custom lighting effect.
 Razer Hypershift
Setting the button to Razer Hypershift will allow you to activate Hypershift mode as long as the button is held down.
 Launch Program
Launch Program enables you to open an app or a website using the assigned button. When you select Launch Program, two choices will appear which requires you to search for a specific app you want to open, or write the address of the website you want to visit.
 Multimedia
This option allows you to assign multimedia controls to your Razer device. Listed below are the multimedia controls you can choose from:
- Volume Down- Decreases the audio output.
- Volume Up - Increases the audio output.
- Mute Volume - Mutes the audio.
- Mic Volume Up - Increases the microphone volume.
- Mic Volume Down - Decreases the microphone volume.
- Mute Mic - Mutes the microphone.
- Mute All - Mutes both microphone and audio output.
- Play/Pause - Play, pause, or resume playback of the current media.
- Previous Track - Play the previous media track.
- Next Track - Play the next media track.
 Windows 8 Charms
This option enables you to assign the mouse button into a Windows 8 shortcut command. For more information, please visit: http://windows.microsoft.com/en-us/windows-8/getting-aroundtutorial
Windows Shortcuts
This option allows you to assign the mouse button into a Windows Operating System shortcut command. For more information, please visit: http://support.microsoft.com/kb/126449
 Text Function
Text Function enables you to type a prewritten text with a touch of a button. Simply write your desired text on the given field and your text will be typed whenever the assigned button is pressed. This function has full Unicode support and you can also insert special symbols from character maps.
 Disable
This option renders the assigned key unusable. Use Disable if you do not want to use the mouse button or if it interferes with your gaming.
Performance
The Performance subtab allows you to modify the sensitivity, acceleration, and polling rate.

Listed below are the performance options and their descriptions.
Sensitivity
Sensitivity refers to the distance the cursor will travel based on how far the mouse moved. The higher the DPI, the farther the cursor will travel given the same distance of mouse movement.
Sensitivity Stages
A sensitivity stage is a preset sensitivity value. You can create up to 5 different sensitivity stages which you can cycle through using the sensitivity stage up/down buttons.
Polling Rate
The higher the polling rate, the more often the computer receives information about the status of your mouse, thus increasing the mouse pointer's reaction time. You can switch between 125Hz (8ms), 500Hz (2ms) and 1000Hz (lms) by selecting your desired polling rate on the dropdown menu.
Mouse Properties
From here, you can access the Windows Mouse Properties where you modify operating system settings that can directly affect your Razer Viper Mini.
Lighting
The Lighting subtab enables you to modify your Razer device's light settings.

Brightness
You can turn off your Razer device's lighting by toggling the Brightness option or increase/decrease the illuminance using the slider.
Switch Off Lighting
This is a power saving tool which allows you to disable your device's lighting in response to your system's display turning off and/or automatically power down when your Razer Viper Mini has been idle for a set amount of time.
Effects
A number of quick effects can be selected and applied to your mouse's lighting, as listed here:
| Name | Description | How to set up | |
 | Audio Meter | The LEDs will light up according to the audio level with a default spectrum of colors | Select a Color Boost level |
 | Breathing | The lighting fades in and out of the selected color(s) | Select up to 2 colors or randomize |
 | Reactive | The LEDs will light up when you click any of the mouse buttons | Select the color and the length of time for the LED to remain lit |
 | Spectrum Cycling | The LEDs will cycle between 16.8 million colors indefinitely | No further customization required |
 | Static | The LEDs will remain lit in the selected color | Select a color |
If you have other supported Razer Chroma-enabled devices, you can synchronize their quick effects with your Razer device by clicking the Chroma Sync button ( ).
).
Advanced Effects
The Advanced Effects option allows you to choose a Chroma Effect you want to use on your Razer Chroma-enabled peripheral. To start making your own Chroma Effect, simply press the Chroma Studio button ( ).
).
Calibration
The Calibration subtab allows you to optimize your Razer Precision Sensor to any surface for better tracking. To use this feature, you must click the Add A Surface option where you can select from a comprehensive list of Razer mouse mats or add your own mouse mat.

PROFILES TAB
The Profiles tab is a convenient way of managing all your profiles and linking them to your games and applications.
Devices
View which Razer device is using a specific profile using the Devices subtab. To create a new profile within the selected device, simply click the add button ( ).To rename, duplicate, or delete a profile, simply press the Miscellaneous button (
 ). Each profile can be set to automatically activate when you run an application using the Link Games option.

Linked Games
The Linked Games subtab gives you the flexibility to add games, view peripherals that are linked to games, or search for added games. You can also sort games based on alphabetical order, last played, or most played. Added games will still be listed here even if it is not linked to a Razer device.

SETTINGS WINDOW
The Settings window, accessible by clicking the ( ) button on Razer Synapse 3, enables you to configure the startup behavior, change language, view your Razer device's master guide, or perform factory reset on any connected Razer device.

General tab
The default tab of the Settings window, The General tab enables you to change the software's display language and start-up behavior, or view the master guide of all connected Razer devices.
Reset tab
The Reset tab allows you to perform a factory reset on all connected Razer devices with on-board memory. All profiles stored on the selected device's on-board memory will be erased.
Note: Performing a factory reset on devices without on-board memory wi// on/v create a new profile for vour deviceon RazerSynapse3 using the default settings.
About tab
The About tab displays brief software information, its copyright statement, and also provides relevant links for its terms of use. You may also use this tab to check for software updates, or as a quick access to Razer's social communities.
SAFETY AND MAINTENANCE
SAFETY GUIDELINES
In order to achieve maximum safety while using your Razer Viper Mini, we suggest that you adopt the following guidelines:
Should you have trouble operating the device properly and troubleshooting does not work, unplug the device and contact the Razer hotline or go to support.razer.com for support. Do not attempt to service or fix the device yourself at any time.
Do not take apart the device (doing so will void your warranty) and do not attempt to operate it under abnormal current loads.
Keep the device away from liquid, humidity or moisture. Operate the device only within the specific temperature range of 0°C(32°F)to 40°C (104°F).Should the temperature exceed this range, unplug and/or switch off the device in order to let the temperature stabilize to an optimal level.
COMFORT
Research has shown that long periods of repetitive motion, improper positioning of your computer peripherals, incorrect body position, and poor habits may be associated with physical discomfort and injury to nerves, tendons, and muscles. Below are some guidelines to avoid injury and ensure optimum comfort while using your Razer Viper Mini.
- Position your keyboard and monitor directly in front of you with your mouse next to it. Place your elbows next to your side, not too far away and your keyboard within easy reach.
- Adjust the height of your chair and table so that the keyboard and mouse are at or below elbow-height.
- Keep your feet well supported, posture straight and your shoulders relaxed.
- During gameplay, relax your wrist and keep it straight. If you do the same tasks with your hands repeatedly, try not to bend, extend or twist your hands for long periods.
- Do not rest your wrists on hard surfaces for long periods. Use a wrist rest to support your wrist while gaming.
- Customize the keys on your keyboard to suit your style of gaming in order to minimize repetitive or awkward motions while gaming.
- Do not sit in the same position all day. Get up, step away from your desk and do exercises to stretch your arms, shoulders, neck and legs.
If you should experience any physical discomfort while using your mouse, such as pain, numbness, or tingling in your hands, wrists, elbows, shoulders, neck or back, please consult a qualified medical doctor immediately.
MAINTENANCE AND USE
The Razer Viper Mini requires minimum maintenance to keep it in optimum condition. Once a month we recommend you unplug the device from the computer and clean it using a soft cloth or cotton swab to prevent dirt buildup. Do not use soap or harsh cleaning agents.
To get the ultimate experience in movement and control, we highly recommend a premium mouse mat from Razer. Some surfaces will cause undue wear on the feet requiring constant care and eventual replacement.
Do note that the sensor of the Razer Viper Mini is 'tuned' or optimized especially for the Razer mouse mats. This means that the sensor has been tested extensively to confirm that the Razer Viper Mini reads and tracks best on Razer mouse mats.
Documents / Resources
References
Razer Synapse 4: Advanced Device Control and Lighting Software | Razer United States
Razer ID
![windows.microsoft.com]() Windows help and learning
Windows help and learning![support.microsoft.com]() Keyboard shortcuts in Windows - Microsoft Support
Keyboard shortcuts in Windows - Microsoft Supporthttp://support.razer.com
Download manual
Here you can download full pdf version of manual, it may contain additional safety instructions, warranty information, FCC rules, etc.
Advertisement


Need help?
Do you have a question about the VIPER MINI and is the answer not in the manual?
Questions and answers