Oakcastle DVD100 Manual
- User manual (20 pages) ,
- User manual (20 pages) ,
- User manual (86 pages)
Advertisement
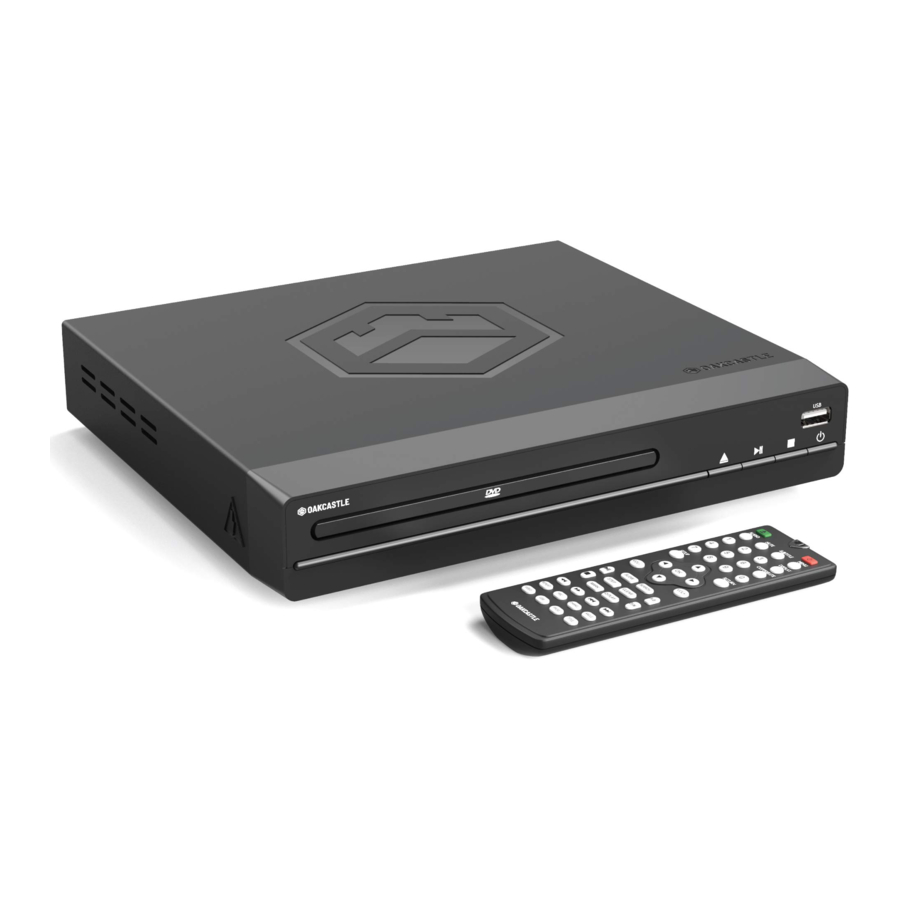
What's in the Box

- Oakcastle DVD100
- Remote Control
- User Manual
- 2x AAA Batteries
- RCA AV Cable
- Power Cable
- HDMI Cable
Controls & Functions
Remote Control

- On/Off
- DVD/USB: Change source from DVD or USB.
- Rewind (<<)
- Play/Pause
- Fast Forward (>>)
- Stop
- Menu: Return to main DVD title menu.
- Navigate up
- Navigate left
- Enter/Confirm
- Title: Go to Title menu
- 0-9/10+: While playing DVD/VCD/CD/MP3 discs, use key to select desired track/chapter in menu selection.
- OSD
- Subtitle (disc dependent)
- Slow: Press to select slow playing speed (press repeatedly to select in between 1/2, 1/3, 1/4, 1/5, 1/6, 1/7 slowed).
- L/R: Use for VCD or CD discs. Press to select left or right channel, or stereo.
- Programme (See "Product Setup")
- Return: Return to the root DVD menu.
- Mute/Unmute
- Open/Close DVD Tray
- Previous (|<<): In DVD mode, press to go to previous chapter. With SVCD, VCD, CD, MP3 discs and USB, press to go to previous track.
- Next (>>|): In DVD mode, press to go to next chapter. With SVCD, VCD, CD, MP3 discs and USB, press to go to next track.
- Setup: Press to enter the setup menu.
- Navigate right
- Navigate down
- Zoom: During DVD playback, press repeatedly to zoom in or zoom out the frame. When in zoom in mode, use arrow keys to move picture.
- GOTO: Press once to bring up 'GOTO' menu. Use the number keys to input Title or Chapter number keys to input Title or Chapter number and time and use the arrow keys to move between Title/Chapter/Time input.
- Angle: Change angle in DVD mode (for discs with multi-angle recording).
- Language: Press to select the language you desire. (Note: The played DVD should be multilingual).
- A-B: Press to repeat certain sections. Press button on start point (A) and the end point (B) to select section. Cancel by pressing button a third time.
- Repeat: Press repeatedly in DVD mode to scroll through the following options: repeat the Chapter, Title, All tracks/scenes, or Repeat Off.
In SVCD, VCD or CD mode: Repeat Track, Repeat All or Repeat Off. - Volume up (+)
- Volume down (-)
Front & Rear View

- DVD Tray
- Display
- Remote Sensor
- USB Port
- Open/Close
- Play/Pause
- Stop
- Power ON/OFF
- (Y.Pb. Pr) Output
- HDMI Output
- 2 X Audio Output Port
- Video Output
- Power Cable Port
Product Setup
PLEASE NOTE: The instructions in this manual will refer to the remote-control buttons number e.g. (Rem. 'number') and DVD player buttons e.g. (Ref* number*), in accordance with the diagrams in the "Controls & Functions" section.
Remove all packaging before first use and prepare your Oakcastle DVD100 player for set-up.
Insert the power cable into the DVD player power port (Ref.46), and the plug end into a wall socket. Once connected, wait 2-3 seconds before powering on the DVD player.
Connect the DVD player to your TV using one cable connection such as:
- HDMI Cable- Connect the HDMI cable between the HDMI Output on the back panel of the DVD player (Ref.43) to the HDMI input port on your TV.
- Component (V Pb Pr ) Cable- Connect a (Y. Pb. Pr) cable via the (Y. Pb. Pr) Output of the DVD player (Ref.42) to your TV (R/L/Video port and cable).
- RCA Cable- Connect an RCA cable (not included) into the 2 channel Audio Output ports (Ref.44) and the RCA input on your TV.
- Once all cables are properly inserted, press the 'Power on/off' button (Ref.41/Rem.1) on the unit or on the remote control to switch the DVD player on. The display on the DVD100 front panel will illuminate.
Standby
PLEASE NOTE: If the DVD player is not used for 5 minutes after being switched on, it will enter Standby Mode. Press any button on the remote control to switch it back to working mode.

If the product will not be used for an extended period of time, it is advisable to disconnect from all cables and unplug for safety.
DVD & CD Operation
The Oakcastle DVD100 can play DVD discs from all regions in supported formats. (See Product Specification)
- Ensure that your TV is set to the correct mode for DVD playback.
- Press the 'Power' button on the unit (Ref.41) or on the remote control (Rem.1), and wait 2-3 seconds until its display will light up.
- Press the 'Open/Close' button on the front panel (Ref.38) or on the remote control (Rem.20) to open the disc tray. Place the DVD or the CD into the disc tray (with the label up), and then press the 'Open/Close' button again to close the tray.
- The DVD player will read the disc and begin playing. You can control the playback and settings via the remote control.
PLEASE NOTE: Blu-ray discs are not supported.
Programming Mode (remote usage only)
The Oakcastle DVD100 has a programming feature which you can use whilst playing a DVD (disc dependent), MP3 CD discs, or when using a USB stick with audio files.
If the disc has two or more tracks, chapters, or titles, you can set up a playing order as per your preferences in a different order than the disc default order.
Press the PROG button (Rem.17) to enter the Program Mode.
Use the number buttons (Rem.12) to input the number of the track, title or chapter. To enter a double-digit number, first press the 10+ button once to get 10, twice to get 20, and so on, followed by the second digit of your preference.
Use the up/down/left/right keys (Rem.8/Rem.9/Rem.24/Rem.25) to move the cursor to the next track, chapter or title position you wish to program.
Once you arrange all in order, navigate and highlight the 'PLAY' button on the screen, and then press the ENTER button (Rem.10) to start program playing.
Navigate to the CLEAR button on the screen, and then press the ENTER button (Rem.10) to clear all settings.
To exit Program mode, press the PROG button (Rem.17) again.
PLEASE NOTE: Commercial CD discs cannot be programmed.
USB Playback
The Oakcastle DVD100 has an USB port at the front panel (Ref.37) which can only be used for playback from an USB stick of up to 32GB.
The DVD player via its USB port can play pictures in JPEG format, audio files in mp3 format or video files in AVI/MPG/VOB. The maximum resolution accepted for the video via a USB stick is for up to 720*576.
- Insert the USB stick into its port (Ref.37).
- Press the 'DVD/USB' button on the remote control (Rem.2) to switch from DVD to select USB Mode. Select USB and press the 'ENTER' button (Rem.10).
- On the TV screen, you will see the USB content displayed as a file list and the first file will start playing.
- Using the arrow buttons left/right/up/down (Rem.8/Rem.9/Rem.24/Rem.25) , browse through the list to select the file you would like to play, then press the 'ENTER' button (Rem.10) to confirm.
PLEASE NOTE: The USB port cannot be used as a connection port for charging other devices.
USB & MP3 discs playback controls
Whilst playing from a USB stick or a CD with MP3 audio files, the following buttons can be used:
- 'Play/Pause' button (Rem.4) to play or pause a track.
- 'Stop' button (Rem.6) to stop a track.
- 'Press the 'Previous/Next' buttons (Ref.21)/(Ref.22) to skip to the previous or next track.
- Press the 'Rewind/Fast Forward' buttons (Rem.3)/(Rem.5) to rewind or fast forward through a track.
Programming mode can be used while playing from a USB or from a CD with audio files in MP3 format as per the instructions described in the "DVD & CD Operation" section.
System Setup
Press the 'SETUP' button (Rem.23) on the remote control to enter the Settings of the DVD100.
Within 'Settings' the following options are available:
Menu 1: System Setup
Menu 2: Language Setup
Menu 3: Video Setup
Menu 4: Audio Setup
Menu 5: Digital Setup
Using the arrow buttons, highlight the menu you would like to enter and set as per your preference.
- Press the arrow buttons 'Up' and 'Left' (Rem.8,Rem.9).
- Press the (Rem.24)/(Rem.25) to access your chosen sub-menu/function.
- Press left to go up back up a level and press right to go down a level into the selected sub-menu/ function options.
- Press the 'ENTER' button (Rem.10) to confirm your selection.
To exit the Set-Up mode, press the 'SETUP' button again (Rem.23).
Follow the guidance below to edit any of these menu's settings.
System Setup
TV System (NTSC/PAL/AUTO): Enter this section to select or change in between PAL/NTSC/AUTO. Select one of these based on your TV colour format, and then press the 'Enter' button (Rem.10) to confirm.
This player conforms to the NTSC and PAL colour systems. However, if you are in the USA, Canada or Mexico, leave this setting on NTSC. If incorrectly set to PAL, the TV picture may roll vertically. In this case, set the TV system to NTSC.
Screensaver: Turn screensaver on or off. If switched on, the screensaver will come on when the unit idles, or the image is paused for several minutes.
TV Type: Select the Aspect Ratio to match the connected TV (16:9, 4:3 LB ("Letter Box") or 4:3 PS ("Progressive Scan").
Password: To set a new password for playing content rated at or above a rating of your choice (selected using the 'Rating' sub-menu below), first select 'Password' by pressing the 'Enter' button (Ref.10). Enter the default password (0000) and press the 'Enter' button (Ref.10). Set your new 4-digit password using the numeric buttons (Ref.12). Press the 'Enter' button (Ref.10) again to confirm your password. View or change the rating of the content you wish to protect with a password by using the 'Rating' sub-menu below.
Rating: Select the desired rating level from the following list: 'Kid Safe', 'G' (All ages), 'PG' (Parental Guidance), 'PG 13' (Parental Guidance for children less than 13 years old), 'PG-R' (Parental Guidance suggested for children under 17 years old), 'R' (Parental Guidance strongly suggested for children under 17 years old), 'NC-17' (Suitable for 17 years or above) or 'Adult' (Adults only).
Resume: Select to set auto-resume to 'Off' or 'On'. If switched on, the unit will resume playback from the point where the disc was last stopped.
Default: Select to reset the unit to factory settings.
Language Setup
OSD Language
Select a language for the on-screen display language (languages available are disc dependent).
Audio Language
Select a language for the audio (languages available are disc dependent).
Subtitle Language
Select a language for the subtitles (languages available are disc dependent).
Menu Language
Select a language for the menu (languages available are disc dependent).
Video Setup
HDMI Output
Set the resolution output to match the connected TV.
Video
If your TV is connected to the unit via a video jack, select 'CVBS'.
If your TV is connected to the unit via Y, Pb, and Pr jacks, select YUV or 'YPBPR'.
Audio Setup
AUDIO OUT: Using the arrow buttons on the remote control, select the submenu 'Audio Out'. Select one of the following options to set the audio, and then press the 'ENTER' button (Rem. 10) to confirm your selection. These options are:
- SPDIF/OFF: Select this option to switch off the digital audio output. SPDIF/RAW: Select this option in case the DVD player is connected to an amplifier using the coaxial/HO cable.
- SPDIF/PCM: Select this option in case the DVD player is connected to a 2nd channel digital stereo amplifier.
- SPDIF/PCM: Select this option in case the DVD player is connected to a 2nd channel digital stereo amplifier.
DOWNMIX: Mixing audio Channels
Choose between the following audio mix settings:
Stereo: If this audio mode is selected, the rear left channel will play through the left speaker, and the rear right channel will play through the right speaker.
LT/RT (Left total/Right total): If this audio mode is selected, the rear left or rear right channels on Dolby 5.1 recording DVD discs will play through both the left and right speakers.
PLEASE NOTE: The availability of this function depends on the recording of the disc.
Digital Setup
DUAL MONO
Choose in between the following digital setup settings:
STEREO: The rear left channel plays on the left speaker; the rear right channel plays on the right speaker.
MONO-L: Select to play the left audio channel through all speakers. MONO-R: Select to play the right audio channel through all speakers.
MIX-MONO: Select to play mixed right and left channels through all speakers
PLEASE NOTE: The availability of this function depends on the recording of the disc.
Troubleshooting & Support
| Observation | Potential Cause/Solution |
No power/function | Check that the power is switched on at the wall. Check that the power adaptor is properly inserted into DVD player and to the wall. |
No video | Ensure the video cables are properly connected. Ensure the TV is has set the correct input settings. Disconnect all cables and re-connect Reset the settings of the DVD player. |
No audio | Ensure the audio cables are properly connected. Make sure that the coaxial connected stereo is powered on. Re-install the connection cables. Reset the settings of the DVD player. |
Issues playing the disc | Place a DVD disc in the disc tray. Place the disc in with the label side up. Clean dust/dirt from the DVD disc. Close the setup of the DVD player. Check that the disc or file is compatible with the unit. |
Remote control is not working | Use the remote control closer to the DVD player. Check the battery level of the batteries and replace if necessary. |
Support
If you require further assistance with your new DVD player, please contact our support team on the Oakcastle website:www.oakcastle.co.uk
Product Specification
| Power Supply - AC Power Input | AC 100-240V 50-60 Hz 0.5A Max |
| Power Supply - DC Power Output | 5.0V = 1.5A |
| Compatible Connections | HDMI A/V RCA Output (Y Pb Pr)R/L/ Video |
| Compatible Disc Formats | CD, CD-R, CD-RW DVD, DVD+R, DVD-R, DVD+RW, DVD-RW |
| Product Dimensions (WxHxD) | 20 × 4.2 × 22.5 cm |
| Regions Supported | Multi-region |
Register your product online for a FREE 3 year extended warranty at: www.oakcastle.co.uk
Documents / Resources
References
Download manual
Here you can download full pdf version of manual, it may contain additional safety instructions, warranty information, FCC rules, etc.
Advertisement


Need help?
Do you have a question about the DVD100 and is the answer not in the manual?
Questions and answers