Advertisement
Important safety information
- The seat must be mounted behind the rider, on the frame's seat tube, as shown in the instructions in this manual. Do not tighten the screws excessively and check the tightness periodically.
- Check that the bicycle is suitable for adding supplementary loads. Check the information supplied with the bicycle or ask for information and advice from the bicycle manufacturer.
- Adjust the seat and its components in order to give the child the most comfort and safety. When the child is in the seat, the backrest should be slightly tilted backwards, so as to prevent the child from sliding forward.
- Check to ensure that each part of your bicycle is working properly with the seat mounted.
- Check the existence of any laws present in your country that govern the use of child bike seats.
- The seat cannot be attached to the seat post unless allowed by the manufacturer of the cycle.
- Ensure not to carry a child that is to young to seat safely to the seat. Check initially and then periodically that the weight and size of the child does not exceed the maximum allowed by the seat. Carry only children that are able to seat unaided for a longer period of time, at least as long as the intended cycle journey.
- Check that the child or part of his clothes do not come into contact with moving parts of the seat or bicycle. Avoid the child's hands and feet coming into contact with the wheel, in the sprung saddle or being caught in the brakes.
- Ensure that there are no sharp edges that could come into contact with the child.
- Ensure that the safety belts are not loose and do not come into contact with the moving parts of the bicycle, especially with the wheels, even when the child is is not being carried in the seat.
- Always use the safety belts. Make sure your child is properly secured with the seat belts.
- The child in the seat must be clothed and protected from the cold more than the person riding the bicycle. Protect the child from rain.
- It is advised to make the child wear an approved protective helmet complying with EN1078:2012+A1:2012.
- Check that the seat is not too hot (e.g., overheated by the sun)prior to placing the child in it.
- Remove the seat when the bicycle is transported by car. Strong wind could damage the seat or detach it from the bicycle, causing accidents.
- Before each use, check the seat is fitted onto the fastening block correctly: on pulling the support arm upwards, the fastening block must hold the seat down firmly. Check carefully the stability when installing the child to the seat on the bicycle.
- The seat material (polypropylene) loses some of its mechanical properties with aging if exposed for longer periods to environmental conditions (sun, rain, ice, etc.). In the case of normal use and exposure to environmental conditions, the seat should be replaced after 3 years.
- Entrapment is not only limited to the child seat itself. Possible areas at the bicycle shall be considered as well (e.g. accessible saddle spring), consumer shall be informed regarding other possible entrapments at the bicycle.
- When riding for the first time with the seat fitted test the cycle in a safe/quiet environment before riding on the highway
- Ensure to cover any exposed rare saddle springs.
- The seat shall be installed as close to the saddle as possible.
Warnings
![]()
Do not attached additional luggage to the child seat. Any additional luggage must be placed on the opposite side of the bicycle with respect to the seat. For example: if the seat is in the rear of the bicycle, use a front bag carrier and vice versa.![]()
Do not modify the seat.![]()
The cycle could behave differently with a child in the sit. Particularly with regard to balance, steering and breaking.![]()
Never leave the cycle parked with a child in the seat unattended.![]()
For any form of crack or if the surface starts to deconstruct, this indicates that the life of the seat has been reached and it should be replaced. A professional shall be contacted in case of doubt.![]()
Always check the surface temperature of the product before any use.![]()
Always ensure that the head of your child is supported in reclined position.![]()
This child seat is not suitable for use during sporting activities.

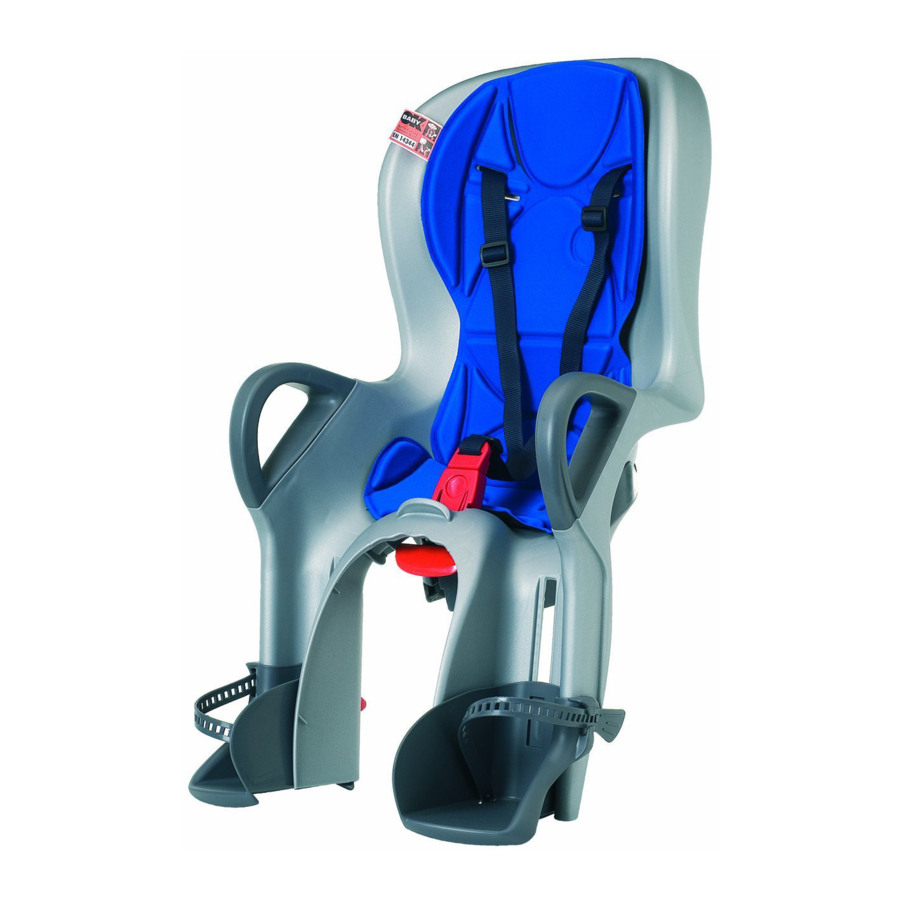
Product description
10+ is a rear seat that is mounted on the bicycle frame seat tube with a round section diameter of between 28 and 40 mm. 10+ is designed to carry children who are at least about 9 months old, weighing minimum 9 kg, and up to a maximum of 22 kg and maximum height of 110 cm. The child must be able to sit independently, at least for the duration of the ride. 10+ can also be mounted on pedelecs. It must not be mounted on any other two-wheeled vehicles such as scooters, mopeds, motorcycles, etc.
Product overview

- Seat
- Padding
- Safety belts
- Footrest with relative strap and adjusting pin
- Support arm with guide plate
- Reflector
- Metal U-bolts
- Fastening block
- Bag of accessories containing 4 M6x70 screws, 4 washers and an Allen key
- Locking pin
- Block tightening wrenches
- U-bolt supports
MAX WEIGHT: FROM 9 TO 22 kg

MAX HEIGHT: 110 cm

Mounting and assembling the product

Illustration 1:
Position the fastening block (8) on the seat tube of the bicycle. Attach the supports (12) to the metal U-bolts (7) and screw up with the block (8) using the four screws and washers (9). Do not fully tighten the screws so the position can be adjusted later. If there is a cable in the area where the metal U-bolts (7) are positioned, the U-bolts (7) can be positioned between the cable and the seat tube (Fig. 1A).

Illustration 2:
Free the support arm (5) of the fastener ring. Remove the support arm from the child seat cradle.

Illustration 3:
Insert the support arm (5) into the guide seat on the cradle as illustrated in the diagram and push the guide plate (5) until it reaches the guide seat and can go no further (see also illustration 4).
Illustration 4:
Insert the locking pin (10) into the hole B.

Illustration 5:
Rotate the locking pin 90° clockwise and click the locking pin safety clip into the free space (see zoomed view).

The locking pin is an important safety precaution and must always be in place. Always check that it is positioned correctly before every trip!

Illustration 6:
Insert the two ends of the support arm (5) into the fastening block holes (8). When the seat is correctly in place, tighten the screws (9) slowly and evenly until the fastening block stops rotating around the frame. The optimum torque wrench setting is 8 Nm.
Illustration 7:
Adjust the vertical and horizontal position of the child seat according to parameters seen in the figure. The barycentre (see fig. red circle) must not be more than 10 cm behind the wheel axis. If necessary, correct the horizontal position of the child seat as described in illustration 8.


Illustration 8:
Correcting horizontal position.
- Press the two halves of the locking pin handle together so that the safety clip opens
- Turn the locking pin 90° downwards.
- Move the child seat horizontally until you find the right position.
- Fix the support as shown in illustration 5.

Illustration 9:
Fastening the footrests: Place the footrest marked "SX" in the highest position of the seat's left leg. Insert the adjusting pin marked "SX" from the outside of the child seat inwards. Repeat the operations for the right footrest and relative adjusting pin, marked "DX".
Using the product

Illustration 10:
Inclining the child seat: To set the inclination of the child seat, pull the release knob (E) upwards. Hold the release knob upwards, and with your other hand incline the seat to the desired position. Then let go of the release knob.
Illustrations 11-12:
Moving the footrests. Rotate the adjusting pin upwards and move the footrest to the desired position. Once in the desired position, block the footrest by rotating the adjusting pin downwards.


Illustration 13:
Fasten the child's safety belt: Adjust the height and length of the belts according to the size of the child. Setting belt height: the belt can be extracted to adjust its height by inserting the buckle behind the backrest through the opening each time. Choose the upper or lower openings to fix the belts based on the child's height. Setting belt length: modify belt length by sliding the buckles. The belts must be fastened firmly without them being too tight for the child.
Fastening the belts: Fasten the belt clasp. Check that the belt clasp clicks shut properly, and then pull the belt.

Illustration 14:
To unfasten the belt, simultaneously press the two buttons (front and rear) found on the clasp. The clasp will open.

Illustration 15:
Fastening the footrest strap: Place the child's feet inside the straps and fasten them onto the hooks behind the brackets. To undo the straps, unhook them and remove them from the brackets whilst they are inclined.

Illustration 16:
Removing the child seat: Press the release button on the fastening block (8) and remove the seat. To reinstall the seat, insert the support arm (5) in the two holes on the fastening block (8) until the release button clicks (Fig. 6).

Illustration 17:
NOTE: the fastening block (8) is fitted with an anti-theft system actuated using one of the keys (11) supplied (Fig. 18). Insert the key (11) in the fastening block (8) and rotate in an anti-clockwise direction to lock the release button to prevent the seat from being removed. Rotate the key (11) in a clockwise direction to restore operation of the release button.
Maintenance
- Clean the seat, the padding and the belts with warm water and a mild detergent. Do not use solvents or abrasive or corrosive detergents. Leave the padding to dry in the open air. Do not iron.
- Seat repairs and replacement of damaged components must only be carried out by authorized personnel.
Technical specifications
| Product | Child bike seat OKBABY mod. 10+ |
| Dimensions | 41x58x70 cm (LxDxH) |
| Weight | 3.7 kg |
Optional accessories
- Fastening block no. 37490000
The support arm is not connected to the fastening block. Seat tube diameter from 28 to 40 mm. - Support arm:


Manufacturer:
OKBABY srl, Via del Lavoro 26, 24060 Telgate (BG) Italy.
Tel. +39 035 830004 • Fax +39 035 832961
okbaby@okbaby.it - www.okbaby.it
Documents / Resources
References

Download manual
Here you can download full pdf version of manual, it may contain additional safety instructions, warranty information, FCC rules, etc.
Advertisement


Need help?
Do you have a question about the 10+ and is the answer not in the manual?
Questions and answers