Table of Contents
Advertisement
Quick Links
Advertisement
Table of Contents

Related Manuals for Therabody JetBoots PRO Plus


Summary of Contents for Therabody JetBoots PRO Plus
- Page 1 User Manual...
-
Page 2: Table Of Contents
5. How the Device Works 6. Preset Treatments 7. Cycle Types 8. Store and Transport The device 9. Device After Care and Cleaning 10. Device Settings 11. Charging the Device 12. Troubleshooting Born in Los Angeles, CA. Designed for everybody. @Therabody... -
Page 3: Intended Use
JetBoots PRO Plus is an air compression therapy device intended to provide graduated pressure to the legs. JetBoots PRO Plus is indicated for the temporary relief of minor muscle aches and pains, and for a temporary increase in blood circulation to the treated area in people who are in good health. JetBoots PRO Plus simulates kneading and stroking of tissues by using an inflatable garment. -
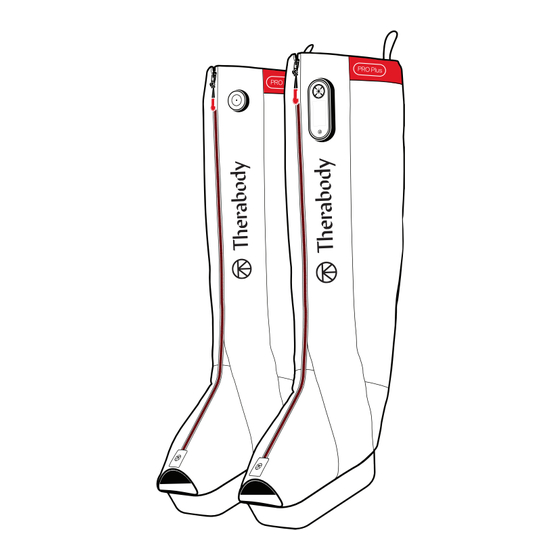
Page 4: Getting To Know The Device
3. Getting To Know the Device Lead compression boot Support compression boot Lead boot control panel High resolution display LCD screen Center button 4 Navigation buttons (up, down, right, left) Support boot power button Charging ports Hanging loops Figure 2. The device and control panel... -
Page 5: Use The Device
4. Use the Device 1. Put on your boots. It is recommended that you wear shorts while using the device to allow the device to contact your skin directly. Reach a comfortable position, either sitting upright or lying down with your legs straight and feet elevated. - Page 6 Menu Screen 3. Turn on the device. To turn on your device, press and hold the center button on the control panel of the lead boot. The LCD screen on the control panel will light up when the lead boot is on. Press and hold the button on the support boot to power it on.
-
Page 7: Preset Treatments
5. How does it work? Using negative gradient technology, the device safely delivers pressure sequentially up the legs, starting from the feet and moving up toward the hips. Each of the device’s four air chambers overlaps, so the pressure is delivered up the leg consecutively without the risk of harmful pressure gaps. -
Page 8: Cycle Types
7. Cycle Types Sequential Cycle Chamber 4 During a sequential cycle, pressure is applied directionally, starting at the base (feet) and progressing upwards (torso). Once Chamber 1 inflates and reaches its preset pressure Chamber 3 level, it holds the pressure and begins inflating Chamber 2. The device continues to hold pressure in each subsequent chamber until all four chambers are inflated. Once all four chambers are inflated, the device releases pressure. -
Page 9: Store And Transport The Device
8. Store and Transport the Device Allow all air chambers to completely deflate before storing. Zip the boots up fully and hang them up. To roll the boots, lay each boot on its side with the control panel facing up. Roll the boots, starting with the foot console and moving up. -
Page 10: Device After Care And Cleaning
9. Device After Care & Cleaning Device Maintenance The following maintenance instructions are important to ensure that your device continues to work as it was designed. Failure to follow these instructions may cause your device to stop working. Super, hygienic design The boots have non-porous medical grade material that helps prevent bacteria buildup and provides a resistant surface. -
Page 11: Boot Status
Figure 6. How to Link the Boots Lead JetBoot PRO Support JetBoot PRO Connected Boot Status Description Plus Screen Plus Power Light Both boots are powered ON but Blinking Fast do not connect Unlinked with each other. One of the boots is Support Boot Light Support Boot OFF or outside the... -
Page 12: Troubleshooting
4. Ensure the electrical wall outlet is connected to a 100–240 Volt wall outlet. 5. If the device is not charging after verifying all of the above, the power adapter or device may be damaged. Contact Therabody for further assistance. - Page 13 A longer boot size may lead to kinks and folds. displays on the screen 3. Contact Therabody for further assistance if the issue persists. Yellow light Support boot: Air cannot move through the air...
- Page 14 None Lead boot: Vibration therapy malfunction Treatment stops and a warning with Contact Therabody for further assistance if the issue repeats. You can the vibration icon is displayed on the continue to use the device with the vibration therapy OFF.
- Page 15 Due care is required in these circumstances and device use may need to be modified. Consult with a medical professional if you currently have or suspect you may have any of the following conditions or if you have any Therabody products are designed to unlock the body’s natural ability to achieve health and well-being. questions.
-
Page 16: Unit Warnings
• Direct pressure over eyes or throat The device is not intended to diagnose, cure, or prevent diseases. Therabody strives to make its devices as • Extreme discomfort or pain felt by client safe for intended use as possible. This is an advanced mechanical tool with electric components. If the device •... - Page 17 Do not handle the cable with wet hands. For long-term storage, store with a fully charged battery. Therabody is not responsible for damages that may occur due to the use of third- party chargers.
-
Page 18: Fcc Statements
GARMENT CARE. CAUTION and WARNING from Safety and EMC Meanings of symbols CAUTION: Label Description Location Do not apply the device near any devices with Electromagnetic Interference (EMI), such as cell phones, Magnetic Resonance Imaging (MRI), computerized axial tomography (CT), diathermy, Radio Frequency Identification (RFID), etc. or MR environment. - Page 19 Description of Wireless Technology Bluetooth Compliance Version 5.3 low energy Operating Frequency 2.402-2.480 GHz Transmission Power 0 dBm Operating Range 10-meter radius (line of sight) Modulation Type GFSK π/4-DQPSK,Adaptive Frequency Hopping This device uses Bluetooth smart technology for wireless communication, which allows for reliable communication in Quality of Service electrically noisy environments.
- Page 20 If you think you or someone in your family has experienced a serious reaction to a medical product, you The JetBoots PRO Plus Device utilizes low power Bluetooth and is intended for use in an electromagnetic are encouraged to take the reporting form to your doctor. Your health care provider can provide clinical environment in which radiated RF disturbances are controlled.
Need help?
Do you have a question about the JetBoots PRO Plus and is the answer not in the manual?
Questions and answers
Hi I own a pair of Jetboots Pro Plus SN:H250900090L Purchased: May 9, 2025 from Wellbots Only the first LED in each of the LED strips lights up on my boots. (See picture below) Shouldn't all of the lights turn on? Are my boots defective? Is there a way to reset the boots so that all of the lights light up? Please send me a support phone number I can call to get support. My mobile number is 917-742-5328 Don Carli
While using the boots my husband's face got VERY red. Why and does he need to be aware of something when using the boots?