Advertisement
- 1 S8 PARTS IDENTIFICATION
- 2 Configuration Table
- 3 Pre-Riding Safety Checklist
- 4 Drive Safety
- 5 Assembly Instructions
- 6 DISPLAY AND SETTING
- 7 ERROR CODES OF THE DISPLAY
- 8 CHARGING AND BATTERY ATTENTION
- 9 INSPECTION INSTRUCTIONS
- 10 NOTES AND CAUTIONS
- 11 IMPORTANT SAFETY INFORMATION
- 12 Documents / Resources
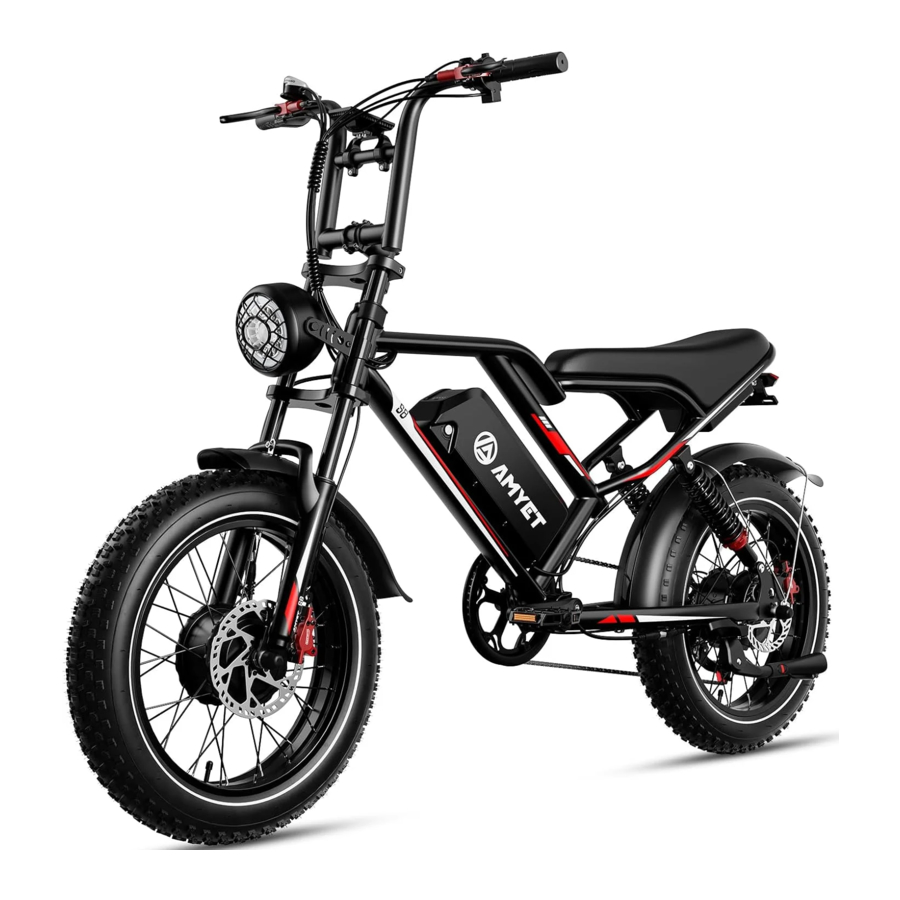
S8 PARTS IDENTIFICATION

Configuration Table
| Item Name | Product specification |
| The vehicle size | 72. 11*28. 34*74. 24inch |
| Packing Size | 57*11*35inch |
| Color | Black and Green |
| The frame material | Chrome molybdenum steel |
| Net Weight | 94. 791b |
| Gross Weight | 113. 541b |
| Max. Support Weight | 3301b |
| Function 1/2/3 | Power cycling/Before the suspension/SHlMANO shifts gears |
| The highest speed | 32KM/h (5 gears adjustable) |
| Inner Tube Tire Press | 20PSl/140KPA |
| Bike Computer | S8 |
| Charger | 110V-240V 50/60Hz |
| Battery | 48V/25AH |
| Brake system | Front and rear hydraulic disc brake |
| Tire | 20x4. 0 |
| Motor Power | 2*1000W Dual Motor |
Pre-Riding Safety Checklist
Notice: Before every riding, and after every 25-45 miles, we advise following the pre-riding safety checklist in the table below.
| Safety Check | Basic Steps |
|
|
|
|
|
|
|
|
|
|
|
|
|
|
|
|
|
|
|
|
|
|
|
|
Your cables, spokes, and chain will stretch after an initial break-in period of 50-100 mile (80-160km), and bolted connections can loosen. Always have all certified, reputable be mechanic perform on your E-bike after your initial break-in period of 50-100 mile (80-160km) (depending on riding conditions such as total weight, riding characteristics, and terrain). Regular inspections and tune-ups are particularly important for ensuring that your bike remains safe and fun to ride.
Drive Safety
Please strictly abide by the traffic rules and safe driving speed control within safe speed, (default of safe speed is 30km/h)
Before you dive, please be familiar with the contents of this manual. Then find an empty, flat training, have complete control of the vehicle diving essentials and familiar with its structure, it is the foundation of safe driving.
 Dangerous:
Read the instructions carefully and understand the performance of the electric bicycle before, do not use electric bike, don't lend it to people won't run the electric bike riding! Please strictly enforce the traffic rules, don't drink driving, driving, one hand after separation is very dangerous! Rain and snow weather driving: want to double pay attention to safety, rain and snow day by the damp ground be dangerous! Therefore, we should avoid speed, to be especially careful. Especially should remember: brake in advance to prevent snow day! Not afraid of rain, snow on the local weather, but can't wade, when water flooded to the rear wheel motor wheel hub, may cause the vehicle internal wiring short circuit, and damage to the electric appliances, please attention!
Check before riding:
- Please you in the vehicle with double supports, the rear wheel off the ground, under the condition of the power switch is normal use.
- Put through power supply, check the instrument on the indicator light is normal; Check whether the power of electric.
- Check the condition of electric bike horn are in good condition; Lighting switch operation, check the head lights, tail lights lighting is normal.
- The saddle, the saddle tube is adjusted.
- Check before and after the brake lever, brakes should be bug to reset the brake is reliable, flexible, rain and snow weather should increase the braking distance.
- Check the tire pressure is normal? Presence of cracks and abnormal wear and nails, stone, glass and other sharp objects embedded.
Note: Tire pressure disturbance, crack damage and abnormal tire wear is the cause of steering is ineffective. the tire burst - Check whether the front and rear screw lock and chain conditions are in good condition.
- Check the shaft fastening condition, ensure the front and rear axles and handlebar clamp reliable.
Drive properly:
- Please stand before you start the bike to the left of the main bracket stand, view the vehicle without exception.
- Open ON/OFF button, the power display lights, said the power supply has been switched ON.
- When you sit in the bike, slowly turn the speed to the inside(counter clockwise) (right). Vehicle to start control the rotation Angle from small to large, the speed from slow to fast. Danger Rear wheel after landing, the person did not ride in the bike before. not the rotational speed adjustment.
- When using brake, should first will speed the return quickly, to hold the brake the grid. Slowly when the brakes brake, then tighten the practice of the the ideal. Not on the brakes, steering. Emergency brake, fierce steering is the main cause of side slip or overturned, is extremely dangerous.
Note: Only brake front or rear, the bike may appear traverse, is extremely dangerous.
On the way to note:
- For you and other safety, please consciously abide by traffic rules, should be in the slow lane, are not allowed to be with people.
- Must wear safety helmet before riding, as well as other relevant safety precautions keep the natural position he can drive.
- The vehicle has just started, should slow acceleration, so as not to cause instantaneous acceleration starting current is too large waste of electricity, auxiliary pedal to start the better.
- To battery, motor maintenance, start-up and climbing in the bike, the foot function models. please try to use pedal power.
- 1n order to ensure the safe premise, driving should try to adopt economic speed. And try to use pedal power.
- Still tighten the control of of motor speed after driving should be avoided in the brake of the phenomenon. so as to avoid the motor overload and damage other parts too much.
- In the mud or as far as possible when driving on rough road with human drives.
- Rain and snow weather, road surface wet. braking distance should be increased. When riding, should focus on, slow carefully, prevent the side slip.
- The default of the over-current protection device. In the uphill slope cases such as larger, against the wind, wind speed is larger. can make the circuit current exceeds rating(flow), the best can use pedal power, power and influence range not not only otherwise, serious will burn out motor and electric appliance. The bike body and electrical components shell should not be charged, its insulation resistance value is not less than 2 MQ.
- Controller has under-voltage protection function, when the voltage is lower than under voltage value automatically power cut in order to protect the service life of the battery.
Parking and matters needing attention:
- When you get off for should shut off the power switch, in order to prevent when push has no intention of rotation speed caused by the accident.
- When parking should be in the flat ground up and lock parking holder and turn the power off.
- For your driving safety, but also make your bike can stay in the best condition and regular maintenance and cleaning.
Assembly Instructions
The following assembly steps are only a general guide to assist in the assembly of your bike from electric bikes and is not a complete or comprehensive manual of all aspects of assembly, maintenance, and repair.
We recommend you consult a certified, reputable bike mechanic to assist in the assembly, repair, and maintenance of your bike.
Unpacke-bike from the carton and carefully set out all contents of the box. Remove packaging material protecting the bike frame and components.
Please recycle packaging materials especially cardboard and foam (all #6 EPSfoam).
Ensure all pieces are included in the package including:

- Battery Keys (two, identical with number)
- Inflator
- Charger
- Pedals (marked left and right)
- Covers
- Front Fender
- Headlight
- Front Wheel
- Assembly Tool kit
- Manual
- S8 E-bike
Handlebars
- Use a screwdriver to twist the 4 screws of the driving rod;

- Pick up the handlebars to fix the position, adjust the Angle, tighten the 4 screws, pay attention to lock the screws to prevent loosening;


Headlight
- Take out the headlight, open the patch on both sides of the headlight, and put the headlight with one end of the line down and the other end up;

- Take out the screw and gasket, remember to put the gasket first and then the screw, and lock it with a screwdriver;

- Align the arrow of the headlight line, and then insert it, paying attention to the direction of the arrow;


Fender
- Take out the fender and take out the nut;

- Put the fender in the position of the front fork, insert the bolt into it, and then lock the nut, fix the nut with a wrench, and tighten the bolt with a hexagonal screwdriver;


Front Wheels
- Cut the front wheel strap, release the protection rod of the front fork, and place the disc brake of the front wheel in the same direction of the brake;
![]()
- Lift the body of the electric vehicle, and then the brake disc stuck in the position of the brake, pay attention to the sequence of gaskets, front fork, washer, nut, adjust the position with a wrench to tighten the nut;

- Connect the front wheel motor line, pay attention to the direction of the motor line should be aligned with the insert, and then clockwise tighten the screws;

- After locking the nut, install the nut cover;


Pedals
- Locate the right-side/ left side pedal, which is marked "R, " "L, "should have an sticker attached.
![]()
- Thread the right pedal onto the right crank gently by hand, turning clockwise. Then tighten pedal by allen wrench.
![]()
- Thread the left pedal onto the left crank gently by hand, turning counter-clockwise. Then tighten pedal by allen wrench.
![]()
- Check the chain alignment. Rotate the right pedal and crank toward the back of the bike as though pedaling backward Watch the chain and ensure the chainrunsthrough the drivetrain (the rear cog, chain tensioner, and around the front chainring) smoothly.
![]()


Note: If the pedal/ chain doesn't run smoothly or something seems misaligned, please contact AMYET Support.
DISPLAY AND SETTING

LCD Display Controls

| Operation | Directions |
| Turn on bike | Press and hold  until power engages(turn the battery first) until power engages(turn the battery first) |
| Turn off bike | Press once |
| Increase pedal assist (PAS) level | Press  button (1) button (1) |
| Decrease pedal assist (PAS) level | Press  button (2) button (2) |
| Turn on headlight | Press once  (5) (5) |
| Activate Electric Bell | Press once  (6) (6) |
| Shift mode | Press the M to switch the interface (3) |
Functional Specification
- Display Function
Speed display, power gear display, power indicator, fault warning, total mileage, single mileage, headlight display, single travel time display. - Control And Set Functions
Power switch control, headlight switch control, 6Km/h point control, wheel diameter setting, maximum speed setting, idle automatic sleep time setting, backlight brightness setting, voltage level setting. - Communication protocol
All contents of the display (full display within IS after starting)

- Headlight
![]() , USB charging tips
, USB charging tips ![]() , Brake status warning
, Brake status warning ![]() .
. - Display of battery capacity (remaining capacity is 100 percent of the BMS support of the battery)
![]()
- Multifunction display area
![]()
Total mileage ODO, single mileage TRIP, digital voltage Pow, single ride Time time, metric mileage Km, British mileage Mile; - Pedal assist mode
![]()
0-9 modes can be displayed, 6 km boost and cruise display![]()
- Speed display area
![]()
Maximum speed MAX, average speed AVG unit MPH, KM/H The meter calculates the true speed based on the wheel diameter and signal data - Ebike status and fault code meaning
Meaning of ebike status code:Status code (decimal) State Meaning 0 Normal state 1 Retain 2 Braking 3 Power sensor failure (ridin si n) 4 Cruise at 6KM/H 5 Real-time cruise 6 Battery undervoltage 7 Motor fault 8 Handle fault 9 Controller failure 10 Communication reception fault 11 Communication sendin fault 12 BMS communication faul 13 Headlight faulty - Setting
P01: Backlight brightness, level 1 is the darkest, level 3 is the brightest;
P02: Unit of mileage, 0: KM; 1: MILE;
P03: Voltage level: 24V, 36V, 48V, default 36V;
P04: Sleep time: O, no sleep; Other numbers are sleep time, ranging from 1 to 60; Unit minute;
P05: PAS: 0-3 mode:- model: 2V,
- mode2: 3V,
- mode3: 4V;
1-5 mode: - model: 2V,
- mode2: 2. 5V,
- mode3: 3V,
- mode4: 3. 5V,
- mode5: 4V;
- Headlight

 , USB charging tips
  , Brake status warning
  .
.


P06: Wheel diameter: Unit, inch; Accuracy: 0. 1;
P07: Speed measuring magnetic steel number: Range: 1-100;
P08: Speed limit: 0 to 100km/h. 100 indicates that the speed limit is not limited,
- Non-communication state (instrument control): When the speed is greater than the set speed, turn off the PWM output; When the speed is lower than the set speed, the PWM output is automatically turned on, and the driving speed is the current speed ±1km/h; (Only for power speed limit, no speed limit on the handle).
- Communication state (controller control): drive speed maintained at the set value, error: ±1km/h; (Power and handle speed limit) Note: The value here is based on kilometers. When the unit setting is converted from kilometers to miles, the speed value in the display interface will be automatically converted to the correct mile value, but the speed limit data set in this menu under the mile interface will not be converted, which is inconsistent with the actual displayed speed limit value of miles.
P09: Zero start, non-zero start Settings, O: zero start; 1: non-zero startup;
P10: Drive mode set 0: power drive (Determine how much power to output through the power gear, at this time Turn handle is invalid).
- Pure Electric (by turning the lever drive, the power mode is invalid at this time)
- PAS mode and Pure Electric is used at the same time (Pure Electric is invalid in zero start state)
P11: Assist sensitivity setting range: 1-24;
P12: PAS setting range: 0-5;
P13: The type of the assisted magnetic steel plate is set in 3 types: 5, 8, 12 magnetic steel;
P14: The default current limiting value of the controller ranges from 1 to 20A;
P15: The function is not available;
P16: ODO Clear Setting Hold down the up key for 5 seconds to clear ODO;
P17: 0:disable cruise, 1: enable cruise. Automatic cruise Optional(valid for Protocol 2 only);
P18: Display speed ratio adjustment range: 50%—150%;
P19: O indicates the enable bit. O: contains the O file. 1: does not contain the 0 file;
P20: Protocol 0: 2 Protocol I: 5S Protocol 2: Standby 3: standby;
Key Introduction
The specific combination positions of keys are as follows: Key operation includes short press and long press, and combination key long press.
Short press for quick/frequent operations, such as
![]() When riding, you need to modify the power/speed gear, short click.
When riding, you need to modify the power/speed gear, short click.![]() Switch the display data in the multi-function are awhile riding, tap it. e power/speed gear, short click.
Switch the display data in the multi-function are awhile riding, tap it. e power/speed gear, short click.
Single key long press mainly used for mode/switch state switch Compound key (long press) Used for parameter setting, because the operation is complex, so as to reduce misoperation (short press do not do the compound key, because it is easy to trigger by mistake, operation is too difficult).
 When riding, you need to modify the power/speed gear, short click.
 Switch the display data in the multi-function are awhile riding, tap it. e power/speed gear, short click.
Specific operation explanation
- Modify the power mode/electric mode assume that the current PAS mode
- Short Press
![]() PAS + 1
PAS + 1 - Short Press
![]() PAS - 1
PAS - 1
- Short Press
- Switching speed display
Long press![]() +
+ ![]() Change the speed display mode
Change the speed display mode - Set/deactivate 6Km/h cruise, switch headlights on and off, ODO clear zero When the vehicle is stationary, press and hold
![]() , Enter 6KM/h cruise mode and exit cruise mode with your hands off; long press
, Enter 6KM/h cruise mode and exit cruise mode with your hands off; long press ![]() Turn the headlights on and off; P16 On the menu screen, hold down
Turn the headlights on and off; P16 On the menu screen, hold down ![]() Five second, ODO reset.
Five second, ODO reset. - Switch LCD
If the current display is working, press and hold,![]() Will close the display, otherwise open the display 5, switch the contents of the multi-function display area.
Will close the display, otherwise open the display 5, switch the contents of the multi-function display area.
Short Press![]() You can switch the value of the multifunction display area.
You can switch the value of the multifunction display area. - Set up parameters
Long press![]() +
+ ![]() The parameter setting screen will be displayed. Parameters that can be set include wheel diameter (unit: inch), magnetic steel number, liquid crystal brightness, undervoltage point, etc. (see Settings: P01-P20);
The parameter setting screen will be displayed. Parameters that can be set include wheel diameter (unit: inch), magnetic steel number, liquid crystal brightness, undervoltage point, etc. (see Settings: P01-P20);
On the Settings screen, press![]() or
or ![]() Add or subtract the set value, and the parameter will blink after modification. After selecting the set value.
Add or subtract the set value, and the parameter will blink after modification. After selecting the set value. - Long press
![]() Save the current value. Parameter blinking stops;
Save the current value. Parameter blinking stops;
Short Press![]() Switch to the next parameter while saving the Settings of the previous parameter;
Switch to the next parameter while saving the Settings of the previous parameter; - Press
![]() +
+ ![]() , Exit the Settings and saves; the parameters. If you do not press, the system automatically exits and saves the modified parameters after 8 seconds.
, Exit the Settings and saves; the parameters. If you do not press, the system automatically exits and saves the modified parameters after 8 seconds.
- Long press
 PAS + 1
 PAS - 1
Note: Due to the upgrade of the company's products, the display content of some products you get may be different from the manual, but it will not affect your normal use.
ERROR CODES OF THE DISPLAY
| Status code (decimal) | Indications | Note |
| 0 | Normal | |
| 1 | Reserved | |
| 2 | Brake | |
| 3 | PAS Sensor Failure (riding mark) | Not Realized |
| 4 | 6km/h Cruise | |
| 5 | Real-Time Cruise | |
| 6 | Low Battery | |
| 7 | Motor Failure | |
| 8 | Throttle Failure | |
| 9 | Controller Failure | |
| 10 | Communications Receiving Failure | |
| 11 | Communications Sending Failure | |
| 12 | BMS Communications Failure | |
| 13 | Light Failure |
CHARGING AND BATTERY ATTENTION
Charging Instructions
- Find the battery charging port (near the battery compartment's key port).
- First, connect the output plug of the charger with the charging port of the bicycle properly, and then connect the input plug of the charger to the power socket.
- When the red LED indicator light turns green, it indicates that the battery is fully charged.
- After charging, first, pull out the plug from the power socket, and then disconnect the charger from the charging port.
Attentions about the Battery
- Charge the battery before the first ride. Depending on the ambient temperature and remaining power, it may take 2 to 9 hours.
- Do not charge the battery when the temperature is lower than 0°Cor higher than 40°C. If higher than 40°C, this may lead to battery failure and oven a fire.
- Ensure that the power supply voltage is 220/240V. Do NOT plug the charger into the power supply of different voltage.
- Charge the battery after each ride to ensure sufficient power for the next ride.
- Charge the battery at least once a month when you are not using the electric bicycle.
- Store the battery in a place higher than 0°C in winter.
- Avoid deep discharge of the battery.
- Do not charge the battery for more than 24 hours, which may shorten its service life.
- Keep battery on the dry conditions. Do NOT let the water into the battery, which may lead to electric shock or short circuit. If water enters the battery, do NOT charge the battery until the water evaporates completely.
- Do NOT clean your bicycle while charging.
- Use only the special charger supplied by our company.
- Do NOT use this charger or our battery to power or charge any incompatible device.
- Never disassemble the battery.
- Do NOT drop the battery. This may cause battery damage.
- Disconnect it when it smells abnormal or smokes while charging, and feed back problems to the maintenance center for troubleshooting or battery replacement.
INSPECTION INSTRUCTIONS
- Check the tension of the chain and spokes to make sure there is no noise or loosening.
- Ensure that all mechanical components can work normally, i. e. , wheels, pedals and handlebars turn freely without unnecessary noise.
- Ensure all the parts that need to be tightened have been correctly tightened, such as frame, handlebar, seat post, etc.
- The distance between the brake lever and the handlebar must be at least 15mm when you press the front and rear brake lever to completely stop the wheels.
- Keep throttle rotating in a proper range and achieve progressive motor traction control.
NOTES AND CAUTIONS
- Avoid direct contact with water. If water enters, please wipe up the water and put the electric bicycle in a dry, airy place as soon as possible. Then, open the frame-integrated control module and switch compartment (29), frame and handlebar clamp until the water completely evaporates. Do NOT charge the battery until the water has completely evaporated.
- Check the wear and damage of the electric bicycle and component loss regularly.
- Check the fastening of each nut every 100 km.
- As sprockets, gears, tires, grips, brake pads, etc. , are consumables with limited-service life, please check them regularly and replace them in time to keep riding safe and efficient.
- Do NOT clean the electric bicycle under water or using the high-pressure cleaning machine.
- Clean the frame, front fork, saddle and wheels with a soft, wring-out, damp cloth.
- Clean the electrical components or electrical related parts with a soft dry cloth.
- Be sure to turn off the power when the bicycle is not in use.
IMPORTANT SAFETY INFORMATION

Electric bikes can be dangerous to use. The user or consumer assumes all risk of personal injuries, damage, or failure of the bicycle or system and all other losses or damages to themselves and others and to any property arising as a result of using the bicycle. It is important for you to understand your new bicycle. By reading this manual before you go out on your first ride, you'll know how to get better performance, comfort, and enjoyment from your new bicycle. It is also important that your first ride on your new bicycle is taken in a controlled environment, away from cars, obstacles, and other cyclists.
- Always Wear A Helmet
Helmets significantly reduce the number and safety of head injuries. Always wear a helmet that complies with your state laws when riding the E-bike. Check with your local police department for requirements in your community. Make yourself more visible by wearing bright reflective clothing. Keep your reflectors clean and eye protection. Also check your state laws concerning other protective gear that may be required when riding the E-bike. - Know Your E-bike
Your new E-bike incorporates many features and functions that have never been built into a bicycle before. Read this manual thoroughly to understand how those features enhancel your riding pleasure and safety. - Ride Within Your Limits
Take it slow until you are familiar with the riding conditions that you encounter. Be especially careful in wet conditions as traction can be greatly reduced and brakes becoming less. effective. Never ride faster than conditions warrant or beyond your riding abilities. Remember that alcohol, drugs, fatigue and inattention can significantly reduce your ability to make good judgement and safety. - Keep Your E-bike In Safe Condition
For your safety and enjoyment, and to insure a long life for your E-bike. Inspect and maintain your E-bike regularly. Follow the inspection and maintenance guidelines beginning. Check critical safety equipment before each and every ride.
Documents / ResourcesDownload manual
Here you can download full pdf version of manual, it may contain additional safety instructions, warranty information, FCC rules, etc.
Advertisement


Need help?
Do you have a question about the S8 and is the answer not in the manual?
Questions and answers