
Related Manuals for Atollspeed Touchscreen Series


Summary of Contents for Atollspeed Touchscreen Series
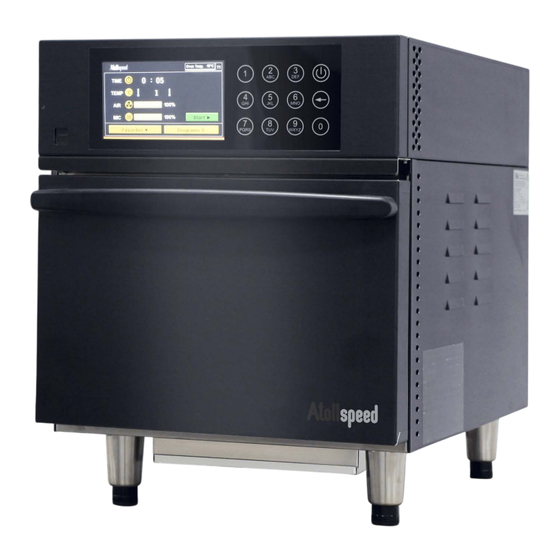
- Page 1 Operation Manual Atollspeed Highspeed Oven Touchscreen Series Atollspeed 300H / HB plus K02–3003T1S Atollspeed 400H / HB plus K02–4003T1S Version 2021–1.0...
- Page 2 3 > Observe the warnings on the Atollspeed Follow the Safety chapter oven. w starting on page 6 > Make sure that all users and personnel have access to the operation manual.
- Page 3 Hot liquid Crushing hazard Hot surfaces Slipping hazard Potential property damage ATTENTION • Atollspeed oven in uninstalled position Follow the Warranty > Always strictly follow the operation manual. chapter w starting on page 79 Technical data w starting on page 69 Note / tip...
-
Page 4: Table Of Contents
Table of contents Table of contents Safety General safety instructions Intended use Conditions for use and installation Oven safety Microwave function Conditions for installation Introduction and general information Parts of the device Start screen Installation and setup Start-up safety instructions Setting up the oven Installation location Unpacking... - Page 5 Table of contents User settings Continued baking step Delete all baking programs and images Factory settings Temperature settings Preheating temperature T1 Secondary temperature T2 Preheating time Reheating time Force timer Temperature unit Alarm settings Acoustic signal Sound repeat time Volume Visual alarm Button sound Interruption alarm...
-
Page 6: Safety
CAUTION carefully prior to use. > Do not touch hot parts of the device. > Do not use the Atollspeed oven if it is not in perfect working order or is damaged. > Use the Atollspeed oven only when fully assembled. - Page 7 Safety > Built-in safety devices must never CAUTION be altered. > The operator is required to make sure that anyone who works with the device is familiar with the fundamental regulations on worker safety and accident prevention, and has been instructed in the use of the device.
- Page 8 Safety Despite its safety devices, every machine has potential hazards when used improperly. Always strictly follow the instructions in order to avoid injuries and health risks: Danger to life due WARNING to electrical shock y There is high voltage that is hazardous to life inside the oven.
- Page 9 Safety Danger to life due WARNING to electrical shock y Damaged power cords may be replaced only by a trained electrician. y There is a hazard of being injured by electrical shock. y Never spray water to clean the device as this can damage it. There is a hazard of being injured by electrical shock.
-
Page 10: Burn Hazard
Always keep the ventilation fan openings clear and do not block them. y Never use plastics or paper, including those suitable for microwave use, in the Atollspeed oven. The baking chamber has very high convection heat. These materials can melt or burn. Microwave-safe ceramic containers are preferred. - Page 11 Safety Burn hazard CAUTION y Always check the temperature of the heated food products before giving them to children. y Always remove caps or nipples when heating baby food in jars or bottles. Always stir heated baby food thoroughly before serving so that the heat is even distributed.
-
Page 12: Health Hazard
Safety Health hazard CAUTION y Only process products that are suitable for consumption and for use in the Atollspeed oven. y Remove prepared foods from packaging prior to cooking, as the packaging is typically not heat-resistant. Follow the manufacturer's preparation instructions for food products. - Page 13 Safety Bruising or crushing hazard / CAUTION risk of injury y When closing the door, hands and fingers may be pinched. > Always close the door carefully. Danger from microwave radiation CAUTION y Never remove the safety covers that protect against microwave radiation.
-
Page 14: Intended Use
The Atollspeed is a combination convection and microwave oven for preparing food products. With the Atollspeed oven, baking and cooking are much faster than with a conventional convection oven. Very high-speed air circulation combined with the microwave function produces very fast heating results. Baked goods get crispy on the outside, while the inside heats up quickly. -
Page 15: Conditions For Use And Installation
Atollspeed Service is only allowed to connect the oven to the prepared connection points. Atollspeed Service is neither authorized nor responsible for carrying out any on-site installation work prior to connection. -
Page 16: Oven Safety
Safety Oven safety Microwave function • Never start the microwave function when the baking chamber is empty. A liquid or suitable product must always be in the baking chamber before the microwave function is started. • Do not dry towels, wet clothing, or wet paper with the microwave function. •... -
Page 17: Introduction And General Information
Introduction and general information Introduction and general information Parts of the device Condenser tank (exhaust) 300H / HB plus with removable power cord Becomes hot when in use. and country-specific plug Thermal limiter Baking shelf 400H / HB plus USB connection with permanently Reset button connected power cord Screen... -
Page 18: Installation And Setup
Installation and setup Installation and setup Start-up safety instructions (For initial start-up after delivery from the factory) Follow the operation manual CAUTION > Read the operation manual prior to use. Follow the “Signs and > Always follow the operation manual, symbols”... -
Page 19: Setting Up The Oven
Installation and setup Setting up the oven Installation location • The installation location must be dry and ATTENTION protected against water spray. Follow the Warranty • The installation surface must be designed chapter to support 150 kg (300H / HB plus) / w starting on page 79 200 kg (400H / HB plus). -
Page 20: Unpacking
> Before using the device for the first time, wipe the 1 pc. Snack scoop interior clean with a damp cloth. 1 pc. USB stick > Retain the original packaging in the event of any 1 bottle Atollspeed subsequent return. Oven Cleaner 1 bottle Atollspeed General notes Oven Protectant • We recommend an installation height of 1.20 m 2 pc. -
Page 21: Electrical Connection
Installation and setup Electrical connection • All work on the Atollspeed oven (connection, installation, repairs, and maintenance) must be done by certified service personnel. The service personnel must be familiar with the applicable local regulations. Prerequisites • The wiring and circuit protection must have... -
Page 22: Risk Of Fire
Requirements cable cross section. page 21 > If the Atollspeed oven is installed as a double module, then two separate supply circuits and line protectors must be available from the distribution box. Starting up the oven •... -
Page 23: Operation
Operation Operation Operation safety instructions Burn hazard / scalding hazard CAUTION • Never start the microwave function when Follow the Safety chapter the baking chamber is empty. w starting on page 6 • Maintain the temperature for 30 minutes. • Do not use metal containers on CAUTION a metal base. -
Page 24: General Tips
Operation • Running the microwave with dry products has the same negative effect on the device as when it is run empty. Dry products can char if the microwave is at high intensity. This can cause damage to the device and the dishes. Always set just the amount of time required and use a low microwave power level. -
Page 25: Switch On The Oven
Operation > After the breakfast period, touch the “T1/T2” button and hold it for 3 seconds. The oven will heat up to the T2 temperature so that it is ready for the lunch rush. The temperature can be reduced to prepare more delicate products. -
Page 26: Home Screen
Operation Home screen All oven functions can be accessed from the home screen DI_02_02 Oven temp. 168°C 13:40 TIME 9 : 59 TEMP Current temperature Air circulation speed T1/T2 temperature selector Baking temperature Start button Baking time Program button Network status indicator Favorites button Time Microwave intensity... -
Page 27: Oven Temperature
Operation Quick access to a baking program Example: For example, select baking program no. 4 from group 5. > First touch “4”, then “5”. This calls up the desired program. Oven temperature The current temperature of the baking chamber is indicated on the display Preheating temperatures T1/T2 Maximum temperature: 280 °C Factory setting: 270 °C... -
Page 28: Network Status Indicator
Operation Network status indicator Red light The device is not connected to the network Green light The device is connected to the network Start button Touch the start button to start a baking procedure Program button Call up baking programs here. Starting a baking program w page 35 Favorites button Access favorites here. -
Page 29: Air Circulation Speed
Operation DI_04_04_05 Air circulation speed Setting range: Level 1–10 The circulating air speed has a direct effect on the baking results. In particular, it affects the browning of the surface. Sensitive baked goods g lower air circulation speed more uniform browning For example: Pastries, vegetables, fried eggs, scrambled eggs Compact baked goods... -
Page 30: Baking Time
These are just rough estimates. Times may vary www.atollspeed.eu w Downloads w Cookbook depending on weight, shape, and ingredients. For detailed recipe recommendations, we have an Atollspeed cookbook. DI_04_04_09 Preheating time Oven temp. 260°C T1 The preheating time is displayed on the yellow and red progress bar. -
Page 31: Reheating Time
Operation Reheating time When removing the baked goods, heat is lost from the baking chamber. Recommendation: Close the door for a moment before the next round of baking in order to heat up the baking shelf again. The reheating time enables uniform results when quality requirements are high. -
Page 32: Start Baking Manually
Operation Start baking manually • Running the microwave while empty can ATTENTION damage the device. Follow the Warranty > Never start the microwave function when chapter the baking chamber is empty. w starting on page 79 Technical data Baking using the parameter settings w starting on page 69 The settings must be complete. -
Page 33: Pause The Baking Cycle
Operation Pause the baking cycle > Touch Stop . The display stops. DI_04_05_02 > Select whether to continue baking or cancel it. Oven temp. 278°C 10:57 Baking cycle interrupted 00 : 29 Attention ATTENTION If the baking process is not stopped by Follow the Warranty touching Stop the machine may be chapter... -
Page 34: Continue The Baking Cycle
Operation Continue the baking cycle DI_04_05_02 > Touch Continue . Oven temp. 278°C 10:57 Baking cycle interrupted 00 : 29 > Remove the baked goods as soon as the baking cycle is complete. An alarm will sound or a visual alarm will be displayed. The alarm will repeat for as long as the baked goods DI_04_05_04 have not been removed. -
Page 35: Starting A Baking Program
Operation Starting a baking program • If the microwave is run while empty, ATTENTION the machine may be damaged. Follow the Warranty > Never start the microwave function chapter when the baking chamber is empty. w starting on page 79 Starting image: Starting page Technical data >... -
Page 36: Starting Favorites
Operation Starting favorites • Running the microwave while empty ATTENTION can damage the device. Follow the Warranty > Never start the microwave function chapter when the baking chamber is empty. w starting on page 79 > Touch the desired baking program. Technical data w starting on page 69 The program is highlighted by a red frame. -
Page 37: Switching Off The Oven
Operation Switching off the oven Burn hazard CAUTION • Do not touch any hot surfaces. Follow the Safety chapter > Touch the on/off button and hold it for at least w starting on page 6 3 sec. > Select the desired option for shutting down. >... - Page 38 Operation The cooldown screen is displayed. This shows the progress toward switching off, or until cleaning can DI_04_08_02 be started. Oven temp. 244°C 13:43 Cooling down Open the oven door. The oven then cools off more quickly. This screen will disappear automatically. Technical data w starting on page 69 Please wait.
-
Page 39: Open A Baking Program
Open a baking program DS_05_01 Open a baking program Program list arrangement > Touch Programs . Program groups are shown as symbols. DI_04_06_01 > Touch the “lock” symbol. Oven temp. 242°C 11:40 Group list Group 1 Group 2 DI_05_01_02 > Enter the base PIN “0000”. Oven temp. -
Page 40: Baking Program Arrangement
Open a baking program Baking program arrangement Starting image: Starting page > Touch Programs . Program groups are shown as symbols. > Select a program group and move to the next level. DI_04_06_01 > Enter the base PIN “0000”. Oven temp. 242°C 11:40 Group list Group 1... - Page 41 Open a baking program DI_05_03_01 Oven temp. 148°C 10:57 Program 1 Step Time °C 0:20 Enter program names Baking time Add to favorites Baking temperature Select a picture Hot air controls Baking steps Microwave intensity 5.3.1 Change program name > Touch the program name. A keyboard opens on the display.
- Page 42 Open a baking program 5.3.3 Adding a picture If you do not want to assign a picture to the baking > Touch the “Camera” symbol. program, select the camera DI_05_03_03_01 A selection of images opens. as the symbol. If a program with a camera symbol is Oven temp.
-
Page 43: Deleting A Program
Open a baking program Deleting a program > Touch the “lock” symbol. > Enter the base PIN “0000”. > Touch the “X” symbol at the top right corner of the selected program. > Touch Save . DI_05_04_01 The settings will be saved. The program is exited. Oven temp. -
Page 44: Favorites
Open a baking program Favorites Baking programs that are marked as favorites are labeled with a star and displayed on the Favorites DI_05_05_01 screen. Oven temp. 102°C 13:40 (1.1) (2.1) Favorites Program 1 Program 2 If no picture has been assigned to a program, then an orange-colored number is displayed. -
Page 45: Pin-Protected Favorites
Open a baking program PIN-protected favorites > Touch the “Lock” symbol. > Enter the base PIN “0000”. > Touch Enter . > The “lock” symbol is “closed, ” and the favorites are locked. It is no longer possible to switch to the starting screen or the program list from a protected favorite screen without entering a PIN. -
Page 46: 1 Function (Continue Baking)
Open a baking program DS_05_05 +1 function (continue baking) The +1 function for continuing baking can be activated in the user settings. This function makes it possible to scale the baking programs dynamically. This means that if several products are baked at the same time, the baking time is adjusted. - Page 47 Open a baking program The temperature, microwave intensity, and air circulation speed will be adjusted in this DI_05_05_03 extended step. Oven temp. 179°C 13:45 Continued baking step Continued baking step Program time 20 % TEMP 250 °C 100 % 20 % If a program is called up while the +1 function is active, then a ...
- Page 48 Open a baking program Baking two products at the same time > Start the desired baking program. > Touch the +1 button. The baking program will be extended according to the settings. A second progress bar shows the additional time in %. The progress bar starts when the set baking DI_05_05_05 program is completed.
-
Page 49: User Settings
User settings DS_06_01 User settings > Turn the oven off and then on again. The start screen will be displayed. DI_04_03 > Touch User settings . Oven temp. 250°C 13:40 Starting Serial No: K02-3003T1S2097478 Firmware Version:V4XA4_T33 [AS520H] > Enter the base PIN “0000”. DI_06_02 >... -
Page 50: Delete All Baking Programs And Images
User settings Delete all baking programs and images ATTENTION This function deletes all baking programs. > Set Delete all Prog&Pic to Yes . User settings w page 49 > Touch Save . All baking programs and images will be deleted. Factory settings ATTENTION All settings will be reset to the factory defaults. -
Page 51: Temperature Settings
User settings Temperature settings DI_06_03 All settings that have to do with the temperature. Temperature settings w page 27 Oven temp. 254°C 11:45 Temperature settings Preheating temperature T1 Temperature unit 270 °C 0 °C Secondary temperature T2 270 °C Preheating time 5 min Reheating time 30 sec... -
Page 52: Alarm Settings
User settings Alarm settings DI_06_05 Oven temp. 179°C 13:45 Alarm settings Acoustic signal Interruption alarm Sound repeat time 15 sec Visual interruption Volume Visual alarm Button sound Acoustic signal Select the desired sound for the end of the baking Setting range: A-D time. -
Page 53: Language
User settings DI_04_03 Language Oven temp. 250°C 13:40 > Touch the globe symbol on the starting screen. This pulls up the language selection. Starting > Touch the desired language. Serial No: K02-3003T1S2097478 DI_06_06 Firmware Version:V4XA4_T33 [AS520H] Set the language. The language can Oven temp. -
Page 54: Energy-Saving Setting
User settings Energy-saving setting DI_06_08 Oven temp. 179°C 13:45 Energy-saving mode Inactive time Energy-saving temperature 260 °C Screen Default • Inactive time: The time since the last baking program ended. Activation time 1–99 minutes. • Energy-saving temperature: Constant temperature of the baking chamber for saving energy, from 0–280 degrees Celsius. -
Page 55: Manual Mode
User settings Manual mode There are three access options. Deactivating • The “Group list” screen is displayed immediately DI_06_09_01 after starting. Oven temp. 242°C 11:40 Group list Group 1 Group 2 Preferred • The “Manual mode” screen is displayed DI_02_02 immediately after starting Oven temp. -
Page 56: Base Pin
USB transfer 6.10 Base PIN The base PIN for the user is 0000. This is used solely to protect the USB function. The PIN can be changed. DS_07_01 USB transfer Baking programs, user images, and user logo can be imported and exported using the USB stick. Import new images >... -
Page 57: Oven To Usb
USB transfer Oven to USB • A USB transfer overwrites the programs, NOTE images, and logo on the USB stick. > Touch USB transfer . Enter PIN w page 49 > Enter the base PIN “0000”. DI_04_03 > Insert the USB stick. Oven temp. -
Page 58: Usb To Oven
RJ45 network connection During the procedure, the power supply must ATTENTION not be interrupted. Do not turn off or remove the USB stick. DI_07_01_04 Oven temp. 138°C 11:40 USB transfer successful Please remove the USB stick. When the USB transfer is complete, this screen is displayed. -
Page 59: Cleaning The Oven
Cleaning the oven Cleaning the oven Clean the interior and exterior of the oven daily. Burn hazard CAUTION • The oven must be properly cooled down Follow the Safety chapter and must no longer be hot. w starting on page 6 >... -
Page 60: Clean The Baking Chamber Daily
Atollspeed.eu severe stains. w Accessories • Use only the cleaning system developed by Atollspeed. It consists of the Atollspeed Oven Protectant and Atollspeed Oven Cleaner. • When the oven cleaning product is used, the baking chamber must be wiped down very thoroughly with clear water afterward. -
Page 61: Cleaning The Air Filter
Cleaning the oven • Never spray cleaning products or water into ATTENTION the top part of the oven, as this can cause Follow the Warranty a short circuit. chapter • Any food residue must be removed. w starting on page 79 •... -
Page 62: Clean The Baking Chamber Regularly
Clean the baking chamber regularly When the oven is turned on, if more than the set Cleaning interval settings w User settings number of baking cycles have been run since the page 49 latest extensive cleaning, then the following screen DI_08_04 will appear. -
Page 63: Maintenance
Maintenance Maintenance Recommended routine maintenance The notice for preventive maintenance will be displayed after 500 microwave operating hours. This maintenance is important in order to ensure that the device works properly. The message has no effect on oven operation. > Acknowledge the message. The oven will then function normally. -
Page 64: Faults And Errors
Faults and errors Faults and errors DI_10_01_01 11.1 Input signal error Oven temp. 278°C 10:57 Input signal error This warning indicates a problem with the controller Please perform a reset or the temperature sensor. or contact Service. > Disconnect the power supply for a few seconds in order to reset the oven. -
Page 65: Baking Chamber Overheated
Faults and errors DI_10_03_01 11.3 Baking chamber overheated Oven temp. 236°C 13:49 Baking chamber overheated The oven is equipped with a thermal limiter. Please allow to cool down for 5 minutes. This guarantees safety in case of a malfunction. Then press the red button. This warning will disappear when the reset is successful. -
Page 66: Microwave Overheated
Faults and errors DI_10_04_01 11.4 Microwave overheated Oven temp. 236°C 13:49 Microwave overheated When the microwave has become too hot, the warning “Microwave overheated” appears after Please wait 5 minutes until the machine has cooled off. Never the run the microwave when it is empty. Has a 5 cm clearance distance been provided on all sides? 3 seconds. -
Page 67: Insert The Air Filter
Faults and errors 11.6 Insert the air filter The “Insert air filter” display indicates that no ATTENTION filter is installed. DI_10_06_01 > Make sure that the filter is properly seated. Oven temp. 278°C 10:57 > Check the filter sensor. Insert the air filter Please insert the filter below the oven in order to continue 11.7... -
Page 68: Contact
Kolb Huizhou Ltd. Shatou Industrial Area, Yuanzhou Town, Boluo County, Huizhou City, Guangdong Province, PC: 516123 China Website: www.kolbcn.com Email: info@kolbcn.com Contact Atollspeed GmbH Gewerbepark Objekt 16 Fabriksplatz 1 A–4662 Steyrermühl (Austria) Website: www.atollspeed.eu Operation Manual 300H / HB plus / 400H / HB plus... -
Page 69: Technical Data
Technical data Technical data General technical information • Make sure that the top cover is accessible for maintenance at all times. All sides and the top require sufficient clearance. • If the oven is set up in a niche in a wall, the following minimum clearance distances must be maintained: Left side... - Page 70 Technical data Technical drawing Atollspeed oven 300H / HB plus USB connection Touch display Thermal limiter Ventilation slits (do not cover) Power line Ventilation slits (do not cover) Reset button Operation Manual 300H / HB plus / 400H / HB plus...
- Page 71 Technical data Atollspeed oven 300H / HB plus K02–3003T1S Dimensions Width B 445 mm Depth T1 687 mm Height H 570 mm With door open Width B 445 mm Depth T2 880 mm Height H 570 mm Baking chamber Width 317 mm Depth 311 mm Height 170 mm Power supply 220–230 V 1L/N/PE/50 Hz...
- Page 72 Technical data Technical drawing Atollspeed oven 400H / HB plus USB connection Touch display Thermal limiter Ventilation slits (do not cover) Power line Ventilation slits (do not cover) Reset button Operation Manual 300H / HB plus / 400H / HB plus...
- Page 73 Technical data Atollspeed oven 400H / HB plus K02–4003T1S Dimensions Width B 583 mm Depth T1 730 mm Height H 592 mm With door open Width B 583 mm Depth T2 935 mm Height H 592 mm Baking chamber Width 450 mm Depth 350 mm Height 200 mm Power supply 380–400 V 3L/N/PE/50 Hz...
-
Page 74: Electrical Drawings
Electrical drawings Electrical drawings Atollspeed 300H / HB plus electrical schematic Operation Manual 300H / HB plus / 400H / HB plus... - Page 75 Electrical drawings Atollspeed 400H / HB plus electrical schematic Operation Manual 300H / HB plus / 400H / HB plus...
-
Page 76: Directives And Certificates
Directives and certificates Directives and certificates Manufacturer: Kolb Huizhou Ltd. Shatou Industrial Area, Yuanzhou Town, Boluo County, Huizhou City, Guangdong Province, China PC: 516123 The device meets the requirements of all applicable provisions of directives MD 2006/42/EC, EMC Directive 2014/30/EU Household and similar electrical devices – Safety, EN 60335–2–90:2006 A1:2010, EN 60335–2–42:2003/ A11:2012 Electromagnetic compatibility (EMC), EN 61000–6–1:2007,... -
Page 77: Certificates
Certificates Certificates Operation Manual 300H / HB plus / 400H / HB plus... - Page 78 Certificates Operation Manual 300H / HB plus / 400H / HB plus...
-
Page 79: Warranty
• The installation or use of spare parts, accessories, or cleaning products that have not been approved by Atollspeed can void the warranty. • Accessories and glass breakage are excluded from warranty coverage. - Page 80 © 2021 Atollspeed GmbH Kolb accepts no liability for any typographical errors in this operation manual. Original operation manual. We reserve the right to make technical modifications. Version: 300H / HB plus, 400H / HB plus, 2021–1.0, English, 08.06.2021...
Need help?
Do you have a question about the Touchscreen Series and is the answer not in the manual?
Questions and answers