Advertisement
Set up your Stick Up Cam Elite
Download the Ring app
The app walks you through setting up and managing your Stick Up Cam Elite.
Search for "Ring" in one of the app stores below:


Or visit: ring.com/app
Grab your Wi-Fi password
You'll need it to set up your Stick Up Cam. Write it down so it's handy when you need it.
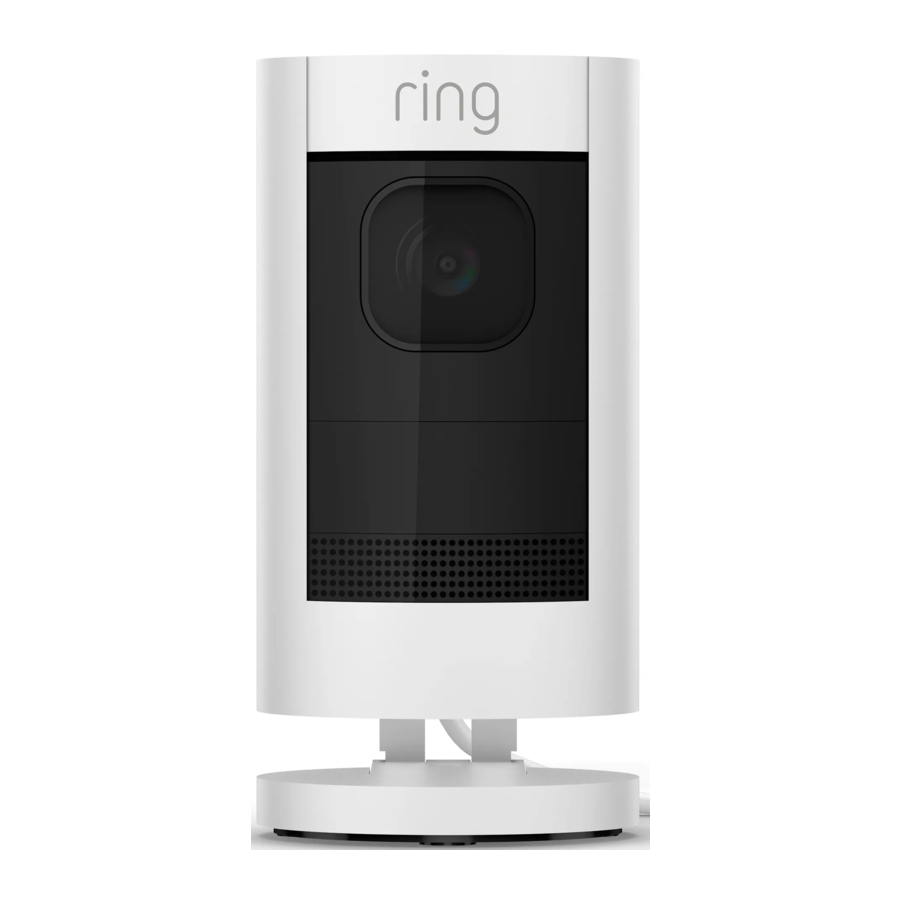
Let's get your Stick Up Cam ready
First, slide off the bottom cover.

Do not reattach this cover until setup is complete!
When you plug your Ethernet cable into your Stick Up Cam, be sure to feed it through the hole in this bottom cover first.

You'll reattach the cover to your Stick Up Cam in a later step.
Powering your Stick Up Cam
Stick Up Cam connects using Power over Ethernet (or PoE). This lets you use one cable for both power and internet.
Most Ethernet equipment does not provide PoE, so we've included a PoE Adapter. You connect it to your network and a power outlet, then connect it to your Stick Up Cam.
If your home is already equipped with a PoE system, you can connect Stick Up Cam directly to a PoE-enabled Ethernet port.
 If using an existing PoE hub or switch, it must meet the IEEE 802.3af (PoE) or IEEE 802.3at (PoE\+) standard.

PoE Adapter (Included)
Connect your Stick Up Cam
Use the included Ethernet cable to connect the PoE Adapter to your internet modem or Ethernet switch. Purchase a 2nd Ethernet cable to connect Stick Up Cam to the PoE Adapter.

Once you connect the PoE Adapter to power and Ethernet, if the light on the adapter turns green, all is well. If it's red or blinking, check your connections.
For outdoor use, install your PoE Adapter indoors, then run an Ethernet cable outdoors to your Stick Up Cam.
Set up your Stick Up Cam in the Ring app
In the Ring app, select Set Up a Device.
When prompted, select Security Cams and follow the in-app instructions.

Try it out!
After setup, tap the Live View button in the Ring app to see live video from your Stick Up Cam.
Blue light flashing?
If the light on the front of your Stick Up Cam is flashing after setup, it's updating its software.
Do not unplug your Stick Up Cam while the light is flashing!
Install your Stick Up Cam Elite
Choose a location
Stick Up Cam is happy just about anywhere, indoors or out. It comes ready to sit on a flat surface like a table or shelf, but can also be mounted to a wall or ceiling.
Choose a spot where it can provide the view you want, within reach of the Ethernet port you've connected to the included Ring PoE Adapter.

How to use Stick Up Cam on a table or shelf

Make sure that your Ethernet cable has been routed through the hole in the bottom cover.
Then, slide the cover into place on your Stick Up Cam. Secure the cover with the attached screw, using the star-shaped end of the screwdriver bit.
Finally, place Stick Up Cam in your chosen position. Your Stick Up Cam is now ready to use.

How to install Stick Up Cam on a wall

- Remove the plastic cover and rubber pad from the base.
You'll put the cover back on once you've mounted your Stick Up Cam.

- Flip the base to the rear.
The base of the stand is hinged. Before wall-mounting, flip the base down and behind your Stick Up Cam.

- Push the rubber pad back into the base.
The rubber pad should sit between your wall and the base of your Stick Up Cam.
![]()
- Drive the screws.
Hold the round part of the base against your wall, rubber-side down. Use the integrated level to ensure it's straight.
Finally, mount it with the included screws.

Then, head to the final steps.


How to install Stick Up Cam on a ceiling
- Remove the plastic cover from the base.
You'll put the cover back on once you've mounted your Stick Up Cam.
![]()
- Rotate the stand above the camera:
The whole stand can rotate on its axis. Before ceiling-mounting, rotate the stand 180 degrees so the base is positioned above your Stick Up Cam.

- Drive the screws.
Hold the round part of the base against your ceiling, rubber-side down. Then mount it with the included screws.

Then, head to the final steps.


Final steps for wall or ceiling mounting
- Close it up.
Make sure that your Ethernet cable has been routed through the hole in the bottom cover and is plugged into your Stick Up Cam.
Then, slide the cover back into place and secure it with the attached screw, using the star-shaped end of the included screwdriver bit.
![]()
- Snap the cover back onto the base.
Then, secure it with the included security screw, using the star-shaped end of the included screwdriver bit.
Now your Stick Up Cam is installed and ready to use.
![]()


For additional help, visit: ring.com/help
Or give us a call...
Canada 1 855 300 7289
EU 1 800 656-1918
Worldwide +1 310 929 7085
For a list of all our customer support numbers, visit: ring.com/callus
To review your warranty coverage, please visit www.ring.com/warranty.
Documents / Resources
References
![www.apple.com]() App Store - Apple
App Store - Apple![play.google.com]() Google Play
Google Play![ring.com]() Downloading and Updating the Ring App
Downloading and Updating the Ring App![ring.com]() Welcome to Ring Help!
Welcome to Ring Help!![ring.com]() Contact Us
Contact Us![www.ring.com]() BEPERKTE GARANTIE EN DIEFSTALBEVEILIGING – Ring
BEPERKTE GARANTIE EN DIEFSTALBEVEILIGING – Ring
Download manual
Here you can download full pdf version of manual, it may contain additional safety instructions, warranty information, FCC rules, etc.
Advertisement


Need help?
Do you have a question about the Stick Up Cam Elite and is the answer not in the manual?
Questions and answers