Boss CH-1 SUPER Chorus Manual
Also See for CH-1 SUPER Chorus:
- Instructions manual (6 pages) ,
- Instructions (2 pages) ,
- Owner's manual (1 page)
Advertisement
Table of Contents
Contents
Boss CH-1 SUPER Chorus Manual
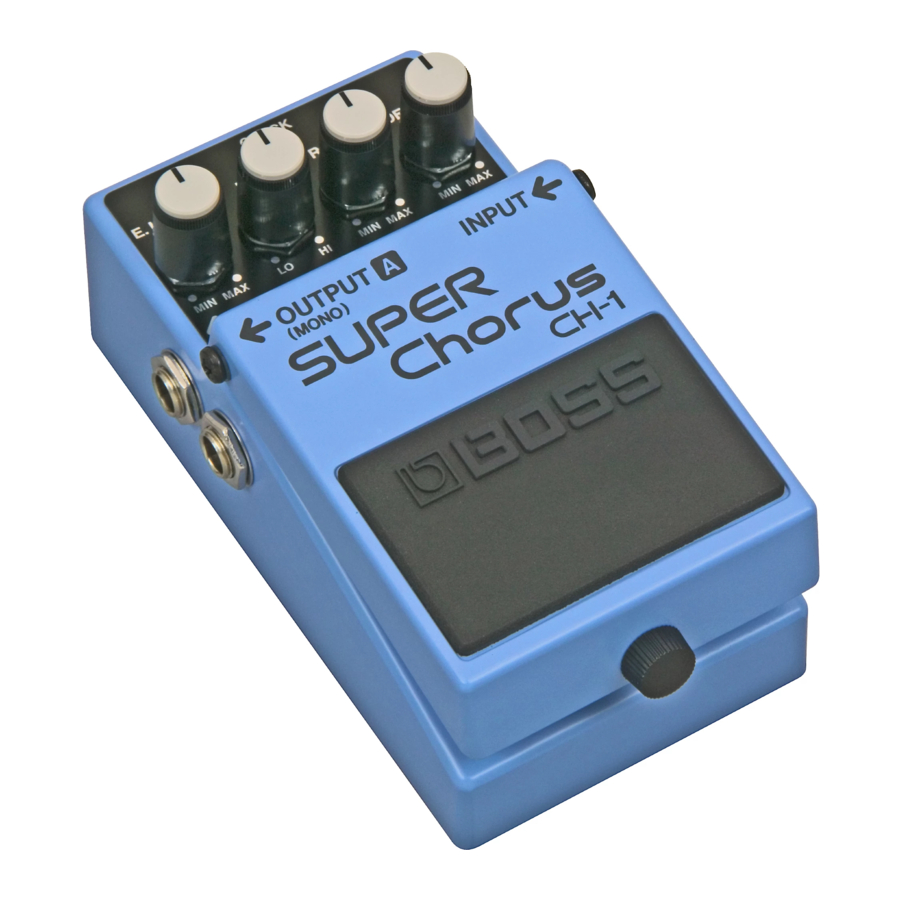
PANEL DESCRIPTION

- AC Adaptor Jack
Connect an optional AC adaptor (BOSS PSA-120, 220 or 240) to this jack for AC operation.- Using the AC adaptor, you can enjoy long and secure operation without having to worry about battery's life. A manganese battery lasts about 20hours.
- Check Indicator
This lights up when the effect is turned on, and therefore can be used as an effect on/off indicator.- The Check Indicator also serves as battery check. When it becomes dimmer or does not light at all, battery replacement is required.
- Effect Level Knob
This sets the mixing level of the effect sound (whose pitch is changing) to the normal sound.
Clockwise rotation (![]() ) increases the volume of the effect sound, while counterclockwise rotation (
) increases the volume of the effect sound, while counterclockwise rotation (![]() ) decreases it.
) decreases it. - Equalizer Knob
This controls the tone of the effect sound. Clockwise rotation (![]() ) boosts higher frequencies and counterclockwise rotation (
) boosts higher frequencies and counterclockwise rotation (![]() ) cuts them.
) cuts them. - Modulation Rate Knob
This sets the rate of the chorus effect. Clockwise rotation (![]() ) quickens the rate and counterclockwise rotation (
) quickens the rate and counterclockwise rotation (![]() ) slows down.
) slows down. - Modulation Depth Knob
This sets the depth of the chorus effect.
Clockwise rotation (![]() ) deepens the effect and counterclockwise rotation (
) deepens the effect and counterclockwise rotation (![]() ) creates the opposite effect.
) creates the opposite effect. - Output Jacks A/B
Connect an amplifier to these jacks. For monaural output, use only Output A. - Input Jack
Connect an electric/electronic musical instrument such as a guitar to this jack.- Plugging in this jack will automatically switch the unit on. Be sure to disconnect the cord from this jack when the unit is not to be used.
- Pedal Switch
Pressing the pedal turns on or off the effect. - Thumb Screw
Loosen this screw to open the cover for battery replacement.- Do not remove the screw from the cover so that you will not lose it.
 ) increases the volume of the effect sound, while counterclockwise rotation (
 ) decreases it.
CONNECTIONS

OPERATION
- Make all the necessary connections, then set the control knobs on the panel as shown below.
![]()
- Make the Check Indicator light up (If it is not lit, press the Pedal Switch).
![]()
- Set the desired rate with the Modulation Rate Knob.
![]()
- Set the desired depth with the Modulation Depth Knob.
![]()
- Adjust the tone of the effect sound with the Equalizer Knob.
![]()
- Set the volume of the effect sound with the Effect Level Knob.
![]()


- For monaural output, use only Output A. Output A sends the mixture of the effect and normal sounds.
- When using the CH-1 in stereo output.
OUTPUT A: Only effect sound (whose pitch is changing) is output.
OUTPUT B: Only normal sound is output. The CH-1 adopts the space compounding stereo system, therefore, the effect will vary depending on the distance between two speakers (L/R). Try playing the instrument to check how it actually sounds like. If you lower the equalizer or effect level, the pan will be moved to Output B. - Sound may be distorted if a guitar of large output is used. If this happens, decrease the guitar's volume or use a limiter.
BATTERY REPLACEMENT
- Loosen the thumb screw on the pedal to open it (cover).
- Take out the battery from the battery case, then disconnect the battery snap.
- Connect a new battery to the battery snap, then replace the battery in to the battery case.
- Make sure that the polarity of the battery is correct.
- Push the coil spring into the spring base on the rear of the pedal (cover), then close the pedal.
- Make sure that the snap cord is not caught in the pedal or coil spring.
- Insert the thumb screw into the guide bush hole and firmly tighten the screw.
Use one 9-volt battery

IMPORTANT NOTES
- If the battery voltage drops (the Check Indicator lights dimmer), various symptoms are shown, such as the effect becomes weak, no sound is produced, etc. To prevent that, replace the battery immediately.
- Make sure that the polarity of the battery is correct when connecting the battery.
- When the unit is not to be used for a long period of time, remove the battery to prevent battery leakage.
- Be sure to use the AC adaptor BOSS PSA-120, 220 or 240 depending on the voltage system in your country.
- Be sure to keep the battery securely connected even while using the AC adaptor, then the unit will continue to operate even if the AC adaptor cord comes out during performance.
- Plugging in the Input jack will automatically switch the unit on. Be sure to disconnect the cord from this jack when the unit is not to be used.
- Do not let any solid or liquid substance into the unit.
- When the unit is not in use, disconnect the AC adaptor from the socket.
- If this unit does not work properly, switch it off immediately, then call your local Roland service center.
BOSS PSA-120/220/240 (Optional)

SPECIFICATIONS
Power: 9V DC 006P (x 1), AC adaptor (PSA series: optional)
Current Draw: 15mA (9V DC)
Controls: Effect Level, Equalizer, Modulation Rate, Modulation Depth
Indicator: Effect On/Off (Battery Check)
Jacks: Input, Output A, Output B, AC Adaptor
Residual Noise: Less than —95dBm (IHF-A) with EQ set to the center position
Input Impedance: 1 MO
Output Load Impedance: Over 10kQ
Dimensions: 70(W) x 55(H) x 125(D) mm/2-%" x 2-3/16" x 4- 15/16"
Weight: 400g/14 oz
- Specifications are subject to change without nonce
![]()
Documents / ResourcesDownload manual
Here you can download full pdf version of manual, it may contain additional safety instructions, warranty information, FCC rules, etc.
Advertisement


Need help?
Do you have a question about the CH-1 SUPER Chorus and is the answer not in the manual?
Questions and answers