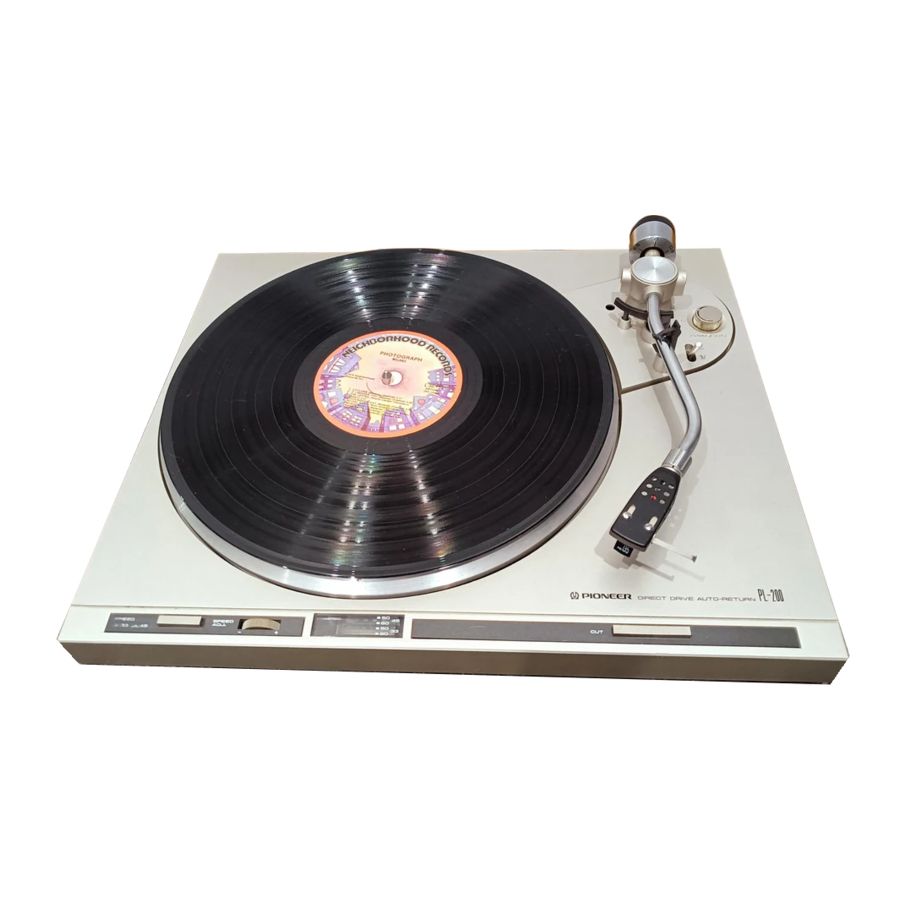
Pioneer PL-200 Manual
- Service manual (12 pages) ,
- Service manual (30 pages) ,
- Service manual (21 pages)
Advertisement
ASSEMBLY PROCEDURE
 Please read through these operating instructions and then you will know how to operate your model properly. After you have finished reading the instructions, put them away in a safe place for future reference.

CHECK THE ACCESSORIES
The styrene pad contains the parts shown in the figure. Check that they are all inside. The EP adapter is used for records with a large center hole.

REMOVING TRANSIT SCREWS
Remove three transit screws with a Phillips screwdriver as shown below. Then remove platter and three platter pads.

REMOVING DUST COVER
- Fully open the dust cover.
- Hold the dust cover, and lift it off by pulling it straight upward.
MOUNTING THE PLATTER AND RUBBER PLATTER MAT
Refer to the assembly figure, and place both the platter and the rubber platter mat down over the center shaft. The platter is heavy, so use both hands to lift it horizontally over the shaft and into position.
MOUNTING THE HEADSHELL
Insert the headshell into the end of the tonearm, and rotate the locking collar in the direction indicated by the arrow in the figure until it stops. Then secure it.
MOUNTING THE COUNTERWEIGHT
Slide the counterweight onto the counterweight shaft on the rear of the tonearm and push it forward. Then rotate it two or three turns in the direction of the arrow.
MOUNTING THE DUST COVER
To install, insert the hinges of the dust cover into the hinge sockets of the cabinet, and push the dust cover downward.
ATTACHING THE CARTRIDGE
You can attach any cartridge to this turntable weighing between 4g and 9g on condition that only the accessory headshell is used with it. Follow the procedure outlined below Washer for attaching the cartridge to the headshell.
- Take out the headshell, cartridge mounting screws, nuts and washers from the styrene pad. The screws come in three different lengths so choose the screws according to the height of the cartridge you intend to attach.
- The terminals on the accessory headshell are aligned as Cartridge shown in Fig. A.

Check the location and polarity of each of the cartridge's terminal pins and then connect the lead wires, taking care not to get the polarities mixed up.
Red: Right channel
White: Left channel
Green: Right channel ground
Blue: Left channel ground - Attach the cartridge lightly to the headshell using the screws, nuts and washers (Fig. A).
- Adjust the position of the cartridge so that the stylus and the connector section of the headshell are 49mm apart and tighten up the screws. Make sure that the cartridge does not tilt to one side when you attach it (see Fig. B).
![]()


Be careful so that the cartridge mounting nut does not come into contact with the cartridge body. When contacting, hum (buzzing noise) may be generated.
INSTALLATION PRECAUTIONS
When installing this turntable, make sure that you avoid the following conditions:
| Conditions to be avoided | Possible problems caused |
| (1) Exposure to direct sunlight, high temperatures or high humidity. | (1) Can cause rust or interfere with insulation. |
| (2) Unstable surfaces. | (2) Will interfere with normal operation of turntable (stylus will jump, etc.). |
| (3) Dirty or dusty locations. | (3) Can cause scratches. |
| (4) Exposure to heavy vibrations, such as on the top of speakers. | (4) Can cause howl. |
| (5) Proximity to power transformer of the amplifier. | (5) Can cause hum. |
| (6) Locations where alcohol, insecticides, or flammable substances are frequently used | (6) Can corrode dust cover or outside of cabinet. |
If the turntable is brought into a warm room from previously cold surroundings, or if the room temperature rises suddenly, moisture will form on the operating sections and the turntable will not be able to display its performance to the full.
In a situation like this, leave the turntable in its new environment for about an hour, or try and increase the room temperature gradually, before operation.
ADJUSTING THE TONEARM
TRACKING FORCE ADJUSTMENT
- Set the ANTI-SKATE knob to "0".
![]()

- Remove the cartridge stylus cover.
- set the ARM-ELEVATION lever to the DOWN position.
- Release the arm clamp and move the tonearm to the space between the arm rest and the platter, taking care not to damage the stylus.
- Support the headshell's finger lift with one hand and attain the horizontal balance by turning the counterweight either clockwise or counterclockwise. "Horizontal balance" means that the tonearm is parallel to the record on the platter, and that the tonearm pipe, therefore, should not tilt toward the counterweight side or the headshell side (See figure).

NOTE: When the ANTI-SKA TE knob is at the "0" position, the tonearm may move a little to the left or right. This is due to the enhanced sensitivity of the rotating section of the tonearm designed so that the tonearm traces the sound grooves on the record more efficiently during record play. This does not, therefore, interfere with play at all.
- Return the tonearm to the arm rest and fasten the arm clamp.
- Attach the stylus cover to protect the stylus.
- Since the tracking force is zero when the tonearm is balanced horizontally, turn just the tracking-force scale ring in front of the counterweight, and set the "0" on the scale to the index fine on the counterweight shaft (Fig. A).
- While turning the counterweight, set so that the correct tracking force comes to the index line on the counterweight shaft (Fig. B). The tracking-force scale ring has 0.5g steps, and one full turn of the counterweight will yield a tracking force of 3g.

NOTE: When playing records at low temperatures or when playing records where the stylus is made to jump or the reproduced sound is distorted (records where part of the recording level is set at an extremely high level), adjust the tracking force to the optimum value across the suitable range.
ANTISKATING ADJUSTMENT
To adjust the antiskating mechanism, turn the ANTI-SKATE knob so that the number corresponding to the required tracking force comes to the index line.
The numbers on the ANTI-SKATE knob correspond to the same number of the tracking force.

PANEL FACILITIES AND CONNECTIONS
BEFORE CONNECTING, CHECK THE FOLLOWING
- Switch the power to the amplifier off to prevent damage to the speaker system.
- If you are using a low-output moving coil (MC) cartridge, you will need a special MC transformer or a head amplifier, or a stereo amplifier with a built-in MC amplifier.
CONNECTION PROCEDURE
- Insert the phono cables (white and red) into the PHONO input jacks of the stereo amplifier (white for left channel into L jack, and red for right channel into R jack).
- Connect the ground lead with the Y-shaped connector at the end to the ground terminal.
- Insert the power plug into the convenience AC outlet of the amplifier or a wall outlet.
STEREO AMPLIFIER

- SPEED SELECTOR BUTTON
45: When this button is depressed, the platter will rotate at 45rpm. Depress for playing 45 rpm records, singles or EP's.
33: When this button is set to the released position, the platter will rotate at 33-1/3rpm. Release for playing 33-1/3rpm records like LP's. - SPEED ADJUSTMENT KNOB
Turn this knob when finely adjusting the speed of the platter. The speed of platter will increase when the knob is turned clockwise in the direction of it will decrease when turned counterclockwise in the direction of For details, refer to "ADJUSTING THE SPEED OF THE PLATTER". - CUT BUTTON
If this button is depressed while the record is playing, the tonearm automatically returns to the arm rest, and the power to the turntable is cut off. - ARM-ELEVATION LEVER
![]() : When this lever is set to this position, the tonearm will rise. Set it to UP before record play and when you want to stop record play while a track is being played or when you want to change over to a different track.
: When this lever is set to this position, the tonearm will rise. Set it to UP before record play and when you want to stop record play while a track is being played or when you want to change over to a different track.
![]() : When the lever is set to this position, the tonearm will be lowered. If it is set to DOWN for record play, the tonearm will be lowered onto the surface of the record, and play will begin.
: When the lever is set to this position, the tonearm will be lowered. If it is set to DOWN for record play, the tonearm will be lowered onto the surface of the record, and play will begin.
 : When this lever is set to this position, the tonearm will rise. Set it to UP before record play and when you want to stop record play while a track is being played or when you want to change over to a different track.
 : When the lever is set to this position, the tonearm will be lowered. If it is set to DOWN for record play, the tonearm will be lowered onto the surface of the record, and play will begin.
OPERATION
WHEN USING THE MODEL FOR THE FIRST TIME
When your model arrives, the vibrations sustained during transportation may have combinea to make the auto mechanisms unstable. Make sure you proceed as follows when first using your model in order to make these mechanisms operate for correctly.
- Set the arm elevation lever to the up position.
- Move the tonearm from the arm rest to the platter. The platter will now start to rotate.
- Depress the CUT button. The tonearm returns automatically to the arm rest from the platter, and the platter stops rotating.
OPERATING PROCEDURE
- Place the record to be played on the platter.
- Set the SPEED SELECTOR button to the speed at which the record is to be played.
- Remove the stylus cover and release the arm clamp.
- Set the ARM-ELEVATION lever to the UP position.
- Hold the headshell by the finger lift and move the stylus across the record to the track you want played. The platter will begin to rotate.
- Check the rotating speed of the platter through the speed checking window. If the stroboscope markings appear to drift left or right, adjust the speed by referring to "ADJUSTING THE SPEED OF THE PLATTER".
- Set the ARM-ELEVATION lever to the DOWN position. The stylus will descend slowly to the record and play will begin.
- Adjust the volume and tone controls on the amplifier to the preferred levels, and then sit back and enjoy your record.
- After the record has been played, the auto-return mechanism is actuated and the tonearm returns to the arm rest. At the same time, the platter stops rotating and the power to the turntable is turned off.
- Secure the tonearm to the arm rest with the clamp and attach the stylus cover to protect the stylus.
STOPPING RECORD PLAY
Press the CUT button gently (until you hear the sound of the return mechanism being actuated). The stylus will rise slowly from the surface of the record and the tonearm will return to the arm rest. The power to the turntable is turned off.
OPERATION PRECAUTIONS
- Always clean the stylus both before and after playing a record with a soft brush and make it a rule to clean the records with a good quality cleaner.
- Be careful not to make the turntable vibrate while a record is playing, since this can result in damage to the stylus and record.
- Place only one record at a time on the platter. If two or more records are stacked on the platter, the stylus will not make proper contact with the grooves, and this will impair the quality of reproduction.
- Do not disconnect the power cord while the stylus is still in a record groove as this may damage the stylus and record.
- Never obstruct the platter with the hand while it is rotating. This may cause damage.
ADJUSTING THE SPEED OF THE PLATTER
- Observe the stroboscope through the speed checking window.
Four different pitches of markings are used in the stroboscope. The pitch varies with the power line frequency and the rotating speed of the platter.

- Make sure one of the four types of stroboscope markings is set according to the line frequency and the platter speed, and turn the SPEED ADJUSTMENT knob to adjust.
- When the markings appear to stand still: The platter is turning at the rated speed (33-1/3 or 45rpm), and no adjustment is required.
- When the markings appear to move to the right: The speed of the platter is lower than the rated speed. Turn the knob clockwise until the markings appear to stand still.
- When the markings appear to move to the left: The speed of the platter is higher than the rated speed. Turn the knob counterclockwise until markings appear to stand still.

When changing over the speed (from 33-1/3 to 45 rpm or from 45 rpm to 33-1/3 rpm), the stripes on the stroboscope may appear to flow slightly to the left or right. This does not, however, indicate that there is a malfunction. In cases like this, refer to the section entitled "ADJUSTING THE SPEED OF THE PLATTER" and adjust so that the stripes appear to stand still.
MAINTENANCE
CABINET AND DUST COVER
When the cabinet or dust cover becomes dusty or dirty, wipe it clean with a soft dry cloth. Remember that the surfaces can be corroded by furniture wax, thinners, and benzine and also by insecticide sprays. The dust cover can be detached and cleaned.
LUBRICATION
The motor shaft and bearings of this turntable employ oil-less bearings and so there is no need for lubrication. There is no need to lubricate the tonearm bearings, either.
TROUBLESHOOTING
Sometimes, an operational fault can be mistaken for a malfunction or failure. Check the following points and see if you can find the symptoms of the trouble below before you get in touch with the serviceman. If you cannot locate the symptoms, contact your nearest Pioneer dealer.
| Symptom | Possible trouble | Remedy |
| Platter does not rotate. | Power cord is unplugged. | Plug cord securely into wall outlet. |
| No sound |
|
|
| Musical tempo is off. |
|
|
| Excessive noise. |
|
|
| Sound is distorted. |
|
|
| Intermittent sound. |
|
|
If you detect any trouble when playing records, the fault may not lie with the turntable but with another hi-fi component. Be sure to check the amplifier, speaker system, and any other electrical equipment which you are using in the vicinity of the turntable.
SPECIFICATIONS
Motor and Turntable
| Drive System | Direct drive |
| Motor | DC servo motor |
| Turntable Platter | 310mm diam. aluminum alloy die-cast |
| Moment of Inertia | 150kg-cm2 (including platter mat) |
| Speeds | 33-1/3 and 45rpm |
| Speed Control Range | ±2% |
| Wow and Flutter | Less than 0.025% (WRMS) |
| Signal-to-Noise Ratio | More than 75dB (DIN-B) (with Pioneer cartridge model PC-135) |
Tonearm
| Type | Static-balance type, S-shaped pipe arm |
| Effective Arm Length | 221 mm |
| Overhang | 15.5mm |
| Usable Cartridge Weight | 4g (min.) to 9g (max.) |
Subfunctions
Auto-return mechanism, Anti-skating force control, Stylus pressure direct-readout counterweight, Cueing device, Strobe light, Free stop hinges
Semiconductors
| ICs | 2 | |
| Transistors | 2 | |
| Diodes | 2 | |
| Hall Elements | 3 | |
Miscellaneous
| Power Requirements | AC120V, 50, 60Hz |
| Power Consumption | 7W |
| Dimensions | 420(W) x 96(H) x 365(D) mm 16-1/2(W) x 3-13/16(H) x 14-3/8(D) in. |
| Weight | 6kg/13 lb 4 oz |
Accessories
| EP Adapter | 1 | |
| Cartridge mounting parts | ||
| 6 | |
| 2 | |
| 2 | |
| Operating Instructions | 1 | |
NOTE: Specifications and design subject to possible modification without notice, due to improvements.

The serial number for this equipment is located on the rear panel. Please write this serial number on your enclosed warranty card and keep in a secure area. This is for your security.

TO PREVENT FIRE OR SHOCK HAZARD, DO NOT EXPOSE THIS APPLIANCE TO RAIN OR MOISTURE.
Documents / ResourcesDownload manual
Here you can download full pdf version of manual, it may contain additional safety instructions, warranty information, FCC rules, etc.
Advertisement


Need help?
Do you have a question about the PL-200 and is the answer not in the manual?
Questions and answers