Hamilton Beach HomeBaker Manual
- Use & care manual (92 pages) ,
- Instructions manual (92 pages)
Advertisement
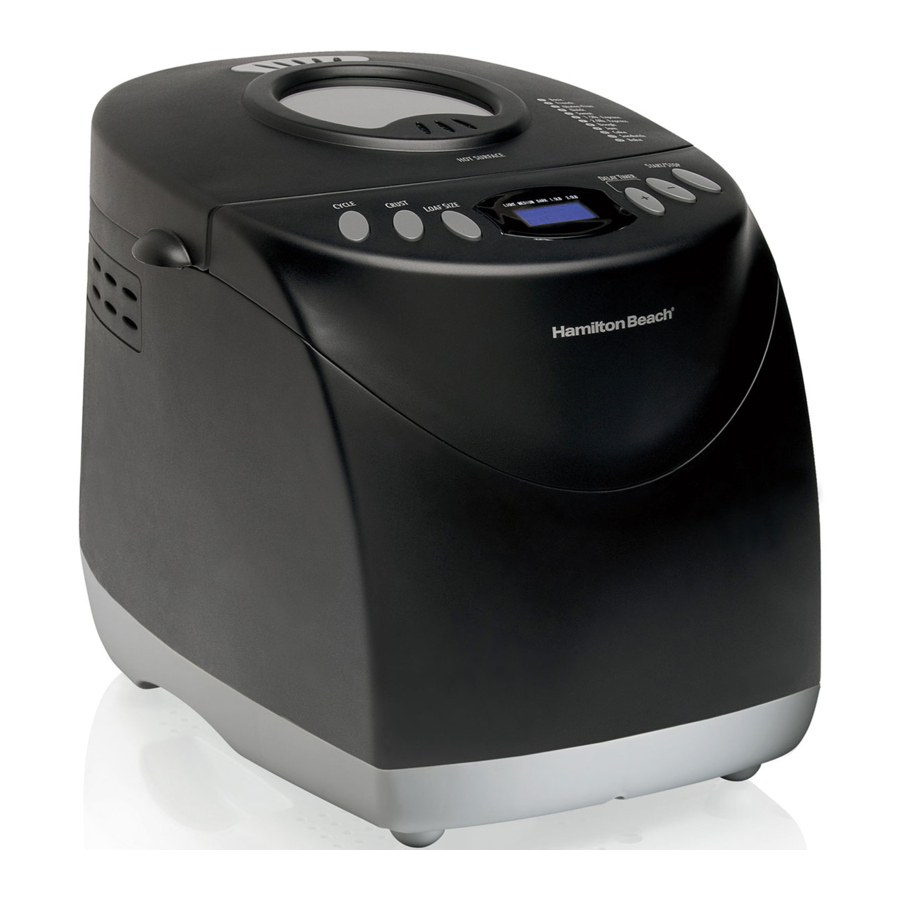
Parts and Features


TO REMOVE BREAD PAN:
Using the bread pan handle, turn the bread pan counterclockwise to unlock it. Lift up and remove bread pan from baking chamber.
Quick-Start Guide
See "Detailed Instructions" section for additional information.
BEFORE FIRST USE: Wash and dry bread pan and kneading paddle.
NOTE: Do not use metal utensils in bread pan as they may damage nonstick surface.

Falling Object Hazard. Breadmaker can wobble and walk during kneading cycle. Always position it in the center of the counter away from the edge.
- Add Ingredients
- Place kneading paddle on shaft, with arrow pointing up, pushing down as far as it will go, making sure flat surfaces are lined up.
![]()
- Carefully measure and add ingredients to the bread pan in the EXACT order given in the recipe.
TIP: Premeasure all ingredients, including add-ins (nuts, raisins) prior to beginning.
![]()
- Place kneading paddle on shaft, with arrow pointing up, pushing down as far as it will go, making sure flat surfaces are lined up.


LAST: Yeast. MUST be separate from wet ingredients
SECOND: Dry ingredients (sugar, salt, shortening, flour)
FIRST: Liquid ingredients – room temperature
- Place bread pan in the breadmaker, turning clockwise until it locks into place. Close cover.
NOTE: Bread pan must lock into place for proper mixing and kneading.
![]()

- Select Cycle
- Press CYCLE button until desired program number appears on the digital display.
- Press CRUST and LOAF buttons to ADJUST to desired setting (not adjustable in some cycles).
- To program a Delayed Start, use the Delay Timer + or – buttons to add up to 12 hours before Cycle will start. Refer to "Control Panel" section for additional information.
- Start Making Bread
- Press START/STOP. The digital display will show the time remaining in the cycle.
- Add-ins: After the second kneading cycle, 10 beeps will signal you to add fruit, nuts, etc.
- Once complete, breadmaker will beep and begin Keep Warm cycle for up to 1 hour.
Press START/STOP button for 2 seconds to cancel the Keep Warm cycle and turn off breadmaker. - Using oven mitts, turn counterclockwise to unlock the bread pan, and pull bread pan straight up. Still using oven mitts, shake loaf from pan and let cool for 10 minutes.
Control Panel

Preprogrammed Cycles
- Basic
- French
- Gluten-Free
- Quick
- Sweet
- 1.5lb. Express
- 2.0lb. Express
- Dough
- Jam
- Cake
- Whole Grain
- Bake
CYCLE
Press CYCLE button to select your desired cycle. The corresponding cycle number is shown on the display.
CRUST COLOR
Press CRUST button to move the arrow to desired setting: Light, Medium, or Dark crust. (Crust is not adjustable in Cycles  ,
,  ,
,  ,
,  , and
, and  .)
.)
LOAF SIZE
Press the LOAF SIZE button to move the arrow to 1.5- or 2-lb. loaf size. (Loaf size is not an option in Cycles  ,
,  ,
,  , , , , and .)
DELAY TIMER
Use the Delay Timer feature to start the breadmaker at a later time. Press the + and – buttons to increase the cycle time shown on the display. Add up to 13 hours including the delay time and breadmaking cycle.
NOTES:
- Set the Delay Time after selecting Cycle, Loaf Size, and Crust Color.
- The 1.5 lb. Express, 2 lb. Express, and JAM cycles do not have a delay function.
- Do not use the timer function with recipes that include dairy or other ingredients, such as eggs, milk, cream, or cheese.
START/STOP BUTTON
Press the START/STOP button once to start a cycle. A short beep will be heard, the colon in the time display will begin to flash, and the cycle will start. To remove bread, press the START/STOP button to end the baking cycle.
To cancel a cycle, press the START/STOP button for at least 2 seconds.
POWER INTERRUPTION
In the event of a power outage, the process of making bread will continue automatically within 5 minutes. If the interruption time is longer than 5 minutes, the unit will not continue running and the display will revert back to the default setting (Cycle ![]() , Medium Color, and 2-lb. loaf). If the dough has started rising, discard the ingredients in the bread pan and start over. If the dough has not entered the rising phase, you can press the START/STOP button to continue the cycle from the beginning.
, Medium Color, and 2-lb. loaf). If the dough has started rising, discard the ingredients in the bread pan and start over. If the dough has not entered the rising phase, you can press the START/STOP button to continue the cycle from the beginning.
WARNING DISPLAY
"HHH" – This warning means that the temperature inside of the bread pan is too high. Stop the program, unplug the power cord, open the cover, and let the machine cool down completely before restarting.
"LLL" – This warning means that the temperature inside of the bread pan is too low. The room temperature is too low for the breadmaker to function.
KEEP WARM
After baking cycle is complete, the bread machine will shift to the Keep Warm setting for 1 hour.
To cancel the Keep Warm process, press the START/STOP button for 2 seconds.
TIP: Removing bread immediately after baking cycle is complete will prevent crust from becoming darker.
Program Cycles
- Basic
For white and mixed breads consisting mainly of basic bread flour. - French
For light breads made from fine flour. Normally, the bread is fluffy and has a crispy crust. This is not a suitable setting for recipes requiring butter, margarine, or milk. - Gluten-Free
For gluten-free breads and mixes. - Quick
For quick-bread recipes that do not use yeast for rising and instead may use baking powder or soda. Kneading, rising, and baking loaf within a time less than for basic bread. - Sweet
For breads with additives such as fruit juices, grated coconut, raisins, dry fruits, chocolate, or added sugar. Due to a longer phase of rising, the bread will be light and airy. - 1.5 lb. Express
Kneading, rising, and baking a 1.5-lb. loaf occurs in 58 minutes using a quick-rising yeast. Loaf will be smaller and rougher than that made with the Basic cycle. - 2.0 lb. Express
Same as 1.5 lb. Express, but yields a 2-lb. loaf. - Dough
This cycle prepares the yeast dough for buns, pizza crust, etc., to be baked in a conventional oven. There is no baking in this cycle. - Jam
For making jams with fresh fruit. - Cake
Kneading, rising, and baking occurs, but with the aid of soda or baking powder. - Whole Grain
For breads with heavy varieties of flour that require a longer phase of kneading and rising (whole wheat flour, rye flour). Bread will be more compact and heavy. - Bake
When additional baking of breads is needed because a loaf is too light or not baked through. There is no kneading or resting.
Detailed Instructions
BEFORE FIRST USE:
- Check for any missing or damaged parts.
- Clean all the parts according to the Cleaning section.
- Set the breadmaker on Bake mode and bake empty for about 10 minutes. Let unit cool down and clean all the detached parts again.
The appliance may emit a little smoke and/or odor when you turn it on for the first time.
This is normal and will subside after the first or second use. Make sure the appliance has sufficient ventilation. - Dry all parts thoroughly. The appliance is ready for use.
- Using the bread pan handle, turn the bread pan counterclockwise and then pull it out of the appliance.
![]()
- Push the kneading paddle into the drive shaft inside the bread pan.
![]()


Falling Object Hazard. Breadmaker can wobble and walk during kneading cycle. Always position it in the center of the counter away from the edge.
- Add the ingredients to the bread pan in the order listed in the recipe. First, add the liquids, sugar, and salt; then the flour; and last the yeast.
NOTE: Make sure that yeast does not come into contact with salt or liquids.
![]()
- Place the bread pan into the appliance and make sure it is firmly locked in place by turning it clockwise. Close the lid.
![]()
- Plug in the appliance. A beep will be heard and the display will default to Cycle
![]()
- Press the CYCLE button until your desired cycle is displayed.
- Press the LOAF SIZE button to move the arrow to 1.5- or 2-lb. loaf size. (Loaf size is not an option in Cycles
![]() ,
, ![]() ,
, ![]() ,
, ![]() ,
, ![]() ,
, ![]() , and
, and ![]() .)
.) - Press the CRUST button to move the arrow to desired setting: Light, Medium, or Dark crust. (Crust is not adjustable in Cycles
![]() ,
, ![]() ,
, ![]() ,
, ![]() , and
, and ![]() .)
.) - If desired, set the DELAY TIMER with the + and – buttons. (Delay function is not available in Cycles
![]() ,
, ![]() , and
, and ![]() .)
.)
NOTE: Do not use this feature when using dairy, eggs, etc. - Press the START/STOP button to begin the cycle. Breadmaker will beep once and the ":" in the digital display will begin to flash indicating the timer is counting down. The kneading paddle will begin to mix your ingredients. If Delay Timer was activated, kneading paddle will not mix ingredients until cycle is set to begin.
- For add-ins (nuts, raisins), the machine will beep at the start of the second kneading. Open the lid and pour in your add-ins. This timing varies by cycle. (Refer to the Timetable for Cycles chart.)
- Once the cycle is complete, the machine will beep 10 times and shift to the Keep Warm setting for 1 hour.
- To stop the machine, press the START/STOP button for 2 seconds and the Keep Warm setting will end. Unplug the power cord and then open the lid using oven mitts.
- Let the bread pan cool down slightly before removing the bread. Using oven mitts, carefully turn the bread pan counterclockwise to unlock and lift up on the handle to remove from the machine.
- Using oven mitts, turn the bread pan upside down (with the bread pan handle folded down) onto a wire cooling rack or clean cooking surface and gently shake until bread falls out. Use a nonstick spatula to gently loosen the sides of the bread from the bread pan.
- If kneading paddle remains in the bread, gently pry it out using a spatula or small utensil. When not in use or when operation is complete, unplug the power cord.


NOTE: Store remaining bread in a sealed plastic bag for up to three days at room temperature. To store for a longer time, place sealed plastic bag in refrigerator for up to 10 days.
Timetable for Cycles
The display timer will count down time for the various steps in each cycle as indicated below. This is the total processing time and does not include time added for a Delayed Start.

Removing Bread
When baking is complete, the unit will switch to the Keep Warm setting for up to 1 hour.
Press and hold the START/STOP button for 2 seconds to end this cycle before removing bread pan.

Carefully shake the bread upside down until the loaf falls out of the bread pan. Allow to cool on a wire rack for 10 minutes before slicing.
TIP: If the kneading paddle comes out in the loaf, remove it with a spatula or small utensil.
Slicing Allow to cool for 10 minutes and slice with a bread knife. Storing Homemade Bread Fresh-baked bread is best when consumed as soon as possible. To store, wrap cooled loaf in foil or a plastic bag to preserve freshness. Bread can be frozen for up to 6 months.
Cleaning

Electrical Shock Hazard.
Disconnect power before cleaning. Do not immerse cord, plug, or housing in any liquid. Allow breadmaker to cool down completely before cleaning.
- To clean kneading paddle: If the kneading paddle is difficult to remove from the bread, add water to the bottom of the bread pan and allow to soak for up to 1 hour.
Wipe the paddle carefully with a damp cloth. The kneading paddle is dishwasher-safe. - To clean bread pan: Remove the bread pan by turning it counterclockwise. Wipe inside and outside of bread pan with a damp cloth. Do not use any abrasive agents, in order to protect the nonstick coating. The bread pan must be dried completely before installation.
NOTE: The bread pan and kneading paddles are dishwasher-safe. The outside of the bread pan and base may discolor. This is normal. - To clean housing and top lid: After use, allow unit to cool. Use a damp cloth to wipe lid, housing, baking chamber, and interior of viewing window. Do not use any abrasive cleaners for cleaning, since this will degrade the high polish of the surface. Never immerse the housing into water for cleaning.
- Before the breadmaker is packed for storage, ensure that it has completely cooled down, is clean and dry, and the top lid is closed.
Tips
Bread Basics
Ingredients
Two things can ensure a perfect loaf of bread: using fresh, quality ingredients and measuring them accurately.
Flour
All-Purpose Flour
Flour that contains no baking powder, suitable for "quick" breads or bread made with the Quick settings. Bread flour is better suited for yeast breads.
Bread Flour
Bread flour is the most important ingredient of making bread and is recommended in most yeast-bread recipes. It has a high gluten content and can keep the size of the bread from collapsing after rising. Flour varies by region. For example, American flour is milled from hard spring wheat; Canadian flour is milled from hard winter wheat.
Self-Rising Flour
Flour that contains baking powder, used especially for making cakes. Do not use self-rising flour in combination with yeast.
Whole-Wheat Flour
Whole-wheat flour is ground from the entire wheat kernel. Bread made with all or part whole-wheat flour will have higher fiber and nutritional content. Whole-wheat flour is heavier and, as a result, loaves may be smaller in size and have a heavier texture.
Tip:
To check whether the yeast is fresh and active:
- Pour 1 cup hot tap water into a measuring cup.
- Add 1 teaspoon white sugar and 1 tablespoon yeast.
- Place the measuring cup in a warm place for about 5 minutes.
- Fresh, active yeast will begin to bubble or "grow." If it does not, the yeast is dead or inactive.
Other Ingredients
Egg
Eggs can improve bread texture and make the bread larger in size. The egg must be whisked in with the other liquid ingredients.
Salt
Salt is necessary to improve the bread flavor and crust color. It is also used to restrain yeast activity.
Shortening, Butter, and Vegetable Oil
Shortening and butter should be cut into small pieces before adding to liquid.
Sugar
Sugar is "food" for the yeast and also increases the sweet taste and color of bread. It is a very important element of making the bread rise. White sugar is normally used; however, brown sugar, powdered sugar, or cotton sugar may also be called for in some recipes.
Water and Other Liquids (always added first)
Water is an essential ingredient for making bread. Generally speaking, water should be at room temperature. Some recipes may call for milk or other liquids. Never use dairy with the Delay Timer option.
Yeast
Yeast is a living organism and should be kept in the refrigerator to remain fresh. It needs carbohydrates found in sugar and flour as nourishment. Yeast used in breadmaker recipes will be sold under several different names: Bread machine yeast (preferred), active-dry yeast, and instant yeast.
Before using, check the expiration date of the yeast. Return to refrigerator immediately after each use.
Use Exact Measurements
One of the most important steps of making good bread is the proper measurement of ingredients. Measure each ingredient carefully and add to your bread pan in the order given in the recipe.
Adding Sequence
Always add ingredients in the order given in the recipe.
FIRST: Liquid ingredients
SECOND: Dry ingredients
LAST: Yeast
The yeast should only be placed on the dry flour and never come in contact with the liquid or salt.
When you use the Delay Timer function for a long time, never add the perishable ingredients such as eggs or milk.
Liquid Ingredients
Water, fresh milk, or other liquids should be measured with a glass measuring cup with clear markings and a spout. Set the cup on the counter and lower yourself to check the liquid level. When measuring cooking oil or other ingredients, clean the measuring cup thoroughly in between.
| Liquid Measurement Conversion Chart | |||
| Fluid Ounce(s) | Cup | Tablespoon(s) | Teaspoons |
| 8 | 1 | 16 | 48 |
| 7 | 7/8 | 14 | 42 |
| 6 | 3/4 | 12 | 36 |
| 5 | 5/8 | 10 | 30 |
| 4 | 1/2 | 8 | 24 |
| 3 | 3/8 | 6 | 18 |
| 2 | 1/4 | 4 | 12 |
| 1 | 1/8 | 2 | 6 |
| 1 | 3 | ||
| 1/2 | 1 1/2 | ||
Dry Measurements
Measure dry ingredients by gently spooning flour, etc., into the measuring cup and then, once filled, leveling off with a knife. Never use the measuring cup to scoop your dry ingredients directly from a container as this could add up to one tablespoon of extra ingredients. Do not tap the bottom of the measuring cup or pack down.
HINT: Before measuring, stir the flour to aerate it.
When measuring small amounts of dry ingredients, such as salt or sugar, use a measuring spoon, making sure it is leveled off.
Weighing dry ingredients with a digital scale will provide better baking results.

| Dry Measurement Weight Equivalents | ||
| 1 cup of: | Ounces | Grams |
| All-purpose flour | 4.4 | 125 |
| Bread flour | 4.5 | 127 |
| Whole-wheat flour | 4.2 | 120 |
| Rye flour | 3.6 | 102 |
Frequently Asked Questions
May I use a sugar substitute in place of sugar?
Sugar is necessary for the yeast to produce a light loaf with a good height. Results may vary with the type and amount of sugar substitute used. If you are going to use an artificial sweetener, choose one that is aspartame-based rather than saccharin-based.
May I omit the salt or sugar from the recipe?
No, both the sugar and salt play an important role in the breadmaking process. Salt prevents the yeast from overreacting and the bread from overrising. The combination of sugar, salt, and yeast is a key part of the breadmaking process. Remember that the total sugar and salt amounts are divided among all the slices, so the amount of sugar and salt per serving is small.
When do I add raisins, nuts, etc., to the bread?
This breadmaker will beep at the start of the second kneading to let you know when to add raisins, nuts, seeds, etc. This timing varies by cycle. (Refer to the Timetable for Cycles chart.) If you are using the Delay Start timer and it is more convenient, you may add ingredients at the start.
Can I open the lid while the breadmaker is operating?
This breadmaker is designed with a window in the lid to let you watch your bread's progress. Quick checks are OK in the early stages of kneading and to add ingredients when the beeper sounds. However, the temperature in the baking chamber adjusts for the Rising and Baking stages. Opening the lid during these steps could cause the loaf to fall or not bake properly. Sometimes condensation forms on the window after initial mixing and kneading. It usually disappears once the baking cycle starts so you should be able to get a clear view of your loaf.
Can I use my favorite bread recipes in my breadmaker?
Yes, but you will need to experiment to get the right proportion of ingredients. Become familiar with the unit and make several loaves of bread with recipes provided before you begin experimenting. Never exceed a total amount of 4 1/4 cups of dry ingredients (that includes flours, oats, cornmeal, etc.). Use the recipes in this book to help determine the ratio of dry ingredients to liquid and amounts of yeast, sugar, salt, and butter/margarine to use.
What will happen if I leave the bread in the bread pan after baking?
This unit has a 60-minute Keep Warm cycle that lets you leave the bread in the pan for up to an hour after baking is complete. Once the warming cycle is over, it is best to remove the bread immediately or the bottom of your loaf will absorb moisture and become soggy.
Can the recipe be cut in half?
No, it is not recommended. The ingredient proportions work better in the full amounts.
How can bread mixes be used in the machine and at what setting?
The package instructions will list the amount of water and amount of yeast to use. Be sure to add liquid, then dry ingredients, followed by yeast. Do not allow the yeast to sit in the liquid. The bread type setting is dependent upon the type of bread mix being used (i.e., White bread uses the Basic bread setting; Sweet Bread setting is for use with dried fruit, cheese, or nuts; whole-wheat or multigrain should use the Whole Grain setting; Crust setting, either Light or Dark, is a personal preference). Do not use bread mixes that exceed 2-lb. loaf size.
Troubleshooting
| PROBLEM | PROBABLE CAUSE | SOLUTION |
| Odor or burning smell. |
|
|
| Ingredients not blending; can hear motor turning. |
|
|
| "HHH" displays when START/STOP button is pressed. |
|
|
| Window is cloudy or covered with condensation. |
|
|
| Kneading paddle comes out with the bread. |
|
|
| Dough is not blending thoroughly; flour and other ingredients are built up on sides of pan; bread loaf is coated with flour. |
|
|
| Bread rises too high or pushes lid up. |
|
|
| Bread does not rise; loaf is short. |
|
|
| Bread has a crater in the top of the loaf once baked. |
|
|
| Crust color is too light. |
|
|
| Crust color is too dark. |
|
|
| Bread loaf is lopsided. |
|
|
| Loaves made are different shapes. |
|
|
| Bottom of loaf is soggy. |
|
|
| Bread is hollow or holey inside. |
|
|
| Underbaked or sticky, doughy bread. |
|
|
| Bread mashes down when slicing. |
|
|
| Bread has a heavy, thick texture. |
|
|
| Base of bread pan has darkened or is spotted. |
|
|
 only).
Recipes
Basic
(Cycle  )
)
*When using Canadian flour, use the reduced flour amount listed for Canadian bread flour. Do not use the American flour amount.
Oatmeal-Buttermilk
1.5-lb. Loaf
1 cup buttermilk
1 teaspoon salt
2 tablespoons sugar
3 tablespoons butter or vegetable oil
3/4 cup regular oats (oldfashioned oats)
2 1/2 cups American bread flour OR 1 3/4 cups Canadian bread flour*
2 teaspoons bread machine yeast
2-lb. Loaf
1 1/4 cups buttermilk
1 1/4 teaspoons salt
2 tablespoons sugar
1/4 cup butter or vegetable oil
1 cup regular oats (old-fashioned oats)
2 3/4 cups American bread flour OR 2 cups Canadian bread flour*
2 1/2 teaspoons bread machine yeast
Maple Wheat
1.5-lb. Loaf
1 cup buttermilk
1 teaspoon salt
2 tablespoons nonfat dry milk
2 tablespoons maple syrup
2 tablespoons butter or vegetable oil
1 cup whole-wheat flour
2 cups American bread flour OR 1 1/4 cups Canadian bread flour*
1 1/2 teaspoons bread machine yeast
2-lb. Loaf
1 1/3 cups buttermilk
1 teaspoon salt
2 tablespoons nonfat dry milk
3 tablespoons maple syrup
2 tablespoons butter or vegetable oil
1 1/2 cups whole-wheat flour
2 1/2 cups American bread flour OR 1 1/2 cups Canadian bread flour*
1 1/2 teaspoons bread machine yeast
Italian Parmesan Bread
1.5-lb. Loaf
1 cup + 2 tablespoons water
1 1/8 teaspoons salt
1 tablespoon sugar
3 tablespoons olive oil
3 1/2 cups American bread flour OR 2 1/4 cups Canadian bread flour*
1 teaspoon dried, crushed basil
1 teaspoon dried, crushed oregano
3 tablespoons grated Parmesan cheese
1 1/2 teaspoons bread machine yeast
2-lb. Loaf
1 1/3 cups water
1 1/2 teaspoons salt
2 tablespoons sugar
1/4 cup olive oil
4 1/2 cups American bread flour OR 3 cups Canadian bread flour*
1 1/2 teaspoons dried, crushed basil
1 1/2 teaspoons dried, crushed oregano
1/4 cup grated Parmesan cheese
1 1/2 teaspoons bread machine yeast
Light Rye
1.5-lb. Loaf
1 cup water
1 1/2 teaspoons salt
2 tablespoons sugar
1 tablespoons butter or vegetable oil
2 teaspoons caraway seed
2 cups American bread flour OR 1 1/2 cups Canadian bread flour*
1 cup rye flour
1 1/2 teaspoons bread machine yeast
2-lb. Loaf
1 1/2 cups water
1 1/2 teaspoons salt
2 tablespoons sugar
1 tablespoons butter or vegetable oil
2 teaspoons caraway seed
3 cups American bread flour OR 2 cups Canadian bread flour*
1 1/2 cups rye flour
2 teaspoons bread machine yeast
Honey Granola
1.5-lb. Loaf
1 cup + 2 tablespoons water
1 1/8 teaspoons salt
1 tablespoon sugar
3 tablespoons butter or vegetable oil
1 1/2 cups American bread flour OR 1 cup Canadian bread flour*
1 cup whole-wheat flour
1 cup granola
1 1/4 teaspoons bread machine yeast
2-lb. Loaf
1 1/2 cups water
1 1/2 teaspoons salt
1/4 cup honey
2 tablespoons butter or vegetable oil
2 1/2 cups American bread flour OR 2 cups Canadian bread flour*
1 cup whole-wheat flour
1 cup granola
1 1/2 teaspoons bread machine yeast
French
(Cycle  )
)
*When using Canadian flour, use the reduced flour amount listed for Canadian bread flour. Do not use the American flour amount.
French
1.5-lb. Loaf
1 1/2 cups water
1 teaspoon salt
1 teaspoon sugar
3 1/2 cups American bread flour OR 2 1/4 cups Canadian bread flour*
1 1/2 teaspoons bread machine yeast
2-lb. Loaf
1 1/4 cups + 1 tablespoon water
1 teaspoon salt
1 1/2 teaspoons sugar
4 1/2 cups American bread flour OR 3 cups Canadian bread flour*
1 1/2 teaspoons bread machine yeast
French Onion
1.5-lb. Loaf
1 cup water
1-ounce envelope dry onion soup mix
3 1/2 cups American bread flour OR 2 1/4 cups Canadian bread flour*
2 teaspoons bread machine yeast
2-lb. Loaf
1 1/2 cups water
1-ounce envelope dry onion soup mix
4 1/2 cups American bread flour OR 3 cups Canadian bread flour*
1 1/2 teaspoons bread machine yeast
Gluten-Free
(Cycle  )
)
Gluten-Free Sandwich Bread
1.5-lb. Loaf
1 1/2 cups warm milk (cow, rice, soy, or nut)
3/4 cup whole egg (must measure 3/4 cups)
1/4 cup vegetable oil
1 teaspoon cider vinegar or lemon juice
3/4 teaspoon sea salt
2 tablespoons sugar
1 tablespoon xanthan gum
1 teaspoon guar gum
3/4 teaspoon lecithin granules (plain soy)
1 tablespoon potato flour
3 cups gluten-free all-purpose baking flour
2 teaspoons active dry yeast Have all ingredients at room temperature.
Whisk together liquid ingredients until very smooth. Add liquid ingredients to bread pan. In separate bowl, whisk together dry ingredients, except yeast, until thoroughly blended. Pour the dry ingredients on top of the wet. Make a small well on the top middle of the dry ingredients and add the yeast.
Whole-Grain Bread
This gluten-free recipe is over 50% whole grain using the brown rice flour.
1.5-lb. Loaf
2 cups hot water (150°F)
3 large eggs, lightly beaten
1 teaspoon cider vinegar
1/4 cup canola oil
2 cups brown rice flour
1/2 cup tapioca flour
1/2 cup potato starch
1/2 cup garbanzo bean flour
1 1/2 teaspoons sea salt
4 1/2 teaspoons xanthan gum
3 tablespoons sugar
3 tablespoons nondairy dreamer
2 1/4 teaspoons yeast, active dry
In a bowl, whisk together the hot water, eggs, vinegar, and oil. Place the liquid ingredients in the bread pan. In a separate bowl, stir together rice flour, tapioca flour, potato starch, garbanzo bean flour, sea salt, xanthan gum, nondairy creamer, and sugar. Pour the dry ingredients on top of the liquid. Make a small well on the top middle of the dry ingredients and add the yeast.
Visit Bob's Red Mill online at www.bobsredmill.com for more bread machine recipes.
IMPORTANT SAFEGUARDS
When using electrical appliances, basic safety precautions should always be followed, including the following:
- Read all instructions.
- Do not touch hot surfaces. Use handles or knobs. Always use oven mitts to handle hot bread pan or hot bread.
- Do not put hand inside oven chamber after bread pan is removed. Heating unit will still be hot.
![shock hazard]() To protect against electrical shock, do not immerse cord, plug, or breadmaker in water or other liquid.
To protect against electrical shock, do not immerse cord, plug, or breadmaker in water or other liquid.- Close supervision is necessary when any appliance is used by or near children.
- Unplug from outlet when not in use and before cleaning. Allow to cool before putting on or taking off parts, or before cleaning the appliance.
- Do not operate any appliance with a damaged cord or plug, or after the appliance malfunctions or is dropped or damaged in any manner. Call our toll-free customer service number for information on examination, repair, or adjustment.
- The use of accessory attachments not recommended by the appliance manufacturer may cause injuries.
- Do not use outdoors.
- Do not let cord hang over edge of table or counter or touch hot surfaces.
- Do not place on or near a hot gas or electric burner or in a heated oven.
- Extreme caution must be used when moving an appliance containing hot oil or other hot liquids.
- To disconnect, turn all controls off (STOP); then remove plug from wall outlet.
- Use extreme caution when removing bread pan.
- To turn breadmaker OFF, press and hold the START/STOP button for 2 seconds. See "Control Panel" section for more information.
- Do not place eyes or face in close proximity with tempered glass viewing window, in the event that the safety glass breaks.
- Do not use appliance for other than intended use.
- Clean oven interior carefully. Do not scratch or damage heating element tube.
![]()
Risk of Electric Shock. Cook only in removable Bread Pan.
 To protect against electrical shock, do not immerse cord, plug, or breadmaker in water or other liquid.
SAVE THESE INSTRUCTIONS!
OTHER CONSUMER SAFETY INFORMATION
This product is intended for household use only.
Shock Hazard: This appliance has a polarized plug (one wide blade) that reduces the risk of electric shock. The plug fits only one way into a polarized outlet. Do not defeat the safety purpose of the plug by modifying the plug in any way or by using an adapter. If the plug does not fit, reverse the plug. If it still does not fit, have an electrician replace the outlet.
The length of the cord used on this appliance was selected to reduce the hazards of becoming tangled in or tripping over a longer cord. If a longer cord is necessary, an approved extension cord may be used. The electrical rating of the extension cord must be equal to or greater than the rating of the appliance. Care must be taken to arrange the extension cord so that it will not drape over the countertop or tabletop where it can be pulled on by children or accidentally tripped over.
To avoid an electrical circuit overload, do not use another highwattage appliance on the same circuit with your breadmaker.
Questions?
Please call us – our friendly associates are ready to help.
USA: 1.800.851.8900
Visit hamiltonbeach.com for delicious recipes, tips, and to register your product online!
Documents / Resources
References
Download manual
Here you can download full pdf version of manual, it may contain additional safety instructions, warranty information, FCC rules, etc.
Advertisement


Need help?
Do you have a question about the HomeBaker and is the answer not in the manual?
Questions and answers