Advertisement
- 1 INTRODUCTION
- 2 GETTING STARTED
- 3 NAVIGATION
-
4
OPERATION
- 4.1 Set Date & Time
- 4.2 Recording Videos
- 4.3 Mode
- 4.4 Adjusting the Settings
- 4.5 Loop Recording
- 4.6 G-Sensor
- 4.7 Emergency Video Protection
- 4.8 Parking Mode (Optional)
- 4.9 Motion Detection (Optional)
- 4.10 Taking a Snapshot
- 4.11 WDR
- 4.12 Screen Saver
- 4.13 Key Tone
- 4.14 Startup Chime
- 4.15 Watermark
- 4.16 Fatigue Driving Alert
- 4.17 Light Reminder
- 4.18 Enable WiFi
- 4.19 Night Vision
- 4.20 Delete Reminder
- 4.21 Format SD Card
- 4.22 Defaults
- 4.23 GPS
- 5 WIFI SETUP AND ANDROID/IOS APP
- 6 COMMON FUNCTIONS
- 7 SETTINGS OVERVIEW
- 8 FAQs
- 9 TECHNICAL SPECIFICATIONS
- 10 IMPORTANT SAFETY PRECAUTIONS
- 11 CUSTOMER SUPPORT
- 12 Documents / Resources
INTRODUCTION
Please read this manual carefully before using this product. Keep this manual for future reference.
Features
- 3-Channel/Dual/Front Recording
- Up to 155 Degrees Wide Angle Lens
- WiFi Connection & Smartphone App
- Built-in GPS Logger
- Built-in G-Sensor
- Sony 5MP Starvis Sensor
- IR Night Vision
- Super Capacitor
- Includes a 64GB Memory Card
- Support up to 512GB Micro SD Card
What's in the Box

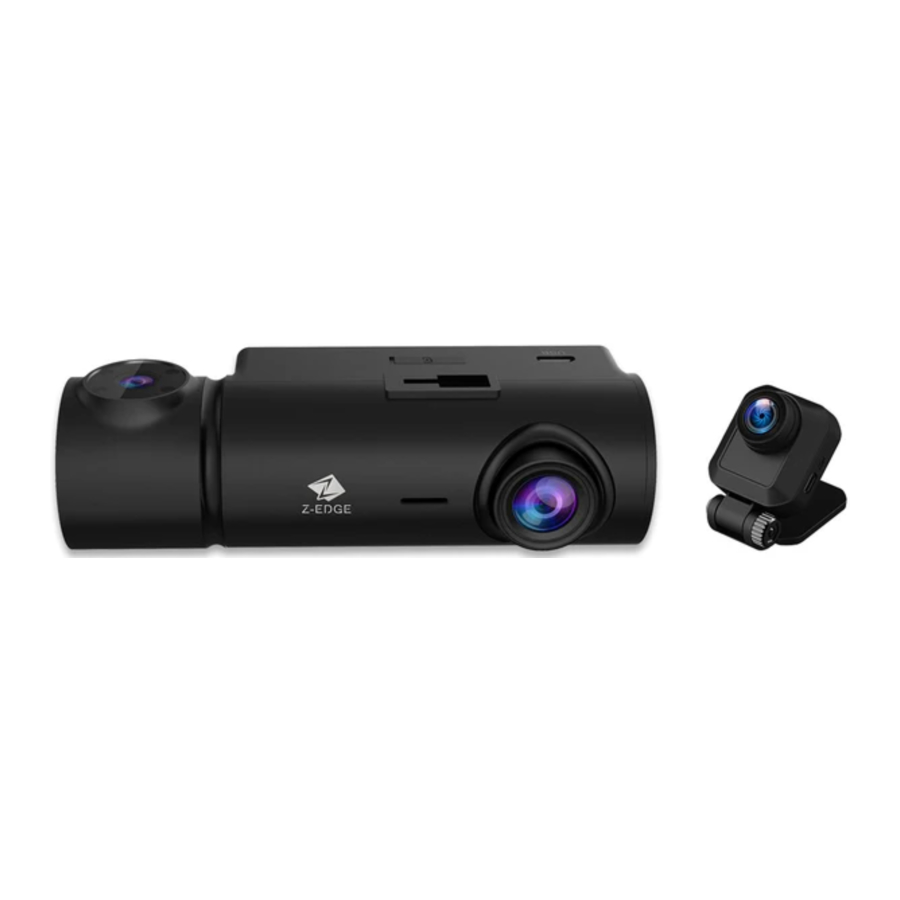
Product Overview

- Front Camera
- Microphone
- Power Button
- Display Screen
- Inner Camera
- Micro USB Port
- Car Mount Slot
- Mini USB Port (Connect rear camera)
- TF/Micro SD Card Slot
- Speaker
- Adhesive Mount
- Rear Camera
GETTING STARTED
Inserting the TF/Micro SD Card

- Insert a TF/Micro SD card into the TF/Micro SD Card Slot (9), with the pins facing towards the front of the device, until it clicks into place.
- To remove the card, push the edge of the TF/Micro SD card inward until you feel it click, then allow it to push out until you can remove it from the slot.

- It is recommended to format the memory card in the dash cam directly in Menu > Settings > Format SD card before initial use.
- Please note that all data saved on the TF/Micro SD card will be erased after formatting.
- Do not remove or insert the TF/Micro SD card whilst the device is powered on - this may damage the TF/Micro SD card.
- Supports Micro SDXC card up to 512GB (Class 10 or above).
- We recommend using the included memory card or well-known brand Micro SD card.
Front Camera Installation
Please follow the below instructions for mounting your dash cam to your vehicles windshield:
- Slide the car mount into the slot on top of the device until a click sound is heard.

- Press the suction cup firmly against your windshield, and rotate the lever clockwise (12 o'clock) to secure.


Adjust Device Position
- Loosen the nut to swivel the device vertically, secure by tightening the nut.

- Rotate the device horizontally for a clear view.


- Do not install the device on a tinted windshield. This may damage the tint film.
How to use static sticker for front camera installation?
Installing the Static Sticker
Thoroughly clean the windshield with water or alcohol, then wipe it with a dry cloth. Carefully stick the static sticker to a desired position, which won't block your view while driving.

Installing the Front Camera
Remove the protective film from the adhesive mount, then attach the mount and camera on the static sticker.
Press the adhesive mount for about 30 seconds, making sure it is attached firmly.

Connecting to Power

- Plug the Micro USB port of the USB charging cable into the car dash camMicro USB Port.
- Plug the other end into the car charger, and insert it into your vehicles lighter socket.
- Use only the supplied car charger to power the dash cam.
- Some car models supply power from the cigarette lighter even when the vehicle's engine is switched off. We recommend you always unplug the USB charger manually before leaving the vehicle to avoid any unwanted car battery drainage.
Powering the Dash Camera
Automatic Power
- Once the vehicle's engine is switched on, the dash cam will automatically power on.
- Once the vehicle's engine is switched off, the dash cam will automatically save the recording and power off.
Manual Power
- To manually turn on the dash camera, press and hold the Power Button (3) for 3 seconds.
- To manually turn off the dash camera, press and hold the Power Button (3) for 3 seconds.
Rear Camera Installation
Please keep as far away from your vehicle's radio antenna as possible. FM/AM radio interference may occur. Therefore, please do a temporary test before permanent installation!

- Connect one end of the Mini USB cable into the Mini USB Port (8) on the dash camera. Connect the other end into the Mini USB Port (12) on the rear camera.
- Connect the dash cam to power and turn on the camera. The rear-lens view will automatically appear on the display screen (4) in PiP display mode.
TIP: To view rear-view in full screen, tap the Screen to bring up the Shortcuts menu, then tap the View icon (H) on the middle right and switch to the desired view. - Whilst looking at the display screen and without removing the adhesive backing, find a suitable area for installing the rear camera on the rear windshield.
- Having found a suitable area on the rear windshield, peel off the protective plastic backing from the adhesive mount (11). Press firmly against the rear windshield to secure.
- For a more organized car environment, the micro USB cable can be routed as indicated by the dashed line in the diagram.
NAVIGATION
Recording Screen
The Recording Screen is the default screen after powering on the dash camera.

| Icon | Item | Description |
 | Recording | A flashing red dot indicates the dash cam is currently recording. |
 | GPS | Indicates if GPS is activated or deactivated. |
 | Drive Mode | Indicates current Mode. (e.g. Drive, Scenic, Park or Standard) |
 | WDR | Indicates if WDR is activated. |
 | Sound Recording | Indicates if the microphone is On or Off. |
 | WiFi | Indicates if WiFi is On or Off. |
Shortcuts
Tap anywhere on the Recording Screen while recording or in standby mode to bring up the Shortcuts. Select one of the following options:

| No. | Item | Description |
| A | Mode | Switch between Drive, Scenic, Park and Standard modes. |
| B | Start/Pause | Start or pause video recording. |
| C | Video Protect | Protect the currently recorded video file from being overwritten. |
| D | Microphone | Set Sound Recording on/off. |
| E | Main Menu | Go to Main Menu. |
| F | Snapshot | Take a snapshot while recording or in standby mode. |
| G | Screen Saver | Enter Screen Saver. |
| H | View | Change the display view on the screen. |
Main Menu
Tap anywhere on the Screen to bring up the Shortcuts. Tap on the Main Menu ' ![]() ' icon to enter the Main Menu.
' icon to enter the Main Menu.
Select one of the following options:

| No. | Item | Description |
| I | Video Resolution | Front Camera + Inner Camera + Rear Camera: 2K+1080P+1080P 1080P+1080P+1080P Front Camera + Inner Camera/Rear Camera 4K+1080P 2K+1080P 1080P+1080P Front Camera 5K/4K/2K/1080P |
| J | Loop Recording | Switch between 1, 3 or 5-mins recording time. |
| K | Settings | View the full list of settings that can be customized. |
| L | Playback | Playback 'Normal' and 'Emergency' video recordings. |
| M | Photo Capture | Preview saved photos. |
| N | REC | Exit Main Menu to Recording Screen and starts recording. |
Setup
From the Main Menu screen, tap on Settings ' ' icon to enter the full list of settings that can be customized.

- Tap on a feature to customize it.
- Tap '
![]() ' icon for previous page.
' icon for previous page. - Tap '
![]() ' icon for next page.
' icon for next page. - Tap '
![]() ' icon to exit and return to Main Setting screen.
' icon to exit and return to Main Setting screen.
 ' icon for previous page.
 ' icon for next page.
 ' icon to exit and return to Main Setting screen.
OPERATION
Set Date & Time
Before using this dash cam, we recommend you set the correct date and time:
- Tap anywhere on the Screen to bring up the Shortcuts.
- Tap on the Main Menu '
![]() ' icon, and select Settings '
' icon, and select Settings ' ![]() ' icon from the menu.
' icon from the menu. - Find and tap on the Date/Time option to customize.
- Select a field to customize, then tap above or below it (on the arrows) to increase or decrease the number.
- Set the correct UTC, the GPS function can automatically correct the time.
- With all fields correct, tap the '
![]() ' icon to save and exit the menu.
' icon to save and exit the menu.
 ' icon to save and exit the menu.
Please note:
You must set the correct UTC, otherwise the date and time will be incorrect.
Recording Videos
- With a TF/Micro SD card inserted and the dash cam connected to power, once the car engine is switched on the dash cam will automatically power on and start recording.
- When the car engine is switched off, the dash cam will automatically save the last recording and power off.
- Alternatively, tap the Start/Pause '
![]() ' icon in the Shortcuts menu to stop/start video recording manually.
' icon in the Shortcuts menu to stop/start video recording manually.
 ' icon in the Shortcuts menu to stop/start video recording manually.
Mode

- Instantly optimize the dash camera by selecting one of four recording modes.
- Selecting a mode automatically optimizes four features with preset values designed to best suit your driving environment, one-finger operation, saving your time having to customize each individually.
- Standard mode is the factory default selected mode.
- To change modes, tap anywhere on the Screen to bring up the Shortcuts.
Note:
- To activate thePark mode, you need to connect the dash cam to your car battery with additional Hardwire Kit (Not included).
- After selecting a mode, you can still customize any of the four settings inside the Main Menu and Setting menu.
- Every time a new mode is selected, all four settings will change to their preset values, overwriting any customization you may have made.
Tap the Mode '  ' icon on the middle left side. From here, switch between:
| Drive | Scenic | Park | Standard | |
| Best for... | Everyday Driving | Scenic Driving | Monitoring your Parked car | Standard Driving (Factory Default) |
| G-Sensor | Medium | Low | High | Medium |
| Loop Recording | 3 Mins | 5 Mins | 1 Min | 3 Mins |
| Watermark | On | Off | On | On |
| Parking Mode | On | On | On | Off |
| Screen Saver | 1 Min | Always On | 1 Min | 3 Mins |
| WDR | On | On | On | On |
Adjusting the Settings
If you'd prefer to customize each dash cam setting yourself, you can do so in the Setting menu:
- Tap anywhere on the Screen to bring up the shortcuts.
- Tap on the Main Menu '
![]() ' icon, and select Settings '
' icon, and select Settings ' ![]() ' icon from the menu.
' icon from the menu. - Scroll the menu by tapping the '
![]() ' or '
' or ' ![]() ' icon.
' icon. - Tap on a feature to enter and customize it.
- Make a selection to automatically save and return to the Settings menu.
- From the Settings menu tap '
![]() ' icon to return to the Main Menu.
' icon to return to the Main Menu. - Tap '
![]() ' icon to exit and return to the Screen.
' icon to exit and return to the Screen.
- Scroll the menu by tapping the '
 ' icon, and select Settings '
  ' or '
 Loop Recording
- Videos are recorded and saved to the TF/Micro SD card at set recording time.
- Once the TF/Micro SD card is full, Loop Recording will automatically overwrite the oldest unprotected saved file. This prevents long duration video clips from being lost in a single overwrite.
- Video files can be saved to the memory card in 1, 3 or 5 mins.
Main Menu > Loop Recording > 1 Minute / 3 Minutes / 5 Minutes
G-Sensor
- The built-in G-Sensor detects unusual impacts or vibrations.
- It automatically triggers the Emergency Video Protection.
- Set the sensitivity to automatically trigger this feature with smaller or larger vibrations (feature can also be turned Off):
Main Menu > Settings > G-Sensor > Off / Low / Medium / High
Emergency Video Protection
- If G-Sensor is enabled and senses an unusual impact or collision the dash cam will automatically protect the currently recorded video file from being overwritten.
- A lock '
![]() ' icon appears on the top of the screen to signify the current recording is protected. Beeps sound simultaneously.
' icon appears on the top of the screen to signify the current recording is protected. Beeps sound simultaneously. - To manually protect a video file during a recording, tap anywhere on the Screen to bring up the Shortcuts and select the Video Protect '
![]() ' icon.
' icon.
Parking Mode (Optional)
- If no Hardwire Kit is connected to the dash cam, the parking monitor will not work even if it is selected from the menu.
- It is not recommended to select this function if no Hardwire Kit is connected.
- Once Parking Mode is activated, the screen will turn off, Recording will stop, WiFi & GPS will be disabled.
- In order not to drain the car battery, the dash cam will automatically turn off after 3 hours of Parking Mode function activated.
- If you power off the dash cam manually by pressing the power button, even if the Hardwire kit is connected, the dash cam will not enter Parking Mode.
- To activate Parking Mode function, you need to connect the dash cam to your car battery with additional Hardwire Kit (Not included).
- After connecting a Hardwire Kit, once the car is parked and the engine is off, the dash cam will record for 5 minutes with enabled Parking Mode. If the front cam does not detect any motion, vibration/collision, position or speed change, the dash cam will stop recording after 5 minutes recording, the screen will turn off and enter Parking Mode.
- In Parking Mode, when the front cam detects vibration/collision, the dash cam will turn on and start emergency recording for 30 seconds.
If more vibrations / collisions are detected between 20 to 30 seconds of this emergency video, the dash cam will continue to record the 2nd 30 seconds emergency video.
Once no more vibration / collision is detected during this period, the dash cam will turn off and enter Parking Mode again.
The screen will not light up during these emergency recordings. Front camera, inner camera and rear camera - This cycle is repeated until the car battery triggers the low-power protection, then the dash cam will turn off, and Parking Mode will not be triggered anymore.
- Once the dash cam detects position or speed change by GPS, or vibration by G-Sensor for more than 3 seconds with normal video recording, it will exit Parking Mode function and enter normal Loop Recording mode.
- Enable/disable feature:
Main Menu > Settings > Parking Monitor > Parking Mode
Motion Detection (Optional)
- If no Hardwire Kit is connected to the dash cam, the motion detection will not work even if it is selected from the menu.
- It is not recommended to select this function if no Hardwire Kit is connected.
- To activate Motion Detection function, you need to connect the dash cam to your car battery with additional Hardwire Kit (Not included).
- Once the Hardwire Kit detects the car is parked and the engine is off, the dash cam will record for 5 minutes with enabled Motion Detection feature. If the front cam does not detect any motion, vibration/collision, position or speed change, the dash cam will stop recording after 5 minutes recording, the screen will turn off and the dash cam will enter Standby mode.
In Standby mode, once the front cam detects any motion, it will start recording for 30 seconds. Front camera, inner camera and rear camera will record. If more vibrations / collisions are detected between 20 to 30 seconds of this video, the dash cam will continue to record the 2nd 30 seconds emergency video.
Once no more motion is detected, the dash cam will enter Standby mode.
The screen will not light up during these 30 seconds recording. - This cycle is repeated until the car battery triggers the low-power protection, then the dash cam will turn off, and no motion detection will be triggered anymore.
- Once the dash cam detects position or speed change by GPS, or vibration/ collision by G-Sensor for more than 3 seconds with normal video recording, it will exit Motion Detection function and enter normal Loop Recording mode.
- Enable/disable feature:
Main Menu > Settings > Parking Monitor > Motion Detection
Note:
- Since the dash cam is always on after connecting to your car battery with the Hardwire kit, it will continue to consume the car's battery.
- In order not to drain the car battery, the dash cam will automatically turn off after 3 hours of Motion Detection function activated.
Taking a Snapshot
Tap anywhere on the Screen while recording or in standby mode to bring up the Shortcuts, and tap the Snapshot '  ' icon to take an instant photo.
WDR
- Wide dynamic range (WDR) technology compensates for extreme light and dark spots, balancing exposure to produce a clear image.
- This feature is particularly useful for night driving where an image can include both dark spots and extreme light spots produced by street lamps or headlights.
- Enable/disable feature:
Main Menu > Settings > WDR > Off / On
Screen Saver
- Enable the Screen Saver feature for the LCD display to automatically turn off and only display current Time on it. This prevents the screen from being a distraction to the driver.
- This feature can be set to Always On, 1 Min, 3 Mins, 5 Mins.
Set the feature to 'Always On' to keep the screen always on while recording. - Main Menu > Settings > Screen Saver > Always On / 1 Minute / 3 Minutes / 5 Minutes
Key Tone
Enable the Key Tone function to have a chime sound when you tap the screen.
Main Menu > Settings > Key Tone > Off / On
Startup Chime
You can enable and disable the startup and shutdown sound.
Main Menu > Settings > Startup Chime > Off / On
Watermark
Enable or disable the logo, date and time stamps to appear on your videos and pictures.
Main Menu > Settings > Watermark > Off / On
Fatigue Driving Alert
The dash cam has a Fatigue Driving Alert function, remind the driver to take a break on a long journey.
It can be turned off or set to 1, 2 or 4 hours
Main Menu > Settings > Fatigue Driving Alert > Off / 1 hour / 2 hours / 4 hours
Light Reminder
The Light Reminder can be set to remind the driver to turn on the vehicles headlights.
This is calculated from a light sensor built into the dash cam.
Main Menu > Settings > Light Reminder > Off / On
Enable WiFi
With the WiFi feature enabled, the Android/iOS app can be used on your supported devices to view and save recorded videos and photos.
Main Menu > Settings > WiFi > Off / On
Night Vision
Once the inner camera detects insufficient light, the IR LEDs will turn on automatically for better recording.
Note: If IR LEDs light on, the video footage of the cabin will turn into black and white.
Delete Reminder
Remind you to delete the protected videos to free up more capacity for normal recordings.
Main Menu > Settings > Delete Reminder > On / Off
Format SD Card
If you want to delete all saved files, you can format the memory card. Before formatting the memory card, please save the required files to you computer.
Once the memory card is formatted, none of the files can be recovered.
Main Menu > Settings > Format SD Card
Note: We recommend that you format the memory card directly in the dash cam before the first use.
Defaults
Reset the dash cam to factory default settings.
Main Menu > Settings > Defaults
GPS
- GPS can be enabled or disabled in:
Main Menu > Settings > GPS > Off / On - With the built-in GPS, it can pinpoint the location of your car dash cam.
WIFI SETUP AND ANDROID/IOS APP
WiFi Setup

- Search for the"Z-DashCam" app on the Google Play Store (Android device) / Apple App Store (iOS device). Then download and install on your smartphone.
- Check if the WiFi feature is enabled on the T3P WiFi dash cam.
- Open the WLAN settings on your smart phone and select the T3P dash cam.
Its name is T3P, followed by 4 characters. E.g. "T3P-XXXX".
Make sure it is connected successfully.
If WiFi password is required, please enter password: 12345678 - Open the "Z-DashCam" app on your smartphone.
- In the App, click Connect DVR, then it will enter the recording screen.
App Overview

| No. | Item | Description |
| 1 | Back Arrow | Return to the main screen |
| 2 | Microphone | Enable/disable audio recording |
| 3 | Recording Icon | Record a 10 second video clip |
| 4 | Compass | Orientate map to North |
| 5 | Connection | Disconnect the app from the dash camera. |
| 6 | Settings | Open the settings menu and adjust settings for the dash camera. |
| 7 | Speed | Switch between mph & km/h |
| 8 | Display view of recording | Tap to view between full and half screen |
| 9 | Camera | Take a snapshot |
| 10 | File Manager | View/Play/Download/Delete the saved videos and images |
| 11 | Traffic | Show traffic on the map |
| 12 | Map | Map location |
| 13 | Route | Record route on the map |
| 14 | Display view of map | Tap to view between full and half screen |
| 15 | Centre | Center map on dash camera's location |
Note:
Some features may not available on T3P.
If you have questions please contact Z-EDGE customer support via Email.
COMMON FUNCTIONS
Playback Videos

- Tap anywhere on theScreen to bring up the Shortcuts.
- Tap on the Main Menu '
![]() ' icon and select Playback from the menu.
' icon and select Playback from the menu. - Select either 'Normal Video' or 'Emergency File' to preview relevant video files.
- Tap on a video clip to start previewing it.
| No. | Item | Description |
| O | Back | Return to browse other videos. |
| P | Previous | Playback previous video. |
| Q | Play/Pause | Play or pause the current video. |
| R | Next | Playback next video. |
| S | Delete | Delete current file. |
Deleted files cannot be recovered. Please ensure you backup important files before deleting them.
Preview Snapshots

- Tap anywhere on the Screen to bring up the Shortcuts.
- Tap on the Main Menu '
![]() ' icon and select Photo Capture from the menu.
' icon and select Photo Capture from the menu. - Tap on a snapshot to preview it.
| No. | Item | Description |
| T | Back | Return to browse other snapshots. |
| U | Previous | Tap to view previous saved snapshot. |
| V | Next | Tap to view next saved snapshot. |
| W | Delete | Delete current file. |
Managing Video & Photo Files
Connecting to a computer
- Connect the dash cam to a computer using the included micro USB data cable.
- The dash cam will automatically power on and a USB icon will be displayed on the display screen.
- The contents of the TF/Micro SD card will appear as a regular disk drive on your computer as if it were a USB flash drive. Browse as normal to view, play, copy and delete saved files.
Recorded videos and photo files are classified and grouped into different folders:
- Z-EDGE T3P > Event: Emergency videos protected by Collision detection, Parking mode automatically or manually.
- Z-EDGE T3P > Normal: Normal videos.
- Z-EDGE T3P > Photo: Saved snapshots.
Recorded video and photo files are saved using the following naming rules:
- Date + time + index + F / R / C
Note:
F means front-view file, R means inner-view file, C means rear-view file.
SETTINGS OVERVIEW
| Menu | Feature | Description | Option |
| Menu | Resolution | Set the recording resolution | Front Camera+ Inner Camera+Rear Camera 2K+1080P+1080P 1080P+1080P+1080P Front Camera+ Inner Camera/Rear Camera 4K+1080P 2K+1080P 1080P+1080P Front Camera 5K/4K/2K/1080P |
| Loop Recording | Set the duration of each video file | 1 min / 3 mins / 5 mins | |
| Settings | App Download | Use a QR Code scanner to scan it and download " Z-DashCam " App | QR Code |
| Language | Set language | English / German / Japanese / Chinese | |
| Date / Time | Set date and time | Date and Time | |
| Sound Recording | Enable/disable audio recording. | On / Off | |
| Parking Monitor GPS | To activate Parking Mode and Motion Detection functions, you need to connect the dash cam to your car battery with additional Hardwire Kit (Not included). Enable/disable GPS | Off / Parking Mode / Motion Detection On / Off | |
| WDR | Enable/Disable Wide Dynamic Range | On / Off | |
| Exposure | Set the Exposure of the recordings | 0, 0.3, 0.7, 1, 1.3, 1.7, 2, -0.3, -0.7, -1, -1.3, -1.7, -2 | |
| Frequency | Set Frequency | 50Hz / 60Hz | |
| G-Sensor | Adjust the sensitivity of G-Sensor | Off / High / Medium / Low | |
| Screen Saver | Set Screen Saver. To keep the screen on, select Always On. | Always On / 1 Min / 3 Mins / 5 Mins | |
| Key Tone | Enable/disable button tone | On / Off | |
| Startup Chime | Enable/disable power on sound | On / Off | |
| Watermark | Enable/disable Date/Time, Logo stamp | On / Off | |
| Fatigue Driving Alert | Set the fatigue Alarm notification | 1 hr / 2 hrs / 4 hrs / Off | |
| Light Reminder | Remind you to turn on the car headlight | On / Off | |
| WiFi | Enable/disable WiFi | On / Off | |
| Delete Reminder | Remind you to delete the protected videos to free up more capacity for normal recordings | On / Off | |
| Format SD Card | Format memory card, delete all files | Yes / No | |
| Defaults | Reset the camera to factory defaults | Yes / No | |
| About | Firmware Version, SN, WiFi Name, WiFi Password | - |
FAQs
Why does the dash cam keep asking Format SD card?
- You need to format the SD card directly in the dash cam's setting menu before the first use.
- Please use only well-known brand SD cards. No-name cards are not compatible with our dash cam and can even damage the dash cam!
Why does the screen display Time Stamp after a few minutes while driving?
- It enters screen saver, so as not to disturb driving, actually the cam is still recording (red LED indicator flashes).
Why does the dash cam stop recording after some time?
- Your memory card may be full and need to be formatted before using again.
- 5K/4K/2K videos are big in size and G-Sensor locked videos cannot be erasedautomatically.
- We recommend formatting your memory card every 14 days.
How do I turn off the screen/audio during recording?
- To turn off the screen, tap the screen to bring up the Shortcuts and select the Display Off icon (G).
- To turn off audio recording, tap the screen to bring up the Shortcuts and select the Audio Recording icon (D).
How do I record videos?
- All dash cams are programmed to automatically start recording when there is power connected and a memory card inserted and correctly formatted.
- When the engine is turned off, or power is disconnected, the dash cam will stop recording and turn off.
- Manually start/stop recording by tapping the 'Start/Pause' icon.
Why do you recommend Class 10 MicroSD card or above?
- 5K/4K/2K videos have a larger data flow and hence requires a MicroSD card with faster writing speed.
- If memory cards below Class 10 are used, they may cause the dash cam to freeze or other related video recording/erasing issues.
TECHNICAL SPECIFICATIONS
| Item | Description |
| Resolution | Front Camera+Inner Camera+Rear Camera 2K+1080P+1080P 1080P+1080P+1080P Front Camera+Inner Camera/Rear Camera 4K+1080P / 2K+1080P / 1080P+1080P Front Camera 5K/4K/2K/1080P |
| Storage Support | Supports Micro SDXC, Up to 512GB, Class10 or above |
| Display | 2.85" IPS |
| Lens | 155 degree wide angle |
| Focus Range | 1.5m~Infinity |
| Video | Front camera: 5K/4K/2K/1080P Inner camera: 1080P Rear camera: 1080P |
| MP4 | |
| Image | Resolution: 5M |
| JPEG | |
| G-Sensor | Yes |
| Microphone | Yes |
| Speaker | Yes |
| GPS | Yes |
| WiFi | Yes |
| Interface | Micro USB Port, Mini USB Port |
| Battery | No internal battery, Built-in Super Capacitor |
| Operating Temperature | -10 to 60°C / 14 to 140°F |
| Storage Temperature | -20 to 70°C / -4 to 158°F |
| Dimensions | 4.6 x 1.5 x 1.5 inch 118 x 39 x 37 mm (LxWxH) |
| Weight | 4.76 oz / 135g |
| Car Charger | INPUT: DC 12-24V, OUTPUT: DC 5V 2.4A |
IMPORTANT SAFETY PRECAUTIONS
The content in this document is for information purpose and is subject to change without prior notice. We made every effort to ensure that this User Guide is accurate and complete. However, no liability is assumed for any errors and omissions that may have occurred. The manufacturer reserves the right to change the technical specifications without prior notice.
Notes on Installation
- Install the device near the rear-view mirror to obtain the best open-field view. Do NOT install the Dash Cam in a location that will obstruct your required driving view.
- Make sure that the lens is within the wiping range of the windscreen wiper to ensure a clear view even when it rains.
- Do not touch the lens with your fingers. Finger grease may be left on the lens and will result in unclear videos or snapshots. Clean the lens on a regular basis.
- Do not install the device on a tinted window. Doing so may damage the tint film.
- Make sure that the installation position is not hindered by the tinted window.

- Use the authorized charger only.
- Never disassemble or attempt repair of this product. Doing so may damage the Dash Cam, cause electric shock and void your product warranty.
- Exposing the Dash Cam to open flames can cause an explosion.
- Due to local laws and vehicles safety considerations, do not manually operate the device while driving.
- Z-EDGE is NOT responsible for the loss of any data/content during operation.
- Before mounting, please check with the local DMV for the traffic laws of the location/method to mount appropriately.
- Audio recorded with the video may not be valid jurisdictional evidence, and it may be illegal to present such audio to the jury in some states.

Before you start using the Dash Cam it is assumed that you agree to the above statements.
CUSTOMER SUPPORT
For customer support inquiries please contact:
support.us@z-edge.com(US) support@z-edge.com(UK/EU/Other)
Or visit our website: www.z-edge.com
Youtube @zeroedge

Tiktok @z_edge_official

Facebook @zeroedgeGA

Twitter @zeroedgeGA

Pinterest @zeroedgeGA

Follow us to get the latest updates.
Documents / Resources
References
Download manual
Here you can download full pdf version of manual, it may contain additional safety instructions, warranty information, FCC rules, etc.
Advertisement


Need help?
Do you have a question about the T3P and is the answer not in the manual?
Questions and answers