Logitech BCC950 - Conference Camera Manual
Also See for BCC950:
- Getting started manual (68 pages) ,
- Getting started (29 pages) ,
- Quick reference manual (2 pages)
Advertisement
Table of Contents
Contents
Logitech BCC950 - Conference Camera Manual
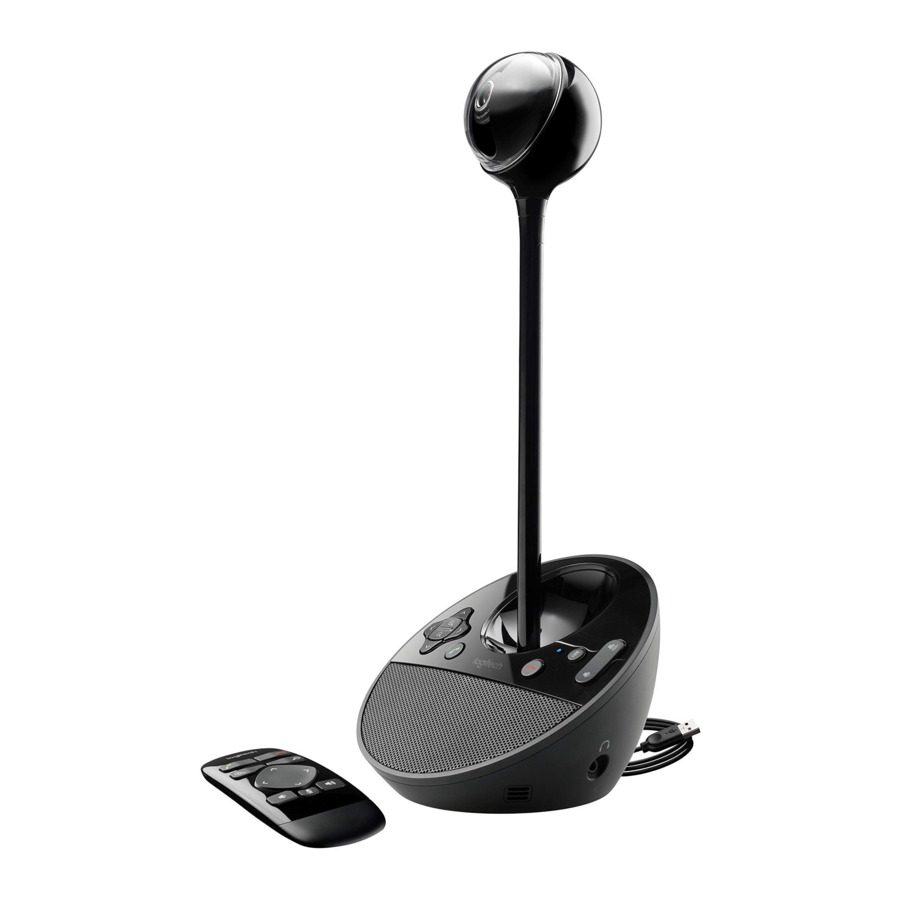
Setting Up the Device

- Turn on the computer and allow it to fully boot up.
- Attach the web camera to the stand and then attach the stand to the speakerphone base.
- Connect the appropriate end of the power adapter to the power port on the back of the speakerphone base. Next, connect the other end to an available electrical outlet.
- Connect the USB cable from the speakerphone base to an available USB port on the computer.
- The included remote control allows you to pan, tilt, and zoom the camera, as well as adjust the volume of the speakerphone. These settings can also be controlled with the buttons found on the speakerphone base itself.
![]()

Skype Setup
PC Instructions
After signing in to Skype, follow these steps to make sure the Logitech BCC950 ConferenceCam is selected:
- Click on "Tools" in the toolbar and then "Options".
- Click on "Audio settings" and make sure that the "Microphone" and "Speakers" dropdown boxes are both set to BCC950 ConferenceCam. The device may also show up listed as Echo Cancelling Speakerphone (BCC950 ConferenceCam).
- Click on "Video settings" and make sure that the "Select webcam:" dropdown box is set to BCC950 ConferenceCam. The device may also show up listed as USB Video Device.
- Click "Save".
Mac Instructions
After signing in to Skype, follow these steps to make sure the Logitech BCC950 ConferenceCam is selected:
- Click on "Skype" in the toolbar and then "Preferences".
- Click on "Audio/Video". Make sure that "Microphone:" and "Speakers:" dropdown boxes are set to BCC950 Conference Cam and that the "Camera:" dropdown box is set to Logitech Camera.
- Click the close button on the window to save the settings.
GoToMeeting Setup
PC Instructions
After signing in to GoToMeeting, follow these steps to make sure the Logitech BCC950 ConferenceCam is selected:
- Click on "File" in the toolbar and then "Preferences".
- Click on "Audio" and make sure that the "Microphone Setup" and "Speakers Setup" dropdown boxes are both set to BCC950 ConferenceCam. The device may also show up listed as Echo Cancelling Speakerphone (BCC950 ConferenceCam).
- Click on "Webcam" and make sure that the "Select a camera:" dropdown box is set to BCC950 ConferenceCam. The device may also show up listed as USB Video Device.
- Click "OK".
Mac Instructions
After signing in to GoToMeeting, follow these steps to make sure the Logitech BCC950 ConferenceCam is selected:
- Click on "Audio" in the toolbar. Make sure that "Audio Input" and "Audio Output" are both set to BCC950 Conference Cam.
- Click on "Webcams" in the toolbar and then "Preferences". Make sure that the "Select a camera:" dropdown box is set to BCC950 ConferenceCam. The device may also show up listed as Logitech Camera.
- Click the close button on the window to save the setting.
Documents / ResourcesDownload manual
Here you can download full pdf version of manual, it may contain additional safety instructions, warranty information, FCC rules, etc.
Advertisement


Need help?
Do you have a question about the BCC950 and is the answer not in the manual?
Questions and answers