Advertisement
- 1 Appearance
- 2 Packing list
- 3 Printer Connection
- 4 The suitable label size
- 5 How to feed label
- 6 Installation for Windows
- 7 Installation for Mac
- 8 Printer preference setting
- 9 Smartphone APP Setup
- 10 Important Tips: Print label of multiple size using 'Take a snap shot'
- 11 Frequently asked question
- 12 Pro tips
- 13 LED indicator
- 14 Specifications
- 15 Safety tips
- 16 Maintenance
- 17 Customer Support
- 18 Documents / Resources
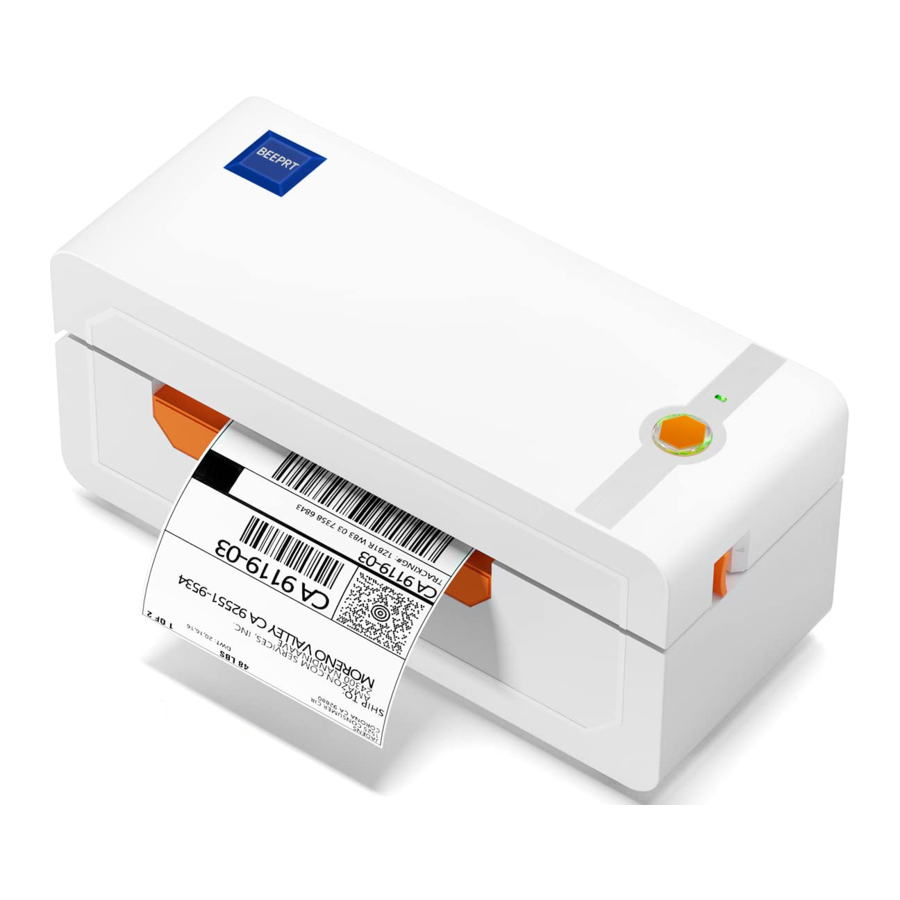
Appearance

Packing list

 If any accessories missing, please contact us to get support.
Printer Connection
Note:
- Ensure the printer is OFF.
- Use original power adapter only in case harm or injure.
- Unplug if no use in a long time.

- Ensure the printer is off

- Attach the power cord to the adapter

- Connect the power

- Plug the power cord into the socket

- Connect the USB cable to the printer

- Connect the printer and computer

- Turn the power on


The suitable label size

- Jadens printer works with any Thermal Direct Label, and compatible with a width range from 1.57 to 4.1 and length over 1.18
- Ideal for 4 *6
How to feed label
- Ensure the printer is off

- Pull the release latch to open the cover

- Load the label and adjust the paper guide to fit the width of paper. The label you peel Off should be facing up (toward the ceiling)

- Carefully close the cover

- Turn the power on

- Label will be automatically positioned at the tear-off point. Beeprt is ready to print.


 Tips: Anytime you change your label, run the automatic label identification. Press and hold the feed button until you hear one beep.

Fan-fold Type Label Loading

Roll Type Label Loading

Installation for Windows
Note: Recommend to close security software before installation in case of preventing installation, and you can open it again after installation.
- Win 7 or later
![]()
Chrome book, Linux, Win ARM - Installation guide video in U-disk for better reference.

- Install the driver

- Connect power and computer(Please skip this step if you have finished it before.)
- Install the driver and printer for Windows
> Copy the driver in the U-disk(Label Printer Driver Setup.exe) to your PC desk, open and install it as below:
(You can also download ' Driver for Windows (BY-426BT)' from https://jadens.com/download-and-video
Driver version may be updated, see latest info at support.jadens.com.

The driver will automatically recognize the printer model "Beeprt BY426BT", then click "Next" and the printer will be successfully set up.

If you get the tips "Printer Disconnected that means your computer and printer didn't connected via USB port, please connect them, then install the driver.


- After setting up the printer, check your computer if the printer has installed or not.
Go to the " setting "> click "Device">click "Printer & scanners", and then you will find the printer "Beeprt BY-426BT 'i if you can find " Beeprt BY-426BT and print labels successfully, that means you have set up the printer successfully. If you can't find the printer you have installed, please restart your computer and printer then try again.


 Note: Now you can print directly via USB, if you want to print via Bluetooth, please follow the steps below.
- Add the Bluetooth of Printer
- (Keep the printer and computer connected with USB cable). Click' Setting' Devices'> 'Bluetooth & Other devices' >' Add Bluetooth or Other device'.


- (Keep the printer and computer connected with USB cable). Click' Setting' Devices'> 'Bluetooth & Other devices' >' Add Bluetooth or Other device'.
- Match the COM port
- Click 'Bluetooth & Other device' > 'More Bluetooth options' >.COM Ports' > Check OUTGOING port Of the Bluetooth 'Beeprt_BY-426BT_ XXXX' (XXXX are suffixes, which will vary depending on the different printer) and mark down the COM number (For example, here is COM3).

- Change printer's port to the COM that matches to the Bluetooth. Click' Printer & Scanners'> Find 'Beeprt BY-426BT' >'Manage'> 'Printer properties'>'Ports' > Check in the Ports match to your Bluetooth Port(For example, here is COM3)>Click 'OK'.

- Now you can unplug the USB cable from computer, and then Open PDF file (recommend to use Adobe)>Choose printer named 'Beeprt BY-426BT'>You may set up printer preference like darkness, speed, size, then click 'Print' (via Bluetooth).
- Click 'Bluetooth & Other device' > 'More Bluetooth options' >.COM Ports' > Check OUTGOING port Of the Bluetooth 'Beeprt_BY-426BT_ XXXX' (XXXX are suffixes, which will vary depending on the different printer) and mark down the COM number (For example, here is COM3).


Note: If you can't print successfully, please restart your computer and printer, install again.
Installation for Mac
- Beeprt is only compatible with MAC OS V 10.9 or later.
- Installation guide video in U-disk for better reference.
- lnstall the driver for Mac
- Connect power and computer
- Copy driver 'Label Printer-MacOS.pkg'to desk and install it.(You can also download 'Driver for Mac (BY-426BT)' from https://jadens.com/download-and-video
Driver version may be updated, see latest info at support.jadens.com.


- Open 'System Preferences',and click on 'Security & Privacy'.(lf you don't see the warning, you can skip this step)

- Click on 'Open AnyWay' button. (If you don't see the warning, you can skip this step)


- Click on 'open' and continue to install the printer. Follow the installation steps until you see ' The installation was successful' window.


- Open 'System Preferences' >click' Printer and Scanners'.


- Click'+' to add a new printer.


- Click 'Thermal Label Printer', and choose 'successfully' in the drop down menu.


- Choose' Label Printer',click 'OK'.


- Click 'Add', now the printer has been installed in your Mac book successfully.


Note:
- Now you can print directly, if you want to adjust the printing density, printing speed or other parameter, please refer to 'Printer preference setting'.
- If you can't print successfully, please restart your computer and install driver again.
Printer preference setting
Printer preference setting for windows
Go to the 'Setting'> click 'Device'>click 'Printer & scanners'>find the printer 'Beeprt BY-426BT' >Click 'Manage'>click 'Printer Preference'.In this part, you can set the print page size and print speed and density of the label.
- Settling the paper quality
- Go to 'Page Setup'. According to the label size, choose the corresponding page size. Generally, most shipping labels are 4" *6" size.


- In the 'Page Quality', you can change the printing speed and printing darkness.
![information]() Especially for density. If the labels print out light or not clear, you can change the density. For Windows system please set the density at 8-12. For Mac system please set the density at 2-5.
Especially for density. If the labels print out light or not clear, you can change the density. For Windows system please set the density at 8-12. For Mac system please set the density at 2-5.


- Print a sample file.
- Open a PDF file in the size of inch with Adobe, click 'print', ensure you choose the right printer(Beeprt BY-426BT). (If you want to print word file, please transfer it to PDF file to get the best quality.)


- You can go to 'properties', in this dashboard, you can set the page size, printing speed and printing density too.
![warning]() Note: Before printing. please make sure the size Of thermal labels you load, and the size settings on devices are same.
Note: Before printing. please make sure the size Of thermal labels you load, and the size settings on devices are same.


- Preview and check the setting you want, such as print size, print density. Then click 'print'. If you don't have PDF Editor, please search' Bartender ' at support.jadens.com to get the corresponding solution, or directly contact us.
Customer support is available for all your questions through email or hotline.
support@jadens.com
phone: 1-833-470-2950
Printer preference setting for MAC
In this step, we will show you how to set the print preference helping you print out well
- Open a sample PDF file in size of 4*6inch, click print.


- Click 'page setup', you can select the page size you want to print.
![warning]() Note: Before printing. please make sure the size of thermal labels you load, and the size settings on devices are same.
Note: Before printing. please make sure the size of thermal labels you load, and the size settings on devices are same.

If there is no suitable size for click 'manage custom sizes',input the width and height, then click 'ok'.


- Click 'printer preference*1>> Choose ' printer feature*>> set up the-Darknsss" and 'Print speed'.
Tips: The darkness, larger number means higher darkness. If labels print out light, you can adjust it to large value, 2 - 4 is recommended.


- After set up, click' Print'


Smartphone APP Setup
Go to support.jadens.com, find and download smartphone App and user manual for Android and IOS by search 'latest app'

Important Tips: Print label of multiple size using 'Take a snap shot'
The function of 'Take a snap shot' can solve most print problem. It enables you to print the area you want. Now let us show you how to use it.
- How to print your labels with nonstandard size.
If the printed PDF/file is unusual size such asA4 which can't be found the same size label to buy. In this situations, you have to use the function Of 'take a snapshot' to print. Here are the steps to operate.- For windows:
- Open the PDF in Adobe Reader
- From the top panel, select 'Edit'>'Take a Snapshot'. choose the area you want to print.


- Click 'Print', set up the page size same as the labels you load. Then print.
![warning]() Note: Please make sure the page size match to the loaded label size. Otherwise, it is possible that it prints out over label or misaligned.
Note: Please make sure the page size match to the loaded label size. Otherwise, it is possible that it prints out over label or misaligned.


- For MAC
- Find the 'File' in the top left corner Of you desktop > Click 'Open'> Click Desktop > Choose PDF file (or you can open the file with Adobe)


- From the top panel, select View > Rotate View> Clockwise so that the labels are side by side. (If the labels has laid vertically. please skip this step)

- Next, from the top panel, select Edit>Take a Snapshot. Then click and drag over one of the labels that you need, so that you can print a specific range of label.


- If you want to print the label that include barcode, please make sure print out the barcode vertically in case the high temperature lead to the barcode print out blocks and can't be scanned.


Frequently asked question
Go to support.jadens.com to see FAQ

Pro tips
- Anytime you change label size, run the automatic label identification by pressing and holding the feed button until you hear one short beep.
- Press the feed button on the printer to skip a blank label.
- To run a self-test, press and hold the feed button until you hear two short beeps.
- Avoid using poor quality labels as they can damage the printer.
- Regularly clean the printer head as described in MAINTENANCE.
- If paper is jammed, turn off the printer, and allow the printer head to cool down. Open the cover and ensure that the rubber is clean. If dirty, use alcohol pad to clean. Allow the area to dry off before turning the printer on.
LED indicator
| Light color | Description | Troubleshoot |
| Green | Normal operation | |
| Flashing Green | Printer Head is overheated | Printer will automatically resume once the printer head has cooled down. |
| Flashing Red (every 2 seconds) |
| Be sure that the labels are loaded correctly. You may need to run automatic label identification. |
| Flashing Red (2 times per second) | Printer cover is not fully closed | Check that the printer cover is completely closed. |
Specifications
| Printing Method | Thermal |
| Resolution | 203DPl |
| Max Printing Speed | 150mm/s |
| Label Width | 1.57"-4.1" (48-108mm) |
| Label Thickness | 0.08-0.2mm |
| Connection | USB + Bluetooth |
| Input Voltage | 100-240V |
| Power Adapter | 24V/2A |
| Supported Paper | Direct Thermal Labels / Paper |
| Supported Operating Systems | Windows MacOS iOS Andriod |
| Printing Life | About 700,000 Labels |
| Label Minimum Length | 1.18" (30mm) |
Safety tips
- The printer head can become very hot after printing labels. Do not touch the printer head until it has cooled.
- Do not bend the power cord excessively or place objects on the cord. This could result in fire.
- Keep the printer out of reach of children.
- Use only approved accessories and do not try to disassemble or repair the unit by yourself.
- Keep the printer away from water and other objects that may destroy or damage the device.
- Printer should remain unplugged when not in use for long periods of time.
Maintenance
CLEANING THE PRINT HEAD
The printer head is a sensitive part of the printer and can be found on the upper part of the printer when open.

While the printer is running, the printer head can be very hot.
- Ensure that the power switch is OFF,remove the power cord, and open the cover. wait several moments to ensure that the printer head cools down.
- Completely clean the printer head using an alcohol swab. Any 70% Isopropyl Alcohol pad would work. Please do not use water.
- Wait 2-3 minutes until the alcohol has completely dried, then close the cover.
- Connect the power cord and print a test page to check if it is clean.
Customer Support
Please kindly contact us if you have any trouble or question when installing and using
 | support@jadens.com |
 | 1-833-470-2950 |
 | support.jadens.com |
How can we help you today?

Scan the below QR code to talk with us


Documents / Resources
References
Download manual
Here you can download full pdf version of manual, it may contain additional safety instructions, warranty information, FCC rules, etc.
Advertisement


Need help?
Do you have a question about the 426BT and is the answer not in the manual?
Questions and answers