RATTAN LF PRO Series, LM PRO Series - Electric Bike Manual
- User manual (44 pages) ,
- User manual (32 pages)
Advertisement
General Information
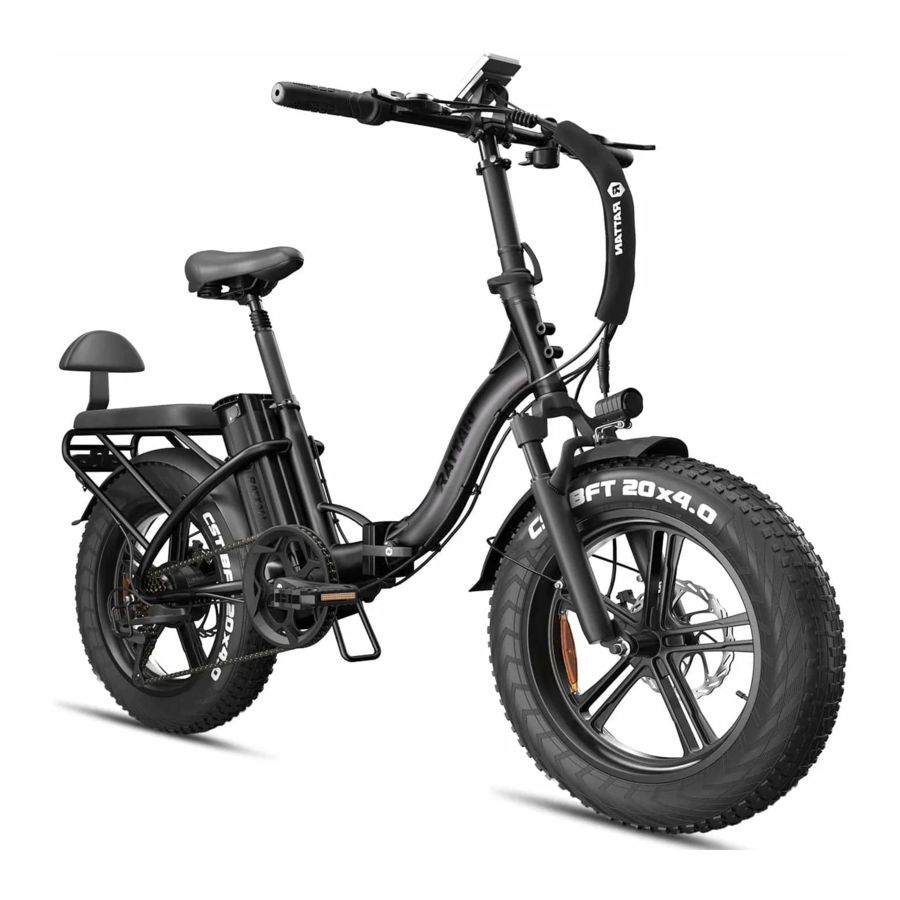
Please note that your LM/LF PRO may include components that look different from those in the illustrations above and elsewhere in this manual. Such changes help ensure uninterrupted shipping. Our engineers rigorously test each component to guarantee quality and compatibility.

| Specification | |
| Model Name | LM/LF PRO |
| Max. Load Capacity | 300lbs |
| Max. Speed | Configurable to 28 MPH |
| Motor | 48V 750W Brushless Hub |
| Battery | 48V 13Ah Li-ion |
| Range Average Per Charge | Average 45miles |
| Wheel Size | 20 x 4" Front /Rear |
| Tire Pressure | 17-18 PSI advisable |
| Weight ( Without battery ) | 25 KG (55.1 lbs) |
Serial Number
There is a serial number attached on the bottom axis connecting the pedals as shown in the below picture. Please take a picture ahead once you received the bike.
You may be asked for a picture of your bike's serial number as a part of warranty requests and may also be asked to provide this number to law enforcement provided that your bike is stolen.

Assembly Instructions
Unpack the Product

Incorrect assembly, maintenance, or use of your ebike can cause component or performance failure, loss of control, serious injury, or death. Even if you're an experienced bike rider, you must read and understand the entire manual and any documentation provided for sub components or accessories before riding. If you are not sure you have the experience, skills, and tools to correctly perform all assembly steps in the manual, consult a local, certified, reputable bike mechanic.
Unfold the Product
- The bikes come being folded as the picture one shown.

- Unfold the bike and press the quick release according to the direction.

- Turn the buckle into the hole of the quick release to lock it.


Install the Handlebar
- Insert the stem of the handlebar into the top tube along the groove.


- Adjust the height of the handlebar then tighten the screw and lock the release.


Fix the Stem

Assemble the Rear Pedals

Install the Rear Seat
- Please unscrew the screw on the picture and connect the cushion with the rear seat.


- Push the cushion according to the direction the picture shown, then tighten the screw.


Connect the Pedals

Unfold the pedals as the picture shown.
Adjust the Seat
- Open the quick release.
- Insert the seatpost, ensuring the minimum insertion point (safety tick marks) goes into the seat tube.

- Search a comfortable height of saddle by sitting on the saddle with your feet on the ground.
- Close the quick-release lever using your palm.

Adjust the Battery

Lock on the battery.

Turn the key to 'ON' position, and you could see the battery power by pressing the button on the battery.
The picture 3 shows the charging port of the battery.
You could adjust the battery track by unscrewing the screws on the bottom to better connect the battery and the bike.

Adjust the Brakes

- Adjust brake disc
- Adjust brake disc
- Adjust the brake
Steps
- Make sure the brake disc is in the middle of two brake pads.
- Adjust the brake tension according to your riding habits.
- Loosen the screw and adjust the brake wire to the suitable brake tightness.
- Loosen the screws to adjust the brake disc (abnormal noise or brake stuck when braking).
- Adjust the brake pad to keep the rotor in the middle position.
- Tighten the screws after each adjustment.
Comfort & Safety
The following steps are critical for your comfort and safety, and must be performed before your first bike ride. We recommend that you consult a bike fitting professional such as a certified, reputable bike mechanic who specializes in bike fit.
Adjust the Seat Height
An ideal seat height for most riders allows them to be comfortable and get the best pedaling efficiency. When the rider is seated, they should be able to place the ball of their feet on the pedal at its lowest position while their legs is almost fully extended, with the knee slightly bent. The seat should never be so high that the rider must rock sides to side or fully straighten their legs while pedaling. And the seat must never be pulled out so far that the minimum insertion point is above the seat tube (see illustration).

Overextending the seatpost can cause it to break or fall off your bike, which will put you at very high risk of serious injury or death. Avoid this danger by inserting your seatpost into the seat tube far enough that the minimum insertion point is no longer visible.
Preparing to Ride
Checklist
- Make sure all components especially fasteners and accessories are tightened. Adjust the height of the handlebar and the seat post. DO NOT raise it above the safety line.
- Make sure the brakes can cut off the power supply to the motor, and whether it is sensitive and reliable.
- Make sure the front and rear axle nuts are tightened.
- Make sure the display, brakes and lights can work properly.
- Make sure the chain is tight.
- Make sure the pedals and all the connection parts are firm and would not be loose, and whether the crank is flexible without jamming.
- Check if the tire pressure exceeds the recommended one marking on the side of tire walls.
- Make sure the throttle works well without jamming, and whether it feels tight or loose when pressing the throttle.
- Make sure the battery has been locked.
- Check if the total weight the bike carried is higher than 300lbs, which is the maximum weight capacity of the bike.
Display

| Battery Level Indicator | Remaining battery power |
| Speed | Real time speed while riding |
| Pedal Assist Level | 0,1,2,3,4,5 Displays the current pedal assisted mode. |
| Trip | Shows the distance of a single trip. Data is automatically cleared when the bike is powered off. |
| Miles | Speedometer units (KPH or MPH) |

| Common Operation | How to Do |
| Turn on/off the bike | Press and hold the "  " for 3 seconds till the display is on / off. " for 3 seconds till the display is on / off. |
| Increase/Decrease the PAS Level | Press "+" or "-" button to increase or decrease the PAS Level. |
| Speed Switch | Long press " " and "+" to switch different speed information. Real Time Speed → Max Speed→Average Speed. |
| ODO/TRIP/VOL/CUR/ERROR/TM Switch | Short press " " to switch ODO / TRIP / VOL / CUR / ERROR / TM ODO (Total Mileage) → TRIP (Single Mileage) → VOL (Current Battery Voltage) → CUR (Current working current)→ERROR (Error Code)→TM (Display Startup Time). |
| Headlight Control | Long press "+" for 3 seconds to turn on/off the headlight. |
Parameter Setting
When the display is powered on, long press " + " and " - " at the same time, then will enter parameter setting mode. In this mode, you can change parameter values according to " + " or " - ". Short press " " will enter the next parameter setting.
Long press " + " and " - " again to exit the settings and save the parameters. If no operation within 8 seconds, it will exit and save the changed parameters automatically.
| Set Mode | Operate | Note |
| P01: Back light lightness | Short press "+" / "-" will switch from 1 to 3. Level 3 islightest, Level 2 is default value and level 1 is darkest. | |
| P02: Switch KPH/MPH | Short press "+" / "-" to switch KPH/MPH. |
|
| P03: Working voltage | Short press "+" / "-" to switch the working voltage. | Available voltage — 24V, 36V, 48V, 60V |
| P04: Auto shutdown time | Short press "+" / "-" to switch from 0 to 60, it is the time to shut down the screen automatically. (Range: 1~60 minutes) | For example, when you set it to 10, it means that the shutdown time is 10 minutes. |
| P05: PAS Mode setting | Short press "+" / "-" to adjust PAS mode. |
|
| P06: Wheel size selection | Short press "+" / "-" to switch wheel size |
|
| P07: Number of magnets for speed sensor | Short press "+" / "-" to switch from 1 to 15. | |
| P08: Speed limit | Short press "+" / "-" to set the speed limit from 10 to 41km/h. | |
| P09~P15: This feature is blank, invalid. | Long press "+" during 5 | |
| P16: Reset ODO distance | Long press "+" during 5 seconds to reset the ODO distance. | |
| P17: Cruise control on/off. | "1" means activated, "0" means deativated. | |
| P18: Speed ratio adjustment | Short press "+" / "-" to set the speed ratio from 50%~150%. The default value is 100%. | |
| P19: Is the 0 PAS displayed | Short press "+" / "-" to set the value. |
|
| P20~P26: This feature is blank, invalid. |
Error Code Definition
When an error appears, M6C will notice users by different codes, please refer to the table for different codes:
| Code (Decimal) | Signification |
| E33 | Current anomaly |
| E34 | Turn handle anomaly |
| E35 | Motor phase deficiency |
| E36 | Motor Hall anomaly |
| E37 | Brake anomaly |
| E30 | Communication anomaly |
The display has generally been set to a normal state, and it is recommended not to modify the data of the display without special requirements.
Specifications
- Power supply: 24V, 36V, 48V
- Rated current: 10mA
- Max current: 30mA
- Leakage current after power off: <1uA
- Current supply to controller: 50mA
- Working temperature: -10~60°C
- Storage temperature: -20~70°C
Troubleshooting
| Problems | Most Common Solutions |
Battery cannot be charged |
|
The brakes make abnormal noise | Adjust the brake pads or brake discs, as we noted in the picture above. |
Motor makes abnormal noise | Lift the rear wheel off the ground and press the throttle to see if the rear works. Then contact us with a video for further solutions. |
The tires got flat or could not be inflated | The tires will not be filled with air. Ride the bike after inflating the tires. (The pumping range is 17-18 psi) |
The product won't work | |
| Possible Causes | Most Common Solutions |
| Insufficient battery power | Charge the battery |
| Battery hasn't been turned on | Turn on the battery by holding the battery button for at least three seconds |
| Battery not fully seated in tray | Install battery correctly |
| Faulty connections | Clean and reconnect connectors |
| Brakes are squeezed | Disengage brakes |
| Battery non-functional | Test the battery voltage with multimeter and contact us |
Maintenance
Basic Product Care
- Fully charge the battery for the first use. (more than 6 hours)
- Do not use the battery in low power level.
- Must use the specified charger for charging.
- Do not charge the battery at high temperature (over 212 Fahrenheit/100°C). Charge at a ventilate place.
- If the battery is not in use for a long time, charge the battery at least once a month to keep the battery active.
- Keep the battery away from water or any other liquid.
- Turn off the battery when not in use.
- Fully charged the battery before use each time. It will extend the battery life. If there are problems with the battery, do not charge it anymore and contact us for further solutions.
Frame Maintenance
- Pay attention to the frame maintains. Wipe the bike and keep it dry.
- Any merchandise with electrical components is not recommended to be exposed to water.
- The warranty of the Rattan does not cover water damage.
- Please try not to store or use the bike in wet condition.
Brake Maintenance
- Check brake pads regularly.
- Check the brake disc regularly to prevent deform. If it is a hydraulic brake, check regularly to see if any oil leakage.
- Clean the brake regularly.
- Using the front brake by itself can cause excessive stress on components, damage to the bike and parts, loss of control, injury, or death. Always apply the rear brake before applying the front brake, using both brakes for all operations.
Motor Maintenance
- Do not try to disassemble the motor.
- If there is any problems with the motor, contact Rattan with a video.
Tire Maintenance
- Check regularly to prevent air leak.
- Check spokes regularly.
Derailleur Maintenance
- Check the rear derailleur regularly to see if it changed to every gear (contact us for the video about how to adjust the shifter).
- Check the rear derailleur guard to see whether it bent to affect the derailleur or not.
Operating Safety
Ride Rattan by taking the sensible measures outlined in this section to maximize your safety. Bicycling is an exciting, delightful, and practical way to get around, but like any sport, it involves risk of injury and death. By choosing to ride a bike, you assume responsibility for those risks.
Be Thoroughly Educated About Your Bike Before Riding It.
Practice riding your bike, braking, shifting gears, and using the throttle and pedal assist systems in a controlled location before venturing into traffic or other risky conditions. The electrical system on your ebike offers various levels of power assistance and lighting for different operating conditions and user preferences. Be sure you understand these features before riding.
Obey All Relevant Local Laws
It is your responsibility to research and understand relevant laws where you ride your bike. Such laws may cover required helmets and safety gears, required lights and reflectors, required hand signals, where you can legally ride a bike ( bikes and ebikes may have different restrictions ), how fast you can go, what (if any) cargo or passengers you can carry, the rider age, and more.
Before using public transportation—buses, trains, etc.—to transport your ebike, check with the relevant transportation authority for any rules governing weight limits, tire widths, lithium-ion batteries, or any other rules that might pertain to ebikes. When you ride on the road, assume you must, at minimum, follow all of the rules that cars must follow. For additional information regarding traffic and vehicle laws, contact the road traffic authority in your area.
Carrying Loads Safely
Your LM/LF PRO is designed to carry one small child on the back.
- Using your LM/LF PRO to transport a passenger who is not the appropriate size or age for your child seat, or who does not have the health, motor control, or impulse control to ride safely as a passenger, can lead to serious injury or death of the rider or passenger. Read and understand the specifications of any child seat you purchase and all safety-, cargo-, and passenger-related information in this manual. It is your responsibility to assess the ability of a potential passenger to ride safely. If you're not certain, consult a physician.
- Leaving a child unattended on a bicycle creates a VERY HIGH RISK of the bike tipping over, causing serious injury or death. Always remove your child from the bike before you look away or walk away from the bike.
- To reduce the risk of injury, always closely supervise children if and when you use your LM/LF PRO near them.
- Serious injury or death can occur if clothing or body parts contact either wheel or other moving parts while the bike is in motion.
Rattan ebike will always be by your side!
Contact us directly by e-mail to info@rattanebike.com or call Rattan ebike phone support: (562) 488-5588

Unboxing Videos

Facebook Group

Facebook Page
Please read the whole manual patiently before you use the new electric bike, for technical assistance or warranty claims contact Rattan Ebike at
Phone: (562) 488-5588 9am-5pm (PST)
E-mail: info@rattanebike.com
Documents / Resources
References
Download manual
Here you can download full pdf version of manual, it may contain additional safety instructions, warranty information, FCC rules, etc.
Download RATTAN LF PRO Series, LM PRO Series - Electric Bike Manual
Advertisement


Need help?
Do you have a question about the LF PRO Series and is the answer not in the manual?
Questions and answers