Table of Contents
Advertisement
Advertisement
Table of Contents

Subscribe to Our Youtube Channel
Related Manuals for RATTAN LF PRO Series


Summary of Contents for RATTAN LF PRO Series
- Page 1 EBIKE USER MANUAL LF& LM PRO Series www.rattanebike.com...
- Page 3 Please feel free to contact us if there are any questions about the bike. Congratulation on your purchase of a new Rattan Ebike! The bike comes 95% assembled and here is the guide helps you get familiar with your new bike in unboxing.
-
Page 5: Table Of Contents
CONTENTS Using this manual ..................01 General information ................... 02 Assembly instructions for LM/LF PRO series ..........04 Adjustment for comfort and safety ............11 Preparing to ride ..................13 Riding guidance ..................14 Display ......................16 Opearting safety ..................25 Troubleshooting ..................32 Matience ......................34... -
Page 6: Using This Manual
Rattan E-bike assumes no liability for any harm, injury, or death of the rider. Because it is impossible to anticipate every situation or condition that will occur while riding, this manual makes no representations... -
Page 7: General Information
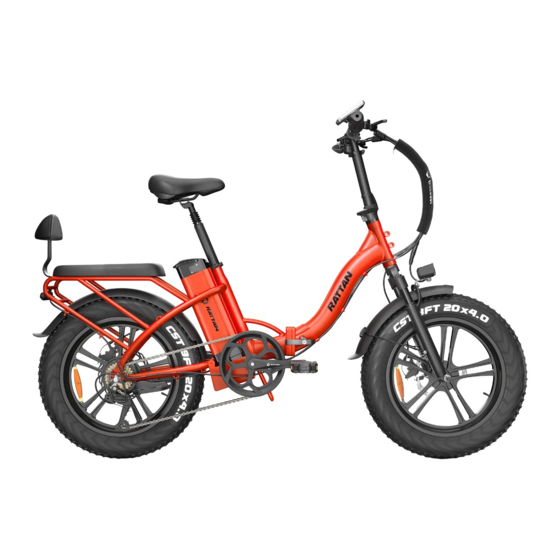
about the safe use of bikes under all conditions. There are risks associated with the use of any bike that cannot be predicted or avoided and are the sole responsibility of the rider. GENERAL INFORMATION Fully assembled LM750 PRO Fully assembled LF750 PRO High-Step Step-Thru Please note that your LM/LF PRO may include components that look... - Page 8 Max.Speed Configurable to 28 MPH Motor 48V 750W Brushless Hub Battery 48V 13Ah Li-ion Range Average Per Charge Average 45miles Wheel Size 20 x 4" Front / Rear Tire Pressure 17-18 PSI advisable Weight ( Without battery ) 25 KG (55.1lbs) SERIAL NUMBER There is a serial number attached on the bottom axis connecting the pedals as shown in the above picture.
-
Page 9: Assembly Instructions For Lm/Lf Pro Series
ASSEMBLY INSTRUCTIONS FOR LM/LF PRO SERIES WARNING Incorrect assembly, maintenance, or use of your ebike can cause component or performance failure, loss of control, serious injury, or death. Even if you’re an experienced bike rider, you must read and understand the entire manual and any documentation provided for sub components or accessories before riding. - Page 10 2. Unfold the Bike ① ② ③ ④ Step1. The bikes come being folded as the picture one shown. Step2. Unfold the bike and press the quick release according to the direction. Step3. Turn the buckle into the hole of the quick release to lock it. 3.
- Page 11 ③ ④ Step1. Insert the stem of the handlebar into the top tube along the groove. Step2. Adjust the height of the handlebar then tighten the screw and lock the release. 4. Fix the Stem ① ② ④ ③ —6 —...
- Page 12 5. Assemble the Rear Pedals 6. Install the Rear Seat ① ② ④ ③ Step1. Please unscrew the screw on the picture and connect the cus- hion with the rear seat. Step2. Push the cushion according to the direction the picture shown, then tighten the screw.
- Page 13 7. Connect the Pedals Unfold the pedals as the picture shown. 8. Adjust the Seat Step1. Open the quick release. Step2. Insert the seatpost, ensuring the minimum insertion point (safety tick marks) goes into the seat tube. Step3. Search a comfortable height of saddle by sitting on the saddle with your feet on the ground.
- Page 14 9. Adjust the Battery Lock on the battery Turn the key to ‘ON’ position, and you could see the battery power by pressing the button on the battery. The picture 3 shows the charging port of the battery. Poor connection Well connection —9 —...
- Page 15 You could adjust the battery track by unscrewing the screws on the bottom to better connect the battery and the bike. 10. Adjust the Brakes ① ② ③ ①Adjust brake disc ②Adjust brake disc ③Adjust the brake Step1. Make sure the brake disc is in the middle of two brake pads. Step2.
-
Page 16: Adjustment For Comfort And Safety
ADJUSTING FOR COMFORT & SAFETY WARNING The following steps are critical for your comfort and safety, and must be performed before your first bike ride. We recommend that you consult a bike fitting professional such as a certified, reputable bike mechanic who specializes in bike fit. 1. - Page 17 2. Adjust the Seat Height An ideal seat height for most riders allows them to be comfortable and get the best pedaling efficiency. When the rider is seated, they should be able to place the ball of their feet on the pedal at its lowest position while their legs is almost fully extended, with the knee slightly bent.
-
Page 18: Preparing To Ride
PREPARING TO RIDE CHECKLIST 01. Make sure all components especially fasteners and accessories are tightened. Adjust the height of the handlebar and the seat post. DO NOT raise it above the safety line. 02. Make sure the brakes can cut off the power supply to the motor, and whether it is sensitive and reliable. -
Page 19: Riding Guidance
RIDING GUIDANCE WARNING Incorrect assembly, maintenance, or use of your ebike can cause component or performance failure, loss of control, serious injury, or death. Even if you’re an experienced bike rider, you must read and understand the entire manual and any documentation provided for sub components or accessories before riding. - Page 20 • Pedal Assist Mode The rider can engage the pedal assist system (PAS) while pedaling, and it will call up assistance from the motor to help propel the bike forward. Pedal assist uses a cadence sensor built into the drive train of the bike.
-
Page 21: Display
DISPLAY • Material Caser and Cover and Press button: ABS, LCD window: PMMA • Dimension Outside and mounting dimensions(mm) Press button outside and mounting dimensions (mm) —16 —... - Page 22 • Installation 1.Install the display in the middle of handlebar, then adjust to suitable angle, install the press button to left side of handlebar. 2. Power off the device, connect the device to controller. 3. Power on. • Overview of GD06 1.
- Page 23 • Presentation of Screen POWER ① SPEED ② km/h ③ 00 10 O D O 0000 ④ 1 km Battery Level Indicator Pas level Speed ODO Mileage 1. Battery level: 5 levels, voltage interval could be customized 2.Speed: Real-time SPEED 3.
- Page 24 • Press Button Definition GD06 uses independent press button, in total three buttons: MODE DOWN • Operation Instructions 1. Power ON/OFF When the power is off, Long press during 3seconds, screen will display all contents and start to normal working mode, and controller will be turned on When the power is on.
- Page 25 3. ODO/TRIP/ Driving Time/Error Code Short press to switch ODO/TRIP/ Driving Time/Error Code Trip (Single trip distance)→ODO(Accumulated distance) →TM (Driving Time)→REE (Error Code). 4. Assist Level Short press to change assist level, default value is level 1. 5. Head Light Control Long press for 3 seconds turn on/off...
- Page 26 P01-back light lightness : short press will switch from 1 to 3, Level 3 is lightest. Level 2 is default value. P02-kmh/MPH : Short press to Switch kmh/MPH. P03-Working voltage : short press to switch 24V,36V,48V. P04-Auto shutdown time: short press to switch from 0 to 60, it is the time (in minutes) to shut down the screen automatically if no operation 0 means never shut down, Default value is 10 minutes.
- Page 27 P08-speed limit : short press to set the speed limit from 10 to 41km/h. This feature is reserved: display P09, invalid. This feature is reserved: display,invalid. P11-assist sensitivity setting : short press to switch from 1 to 24. P12-assist starting power setting: short press to switch from 0 to 3.
- Page 28 P17-The signal direction of the booster sensor: short press to switch from 0 to 1; 0:Booster signal; 1:Power signal negative. 18-Shift gears with gear : short press to switch from 0 to 1; 0:Don't shift gears 1:Shift gears. P19- Throttle the 6KM function : short press to switch from 0 to 1;...
- Page 29 • Error Code Definition When an error appears, GD06 will notice users by different codes, please refer to table 1 for different codes: Code ( Decimal ) Signification Normal Low Battery level Communication failure current sensor fault Throttle failure Failure of motor phase line Motor hall failure Brake abnormity •...
-
Page 30: Opearting Safety
Please confirm all details before purchasing. OPERATING SAFETY WARNING Ride Rattan by taking the sensible measures outlined in this section to maximize your safety. Bicycling is an exciting, delightful, and prac- tical way to get around, but like any sport, it involves risk of injury and death. - Page 31 If the pedal assistance, throttle, or lighting is functioning abnormally, intermittently, or not at all, please discontinue using your ebike immediately and contact Rattan Ebikes Product Support for assistance. Take extreme care getting to know and learn to control the pedal assist and brake systems.
- Page 32 responsibility to know and obey local regulations regarding the rider age and other qualifications. WARNING Riding any bike under the influence of alcohol, drugs, or any sub- stance or condition that could impair your motor function, judg- ment, reaction time, or ability to safely operate a vehicle puts you at VERY HIGH RISK of serious injury or death.
- Page 33 Obey All Relevant Local Laws It is your responsibility to research and understand relevant laws where you ride your bike. Such laws may cover required helmets and safety gears, required lights and reflectors, required hand signals, where you can legally ride a bike ( bikes and ebikes may have different restric- tions ), how fast you can go, what ( if any ) cargo or passengers you can carry, the rider age, and more.
- Page 34 ing riding conditions, such as when roads are wet or slick. Hills that are normally easy to climb or descend without cargo can become challenging or even dangerous once extra weight is loaded onto the bike. Extra weight will increase the time it takes to slow the bike when braking.
- Page 35 touching or dragging on the ground. 7. When carrying heavy loads or passengers, plan your routes to avoid challenging hills and other hazards. 8. It is always the rider’s responsibility to ensure cargo or a passenger loaded on the ebike will not interfere with the rider’s ability to safely operate the ebike.
- Page 36 4.Serious injury or death can occur if clothing or body parts contact either wheel or other moving parts while the bike is in motion. Carrying Pets Rattan Ebike understands that you may want to bring your pet along —31 —...
-
Page 37: Troubleshooting
We cannot recommend any pet carrier or restraint system that we have not tested for compatibility and safety with your ebike from Rattan Ebikes. WARNING Transporting a pet using any bike puts you and your pet at risk of injury or death, especially if the pet distracts you, affects your balance, interferes with moving bike parts, etc. - Page 38 Problems Most Common Solutions Lift the rear wheel off the ground and Motor makes abnormal press the throttle to see if the rear noise works. Then contact us with a video for further solutions. The tires will not be filled with air. Ride The tires got flat or could the bike after inflating the tires.
-
Page 39: Matience
② Any merchandise with electrical components is not recommended to be exposed to water. ③ The warranty of the Rattan does not cover water damage. ④ Please try not to store or use the bike in wet condition. —34 —... - Page 40 Motor Maintenance ① Do not try to disassemble the motor. ② If there is any problems with the motor, contact Rattan with a video. Tire Maintenance ① Check regularly to prevent air leak.
-
Page 41: Disclaimer
Damage caused by failing to adhere to instructions and warnings issued by Rattan Ebike is not covered under warranty. We will replace any parts deemed to have been damaged during shipping. -
Page 42: Warranty
Rattan Ebike is not responsible for repair or replacement of damaged bikes or parts. Rattan Ebike reserves the right to change the warranty at any time and without notice.Under no circumstances is Rattan Ebike responsible for any damage resulting from damaged,defective, or improperly secured parts. - Page 44 amazonsupport@rattanebike.com Contact us for more owner benefit.
Need help?
Do you have a question about the LF PRO Series and is the answer not in the manual?
Questions and answers