Advertisement
- 1 Package Included
- 2 Specification
- 3 Product Features
- 4 Button Function
- 5 Screen Overview
- 6 Install Memory Card
- 7 Installation Guide
- 8 Initial Settings
- 9 View the Recorded Videos
- 10 Menu Settings
- 11 WIFI Instructions
-
12
Problem and Answers
- 12.1 Can't get to the menu?
- 12.2 The dash cam will stop automatically when recording
- 12.3 Suction mount cannot attach on windshield well?
- 12.4 The camera keeps turning on and off repeatedly
- 12.5 How does the recorder work after it crashes?
- 12.6 Why dash cam drain car battery?
- 12.7 How to connect the suction cup?
- 13 Important Notice
- 14 Documents / Resources
Package Included

- Front Dash Camera
- User Manual
- 360º Suction Mount
- Car Charger
- 32GB TF Card
- USB Type-C Cable
- Wire Trim Tool
- Cable Clip
- Rear Camera
- Adhesive Mounting Pad
- Windshield Sticker
Specification

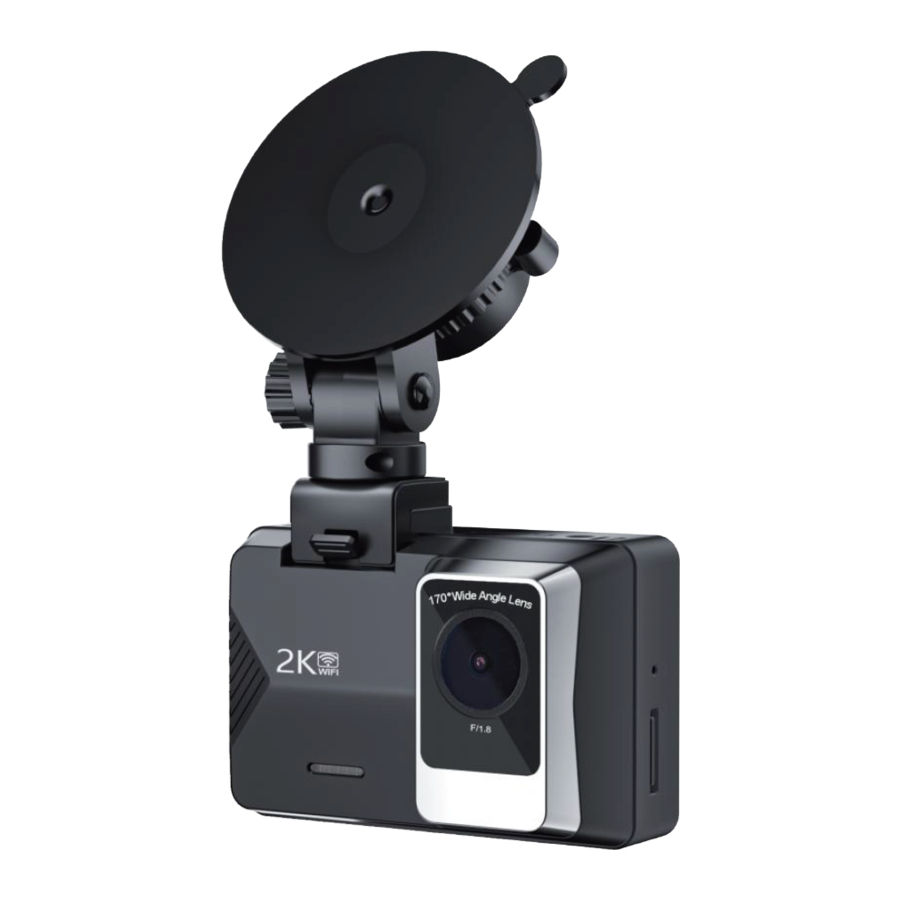
Product Features

| No. | Name | Description |
| 1 | Front Camera Lens | Front facing camera for video recording road events |
| 2 | LCD Screen | 2" TFT Color LCD Display |
| 3 | Speaker | Delivers sound during video playback |
| 4 | OK Button | Long press the OK button to turn on the camera, Confirms the action; Stop/Start the video recording |
| 5 | Up Button | Move selector up |
| 6 | Menu Button | Enter/Exit setup menu |
| 7 | Down Button | Move selector down |
| 8 | Micro SD Card Slot | Provides expandable storage, up to 128GB |
| 9 | Reset Button | Press to force reset the devic |
| 10 | Mount Connector | Connects to the suction cup mount |
| 11 | AV | Connect the rear camera |
| 12 | USB Port | USB port for charging or transferring |
Button Function
 Up |
|
 Down |
|
| OK |
|
| MENU/ MODE |
|
Screen Overview

- Video Mode
- Recording Time
- Resolution
- WiFi
- Record Audio
- Loop Recording
- Battery
- Exposure
- WDR
- Parking Monitor
- G-Sensor
- Time Stamp
- Micro SD Card
Install Memory Card

Install the Memory Card
Please insert the SD card in the correct direction. Please insert the SD card when dash cam is off. Carefully insert the memory card into the camera's card slot until it clicks. (32GB SD card is already inserted in the SD card slot)
To remove the memory card
To remove the card, power off the camera first, then push the card into the slot until it clicks again.
Note:
- Please do not remove the card while the camera is recording to prevent data loss/corruption.
- Please use a Class 10 or higher rated micro SD card with a maximum capacity of 128GB.
- Ideally, the Micro SD card should be formatted once a month to maximize the lifetime of the memory card.
- Please format the Micro SD card before the initial use.
Installation Guide
Installing the front dash camera onto your windshield
- Attach the Suction Mount to the camera's mount connector, pushing it in until it clicks.
Note: Please press this lock button down to lock the suction mount and dash cam, press up to unlock it.


- Thoroughly clean the windshield using water or alcohol, and wipe clean with a dry cloth.
- Wipe the suction mounting pad clean on the suction mount.
- Securely attach the suction mount to the windshield. Recommended mount the front camera near the rear view mirror, adjust the lens angle for best coverage.
- With the Type C USB Cable, connect the supplied car charger to the camera mount base.
- Carefully route the power cable around the windscreen and tuck it under the trim.
- Insert the car charger into your vehicle's cigarette lighter port. The indicator will light up meaning power is on.
- After installation, please start the engine, and test it to make sure all function works well.


Warm Tips:
- Do not install the dashcam in a location that will obstruct your required driving view.
- Make sure that the lens is within the wiping range of the windscreen wiper to ensure a clear view even when it rains.
- Do not touch the lens with your fingers. Finger grease may be left on the lens and will result in unclear videos or snapshots. Clean the lens on a regular basis.
- Do not install the device on a tinted window. Doing so may damage the tint film.
- Use only the supplied car charger to power up the device.
- Connect the car charger's one end to the dash camera's USB port.
- Connect the vehicle's cigarette lighter socket to the other end of the car charger. The dash camera automatically powers on and begins recording when the vehicle's engine is started.
Installing the rear camera
Position 1: For easy installation, install the rear camera on the rear windshield.

Position 2: Rear camera should be installed near the license plate. Position 2 is very advised. Both the rear viewing and reverse guidance images are sharp and clear. To use the reversing function-please install the rear camera in this position.


- Automatically
When connected to the car charger, the camera will auto power ON after you start your car and the battery charging will commence. The camera will power OFF 5 seconds after you turn off the car engine.


Basic Operation
There are two ways to power ON/OFF the camera:
- Manually
Single press the OK Button to power ON the camera unit, long press the button to power it OFF.
Reset the Device
If the dash cam does not function normally, try restarting the dash cam. Please insert a flattened paper clip into the "R" hole on the side of the dash cam for 5 seconds, then release it. The dash cam will restart.
Initial Settings
Before using the dash cam we recommend Formatting the Inserted Micro SD Card, setting the correct Language, Time and Date. After setting the initial settings, press M to return to standby mode. Press the OK button to start camera operation.
Set the Language
- Press the OK key to stop the recording and press the M key to enter the system menu.
- Press the Up/Down button to select the language option and press OK to enter the language setting.
- Press the Up/Down button to select your language, press OK button to confirm and return to the system menu.
Set the Date and Time
Setting the Time and Date allows you to stamp your footage with the time as a reference.
- Press the OK button to stop the recording and press the M key to enter the system menu.
- Press the Up/Down to select the date and time option, and press OK to enter the setting.
- .Press to the Up/Down to adjust the number, press OK to confirm and go to the next item.
- Press M to return to the system menu.
Format the Memory Card
Formatting the Micro SD card will delete all information on the inserted Micro SD Card and prepare the card for use with the dash cam.
- Press the OK button to stop the recording and press the M key to enter the system menu.
- .Press the Up/Down button to select format option, press OK to enter the setting.
- Press the Up/Down button to select "OK", press OK to confirm the formatting and return to the system menu.
Note:
- Menus cannot be accessed while the camera is recording. Please stop the recording before attempting to access the menu.(The blinking red dot on the screen means the camera is recording video).
- Formatting your Micro SD Card will delete all files from the card. Once these files have been deleted you will not be able to recover them.
- After setting the initial settings, press M to return to standby mode. Press the OK button and the camera starts working.
View the Recorded Videos
Playing Back Video on dash cam
- Press the 0K button to stop recording (no red dot flashing on the screen)
- Press and hold the M button for 3 seconds to enter photo mode and video playback mode.
- Select a video by pressing the Up and Down keys. Press 0K to play the video.
- Press and hold the M button for 3 seconds again to exit and go back to video recording.
Playing Back Video on a PC
- Connect the dash cam to the computer using the USB cable(included).
- Select "MSDC" on the dash cam.
- Open the folder in the storage disk on your computer to view your recorded video.
Note:
To playback video files on your PC it is recommended to connect the Micro SD card directly to your PC using either a USB Micro SD card reader (not included) or if your PC has a SD card slot, a Micro SD/SD Card converter(not included). Once the Micro SD card is connected it should appear as a removable storage device. It is recommended that you transfer video files that you want to playback to a file on your computer before attempting to playback. This will reduce any delay in playback.
Menu Settings
- The dash cam operates in 3 modes: Video Recording Mode, Photo Mode and Playback Mode. These modes also have menu to help you configure recording
- Long press M button to switch between different modes and access the mode you want. Watch the icon on top left corner of the screen for each mode.
- In these 3 modes, you can enter the setting mode by pressing the M button.
- Press the Up or Down button to select the setting option, press the 0K button to confirm, press the M button to return the menu.
- After powering ON the camera, press the MENU button to enter the setup process.(lf the camera is recording video, press the 0K button to stop recording before pressing the MENU button.)
Video Recording Mode
The camera will automatically enter Video Recording Mode and start recording when connected to a car charger and power on. A Red dot flashing on the top left corner indicates recording is in progress. Press the 0K to stop recording or start recording again.
Locked Recording
Lock Recording saves the current video file and prevents it from being overwritten. When the car encounters a collision, the G-sensor detects the vibration and the camera automatically locks the video.
Resolution: Adjust front lens recording video resolution.
Dual camera: Front 1440P + Rear 720P.
Loop Recording: Off/ 1/3/5 Minutes. This function allows you to set the recording video file length to 1/3/5 minutes to automatically overwrite the earliest file when the SD card's storage fills up. We recommend you turn on the loop recording function to prevent the memory card space runs full and stop recording. (3 minute setting by default).
WDR: Wide Dynamic Range: turn on to optimize video quality with wider light range and image details. Default is OFF.
Exposure: Exposure is used to manually control the light sensitivity settings. The default is 0.
G sensor: G-sensor will detect significant or sudden shock and movement then the camera will automatically lock current recording file. The detection sensitivity can be adjusted to OFF / Low / Middle / High. If set to "High", the camera will automatically lock the video even if the car goes over a speed bump. This will cause a lot of useless video to be locked. Recommended setting is "Middle".
Record Audio: Turn sound recording on or off.
Date Stamp: Enable/Disable the date and time marks in video files.
Parking Monitor: (Optional) With optional hard wire kit connected, the Parking Monitor is enabled, the camera will stay standby after the engine is turned off. When camera detects shaking, it will automatically turn on and take a short video, then return to standby automatically. (Must use the hard wire kit when using the Parking Monitor function.)
Date/Time: Set the time and date. Press the up and down keys to adjust the numbers, then press the [0K] button to confirm/change, and press the [M] button again to exit the time setting.
Screen Save: Timing can automatically turn off the display screen, so that the product can work under extremely low power consumption. Choose "I" Minutes means that it will enter the power saving mode after 1 minute of power on, and turn off the display. Option: Off/ 1 minute/2 minutes/ 3 minutes
Beep Sound: Used to turn off or on the beep sound when a key is pressed.
Language: Set the language for the dash cam. (English / Chinese/ French / pyccкий язык)
Frequency: 50Hz/60Hz, If the camera interferes with the radio, try changing the frequency.
Photo Mode
Short press the down button to take photo in video recording or locked recording. Press the 0K Button to stop the dash cam from recording.(no red dot flashing on the screen)then long press the mode [M] button to enter the photo mode. In the photo mode, use the Up and Down button to scroll through the record photos, short press the M key to enter the menu to deleted or protect files. This mode is for manual operation only.
Playback Mode
This mode allows you to playback recorded video or view photos, and manage the recorded files.
- Stop the video recording, long press the M button to enter Playback Mode, you can view all the files in this mode.
- Use the Up and Down button to scroll through the recorded files / photos, and press 0K to play or pause playing the selected file.
- Press the M key to enter the file menu. You can delete or protect video files.
Delete: Delete the recorded files.
Protect: Use this option to Lock and Unlock files, locked files will not be overwritten by loop recording. - Long press M button to quit playback and return to standby mode.
Note: The name of the file is in the upper right corner of the screen.
- The video ending with F is the video recorded by the front camera.
- The video ending with R is the video recorded by the inside camera.
WIFI Instructions
- The WiFi App name is (Viidure), you can search for Viidure in the mobile browser and mobile application market, click to download and install.
- Scan the QR code to download Viidure.

IOS & Android


- First, select WiFi on the second item in the menu (Picture l)or press and hold the Up button for few seconds on the camera until the WiFi icon appears on the screen. WiFi is default off.


- When you open WiFi, the WiFi account and password will appear. At this time, we open our mobile phone settings and click WiFi to query the corresponding Dash cam account and password.


- Note that the WiFi account will change for each machine (A1225 ) and the password will remain the same(12345678).
- Successfully connected to WIFI. Long press Up button more than 3 seconds tp exit the WIFI.


- After the connection is successful, click to enter the Viidure APP to control the Dash cam on the mobile phone.

![]()
Take the picture ![]()
Switch the camera ![]()
Microphone switch ![]()
Landscape & Portrait switch ![]()
Turn on/ Turn off the recording ![]()
Record video and photo files ![]()
Setting


Download: Click ' to download the video or photo to the phone.
Problem and Answers
Can't get to the menu?
When the camera is recording video, the menu button does not work. A flashing red dot on the screen means the camera is recording video. Please press 0K to pause recording, then press M to enter the menu.
The dash cam will stop automatically when recording
Solution:
- Check whether the memory is full.
- Check whether the loop recording function of the dash cam is working.
- Check whether the Micro SD card is high speed above
- Playback the recorded video on dash cam to check whether there might be to many locked videos, which cause the SD card space run out and stop looping recording. If yes, please format the SD card.
If the video played on the computer is somehow jammed or not fluent. There might be the problem with the memory card speed.
Solution:
- Format your Micro SD card in the camera.
- Change a U3 or above high-speed Card.
There are stripes interference in the video. Or radio is disturbed.
Solution: There should be wrong light frequency. According to the local main frequency, make the appropriate settings 50HZ or 60HZ.
Suction mount cannot attach on windshield well?
Solution:
- Please clean the windscreen where attaching with a glass cleaning wipe. Removed the protective film, If it does not work, warming your windscreen then try it again.
- Please soak suction mount to warm water for a moment.
- If it is still not working, we are glad to send a new suction mount to you, please contact us to get a replacement.
The camera keeps turning on and off repeatedly
Solution:
- Please check if the charging cable is well connected.
- Please insert a paper clip into the "R" hole on the side of the camera for 3 seconds, then release. The camera will restart automatically.
- Please format the memory card in the menu.
- Please check if the camera is back to normal.
How does the recorder work after it crashes?
Solution:
If the machine crashes for some reason during use, please insert a paper clip into the "R" hole on the side of the camera for 3 seconds, then release. The camera will restart automatically.
Even though set the screen saver, but the screen will randomly.
Solution: The power supply might not be stable, please change another car charger to try.
Why dash cam drain car battery?
Solution: Please check whether the cigarette lighter still be on after you turn off car engine.
How to connect the suction cup?
Solution:

- Take off the protective film.
- Insert the suction cup and push it to the right direction and lock into place.
- Clean the place of monting on windshield.
- Turn the steering wheel so that it sticks firmly to the windshield.
Important Notice
- This dash cam is intended for use in motor vehicle only. Do NOT install the camera where it might block the driver's view of road or the deployment of the airbag.
- Before using this device, please check the memory card first, and format the SD card, set the time and date in the menu.
- This camera records video at high resolution, Be sure to use a U3 or above high-speed Micro SD card. Maximum support 128G cards.
- To access the menu settings, please press the OK button to stop the video recording first.
- Do not leave the camera in direct sunlight for a long period of time or where the temperature could go above 140ºF(60ºC)
- Do not disassemble, repair, or modify the product yourself.
- For internal inspection and repair, contact the service center.
Documents / Resources
References
Download manual
Here you can download full pdf version of manual, it may contain additional safety instructions, warranty information, FCC rules, etc.
Advertisement


Need help?
Do you have a question about the A12 and is the answer not in the manual?
Questions and answers