Advertisement
Package Included

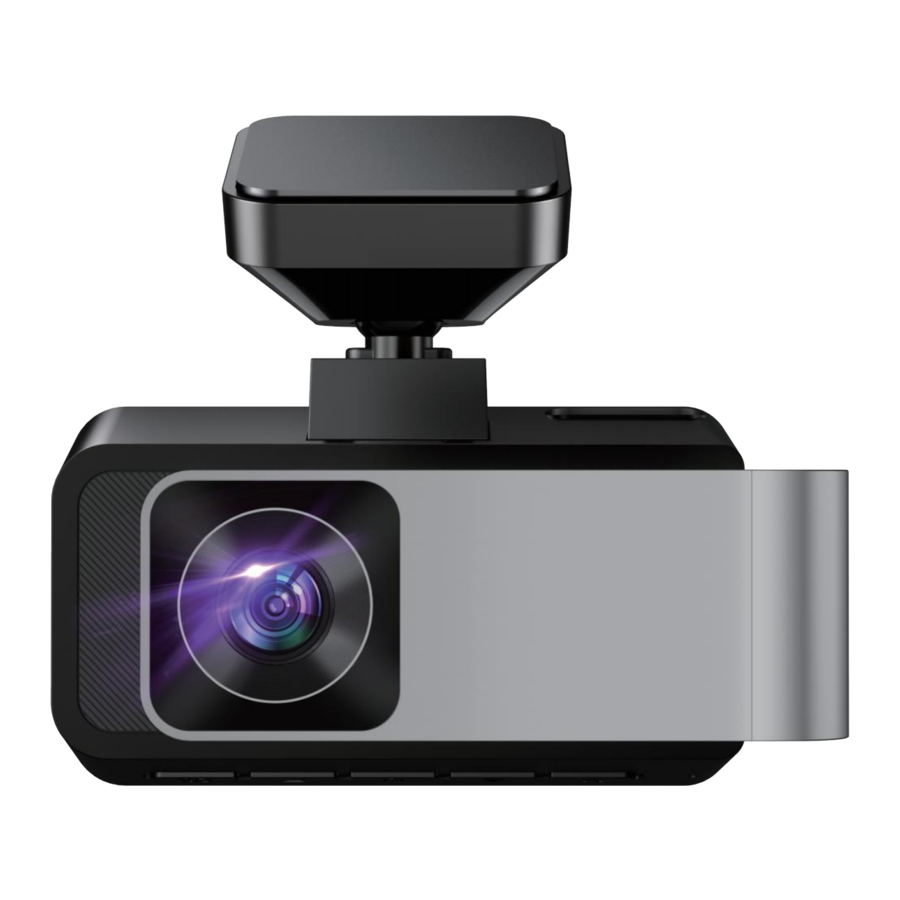
- Front Dash Camera
- User Manual
- Bracket
- Car Charger
- 32GB TF Card
- Rear Camare
- Adhesive Mounting Pad
- Windshield Sticker
- Wire Trim Tool
- Cable Clip
Specification
| Model | D370S |
| Screen Display | 3.0 inch LCD Screen |
| Lens | 170° Wide Angle Lens |
| Video Resolution | 1080P/1440P/2160P |
| Video Format | MP4 |
| Video Mode | Normal / Loop Recording |
| Picture Format | JPG |
| Loop Recording | 1 Min/3 Min/5 Min |
| Power ON Recording | Supported |
| G-Sensor Lock | Supported |
| Language | English/Franqais/Espaäol/Deutsch/ Italiano/简体中文/日本語 |
| Audio Recording | ON/OFF |
| Storage | Micro SD Card (Up to 256GB) |
| Power Supply | 12V to 5V Auxiliary Power Adapter |
| Frequency | 50HZ/60HZ |
| Input | 5V/3A |
| Storage Temperature | -30°C~80°C (-22°F~176vF) |
| Operating Temperature | -20°C~65°C (-4°F~149°F) |
Product Features

| No. | Name | Description |
| 1 | Front Camera Lens | Front facing camera for video recording road events |
| 2 | LCD Screen | 3.0" IPS LCD Display |
| 3 | Power Button | Long press this button to turn on/off the camera |
| 4 | OK Button | Confirms the action |
| 5 | Up Button | Move selector up |
| 6 | Menu Button | Enter/Exit setup menu |
| 7 | Down Button | Move selector down |
| 8 | Micro SD Card Slot | Provides expandable storage, up to 256GB |
| 9 | Reset Button | Press to force reset the device |
| 10 | Bracket | Built-in GPS |
| 11 | AV | Connect the rear camera |
| 12 | Type-C Port | USB port for charging |
Button Function
 Up |
|
 Down |
|
| OK |
|
| M | In video / playback mode, short press to enter setup menu for that particular mode, short press again to access system setup Menu. |
 | Long press this button to turn on/off the camera. |
Screen Overview

Install Memory Card
Install the memory card
Please insert the SD card in the correct direction. Please insert the SD card when dash cam is off. Carefully insert the memory card into the camera's card slot until it clicks. (32GB SD card is already inserted in the SD card slot)

To remove the memory card
To remove the card, power off the camera first, then push the card into the slot until it clicks again.
Note:
- Please do not remove the card while the camera is recording to prevent data loss/corruption.
- Please use a Class 10 or higher rated micro SD card with a maximum capacity of 256GB.
- Ideally, the Micro SD card should be formatted once a month to maximize the lifetime of the memory card.
- Please format the Micro SD card before the initial use.
Installation Guide
Installing the front dash camera onto your windshield
- Attach the bracket to the camera's mount connector, pushing it in until it clicks.

- Please insert a micro SD card into the dash cam before the device is turned on for the first time.
- Attach the dash cam to the front windshield of your vehicle as shown in the figure below. Adjust its position as needed to ensure that the camera lens is not covered by the rear view mirror. Use the provided fastener to secure the dash cam to the mirror.
- Using the pry tool to pry up the edges of the decorative paneling in the vehicle so the wiring can be run underneath, run the power cable along the front windshield, down the structural pillar, and across the passenger dash panel to the cigarette lighter. Make sure that it does not interfere with your vision and will not impede your ability to drive in any way.
- Plug the auxiliary power cable into the car's auxiliary power outlet, and plug the other end of the cable into the power input port on the dash cam as shown in the figure below.
![]()
Note: It is important to ensure that the cable installation does not interfere with the vehicle's airbags or other safety functions. If you are not sure if you can do this without risk to the safety features of the vehicle, please contact a local professional for installation assistance.


Warm Tips:
- Do not install the dash cam in a location that will obstruct your required driving view.
- Make sure that the lens is within the wiping range of the windscreen wiper to ensure a clear view even when it rains.
- Do not touch the lens with your fingers. Finger grease may be left on the lens and will result in unclear videos or snapshots. Clean the lens on a regular basis.
- Do not install the device on a tinted window. Doing so may damage the tint film.
- Use only the supplied car charger to power up the device.
- Connect the car charger's one end to the dash camera's type-C port.
- Connect the vehicle's cigarette lighter socket to the other end of the car charger. The dash camera automatically powers on and begins recording when the vehicle's engine is started.
Installing the rear camera
Position 1: For easy installation, install the rear camera on the rear windshield.

Position 2: Rear camera should be installed near the license plate. Position 2 is very advised. Both the rear viewing and reverse guidance images are sharp and clear. To use the reversing function please install the rear camera in this position.


Basic Operation
There are two ways to power ON/OFF the camera:
- Manually
Long press the![]() button to power ON the camera unit, long press the
button to power ON the camera unit, long press the ![]() to power it OFF.
to power it OFF.
![]()
- Automatically
When connected to the car charger, the camera will auto-power ON after you start your car and the battery charging will commence. The camera will power OFF 5 seconds after you turn off the car engine.
 button to power ON the camera unit, long press the
Reset the Device
If the dash cam does not function normally, try restarting the dash cam. Please insert a flattened paper clip into the "R" hole on the side of the dash cam for 5 seconds, then release it. The dash cam will restart.
Initial Settings
Before using the dash cam we recommend Formatting the Inserted Micro SD Card, setting the correct Language, Time and Date in the menu. After setting the initial settings, press M to return to recording mode.
Set the Language
- Press the M key to enter the system menu.
- Press the Up/Down button to select the language option and press 0K to enter the language setting.
- Press the Up/Down button to select your language, press OK button to confirm and return to the system menu.
Set the Date and Time
Setting the Time and Date allows you to stamp your footage with the time as a reference.
- Press the M key to enter the system menu.
- Press the Up/Down to select the date and time option, and press OK to enter the setting.
- Press to the Up/Down to change the time, press OK to confirm and go to the next item.
- Press M to return to the system menu.
Format the Memory Card
Formatting the Micro SD card will delete all information on the inserted Micro SD Card and prepare the card for use with the dash cam.
- Press the M key to enter the system menu.
- Press the Up/Down button to select storage, press OK to enter the setting.
- Press OK to confirm the formatting and return to the system menu.
Note:
- Formatting your Micro SD Card will delete all files from the card. Once these files have been deleted you will not be able to recover them.
- After setting the initial settings, press M to return to recording mode.
View the Recorded Videos
Playing Back Video on dash cam
Press the UP button to enter the playback interface.
- There are 2 folders: Normal Video Folder and Locked Video Folder. Select a folder by press up and down button.
- And there are 2 video lists in each folder: Front Video List and Rear Video List. Select a folder by press up and down button.
- After entering the video list, you can see the following video list.
- Press OK to play the video, then press M button to exit and go back to video recording.
Note: Front video name ends with F, Rear cam video name ends with R.
Note: If the video recorded by time-lapse mode is locked, it is still stored in the parking video folder, but it is locked.
Playing Back Video on a PC
To playback video files on your PC it is recommended to connect the Micro SD card directly to your PC using either a USB Micro SD card reader (not included). Once the Micro SD card is connected should appear as a removable storage device. It is recommended that you transfer video files that you want to playback to a file on your computer before attempting to playback. This will reduce any delay in playback.
Menu Settings
Video Recording Mode
The camera will automatically enter Video Recording Mode and start recording when connected to a car charger and power on. A Red dot flashing on the top left corner indicates recording is in progress.
Locked Recording
Lock Recording saves the current video file and prevents it from being overwritten. When the car encounters a collision, the G-sensor detects the vibration and the camera automatically locks the video.
Resolution: 1080P/1440P/2160P
Loop Recording: 1/3/5 Minutes. This function allows you to set the recording video file length to 1/3/5 minutes to automatically overwrite the earliest file when the SD card's storage fills up. We recommend you turn on the loop recording function to prevent the memory card space runs full and stop recording. (3 minute setting by default).
Exposure: Exposure is used to manually control the light sensitivity settings. The default is 0.
G sensor: G-sensor will detect significant or sudden shock and movement then the camera will automatically lock current recording file. The detection sensitivity can be adjusted to OFF/ Low/Middle/High. If set to "High", the camera will automatically lock the video even if the car goes over a speed bump. This will cause a lot of useless video to be locked. Recommended setting is "Middle".
Sound Record: Turn sound recording on or off.
Volume: Set the Volume as demand, Off/Low/Medium/High.
Display Mode: Driving Mode/Always on/Auto LCD Off.
Driving Mode: When choose this setting, the dash camera will enter the screen saver mode after 30s, and time and date & speed will be displayed on the black screen.
Date/Time: Set the time and date. Press the UP and DOWN keys to adjust the numbers, then press the [OK] button to confirm/change, and press the [M] button again to exit the time setting.
Screen Save: GPS Information To track the Location, Speed, GPS state, Signal Strength, please check it in this setting.
Speed Unit: Set the speed unit you want, km/h / mph.
Language: Set the language for the dash cam. (English/Franqais/Español/Deutsch/Italiano/简体中文/日本語)
Frequency: 50Hz/60Hz, If the camera interferes with the radio, try changing the frequency.
Rear Mirror
If you find that the rear camera screen is reversed from left to right after installing the rear camera, please turn on/off "Rear Mirror" to adjust the view.
Rear Flip(180°)
If you find that the rear camera image is upside down after installing the rear camera, please turn on/off "Rear Flip(1 80)" to adjust the view.
Reset
This option is used to restore the factory settings.
About
Include Product Model and System Version. Please continue to pay attention to the latest version.
Parking Monitor Noted
Available after install the hardware kit, please contact us to purchase There are two parking Monitoring mode.
Mode 1: Collision boot recording.
There are two ways to open this mode. (Note: Do not turn on "Time Lapse")
- Way-1: Turn on "Parking Mode" and set "G-Sensor" among Low, Medium or High.
- Way-2: Turn on "Parking Mode"and set the"Monitoring Sensitivity" among Low, Medium or High.
After the car engine is off, the camera will turn off automatically, and prompt "Enter parking monitoring mode!" on the screen. The camera will turn on and start recording automatically when there's collision or vibration detected and the video file will be locked.
Mode 2: Time lapse recording.
Turn on "Time Lapse", set 0.5Sec/1 Sec/5Sec and set Time-Lapse Recording Time(12H/24H/72H)After the car engine is off, the camera will turn off automatically, and prompt "Enter time lapse mode!" on the screen. If you turn the G-Sensor among Low, Medium and High, the parking video will be locked when there's collision or vibration detected.

Note: The Parking Monitor function is optional, and Parking Mode will shows in the setting menu after connect the hard wire kit.
WIFI Instructions
- The WiFi App name is (Viidure), you can search for Viidure in the mobile browser and mobile application market, click to download and install.
- Scan the QR code to download Viidure.


- Turn on the WiFi setting in the menu, the WiFi name and WiFi Password will appear on the screen. Wifi is default off.
![]()
- At this time, we open our mobile phone settings and click WiFi to query the corresponding dash cam account and password.
![]()
- Note that the WiFi account will change for each machine (SUVCOND370S_****) and the password will remain the same (12345678).
- Successfully connected to WIFI.
Noted: Once your camera is connected to WiFi successfully and when you open the "Viidure" app. You should see the live video feed from the camera on the "Viidure" app. Then keep exploring the app from here on.
![]()
![]()
![]() Capture the photo
Capture the photo
![]() Switch the camera
Switch the camera
![]() Microphone switch
Microphone switch
![]() Landscape & Portrait switch
Landscape & Portrait switch
![]() Turn on/ Turn off the recording
Turn on/ Turn off the recording
![]() Record video and photo files
Record video and photo files
![]() Setting
Setting


 Capture the photo
 Switch the camera
 Microphone switch
 Landscape & Portrait switch
 Turn on/ Turn off the recording
 Record video and photo files
 Setting
Download: Click ' ' to download the video or photo to the phone.
GPS Setting
The product you have purchased is compatible with GPS track function, you can trace the exact GPS location in your video.
- Please connect the GPS bracket to the corresponding fuselage interface and then connect the power supply to see the GPS logo appear.
- Ordinary video players cannot display GPS logs. To look the GPS log, you will need to play the video file with customized CAR DVR player, enter the following website to get it.
For Windows
https://drive.google.com/file/d/1EDj38cwaQzjxEZgOsklgKgUu67oloKN8/
For Mac
https://drive.google.com/file/d/1MrzhDmCOW2dPEQ-aa1n_Hzv10Ki1bQ6g/
ProbIem and Answers
- What's the WIFI range?
The WiFi signal range is about 10ft when there are no obstructions in the middle. Please NOTE that just like your home WiFi network, you can't have WiFi signal outside your home, the same way, WiFi range is 10FT from this small device. - Can I change the password?
Yes. You can set the WIFI password in the app. And if you need to modify the WIFI password, please restart the dash cam and forget the original network with your mobile phone after the modification is completed. - Why is my unit not turning on?
- Ensure the power cable is firmly and fully connected.
- Make sure the socket of your vehicle's auxiliary power outlet is clean and free of corrosion.
- Make sure the power cable is firmly and fully seated in the auxiliary power outlet.
- Why does the dash cam continuously display "No SD card?"
- Please double check to be certain that a micro SD card is inserted in the unit, and ensure that the SD card is Class 10 or above.
- The SD card may be damaged due to repeated writing and erasing cycles. You can test to see if this is the issue by trying a new or known working micro SD card in the unit. If this is the issue the SD card will need to be replaced.
- What should I do if the SD card is full or the latest videos are overwritten?
- Replace the SD card with a new SD card.
- Pull the old files off your SD card regularly.
- Format the SD card once a month to keep the device running normally.
- How do I format the SD card?
- Option 1: In the Dash Cam manu navigate to: Settings > Storage > Format SD Card.
- Option 2: Using a computer or laptop, follow the instructions provided by the OS manufacturer to format a disk.
- The screen doesn't show the reversing assistant line and/or the rear camera image when reversing.
- Please go to the preview interface to see if you can see the footage from the rear camera.
- If yes, please verify whether the Red Trigger Wire on the Rear Camera Power Connection Cable is electrically tied to the reversing lamp positive lead.
- If not, please check all of the connections leading to the rear camera to ensure that the camera is plugged into the system.
- Why are all of the recorded videos blurry?
- Please make sure that both the front and rear camera lenses are clean and are free from fingerprints or smudges. Please clean both lenses using an approved lens cleaning solution, or with rubbing alcohol.
- Ensure that you have removed the protective film off the lens.
- Make sure the windshield around the camera lens is clean and free of dirt and debris. Both inside and outside of the vehicle.
- How do I transfer files from the dash cam to my computer?
- Turn off the dash cam and remove the micro SD card from the device. Using a card reader, insert the SD card into your computer. You can then transfer files from the SD card onto your computer.
Note: Do not insert or remove the Micro SD card while it is saving or reading data. The data may be damaged or lost. Only insert or remove the SD card when the dash cam is turned off.
- Turn off the dash cam and remove the micro SD card from the device. Using a card reader, insert the SD card into your computer. You can then transfer files from the SD card onto your computer.
lmportant Notice
- This dash cam is intended for use in motor vehicle only. Do NOT install the camera where it might block the driver's view of road or the deployment of the airbag.
- Before using this device, please check the memory card first, and format the SD card, set the time and date in the menu.
- This camera records video at high resolution, Be sure to use a U3 or above high speed Micro SD card. Maximum support 256GB cards.
- Do not leave the camera in direct sunlight for a long period of time or where the temperature could go above 140°F(60°C)
- Do not disassemble, repair, or modify the product yourself.
- For internal inspection and repair, contact the service center.
Documents / Resources
References
Download manual
Here you can download full pdf version of manual, it may contain additional safety instructions, warranty information, FCC rules, etc.
Advertisement


Need help?
Do you have a question about the D370S and is the answer not in the manual?
Questions and answers