Arenti Ainanny - Baby Monitor Manual
- User manual (54 pages) ,
- User manual (12 pages) ,
- User manual (75 pages)
Advertisement
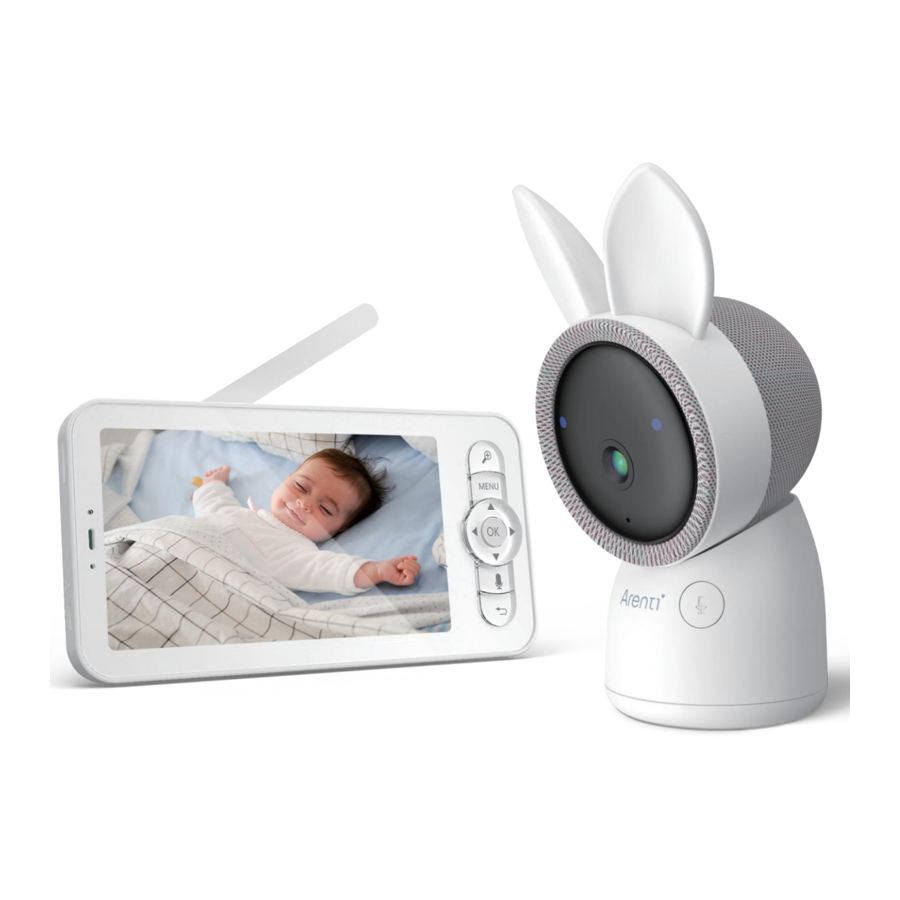
Product description
Please read this manual carefully before using the product and keep it properly. Label information is located on the side of the camera.
Packing list

Overview

Status light
- Blinking red light: wait for the network connection (slow) connecting the network (fast)
- Solid blue light on: the camera is working correctly
- Solid red light on: the camera is out of work
Call/Pairing
Press to make a call; long press to pair
Reset
Press and hold for 5 seconds to reset the camera (if you have modified settings, they will return to factory defaults)

Status light of charging
- Orange light: Charging
- Green light: Fully charged
Status light of using
- Yellow light: The monitor is on
- No light: The monitor is off
Antenna
Adjust the angle to get better signals
ON/OFF button
Long press 5s to turn on and turn off the monitor
Zoom in/out
Zoom the image in 1X, 2X or 4X
Menu
On the homepage, press to enter the menu interface;
On the homepage, long press to enter the setting interface
Direction
Control the rotation directions; select the menu items
OK
Confirm
Call
Make a call after pressing the button
Back
Press to back up;
On the homepage, long press to stop playing music
Installation
Find a position where you can get the desired field of view. You can put the camera on a flat surface or mount it on the wall.

Tips:
- The installation wall needs to be able to bear at least 3 times the total weight of the camera.
- In case your camera is mounted upside down, its picture shall be flipped as well. Please set from Arenti App > Device (tap device to live video page) > Settings > Basic Function > Image Setting > Screen Flip
- Do not point the camera toward a glass window. Or it may result in poor image performance because of the window glare by infrared LEDs, ambient lights, or status.
Camera Using tips
- Live video viewing:
In the camera control interface of the APP, you can view the camera monitoring in real-time, adjust the resolution, capture images, record video, and make 2-way talking. - Infrared night vision:
The camera can automatically switch to night vision mode (black & white) at night according to the degree of change in surrounding light. With built-in red Infrared LED lights, the night vision distance can reach meters, and it can be viewed super clearly in the dark. - Motion detection:
The camera can detect the movement changes in the camera's view, and push the notification of the movement changes to the APP.
Set from: APP > Device (tap device to live video page) > Settings > Alert Settings > Motion Detection.
Basic Parameter
| Product name | AInanny |
| Angle of view | 100° |
| Pan/Tilt | 0° ~ 355°/15° ~ 45° |
| Working temp | 0°C to 40°C |
| Local storage | Micro SD card (up to GB) |
| Size | 69 x 63 x 119mm |
| Power | DC 5V, 1A |
| Consumption | Up to 4.5W |
| Supported phone OS | iOS 9/ Android 5.0 and above version |
| 2.4G Wi-Fi | 2412-2472 MHz (Max. power |
Connection of camera and App
The camera can be connected both to the monitor and the App. Generally, it is connected to the monitor by default.
Follow the steps below to connect the camera to the App:
- Make sure the Wi-Fi network is a 2.4 GHz network, as the camera doesn't support 5 GHz Wi-Fi.
- Download the App on your phone. Register a new account to log in or log in directly.
- Reset the camera using a pin until the status light is red in fast blinking.
(You have to connect the camera to the App within 2 minutes; otherwise, you have to reset the camera again.)
(If you are using the monitor, the audio and video will be temporarily disconnected, and will automatically resume after the camera is successfully configured with the network. The maximum time is 2 minutes.) - Follow the step instructions on your smartphone to add the monitor, and scan the QR code with your camera.
Set up a router
The router supports 2.4GHz WiFi (doesn't support the 5GHz), and is connected to the WiFi network. Please set the parameters of the router before connecting to the WiFi network, and record the SSID and password of your WiFi.

Connect Arenti APP
Scan the QR code to download and install the Arenti APP. Also, you can search "Arenti" on App Store (IOS) or Google Play (Android). Download and install Arenti APP. Open the APP home page, click "+" at the right top page. Follow the guide on the APP to add the camera step by step.


After the connection is successful, the indicator is solid blue.
Monitor Using tips
Pairing of camera and monitor
Power on the camera and the monitor, and they will automatically connect. If the connection fails, please follow the steps below to pair. The pairing is distance limited, so make the distance between the camera and the monitor no more than 200m.

Pair the monitor and camera:
- Press the Menu button on the monitor screen, and select
![]() > Camera.
> Camera. - Select Camera 1 or Camera 2 which you need to pair.
- Long press the camera pairing button until you hear the prompt tone.
- Press the OK button on the monitor screen to start pairing.
- For 2 cameras, repeat step 2~ step 4.
Unbind the monitor and camera:
- Press the Menu button on the monitor screen, and select
![]() > Camera.
> Camera. - Select Camera 1 or Camera 2 which you need to unbind.
- Long press the OK button to release the binding.
Camera selection method:
Note:
- For different products, you may add 1 or 2 cameras. If you have added 2 cameras, the monitor screen will display 2 live views at the same time.
- If you want to set parameters or enable functions of one of the cameras, you need to select the camera first.
On the home page, press  button to switch the camera between Cam1 and Cam2 if you have added two cameras.
If you have added two cameras, select one camera you need and press the OK button on the monitor to enter full-screen viewing mode. And then you can press button again to zoom in and zoom out. (Zooming function does not work when the screen is not in full screen.)

Rotate the camera
You can adjust the monitoring angle for better vision.
The direction buttons on the monitor screen are available when the camera is powered on. Press the direction buttons to rotate the camera horizontally and vertically for better vision.
Photo & video
Take a photo:
You can take a photo when you want to capture an interesting scene of a baby. Press Menu button on the monitor, select ![]() and press OK to take a photo.
and press OK to take a photo.
Record a video:
You can record a video when you want to capture a meaningful time for a baby. Press Menu on the monitor, select ![]() and press OK to record a video.
and press OK to record a video.
View the taken photos and recorded videos:
- Press the Menu button on the monitor, select
![]() and press OK to enter the interface.
and press OK to enter the interface. - Select the camera and date, select the photo or video you want to view and press OK to enter preview mode.
- For a video, press OK to play or pause in the preview mode.
- Press the backup button to the quit preview or return to the main menu.
![]()

Play music
You can play music to soothe your baby when the baby is crying or sleeping. There are various soft music to select.
Press the Menu button on the monitor screen, and select  and press OK to enter the music interface. You can select different music, change the music cycle mode, or adjust the music volume.

Feeding reminder
Remind you to feed your baby, when you are too busy, or when you want to give your baby a regular diet.
- Press the Menu button on the monitor screen, and select
![]() > Feeding Reminder.
> Feeding Reminder. - Press UP and DOWN direction buttons to select between 10 time options, and press OK to start the time setting.
- When starting to set up one feeding time, press LEFT and RIGHT direction buttons to change options between hour, minute, second, and on/off; and press UP and DOWN direction buttons to change values and select on or off.
- Select on or off to open or close feeding reminders. You can set up to 10 feeding times one day. And when the set time is up, a feeding alarm will appear on the monitor screen.
![]()

Smart care
You can turn on functions of motion detection, noise detection, and cry detection, so that you can know the baby's status immediately, no matter what you are doing.
- Press Menu on the monitor and select
![]() > Smart Care.
> Smart Care. - Press UP and DOWN direction buttons to select options between motion detection, noise detection, cry detection, and alarm volume, and press OK to save.
- When starting to set up one detection mode, press LEFT and RIGHT direction buttons to change options, and press UP and DOWN direction buttons to adjust the sensitivity.
- You can select different sensitivity according to needs. Low is low sensitivity, and high is high sensitivity.
- When setting up the alarm volume, press LEFT and RIGHT direction buttons to adjust.
- There will be an alarm when the set detection is triggered, press OK to stop the alarm.
Temperature and humidity detection
You can real-time monitor the temperature and humidity of your baby's room. When the temperature and humidity are out of range, you can get the alarms immediately, and then take measures.
- Press the Menu button on the monitor screen, and select
![]() > Temperature and humidity.
> Temperature and humidity. - Press UP and DOWN direction buttons to select options between temperature range, humidity range and out-of-range reminder, and press OK to start setting.
- Press LEFT and RIGHT buttons to change options, and press UP and DOWN buttons to change values and units.
- In the Out of range reminder option, select to turn on or off the alarm when the temperature and humidity are out of range.
![]()

Safety Protection
You can turn on or turn off the Wi-Fi network channel so that others cannot live view the videos by App if the function is off. You can also view the visited records as all visits through the App will be recorded.

Night light
You can turn on the night light if needed, and you can set lighting mode and light color.
Press Menu on the monitor and select  >
>  . Or press the Menu button, and select
 ![]() > Light > Night light.
> Light > Night light.

General setting
- Set up brightness:
- Press Menu on the monitor select
![]() and press OK to enter.
and press OK to enter. - Press UP and DOWN buttons to adjust brightness.
- Press Menu on the monitor select
- Set up time:
- Press Menu on the monitor and select
![]() > Time setting.
> Time setting. - Press the direction buttons to change the date, time, and time displaying mode.
- Press Menu on the monitor and select
- Set up language:
- Press Menu on the monitor and select
![]() > Language.
> Language. - Select the language you need.
- Press Menu on the monitor and select
- Set up sleep mode:
You can set up sleep mode to increase standby time.- Press Menu on the monitor and select
![]() > Sleep mode.
> Sleep mode. - Select sleep mode as minute, minutes, minutes, minutes, minutes, or off.
- Press Menu on the monitor and select
- Turn on and off status indicator:
If you turn on the status indicator, you can get the working status of the camera. You can also turn off the status indicator if you think it will affect your baby's sleep.
Press Menu on the monitor and select![]() >
> ![]() . (Or Press the Menu button, select
. (Or Press the Menu button, select ![]() > Light > Status light.)
> Light > Status light.) - SD card:
- Press Menu on the monitor and select
![]() > SD card management. Then you can view the total capacity and remaining capacity of your SD card.
> SD card management. Then you can view the total capacity and remaining capacity of your SD card. - (Optional) You can format the SD card as you needed, but make sure that the important data is backed up.
- Press Menu on the monitor and select
- Upgrade:
Make sure your camera is connected to the 2.4 GHz Wi-Fi. You can upgrade your camera when the upgrade alarm appears. Or press Menu on the monitor and select![]() > Device information to check whether there is an upgrade.
> Device information to check whether there is an upgrade. - Low battery alarm:
When the camera is low on battery, the low battery alarm will appear on the monitor screen. Please charge the monitor as soon as possible.
 . (Or Press the Menu button, select
 FAQ
How to disable the LED indicator/blue light with my camera?
Arenti APP > Device (tap device to live video page) > Settings > Basic Function > Network Indicator: Disable it.
How to turn off the camera real-time monitor, and stop recording?
Arenti APP > Device (tap device to live video page) > Settings > Basic Function > Privacy Protection > Lens OFF.
How to change the WiFi or update the WiFi password for the device?
Please delete the camera on APP, tap "Add" and follow the steps to use the new WIFI network to add the camera again.
How to share Arenti devices with friends and family?
Arenti APP > Device (Tap device to live video page) > Settings > Device Share > Add, follow the guide to share your device.
Failed to access the Live video, prompts offline?
- Please ensure the camera is in the power-on state: the camera network indicator will be on.
- Check the WiFi network is in good condition and restart the router.
- Try to move the camera near the router, and check again.
- Delete the camera from Arenti APP and add it again. Confirm the APP and camera firmware are the latest versions.
If there doesn't work, please contact support@arenti.com to get help.
Precautions
- The applicable working temperature of this product is 0℃ ~ 40℃, please do not use it in an environment where the temperature is too high or too low use this product.
- To use this product better, avoid the front and side of the lens close to the glass, white walls, etc. light objects, so as not to cause the picture to be bright near, dark, or whitish in the distance.
- Please make sure that the camera is installed within the range covered by the WiFi signal, and placed as far as possible on the location where the signal is better, and try to install it away from metal and microwave ovens that may affect the signal.
After-Sale Service and Technical Support
- Access Support Articles, Videos, and Documentation. www.arenti.com
- Access Support from the Arenti App, log in to your Arenti App and tap to get support.
- You can send an email to support@arenti.com. Describe the camera issue, and inform us of the camera model and SN from the camera body. We will reply to you in 24h.
Documents / Resources
References
Download manual
Here you can download full pdf version of manual, it may contain additional safety instructions, warranty information, FCC rules, etc.
Advertisement


Need help?
Do you have a question about the Ainanny and is the answer not in the manual?
Questions and answers