Advertisement
INTRODUCTION

This manual contains important instructions for operating this product. For your safety, and the safety of others, be sure to read this manual thoroughly before operating the product. Failure to properly follow all the instructions and ns can cause you and others to be seriously hurt or killed.
Please contact us if you have any questions.
Record the model and serial numbers indicated on your air compressor's nameplate:
Model No.
Serial No.
Date of Purchase:
Store/Dealer:
How to find a local service center:
Even quality built equipment might need service or repair parts. Contact the California Air Tools Customer Service Department:
Phone: 1-866-409-4581
Online: WWW.CALIFORNIAAIRTOOLS.COM
Please provide the information below:
Model number and Serial number and specifications shown on the Model number/Serial number plate.
Part number or numbers shown in the parts list section of the owner's manual for your air compressor model.
A brief description of the trouble with the air compressor.
Do not return your air compressor for service or parts to the store/dealer where purchased.
LOCATIONS OF IMPORTANT LABELS
Read these important labels before operating. These labels provide important safety and maintenance information. These labels should be considered as permanent parts of the air compressor. Should any of these labels become illegible, damaged or removed, please contact California Air Tools Customer Service department at 1-866-409-4581 for replacements.


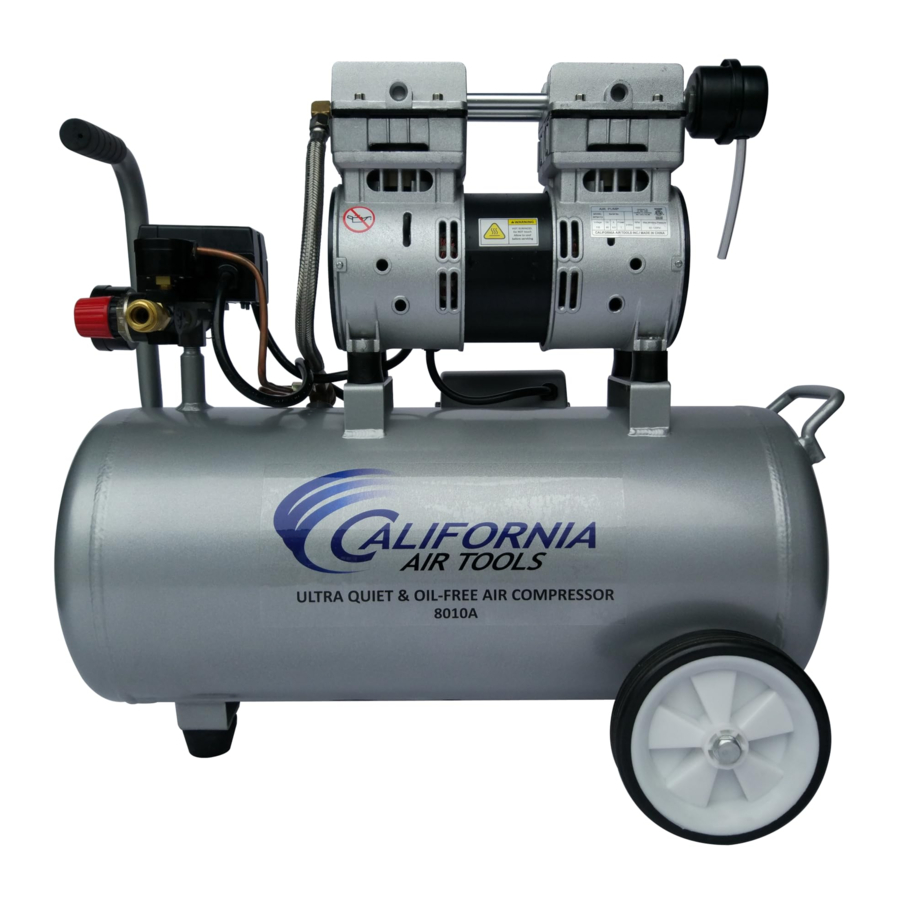
PARTS

PRE-OPERATION CHECKLIST
Package Contents & Assembly
Model: 8010A Package contents:
Air Compressor
Owner's Manual
Air Filter &
Intake Tube
Wheel Assembly Kit 2
2 - #54 Wheel Bolts
2 - #55 Wheel
4 - #56 Washers
2 - #57 Nut
1 - #52 Bolt
2 - #50 Washers
1 - #51 Cushion Foot
1 - #49 Nut
Assembly:
Install the Air Filter and Intake Tube

- Attach the air filter to the top rear of motor head. >Screw the air filter into the motor head port. >Attach 4" intake tube into side of filter.
![]()

Install the Wheel Kit

- Slide Bolt #54 through Wheel #55.
- Slide the Bolt #54 through Washer #56 and wheel support hole located on the back bottom of the air compressor tank.
- Attached the Washer #56 and Nut #57 to the Bolt #54 and tighten firmly.
- Repeat steps 1-3 to assemble the other wheel.
- Slide Bolt #52 through Washer #50 and Cushion Foot #51
- Slide Bolt #52 through cushion foot support hole located on the front bottom of the air compressor..
- Attach Washer #50 and Nut #49 to Bolt #52 firmly.
Inspect for Damage
Before using the air compressor, make sure the air tank is not damaged, inspect all parts for damage, and check that all pipes are firmly connected. Do not use the air compressor if any damage is found. If damaged, have an authorized service center inspect and test the air compressor to ensure that is working properly.
Save Packaging

Save all outside packaging in case you ever need to return the product for service or repair.
Compressor Location
Use on Flat Surface
For proper operation, the air compressor must be placed on a flat surface with an incline no greater than 15 degrees.

EXPLOSION

FIRE
Use caution to minimize risk of fire or explosion. It is normal for the air compressor motor and pressure switch to produce sparks while operating. If sparks come in contact with vapors from gasoline or solvents, they may ignite and cause a fire or explosion. Abrasive tools such as grinders, drills and other tools are capable of making sparks that can ignite flammable materials. Always operate the air compressor a safe distance away from flammable items. Use in well-ventilated areas. Never exceed the maximum rated pressure.
Maintain a Clear Area
It is very important that the air compressor is positioned so that there is adequate airflow around the machine. There must be at least 2 feet of obstacle-free space surrounding and above the air compressor.

RISK TO BREATHING
Dust or dust-like particulates caused by power-sanding, sawing, grinding, drilling or any other construction-like activities can contain contaminants that are harmful to breathe. Always use your air compressor in a well-ventilated and clean area. Never breathe the air that comes air compressor or air hose. This breathing. Always wear approved safety equipment. When performing dust-creating activities, securely wear properly-fit face masks or respirators. If you fee! ill from breathing while operating your air compressor, stop and seek medical attention immediately.
Use in Areas with Clean Air
For proper operation and to maximize the longevity of the air compressor, it is very important that the air drawn into the air compressor is clean. The air compressor should not be used in areas where dust or particulates are in the air. This will damage the motor and impair proper operation.
Always use the air filter, properly installed.
Electrical Power
Electrical Power Requirements


SHOCK
There is a danger of electric shock. Use only undamaged electrical cords. DO NOT touch bare wires or receptacles. DO NOT operate air compressor in wet weather or in wet conditions. DO NOT touch air compressor or cords if hands or feet are wet. Ensure that all cords are free of damage before connecting to the power supply. Ensure that you have a sufficient electrical supply for supporting the requirements of the motor. Improper installation of the grounding plug is able to result ina risk of electric shock. When repair or replacement of the cord or plug Is required, do not connect the grounding wire to either fiat terminal. The wire with insulation having an 'outer surface that is green with or without yellow stripes is the grounding wire. This product must be grounded. In the event of an electrical short circuit, grounding reduces the risk of electrical shock by providing an escape wire for the electric current. This product is equipped with a cord having a grounding wire with an appropriate grounding plug. The plug must be plugged into an outlet that is properly installed and grounded in accordance with the local codes and ordinances. This product is for use on a nominal 120-V circuit and has a grounding plug similar to the plug illustrated in sketch A. Only connect the product to an outlet having the same configuration as the plug. Do not use an adapter with this product.
Before using the air compressor, refer to the serial label for voltage and amperage requirements. Make sure you have a sufficient electrical supply for supporting the motor's requirements. Use a dedicated 15 Amp Circuit or a 2500 Watt (running) Generator
Low voltage and/or an overload circuit can cause the motor's overload protection system circuit breaker to trip.
Electrical Extension Cords

Use caution when using extension cords. Use an extension cord which is no more than 25' (7.6 m) long and at least 14 gauge. Using an excessively long or thin-wired extension cord will cause severe damage to the motor. Use only a 3-wire extension cord that has a 3-blade grounding plug. As undersized cord results in a drop in the line voltage and loss of power and overheating. When in doubt, use a heavier gauge. The smaller the gauge the more current the cord can carry.
Inspect all electrical extension cords to ensure that they are free of damage. When using an extension cord, use a heavy-duty cord that is no more than 25 feet long and at least 14 gauge. Use only a 3-wire extension cord that has a 3-blade grounding plug.
OPERATING THE AIR COMPRESSOR
This manual contains important instructions for operating this product. For your safety, and the safety of others, be sure to read this manual thoroughly before operating the product. Failure to properly follow all the instructions and ns can cause you and others to be seriously hurt or killed.
Save this manual for future reference.
Introduction
This air compressor features a compact structure, stable performance, a high airflow rate, easy operation and maintenance. Because the air compressor produces no oil in the airflow, it can be used as an independent air supply machine for situations in which oil in the airflow is an issue. The motor directly drives the pistons and is able to function without lubrication for a long period of time.
Assembly
- Connect your air supply hose to a 1/4" male industrial quick connect coupler. Connect the male quick connect coupler to the female quick connect coupler located on the air compressor
- Make sure the drainage valve is off and that the pressure switch is in the OFF position.
- Ensure that the power supply you are going to use is operating normally. 110 Volts 60 Hertz 15 amp Outlet.
- Insert the power supply cord into the power supply socket.
Test Run
Before using the air compressor for the first time, complete a test run as follows:
- Turn the power switch to the OFF position. Plug the power supply cord into a power supply socket. Start the air compressor by turning the power switch to the ON position. The pressure gauge reading will slowly rise as pressure increases inside the air tank. When the gauge reading reaches 120 PSI (plus or minus 5 PSI), the pressure switch will automatically turn the power off. This indicates the compressor is working normally.
- Turn the power switch to the Off position, unplug the power supply cord and release the air in the air tank by opening the drain valve at the bottom of the tank. At this point proceed to the next step (daily operations). Note: If the Air Compressor is not working properly, the pressure gauge will indicate that there is a decrease in pressure in the air tank. If there is an air leak from the compressor the pressure in the air tank decreases, the pressure switch resets and the motor automatically turns back on. If you detect an air leakage, turn the power switch to the Off position, release the air from the tank by pulling on the safety valve. Unplug the power supply cord and contact Customer Support for Assistance.

HOT SURFACE

FIRE
Air compressor surfaces become hot during operation.
DO NOT touch hot surfaces, because they can cause severe burns.
Do not touch the air compressor's cylinder head.
During operation, the cooling fins of the cylinder head and delivery pipe become hot.
Allow the air compressor to cool before touching it.
DO NOT place a storage cover on the unit during operation. Only place a cover on the air compressor after it has thoroughly cooled down.

FLYING OBJECTS
Flying object can cause injury to the eyes, head and other parts of the body. Air-powered equipment and power tools are capable of propelling items (metal chips, fasteners and particulates) at high speed into the air and could result in injury. Always wear approved head and eye protection. Never point the air stream at any part of the body, or at another person or animal. When operating the air compressor, make sure all other people and animals maintain a safe distance. Do not move the air compressor when the air tank is under pressure. Never use the air hoses to pull or move the air compressor. Keep the air compressor on a flat surface.
Daily Operation
Starting the compressor:
- Turn the power switch to the OFF position.
- Attach the air hose to the 1/4" Industrial Male Quick Connector
- Close the drain valve.
- Have air filter attached
- Plug the power supply cord into a power supply socket.
- Turn the power switch to the ON position.
- Let the motor run and tank fill until motor turns off.
- To regulate the air flow. While the air compressor is running, turn "On" your tool and turn the regulator knob to the right increasing the pressure. Turn the pressure up until the desired pressure is reached.
- Operate air tool normally.
Shutting down the compressor:
- Turn the power switch to the OFF position.
- Unplug the power supply cord.
- Remove the pressure and water in the air tank through drain valve.
MAINTENANCE
Draining the Air Tank
The frequency at which you should drain the air tank depends on the environmental conditions and the amount of operating time logged. The average draining frequency is every 1 to 2 days.
- Place the air compressor above a container capable of holding water.
- With compressed air in the air tank, slowly turn the drain valve knob to the forward (open) or straight position. The water in the air tank will drain out.
- After all of the accumulated water has drained out, turn the drain valve knob to the closed or left position in order to avoid leakage.
- Draining the air tank protects parts from rust and corrosion.
Cleaning or Changing the Air Filter
The air filter is designed to reduce noise and help prevent particulates in the air from entering and damaging the air compressor. After being used for a period of time, the air filter will become clogged. This will reduce the air intake capabilities of the air compressor, reducing performance. Therefore, the air filter must be cleaned or replaced regularly.
- Open the lid on the air filter, then remove the air filter element.
- To clean the element blow off or brush off the dirt and dust.
- If clogged, replace with a new air filter.
Testing for Leaks
Make sure all connections are tight. Do not overtighten. A small leak in any hose or pipe connection will reduce the air compressor's performance. To test for small leaks, spray a small amount of soapy water on the area suspected of leaking. If the soap bubbles, replace the broken part.
Cleaning
Clean items with a soft brush, or wipe with a moistened cloth using a biodegradable solvent. Do not use flammable liquids such as gasoline or alcohol. Always keep parts clean from dirt and dust for better performance.
Pressure Switch
The pressure switch is factory pre-set to shut off at 120 PSI (plus or minus 5 PSI) and to re-start at 90 PSI (plus or minus 5 PSI)
STORAGE
Before storing for a prolonged period of time:
- Turn off the power supply.
- Disconnect the power cord from the power supply and wrap the power cord around the air compressor handle to reduce the risk of damage.
- Pull the relief valve and release all the pressure from the air tank.
- Clean the air compressor to remove all dirt and dust.
- Cover the air compressor with a cover to protect the unit from dust and moisture.
- Do not stack or store any items on top of or around the air compressor. Damage could occur.

TO REDUCE THE RISK OF ELECTRIC SHOCK, DO NOT EXPOSE TO RAIN. STORE INDOORS.
TROUBLESHOOTING
| PROBLEM | POSSIBLE CAUSE | POSSIBLE SOLUTIONS |
Pressure drop in the tank | Air leaks at connections. | Let the compressor build pressure in the tank, to the maximum pressure if possible. Brush soapy water on air connections and look carefully for air bubbles. Tighten leaky connections. If the problem persists, contact the seller for further advice. |
The unloader valve leaks when the compressor is idle | Unloader valve seal is defective. | Let the air in the air tank flow out until all the pressure is released. Then remove the unloader valve plug and clean the valve seal. If necessary, replace the seal and then reinstall all components. |
The compressor stopped and does not start | The thermal protector turned on because the motor is overheating. | Check that the main voltage corresponds to the air compressor specifications. An extension cord that is too thin or too long can cause a voltage drop and cause the motor to overheat. Excessive use (over 1 hour continuous use) can cause the motor to overheat Allow the motor to cool down. |
| Motor windings are burned out. | Contact Customer Support. | |
| The motor does not start and makes a humming noise. | Head Pressure Low voltage supply to the motor. (see below) | Do a Check Valve Adjustment. Drain air tank. Remove check valve cap Take out check valve spring Clean inside the check valve and and elongate.spring. Replace spring and cap |
The motor does not start or starts slowly | Low voltage supply to the motor. | Check that the main voltage corresponds to the air compressor specifications. An extension cord that is too thin or too long can cause a voltage drop.. Use heavy duty extension cords. Ensure that the air compressor is plugged into a fully functional power outlet |
The compressor is noisy with metallic clangs | Compressor head gasket or reed valve is damaged | Stop the compressor and contact the dealer. |
The compressor does not reach the maximum pressure | Compressor head gasket or reed valve is faulty. | Stop the compressor and contact the dealer. |
| The compressor doesn't seem to provide as much air as it did when new and/or the compressor cuts off within a much shorter time period. | The pressure switch needs adjusting. | Stop the compressor and contact the dealer. |
| The tank is full of water due to condensation. | Open the drain valve and release the water from the tank. | |
| The motor pump unit does not stop when the tank pressure reaches its maximum working pressure (120 PSI).(plus or minus 5 PSI) | Pressure switch defective or needs adjusting. | Stop the compressor immediately and contact Customer Support. |
SPECIFICATIONS
Electrical Circuit

Air Passage Drawing

IMPORTANT SAFETY INSTRUCTIONS
Safety Messages & Signal Words:

Indicates an immediate hazardous situation which, if not avoided, will result in death or serious injury to the operator or to bystanders.
Indicates a potentially hazardous situation which, if not avoided, could result in death or serious injury to the operator or to bystanders.
Indicates a potentially hazardous situation which, if not avoided, may result in moderate or minor injury to the operator or to bystanders.
NOTICE
Indicates a situation which, if not avoided, may result in damage to product components or other property.

RISK OF CUTTING
Moving parts can cause severe trauma. Keep hands and feet away from rotating parts, tie u tong halt, remove Jewelry, and DO NOT Weer loose clothing.

SHOCK
There is a danger of electric shock. Use only undamaged electrical cords. DO NOT touch bare wires or receptacles. DO NOT operate air compressor in wet weather or in wet conditions. DO NOT touch air compressor or cords if hands or feet are wet. Ensure that all cords are free of damage before connecting to the power supply. Ensure that you have a sufficient electrical supply for supporting the requirements of the motor. Improper installation of the grounding plug is able to result ina risk of electric shock. When repair or replacement of the cord or plug Is required, do not connect the grounding wire to either fiat terminal. The wire with insulation having an 'outer surface that is green with or without yellow stripes is the grounding wire. This product must be grounded. In the event of an electrical short circuit, grounding reduces the risk of electrical shock by providing an escape wire for the electric current. This product is equipped with a cord having a grounding wire with an appropriate grounding plug. The plug must be plugged into an outlet that is properly installed and grounded in accordance with the local codes and ordinances. This product is for use on a nominal 120-V circuit and has a grounding plug similar to the plug illustrated in sketch A. Only connect the product to an outlet having the same configuration as the plug. Do not use an adapter with this product.

RISK TO BREATHING
Dust or dust-like particulates caused by power-sanding, sawing, grinding, drilling or any other construction-like activities can contain contaminants that are harmful to breathe.
Always use your air compressor in a well-ventilated and clean area.
Never breathe the air that comes directly out of the air compressor or air hose. This air is not suitable for breathing.
Always wear approved safety equipment. When performing dust-creating activities, securely wear properly-fit face masks or respirators.
If you feel ill from breathing while operating your air compressor, stop and seek medical attention immediately.
HOT SURFACE
FIRE
Air compressor surfaces become hot during operation.
DO NOT touch hot surfaces, because they can cause severe burns.
Do not touch the air compressor's cylinder head.
During operation, the cooling fins of the cylinder head and delivery pipe become hot.
Allow the air compressor to cool before touching it.
DO NOT place a storage cover on the unit during operation. Only place a cover on the air compressor after it has thoroughly cooled down.
FLYING OBJECTS
Flying object can cause injury to the eyes, head and other parts of the body. Air-powered equipment and power tools are capable of propelling items (metal chips, fasteners and particulates) at high speed into the air and could result in injury. Always wear approved head and eye protection. Never point the air stream at any part of the body, or at another person or animal. When operating the air compressor, make sure all other people and animals maintain a safe distance. Do not move the air compressor when the air tank is under pressure. Never use the air hoses to pull or move the air compressor. Keep the air compressor on a flat surface.

EXPLOSION
Exercise caution when using pressurized air. To prevent injury and for your general safety, only use high-pressure hoses, fittings and couplings. designed for use with air compressors. Inspect all hoses, fittings and couplings for leaks and wear. When leaks and wear detected, stop use and replace those items immediately. Do not repair. Never leave pressurized air in the air tank when performing maintenance. Never leave air compressor unattended with the power supply in use and the air hose connected.

EXPLOSION
Improper care could lead to the air tank bursting or exploding. Drain air tank daily or after each use to prevent moisture buildup in the air tank. Rust can weaken the air tank and cause leaks or if rust is detected, replace tank immediately. Do not try to repair the air tank by welding, drilling or modifying it in any other way. These modifications can weaken the air tank and cause a hazardous condition. If air tank develops a leak, replace the air tank immediately. Never repair, weld or make modifications to the air tank or its attachments. Never make adjustments to the factory-set pressures. Never exceed manufacturer's maximum-allowable pressure rating attachments. Because of extreme heat, do not use plastic pipe or lead tin solder joints for a discharge line.


EXPLOSION

FIRE
Use caution to minimize risk of fire or explosion. It is normal for the air compressor motor and pressure switch to produce sparks while operating. If sparks come in contact with vapors from gasoline or solvents, they may ignite and cause a fire or explosion. Abrasive tools such as grinders, drills and other tools are capable of making sparks that can ignite flammable materials. Always operate the air compressor a safe distance away from flammable items. Use in well-ventilated areas. Never exceed the maximum rated pressure.
Use caution when using extension cords. Use an extension cord which is no more than 25' (7.6 m) long and at least 14 gauge. Using an excessively long or thin-wired extension cord will cause severe damage to the motor. Use only a 3-wire extension cord that has a 3-blade grounding plug. As undersized cord results in a drop in the line voltage and loss of power and overheating. When in doubt, use a heavier gauge. The smaller the gauge the more current the cord can carry.
THIS EQUIPMENT INCORPORATES PARTS, SUCH AS SNAP SWITCHES, RECEPTACLES AND THE LIKE THAT TEND TO PRODUCE ARCS OR SPARKS, THERE, WHEN LOCATED IN A GARAGE, IT SHOULD BE IN A ROOM OR ENCLOSURE PROVIDED FOR THE PURPOSE, OR SHOULD BE 48 IN (45.7 CM) OR MORE ABOVE THE FLOOR.
Documents / Resources
References
Download manual
Here you can download full pdf version of manual, it may contain additional safety instructions, warranty information, FCC rules, etc.
Advertisement


Need help?
Do you have a question about the 8010A and is the answer not in the manual?
Questions and answers