Cricut EasyPress - Printer Manual
- Welcome booklet (24 pages) ,
- Manual (4 pages) ,
- Instructions manual (6 pages)
Advertisement
- 1 What's Included
- 2 Can Be Used With
- 3 Overview
- 4 Using the EasyPress
- 5 Using the Cricut Heat App
- 6 Send recommended time & temp settings to Cricut EasyPress 3
- 7 Cricut Heat App
- 8 Quick Tips!
- 9 Using HTV (Heat Transfer Vinyl) Iron On Prepping the HTV to Press
- 10 Cricut Design Space App
- 11 Designing in Cricut Design Space on Desktop
- 12 Documents / Resources
What's Included
- Cricut EasyPress
- EasyPress Mat
- Safety Base
- Scoring stylus
- Weeder
- Tweezers
- Spatula
- Scissors
- Scraper
- Carrying Case
- Instructions
Can Be Used With
- Cricut Iron On Designs
- Iron On Patches
- Iron On Transfers
- Infusible Ink
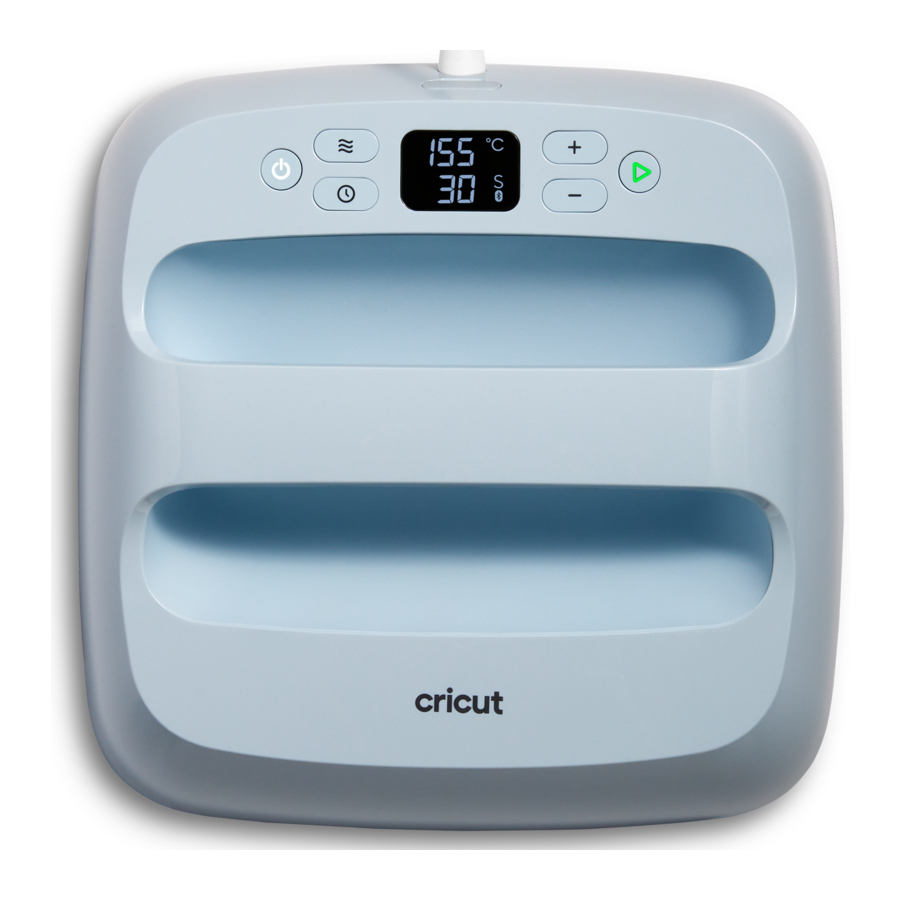
Overview

- Set Temperature
- Set Timer
- What the lights mean
Orange light means it's heating up.
Green light means temperature has been reached. - Start Timer, GO
Using the EasyPress
- Power Cricut EasyPress on.
- For flat base materials: find a flat, heat-resistant surface. Use EasyPress mat to protect surface.
- Be sure to avoid flimsy ironing boards!
- Set timer & temperature.
- Use the Cricut Heat Guide to determine project settings. cricut.com/heatguide
- Press timer, then use +/- buttons to set recommended time. Cricut Heat app can send settings directly to Cricut EasyPress 3.
- Press temperature, then use +/- buttons to set recommended temperature. Cricut Heat app can send settings directly to Cricut EasyPress 3.
- Orange lights mean it's heating up.
- Green lights mean temperature has been reached. Beep sounds when it's ready.
- Preheat base material.
- Place Cricut EasyPress on fabric for recommended time.
![]()

- Position design.
- Make sure shiny side (clear liner) is facing up.


- Apply Heat.
- Place Cricut EasyPress on base material, then press Go button to start timer.
- Hold Cricut EasyPress in place and apply recommended pressure.

- Before removing carrier sheet, refer to theCricut Heat Guide or Cricut Heat App for peel temperature instructions.


Using the Cricut Heat App

Once signed in with your Cricut account, you will need to set up the press.

Select the set up option to begin activating the device. Select the unit from the list of available Heat Presses, and tap Connect.
The Cricut Heat app will show 'Connecting to Easy Press 3' with the Bluetooth logo.
The app will ask to confirm the activation of Cricut EasyPress 3. Select the box to accept Cricut Terms of Use and Privacy Policy and tap Activate.
Cricut Heat will show a status bar as it is activating Cricut EasyPress 3.
When complete, you will see a Success! message indicating the press is set up and ready to use! Cricut EasyPress 3 will begin to heat up and can be used with Cricut Heat app or on its own.
Send recommended time & temp settings to Cricut EasyPress 3

Open the Cricut Heat app.

Under My Heat Presses, select Cricut EasyPress 3, and select Start New Project.

Select your transfer material and the base material to which you will apply it, then select Next.

Once all selections have been made, select Send Settings to EasyPress and follow the on-screen prompts to finish the project!

The timer will start and you will use the press to put the image on your item!
Cricut Heat App
Set custom time & temp

Open Cricut Heat app.
Under My Heat Presses, select the Cricut EasyPress 3 and scroll to the Set Custom Time & Temp option.

Change the Temperature and Press time as desired. You can also select options to Preheat Blank and Flip & Press when pressing blanks that require these steps. When you're finished, select Send Settings to EasyPress.
Quick Tips!
- Always use Cricut EasyPress at room temperature.
- Before using Cricut EasyPress ensure that fabrics and other base materials are completely dry.
- Always return Cricut EasyPress to its Safety Base when not in use.
- Before using Cricut EasyPress, ensure there is no tape or protective film over its control panel.
- Make sure you mirror your image before cutting it with the Cricut when using iron-on or infusible ink.

Using HTV (Heat Transfer Vinyl) Iron On Prepping the HTV to Press:
Prepping the HTV to Press:

Lay the HTV sheet on a mat and press it down to ensure that it is fully adhered to the mat. The transfer sheet should be lined up with top left corner of the mat. Cut the HTV with any of the Cricut cutting machines.
Cutting HTV with the Cricut:

Save your design and then click on Make It. Make sure to cut it out in a mirror setting. Click the toggle so the mirror setting is on. Select Iron On as your material in the drop down settings.
Weeding the HTV:

Weed out the words, images and edges. There should be a bottom layer of plastic that sticks out of both sides.
Applying HTV to the Material:

Once the images are weeded, it's time to apply them on to the items Center the image, then press it down really well. The plastic backing is sticky so it will stick to the item.
Cricut Design Space App
Go to the App Store and download the Cricut Design Space App
Once downloaded, create or sign into your Cricut account.


Once signed in, You have to connect the Cricut. Plug in the machine and follow the instructions to connect.

Once connected, you can browse through projects or create your own by selecting New Project.

Design Space is a grid that matches your mat. It will look like this. Once here, you can add any images or text that you would like to design with the Cricut.

Designing in Cricut Design Space on Desktop

If you are using a computer, open your Bluetooth settings and select Cricut Explore. The pairing code is 0000.
You can also connect using the USB Cable to connect your computer and Cricut.
Download Design Space via the Cricut website.
Once downloaded, create or sign into your Cricut account.
Now start designing!
You will also have to connect the Cricut to your computer, you can follow the prompts in Product Setup.
In Design Space, you can browse their projects or create a New Project.

You are able to add images and text here. Once happy with your design, select Make It.

Visit the Cricut Help Center for Further Assistance!
Documents / Resources
References
Download manual
Here you can download full pdf version of manual, it may contain additional safety instructions, warranty information, FCC rules, etc.
Advertisement


Need help?
Do you have a question about the EasyPress and is the answer not in the manual?
Questions and answers