EINHELL GC-CL 18 Li E - Cordless Leaf Blower Manual
- Original operating instructions (163 pages) ,
- Original operating instructions (14 pages) ,
- Original operating instructions (37 pages)
Advertisement
Explanation of the symbols used

- Important!
- Wear safety goggles
- Wear ear protectors.
- Read the instructions before use!
- Keep all other persons away from the danger zone.
- Do not use the equipment in rain or snow. Do not expose the equipment to wet conditions.
- Guaranteed sound power level
- Store the battery only in dry rooms with an ambient temperature of +10°C to +40°C. Place only charged batteries in storage (charged at least 40%).
- Safety class II
- For use in dry rooms only.
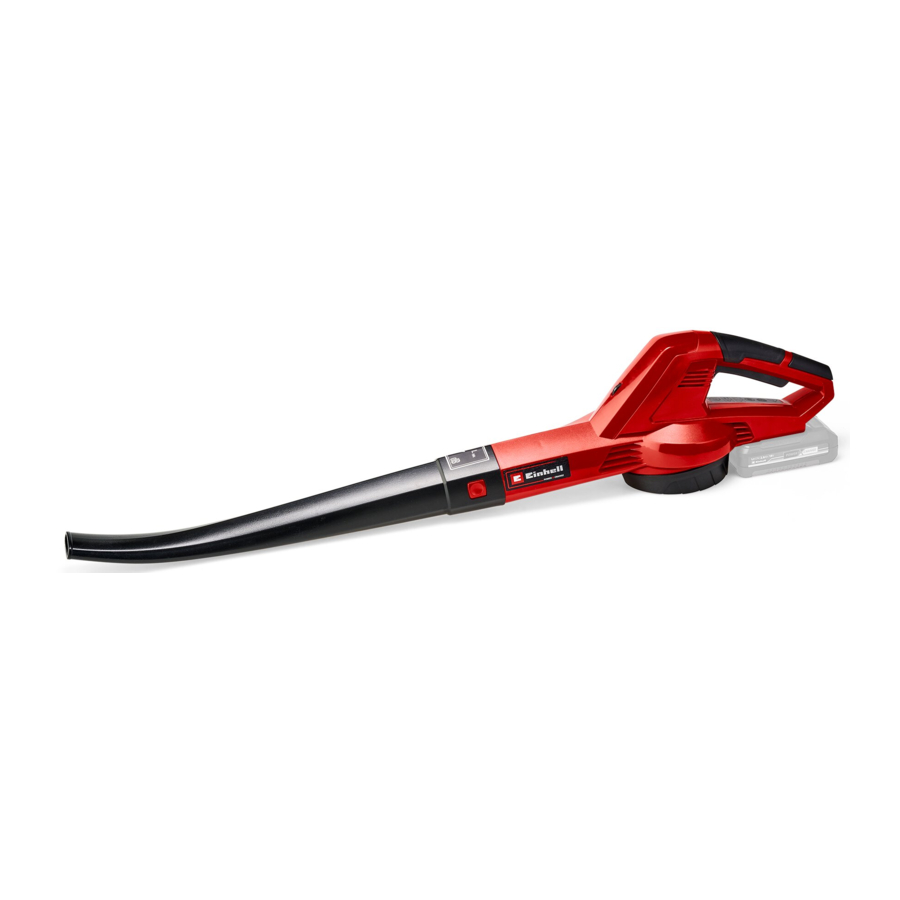
Layout and items supplied
Layout

- Blower tube
- On/Off switch
- Motor unit
- Charger
- Battery pack
- Speed selector
Items supplied
Please check that the article is complete as specified in the scope of delivery. If parts are missing, please contact our service center or the nearest branch of the DIY store where you made your purchase at the latest within 5 work days after purchasing the article and upon presentation of a valid bill of purchase. Also, refer to the warranty table in the warranty provisions at the end of the operating instructions.
- Open the packaging and take out the equipment with care.
- Remove the packaging material and any packaging and/or transportation braces (if available).
- Check to see if all items are supplied.
- Inspect the equipment and accessories for transport damage.
- If possible, please keep the packaging until the end of the guarantee period.

The equipment and packaging material are not toys. Do not let children play with plastic bags, foils or small parts. There is a danger of swallowing or suffocating!
- Motor unit
- Blower tube
- Battery (in the case of Art. No.: 34.335.32 it is not included in delivery)
- Charger (in the case of Art. No.: 34.335.32 it is not included in delivery)
- Original operating instructions
- Safety information
Proper use
The cordless leaf blower is designed to handle only foliage and garden refuse such as grass and small branches. Any other use is prohibited.
The equipment is allowed to be used only for its prescribed purpose. Any other use is deemed to be a case of misuse. The user/operator and not the manufacturer will be liable for any damage or injuries of any kind resulting from such misuse.
Please note that our equipment has not been designed for use in commercial, trade or industrial applications. Our warranty will be voided if the equipment is used in commercial, trade or industrial businesses or for equivalent purposes.
Technical data
Idle speed n0: 12,000 rpm
Maximum air speed: 210 km/h
Protection class: III
Sound power level LWA: 79.5 dB(A)
Sound pressure level LpA: 68.5 dB(A)
Uncertainty K: 3 dB (A)
Vibration ahv: ≤ 2.5 m/s2
Uncertainty K: 1.5 m/s2
Weight: 1.5 kg
Power X-Change lithium-ion batteries
Voltage: 18 V DC
Capacity: 2.0 Ah
Number of cells: 5
Power X-Charger battery charger
Input voltage: 200-250 V ~ 50-60 Hz
Output voltage: 20 V DC
Output current: 3 A Protection class: II / 

The equipment and the charger are allowed to be used only for the lithium-ion batteries of the Power-X-Change series!
Measured and guaranteed sound power level determined in accordance with 2000/14/EC, extended by 2005/88/EC.
The value given for vibration was determined in accordance with a set of standardized criteria and can be used to compare different products with one another. This value is also suitable to be used for estimating the strain on the user caused by the vibration beforehand.
Depending on how you use the device, the actual vibration emissions can vary from the values listed above. Take appropriate measures to protect yourself against vibration stress. Take the entire work sequence into consideration including times at which the device is not working under load or is switched off. Appropriate measures include among other things regular care and maintenance of the device and tool attachments, keeping your hands warm, taking regular breaks and good work sequence planning.
Keep the noise emissions and vibrations to a minimum.
- Only use appliances which are in perfect working order.
- Service and clean the appliance regularly.
- Adapt your working style to suit the appliance.
- Do not overload the appliance.
- Have the appliance serviced whenever necessary.
- Switch the appliance off when it is not in use.
- Wear protective gloves.
- Wear ear-muffs.

Residual risks
Even if you use this electric power tool in accordance with instructions, certain residual risks cannot be rules out. The following hazards may arise in connection with the equipment's construction and layout:
- Lung damage if no suitable protective dust mask is used.
- Damage to hearing if no suitable ear protection is used.
- Health damage caused by hand-arm vibrations if the equipment is used over a prolonged period or is not properly guided and maintained.
- Risk of eye damage if suitable safety goggles are not worn.
Before starting the equipment
Fitting the blower tube

Plug the blower tube (Fig. 1) to the motor unit (Item 3).
Fitting the battery

Press the pushlock button (Fig. 4a/Item A) of the battery as shown in Fig. 4a and push the battery into the battery mount provided. When the battery pack is positioned as in Fig. 4b, make sure that the pushlock button latches in place! To remove the battery, proceed in reverse order!

Charging the battery

- Take the battery pack out of the equipment. Do this by pressing the pushlock button.
- Check that your mains voltage is the same as that marked on the rating plate of the battery charger. Insert the power plug of the charger into the socket outlet. The green LED will then begin to blink.
- Insert the battery pack into the charger.
- In section „Charger indicator" you will fi nd a table with an explanation of the LED indicator on the charger.
The battery pack can become a little warm during the charging. This is normal. If the battery pack fails to charge, check:
- whether there is voltage at the socket outlet
- whether there is good contact at the charging contacts
If the battery pack still fails to charge, send
- the charging unit
- and the battery pack
to our customer service center.
To ensure that items are properly packaged and delivered when you send them to us, please contact our customer service or the point of sale at which the equipment was purchased.
When shipping or disposing of batteries and cordless tools, always ensure that they are packed individually in plastic bags to prevent short circuits and fi res.
To ensure that the battery pack provides long service, you should take care to recharge it promptly. You must recharge the battery pack when you notice that the performance of the device drops. Never allow the battery pack to become fully discharged. This will cause it to develop a defect.
Battery capacity indicator

Press the button for the battery capacity indicator (D). The battery capacity indicator (E) shows the charge status of the battery using 3 LEDs.
All 3 LEDs are lit:
The battery is fully charged.
2 or 1 LED(s) are lit:
The battery has an adequate remaining charge.
1 LED fl ashes:
The battery is empty, recharge the battery.
All LEDs blink:
The battery temperature is too low. Remove the battery from the equipment, keep it at room temperature for one day. If the fault reoccurs, this means that the rechargeable battery has undergone exhaustive discharge and is defective. Remove the battery from the equipment. Never use or charge a defective battery.
Controlling the speed
(Fig. 1)
The equipment comes with electronic speed control for setting the blowing velocity. The blowing velocity depends on the setting of the speed controller (Item 6).
Use the equipment only with the blowing velocity needed for the job.
Operation
- To switch on, press and hold the On/Off switch (2).
- To switch off, let go of the On/Off switch.
- Channel the air stream forward and walk slowly to blow foliage or garden refuse into a pile or to clear out hard-to-reach places.
Cleaning, maintenance and ordering of spare parts
Before putting away or cleaning, switch off the leak blower and remove the battery pack.
Cleaning
- Keep all safety devices, air vents and the motor housing free of dirt and dust as far as possible. Wipe the equipment with a clean cloth or blow it with compressed air at low pressure.
- We recommend that you clean the device immediately each time you have finished using it.
- Clean the equipment regularly with a moist cloth and some soft soap. Do not use cleaning agents or solvents; these could attack the plastic parts of the equipment. Ensure that no water can seep into the device. The ingress of water into an electric tool increases the risk of an electric shock.
Maintenance
- Should the tool experience problems beyond those mentioned above, let only an authorised professional or a customer service shop perform an inspection.
- There are no other parts inside the equipment which require maintenance.
Ordering replacement parts
Please quote the following data when ordering replacement parts:
- Type of machine
- Article number of the machine
- Identification number of the machine
- Replacement part number of the part required
For our latest prices and information please go to www.Einhell-Service.com
Faults
The equipment does not work:
Check that the battery is charged and that the charger is working. If the equipment will not work in spite of the voltage supply being OK, please send it to the customer service address provided.
Storage
Store the equipment and accessories out of children's reach in a dark and dry place at above freezing temperature. The ideal storage temperature is between 5 and 30°C. Store the electric tool in its original packaging.
Charger indicator
| Indicator status | Explanations and actions | |
| Red LED | Green LED | |
| Off | Flashing | Ready for use The charger is connected to the mains and is ready for use; there is no battery pack in the charger |
| On | Off | Charging The charger is charging the battery pack in quick charge mode. The charging times are shown directly on the charger.  The actual charging times may vary slightly from the stated charging times depending on the existing battery charge. |
| Off | On | The battery is charged and ready for use. (READY TO GO) Action: |
| Flashing | Off | Adapted charging
Action: |
| Flashing | Flashing | Fault Action: |
| On | On | Temperature fault Action: |
Service information
We have competent service partners in all countries named on the guarantee certifi cate whose contact details can also be found on the guarantee certifi cate. These partners will help you with all service requests such as repairs, spare and wearing part orders or the purchase of consumables.
Please note that the following parts of this product are subject to normal or natural wear and that the following parts are therefore also required for use as consumables.
| Category | Example |
| Wear parts* | Battery |
| Consumables* | |
| Missing parts |
* Not necessarily included in the scope of delivery!
In the effect of defects or faults, please register the problem on the internet at www.Einhell-Service.com. Please ensure that you provide a precise description of the problem and answer the following questions in all cases:
- Did the equipment work at all or was it defective from the beginning?
- Did you notice anything (symptom or defect) prior to the failure?
- What malfunction does the equipment have in your opinion (main symptom)?
Describe this malfunction.
Documents / Resources
References
Download manual
Here you can download full pdf version of manual, it may contain additional safety instructions, warranty information, FCC rules, etc.
Download EINHELL GC-CL 18 Li E - Cordless Leaf Blower Manual
Advertisement


Need help?
Do you have a question about the GC-CL 18 Li E and is the answer not in the manual?
Questions and answers