Advertisement
- 1 Installing the Music Stand
- 2 Panel Instruction
- 3 External Connection
-
4
Function Introduction
- 4.1 Operation Guide
- 4.2 Turn On the Power
- 4.3 Master Volume Setting
- 4.4 Auto Power Off
- 4.5 Key Sound Setting
- 4.6 Double Keyboard Setting
- 4.7 Selecting & Playing Timbre
- 4.8 Timbre Demo
- 4.9 Split Timbre
- 4.10 Piano Demo
- 4.11 Reverb Effect
- 4.12 Reverb Depth
- 4.13 Tone Setting
- 4.14 Transposition Setting
- 4.15 Metronome Switch
- 4.16 Metronome Type
- 4.17 Metronome Speed
- 4.18 Touch Curve
- 4.19 MIDl Record Setting
- 4.20 Bluetooth MIDl
- 5 Product Specifications
- 6 Timbre Sheet
- 7 Piano Demo
- 8 Piano Maintenance
- 9 Troubleshooting
- 10 Security Consideration
- 11 Documents / Resources
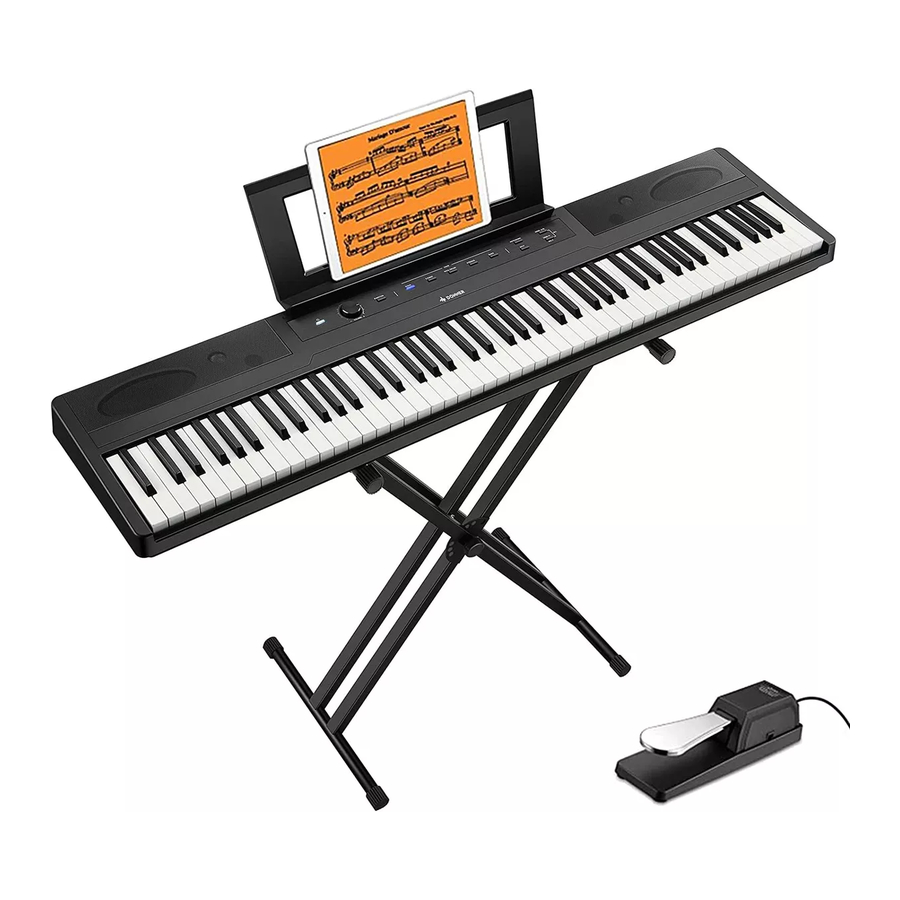
Installing the Music Stand
Slightly install the music stand into the groove of the piano body.

Panel Instruction
Control Panel

- POWER
- VOLUME
- FUNCTlON
- PlANO
- E.PlANO
- ROCK ORGAN
- STRlNGS
- BASS
- METRONOME
- SPLIT
- DEMO PLAY / STOP
- DEMO NEXT SONG REC PLAY
- REC
Back Panel

- PEDAL
- USB
- PHONES
- AUX OUT
- SUSTAlN
- POWER
External Connection
Power Cord Connecting

- Connect the power cord when using. Insert one end of the cord into the power socket behind the piano, and plug the other end of power adapter into the 100V~220V domestic power socket.
- Please unplug the power cord and save it in an appropriate way when it is not used for a long time.
Pedal Connection
Single Sustain Pedal:
Use specified pedal plug & insert the sustain pedal socket to turn on or off sustain effect.

Three Pedals:
- Soft Pedal: Depressing this pedal softens the sound so that it can reduce its volume.
- Sostenuto Pedal: Depressing this pedal sustains the sound that have been played.
- Sustain Pedal: Depressing this pedal sustains the sound after one's hands have been lifted from the keyboard.
![]()

Headphones Connecting
When you need to practice alone or play at the midnight, you can insert the stereo headphones into the headphones output socket on the behind of the piano.

 Note: Please avoid to wear headphones for a longtime in high volume, preventing hearing damage.
Audio Devices Connecting
The input / output socket on the back panel can be used in connecting to stereo audio system, mixer, recorder or other audio devices.

Note:
Please be sure the power supply of all the equipment have been turned off before connecting or disconnecting other devices. Meanwhile, turn down the volume of all devices to a minimum before turn on the power of devices.
Computer Connecting
The USB socket of this piano is MIDl Jack that can be connected directly to the computer.
Insert one end of the connecting line of USB to this piano, and insert the other end to the USB socket of the computer to achieve two-way transmission of signals so that you can play the MIDl of the computer on this piano.

Note:
- When setting the software of the computer, do not set the USB audio device to Input & Output at the same time, or else the sound would overlap when you play.
- When using connecting line of USB, do not use USB hub.
Function Introduction
Operation Guide
At the same time as the [FUNCTION] button above, click the corresponding key to set the function of this piano.

FUNCTION

Turn On the Power
NOTE
When not using the piano or thunder Please unplug the power plug.

- First, check if the power switch of the piano is turning off. If not, please turn off the power.
- Connect the power, insert the plug into the power socket behind the piano first, and then plug the opposite end of power adapter into the power socket.
- Before turning on the power, turn down the volume controller to the minimum first. Press the switch button and when the power button lights up, it indicates this piano is started. Backside
- Before turning off the power of digital piano, turn down the volume Piano Body controller to the minimum first, and press the button to turn it off.
![warning]() Note:
Note:
Be sure the supply voltage is 12V, too high or too low will damage the piano. Do not unplug the power cord from the power socket under the state of electrification.
Master Volume Setting
Adjust the volume knob on the control panel to turn up & down the volume.

- Turn the knob right to increase the overall volume.
- Turn the knob left to decrease the overall volume.
Auto Power Off

- In standby mode, this piano will shut down automatically with no operation for 30 minutes. This capability can be enabled or disabled as needed.
- Press the [FUNCTION] and [ A2 ], switch on/off the Auto Power Off function.
Key Sound Setting

- The default of the key sound is on.
- Press the [FUNCTION] and [#A2 ] simultaneously to turn on or off the key sound.
Double Keyboard Setting

- When double keyboard is turned on, the system automatically takes el key as separation point & separates the keyboard into two same sections in pitch & tone.
- By this state, you can achieve one-to-one teaching & practicing.
- Press the [FUNCTION] and [ B2 ] simultaneously to turn on or off the piano duet mode.


Selecting & Playing Timbre

- This piano has 10 pre-set authentic tones. (See Timbre Sheet)
- In standby mode, press [FUNCTION] and [ C1-E1 ] simultaneously to select the timbre.
- Press the direct selection buttons [PIANO], [E. PIANO], [ROCK ORGAN], [STRINGS], [BASS] on control panel.
- Press the desired timbre button, play & enjoy the pleasant music.
Key to Choose Timbre


Timbre Demo

- When the timbre is enabled, conduct related operation on Timbre Demo.
- Press the [FUNCTION] and [ F1] simultaneously to play the previous timbre demo.
- Press the [FUNCTION] and [ #F1] simultaneously to play the next timbre demo.
- Press the [FUNCTION] and [ G1] simultaneously to play/stop the timbre demo.
| Key | Description |
| F1 | Change the previous demo |
| #F1 | Change the next demo |
| G1 | Play/Stop the Timbre demo |
Split Timbre

- When this function is turned on, the keyboard can be separated into two individual playing segments that have different tones.
- In standby mode, press the [SPLIT] simultaneously to turn on or off the split timbre.
- Press the desired timbre with direct selection buttons. After turning off the SPLIT function, the tone direct selection key selects the right-hand tone.
- Taking #f as split point, you can hear different effects of timbre on the left & right section.
- When it is turned on, press the [SPLIT] simultaneously to turn off the split timbre.
- The main timbre is turned on by default and cannot be turned off. Split timbre can be turned on and off at will.


- Split Point: The position that separates the Keyboard to left & right hand segment called split point. The default split point is #f (34).
- When split timbre is turned on, press the [SPLIT] and any key simultaneously to change the split point.
- When you hold down the [SPLIT] button, and then press the key, the response is to set the split point, otherwise the response to the release of the button is the metronome. The left and this key of this key are the left-hand area, and the right is the right-hand area.
Piano Demo

- The piano is built-in 5 beautiful piano demos. (See Piano Demo.)
- Press
![]() button firstly. Play/Pause the piano demo. At this time, it will loop all the demos.
button firstly. Play/Pause the piano demo. At this time, it will loop all the demos. - Press
![]() to cyclically switch demos.
to cyclically switch demos. - Press [FUNCTION] while press [ #G1-C ] key to enter/exit the state of playing the corresponding demos. At this time, it will loop the current demo.
![]()
 button firstly. Play/Pause the piano demo. At this time, it will loop all the demos.
 to cyclically switch demos.
Reverb Effect

- The piano has 4 reverb Effect. Through adjusting reverb effects, it can achieve the effect of playing in different occasions.
- The default setting of reverb Effect is Hall 1.
- Press [FUNCTION] and [ #C], to turn OFF/ON Reverb Effect.
- Press [FUNCTION] and [ D-F ], to choose Reverb Effect.
| Key | Reverb Effect |
| #C | OFF/ON |
| D | HALL 1 |
| #D | HALL 2 |
| E | STAGE 1 |
| F | STAGE 2 |
Reverb Depth

- Adjust reverb depth, range: 0-127.
- Press [FUNCTION] and [ #F ], reverb depth value -1.
- Press [FUNCTION] and [ #G ], reverb depth value +1.
- Press [FUNCTION] and [ G ], return to reverb depth default value (depend on reverb types).
Tone Setting

- Slightly adjust the standard tone of the whole keyboard to match other music equipment.
- Adjustable range: 415.3Hz-466.2Hz. Default value: 440Hz.
- Press [FUNCTION] and [ A ], tone -, decrease the overall pitch in 0.2Hz.
- Press [FUNCTION] and [ B ], tone +, increase the overall pitch in 0.2Hz.
- Press [FUNCTION] and [ #A ], return to tone default value.
Transposition Setting

- The function of transposition is to adjust the overall pitch upward or downward in semitone.
- Maximum range: ±12 semitones. Transposition default value: 00.
- Press [FUNCTION] and [c], transposition -, decrease the overall pitch in semitone.
- Press [FUNCTION] and [d ], transposition +, increase the overall pitch in semitone.
- Press [FUNCTION] and [ #c ], return to transposition default value.
Metronome Switch

- If you are not sure about the beat, use this metronome and get tips about specific beat.
- Press the [METRONOME] key to turn on the metronome, and the beat sounds;
- Press the [METRONOME] key again to turn off the metronome, and the beat will stop.
![warning]() Notes: During MIDl recording, you can turn on the metronome, but it will not be recorded as recording data.
Notes: During MIDl recording, you can turn on the metronome, but it will not be recorded as recording data.
Metronome Type

- Press [METRONOME] and switch on metronome switch.
- Adjustment range: 1-9, the default value: 4.
- Press [FUNCTION] and [ #d ], the metronome type -1
- Press [FUNCTION] and [ f ], the metronome type +1
- Press [FUNCTION] and [ e ], return to the default value.
Metronome Speed

- Adjust the beat speed according to needs.
- Adjustment range: 30-280, the default value: 120.
- Press [FUNCTION] and [ #f ], the metronome speed -1.
- Press [FUNCTION] and [ #g ], the metronome speed +1.
- Press [FUNCTION] and [ g ], return to the default value.
Touch Curve

- The selection of the degree curve type can change the performance of the keyboard. The default is: Medium.
- Press [FUNCTION] and a-c1 to adjust the touch curve.
| KEY | Touch Curve Type | KEY | Touch Curve Type |
| a | Fixed | b | Soft |
| #a | Medium | c1 | Hard |
MIDl Record Setting

- The recorder function allows performances to be recorded and stored in the piano's internal memory.
- Only one song can be stored in this piano.
Before Recording
- Before recording, specifications e.g. tone and transposition need to be set.
- Press
![]() +
+![]() and begin to record. At this time, these two indicator lights are on.
and begin to record. At this time, these two indicator lights are on.
 +
+ and begin to record. At this time, these two indicator lights are on.
Record Start
- Play and start to record.
Record Stop
- During recording, press
![]() +
+![]() to stop the recording which can be stored automatically. These two indicator lights are off.
to stop the recording which can be stored automatically. These two indicator lights are off. - During recording, if the memory is full, the recording will stop and be stored automatically. Two indicator lights are off.
Record Playback
When  in the recording stop state, the button is the recording playback/stop function.
Bluetooth MIDl
- The default state of Bluetooth MIDl function is on.
- You can select the Bluetooth name of this piano in the MIDl setting interface of the external device or software compatible with this piano to complete the connection.
- The Bluetooth name of this piano: BTMIDI.
Instructions to use Bluetooth MIDI:
- Instructions for use of blue MIDI: Any app that can connect to Bluetooth MIDl and use the MIDI standard protocol for playback can be used.
- It is both compatible with IOS and Android devices.
Note: When you connect to the apps in the following list, you can directly enter the Bluetooth connection option in the app, without having to search for Bluetooth in the system.
| NO. | NAME | IOS | Android | Description |
| 1 | Garage band | Yes | No | Connect Bluetooth |
| 2 | Piano Diary | Yes | No | Connect Bluetooth |
| 3 | Cubasis LE 2 | Yes | No | Connect Bluetooth |
| 4 | Flow key | Yes | Yes | No need to connect Bluetooth |
| 5 | Simply Piano | Yes | No | No need to connect Bluetooth |
| 6 | Piano Maestro | Yes | No | No need to connect Bluetooth |
| 7 | Dust Buster 2 | Yes | No | No need to connect Bluetooth |
| 8 | Music School | Yes | No | No need to connect Bluetooth |
Product Specifications
Product Parameters

Product List
Timbre Sheet
| NO. | Timbre | NO. | Timbre |
| 1 | Grand Piano | 6 | Church Organ |
| 2 | Brite Piano | 7 | Strings |
| 3 | Electric Piano | 8 | Guitar |
| 4 | Harpsichord | 9 | Bass |
| 5 | Rock Organ | 10 | pad |
Piano Demo
| NO. | Name |
| 1 | Chpn_op25_n01 |
| 2 | Hungarian Dance No.5 |
| 3 | Lyrical Rondo |
| 4 | Minute Waltz |
| 5 | BWV 848 |
Piano Maintenance
Conscientiously do a good job in the maintenance and protection of this product. It plays an important role in prolonging the service life and reducing faults.
Avoid heat, dampness, or direct sunlight
The product should not be exposed excessively to the direct sunlight, placed near the air conditioner or extremely hot places.
No use near TV or radio
This product may cause video or audio interference to the reception of TV and radio. If this happens, it should be removed from the radio or TV products.
Don't use paint, diluent or similar chemicals to clean it
Wet a soft towel with weak solution and detergent and wring it out until it dries. Clean the product with this towel.
No shaking and collision
The product should be moved carefully. Violent shake and collision are prohibited to avoid damaging the shell or internal electronic components.
Troubleshooting
| Issue | Reason | Solution |
| There was no sound on the keyboard. |
|
|
| The pedals don't work. |
|
|
| When the piano power is turned on or off there is a murmur. | Normal phenomenon | This is a normal phenomenon, indicating that the current enters the machine at this time. |
| The piano is noisy when using a mobile phone. | Radio interference | The use of mobile phones in the vicinity of the piano produces radiation. To avoid this situation, you can turn off the mobile phone or use it away from the piano. |
| Abnormal tone or rhythm. | Power shortage | Power shortage. Check power stability. |
| It seems that all tones are pronounced or that the pronunciation seems to be cut off. | Normal phenomenon | The maximum sounds the dual accompaniment notes or sounds in the accompaniment music number of simultaneous on this instrument is 128 notes. If tone mode is in use and the or music is playing, some or will be default. |
| Under the same timbre, the quality of a note is different from that of a note. | Normal phenomenon | This is a normal phenomenon. This machine adopts AWM sound source mode. This kind of sound source is sampled and recorded in the whole keyboard area, so the quality of the two notes is slightly different. |
| Connecting Computer, Not recognized | USB plug loose | No need to install extra drives. If the piano isn't recognized by computer, please check if the USB cords are connected securely or try to connect other USB socket of the computer. |
Security Consideration
Power Adapter
This product can be supplied by standard indoor wall socket. Please use only the power cord specified by this product. When you do not use, please be sure to turn off the power supply. If you do not use it for a long time, please pull out the power cord and keep it properly.

Sign
In order to ensure that you use this product safely and correctly, prevent damage to the user and other people and the financial issue. The specification and the product are marked with a series of safety signs. All kinds of signs and their meaning are as follows:

This sign indicates that, if you ignore the flag and error operation of this product, there is a fire hazard or serious injury to personnel.
Attention
This sign indicates that, if you ignore the flag and the wrong operation of this product, there is a potential risk of injury or other financial damage caused by personnel.
Logo example
 This triangle mark (
  ) indicates that the user should pay attention to the matters.( Left case shows "Be careful electric shock.")
 The circular sign painting a slash (
  ) said prohibited matters. The logo shows the specific content of the ban. (Left case shows "No Disassemble".)
 Black dots (
  ) indicate matters must be complied with. Icon in this sign indicates the specific content that must be followed. (Left case shows "The power plug must be pulled out of the socket.")
Smoke, odor, overheating
When the product is smoking, emitting odors or overheating, continue use may lead to the danger of fire and electric shock. In the event of such a situation, the following operations shall be carried out immediately.
- Turn off the power supply.
- Pull the plug from the power outlet.
- Contact your agency.
Power line
Improper use of power supply leads to danger of fire and electric shock must observe the following precautions.
![warning]() Special power lines specified for this product must be used.
Special power lines specified for this product must be used.- An AC power source with output voltage within the household rated voltage must be used.
![]() It is not allowed to overload the power socket and the power extension line.
It is not allowed to overload the power socket and the power extension line.
Improper handling of power lines may result in damage or rupture, which may cause the danger of fire and electric shock. The following precautions must be observed:
![]() Do not place heavy objects on the power line or make them heated.
Do not place heavy objects on the power line or make them heated.- Do not attempt to transform the power cord or bend it too much.
![warning]() Do not twist or pull the power cord.
Do not twist or pull the power cord.- If the power cord or plug is damaged, replace the power cord of the same type.
 Do not use wet hands to touch the power cord and plug, otherwise there is a risk of electric shock.
![warning]() Please use the power lines in the place where the water will not be spilled. Water has the risk of fire and electric shock.
Please use the power lines in the place where the water will not be spilled. Water has the risk of fire and electric shock.![]() Never put a vase or any other container with water on this product. Water has the risk of fire and electric shock.
Never put a vase or any other container with water on this product. Water has the risk of fire and electric shock.![]() Do not let the minors contact plug and power line or a connecting plate. The minors have less knowledge of electricity safety which may cause danger of electric shock.
Do not let the minors contact plug and power line or a connecting plate. The minors have less knowledge of electricity safety which may cause danger of electric shock.
 Never put a vase or any other container with water on this product. Water has the risk of fire and electric shock.
Improper use of power lines has the risk of fire and electric shock hazard. The following precautions must be observed.
![]() Do not place the power cord near the furnace or other heat sources. Unplug the power cord from the power outlet. The plug body must be grasped.
Do not place the power cord near the furnace or other heat sources. Unplug the power cord from the power outlet. The plug body must be grasped.- Plug the power cord into the power socket.
- Before connecting or cutting off the power cord, make sure that the power is off.
![warning]() The power cord should be removed from the electrical outlet of the wall before a thunderstorm occurs or traveling or before other long leave.
The power cord should be removed from the electrical outlet of the wall before a thunderstorm occurs or traveling or before other long leave.- At least once a year, unplug the power cord from the wall outlet and clean the dust around the plug.
Don't burn this product
 Do not put this product into the fire otherwise it will cause the burning of wood products and the explosion of the internal electronic components. There is a danger of fire and personnel injury.
Water and foreign matter
 Water and other liquids and (metal) into this product has the risk of causing fire and electric shock. The following operation should be performed immediately when the above situation occurs.
- Turn off the power supply.
- If the power cord is used for power supply, it will be pulled off from the wall of the power outlet.
- Contact your dealer.
Dismantling and rebuilding
 Do not disassemble this product or transform it in any way. Otherwise it will be hazardous to electrical shock, burns or other personal injury. All internal inspection, adjustment and maintenance operations should be entrusted to your dealer.
Drop or impact
This product is subject to the risk of fire and electric shock after falling or being subjected to a strong impact. The operation should be performed immediately following the above mentioned situation.
- Turn off the power supply.
- If the power cord is used for power supple, it should be pulled off.
- contact your dealer.
Plastic bag
Do not let any person put the plastic bag on the head or put in the mouth. Otherwise there is the risk of suffocation families with children should pay special attention to that.
Keep the distance with the product and support
Climb the body or its support is in danger of tipping or damage. The children's families should pay special attention to.
Display
You should avoid placing this product on an uneven surface or any other unstable place. Otherwise, it will cause it falling and a risk of injury to the person.
Product movement

Before moving this product, you must first pull off the wall of the power outlet, the power cord plug and pull off all other cables and connecting wires. Otherwise there will be damage to the line, resulting in fire and electric shock hazard.
Clean
Before you clean this product, you must first remove the power cord from the wall outlet, otherwise there is a risk of fire and electric shock.
Interface
The interface of this product can only be connected to the specified equipment and devices. The connection of non designated equipment or devices have the risk of fire and electric shock.
Location selection
This product shouldn't be put in the following places. Otherwise there will be a risk of fire or electric shock.
- High temperature or dusty places.
- Kitchen or other places with oil fumes.
- A place where direct sunlight is irradiated. Do not expose to excessive heat or moisture environment
Volume
Do not play music at high volume for long periods of time. Special attention should be paid when using the headphones. Too high volume may damage your hearing.
Heavy objects
Do not place heavy objects on this product otherwise the top will be overloaded causing the product or the object falling and the risk of injuring persons.
Correct assembly of the support
The incorrect assembly of support will make it overturned, causing the product dropping and the risk of injuring personnel. Therefore, it is necessary to carry out the instructions in accordance with the instructions to ensure that the product is properly installed.
Replace the fuse
If the fuse breaks, there may be short circuit or voltage instability in the product. Professionals are required to identify and replace them, otherwise there is a risk of fire or electric shock.
Documents / ResourcesDownload manual
Here you can download full pdf version of manual, it may contain additional safety instructions, warranty information, FCC rules, etc.
Advertisement


Need help?
Do you have a question about the DEP-45 and is the answer not in the manual?
Questions and answers