Philips DVDR3475 User Manual
Digital video disc recorder
Hide thumbs
Also See for DVDR3475:
- Specifications (2 pages) ,
- Quick start manual (2 pages) ,
- Service manual (69 pages)

Related Manuals for Philips DVDR3475


Summary of Contents for Philips DVDR3475
-
Page 1: User Manual
DIGITAL VIDEO DISC RECORDER DVDR3475/37 User Manual E7E4AUD.indd 1 E7E4AUD.indd 1 2007/06/20 13:09:48 2007/06/20 13:09:48... -
Page 2: Precautions
Registering your model with PHILIPS makes you eligible for all of the valuable benefits listed below, so don't miss out. Complete and return your Product Registration Card at once, or register online at www.philips.com/welcome to ensure:... -
Page 3: Important Safety Instructions
PRECAUTIONS IMPORTANT SAFETY INSTRUCTIONS Read before operating equipment 1. Read these instructions. Do not compromise these design standards by applying excessive ● 2. Keep these instructions. pull force to the front, or top, of the cabinet which could ultimately 3. Heed all warnings. overturn the product. -
Page 4: Safety Precautions
If there are questions regarding your TV set compatibility with this 525p (480p) DVD player, please contact our customer service center. Declaration of Conformity Model Number: DVDR3475/37 Trade Name: Philips Responsible Party: Philips Consumer Electronics Company Marietta, GA 30006-0026 1-888-PHILIPS (744-5477) Copyright 2007 Philips. All rights reserved. E7E4AUD.indd 4 E7E4AUD.indd 4 2007/05/16 14:56:06... - Page 5 For online remote control is working. reference, please visit our web site at http://www. • With a digital camera (including built-in camera of philips.com/welcome cellular phone): Direct a digital camera to remote control, Cleaning the cabinet press and hold a button on remote control.
-
Page 6: Table Of Contents
CONTENTS Introduction Recording PRECAUTIONS ........2 INFORMATION ON DVD RECORDING . - Page 7 CONTENTS Playback Editing INFORMATION ON PLAYBACK ....42 INFORMATION ON DISC EDITING....60 BASIC PLAYBACK .
-
Page 8: Features
FEATURES This unit not only plays back DVD and CD but also offers features for you to record on DVD and edit them after that. The following features are offered with this unit. Recording Compatibility This unit is compatible with DVD+RW/DVD-RW, which is Available for playing back discs on a regular DVD player: rewritable repeatedly and DVD+R/DVD-R, which is avail- Recorded discs can be played back on regular DVD players,... -
Page 9: Functional Overview
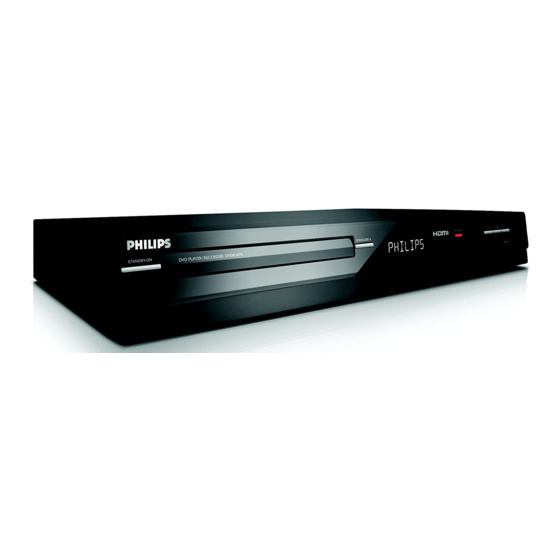
FUNCTIONAL OVERVIEW Front Panel 6* 7 3475 3475 ( * ) The unit can also be turned on by pressing these buttons. 8. RECORD button Press once to start a recording. Press repeatedly to 1. STANDBY-ON button start one-touch timer recording. Press to turn the unit on and off. -
Page 10: Remote Control
FUNCTIONAL OVERVIEW Remote Control Installing the Batteries in the Remote Control Using a Remote Control Install the batteries (AAAx2) matching the polarity Keep in mind the following when using the remote control: indicated inside battery compartment of the remote • Make sure that there are no obstacles between the remote control. -
Page 11: Functional Overview
11. PAUSE F button 29. TV VOL button Press to pause playback or recording. Limited to the Philips brand TV products, you can 12. PREV button adjust the TV volume with these buttons. • During playback, press to return to the beginning of 30. -
Page 12: Front Panel Display
FUNCTIONAL OVERVIEW Front Panel Display 3. Current status of the unit 4. Displays the following • Elapsed playback time : Appears when playback is : Appears in the afternoon paused. with the clock display. • Current title / chapter / track / file number 2. -
Page 13: Connection To An External Tuner
CONNECTION TO AN EXTERNAL TUNER This section describes how to connect this unit to an external tuner such as cable/satellite box. rear of your TV • When you change the connections, all devices should be turned off. VHF / UHF antenna •... -
Page 14: Settings For The Video Input
SETTINGS FOR THE VIDEO INPUT You must let the unit know which video input jack you are using before making a recording. Press [SETUP] and use [K / L] to select “General Setting”, then press [OK]. “General Setting” menu will appear. Use [K / L] to select “Video”, then press [OK]. -
Page 15: Connection To A Tv
CONNECTION TO A TV Make one of the following connections, depending on the capabilities of your existing device. Method 1 Method 2 Method 3 analog audio standard picture good picture better picture AUDIO IN S-VIDEO IN VIDEO COMPONENT VIDEO IN (Green) (Blue) (Red) -
Page 16: Connection To A Tv With An Hdmi Compatible Port
CONNECTION TO A TV WITH AN HDMI COMPATIBLE PORT A simple 1-cable connection with a device having an HDMI (high-definition multimedia interface) connector allows digital transfer of the digital images of DVD-video and other devices. Method 4 best picture HDMI IN HDMI cable this unit HDMI OUT... -
Page 17: Connection To A Tv With An Hdmi Compatible Port
CONNECTION TO A TV WITH AN HDMI COMPATIBLE PORT Actual Output Modes by Media Audio recording format of the disc Dolby Digital setting of this unit Actual output 2channel PCM Dolby Digital Stream Dolby Digital DVD-video LPCM 2channel PCM Stream 2channel PCM Dolby Digital Stream... -
Page 18: Connection To An Audio System
CONNECTION TO AN AUDIO SYSTEM 2 Channel Analog Audio Connection Digital Audio Connection stereo system Dolby Digital decoder, MD deck or DAT deck COAXIAL audio AUDIO IN analog audio digital audio input jacks coaxial input jack RCA audio cable digital audio coaxial cable this unit VIDEO VIDEO... -
Page 19: Guide To On-Screen Displays And Menus
GUIDE TO ON-SCREEN DISPLAYS AND MENUS This unit uses the following on-screen displays and menus to guide you to the easy operations. The on-screen displays give you the information on the loaded disc, the disc/file in playback, or the HDMI status, etc. The menus allow you to change the various kinds of settings for playing back, recording, or editing to suite your preference. - Page 20 GUIDE TO ON-SCREEN DISPLAYS AND MENUS Title/File Name Information HDMI Information Title Name Information Title Name Video Info. : 480p YCbCr My Title Audio Info. : Bitstream File Name Information File Name My File 1. Displays title/file name. * This is an example screen only for explanation. 1.
-
Page 21: Main Menu
GUIDE TO ON-SCREEN DISPLAYS AND MENUS Main Menu Press [SETUP] to display the main menu. Then use 1. General Setting: [K / L] to select a menu and press [OK] to display the To go to general setting menu. 2. Timer Programming: menu. -
Page 22: Initial Setting
INITIAL SETTING You need to follow these steps when you turn on this unit for the first time. Press [STANDBY-ON y y ]. Turn the TV on. Select the input to which the unit is connected. Use [K / L] to select your desired language, then press [OK] to set language. -
Page 23: Setting The Clock
SETTING THE CLOCK Set the clock before you try the timer programming. Clock Setting Press [SETUP] and use [K / L] to select “General Setting”, then press [OK]. “General Setting” menu will appear. Use [K / L] to select “Clock”, then press [OK]. -
Page 24: Information On Dvd Recording
INFORMATION ON DVD RECORDING Before you make a recording, read the following information. Recordable Discs Recording Mode This unit can record to DVD+RW, DVD+R, DVD-RW and You can select a recording mode among 6 options, and DVD-R. the recording time will depend on the recording mode DVD+R/DVD-R can only be recorded to once. -
Page 25: Before Recording
BEFORE RECORDING Make Recording Compatible Setting for Auto Chapter You can set a specified time for chapter marks. Use this feature to make the unfinalized +VR mode discs 1) Press [SETUP] and use [K / L] to select “General recorded on other unit recordable on this unit. When you Setting”, then press [OK]. -
Page 26: Basic Recording & One-Touch Timer Recording
BASIC RECORDING & ONE-TOUCH TIMER RECORDING Follow the steps to record TV programs from an external Press [STANDBY-ON y y ]. tuner. Turn on the TV and be sure to select the input to This unit has no tuner system so cannot receive TV which the unit is connected. - Page 27 BASIC RECORDING & ONE-TOUCH TIMER RECORDING Press [REC I] to start recording. Press [STOP C] to stop recording. “I” will be displayed for 5 seconds. The recorded title will appear in the title list. (Refer to “Guide to a Title List” on page 60.) e.g.) DVD+R Finalize the recordings so that the disc can be played on regular DVD players.
-
Page 28: Timer Recording
TIMER RECORDING You can program the unit to record up to 12 programs Guide to Timer Programming Display within a month in advance. Daily or weekly program recordings are also available. Timer Programming Before recording, make sure JAN/ 2/07 12:00 AM E1 SP SP (1:00) MON JAN/01 11:00AM •... - Page 29 TIMER RECORDING Use [K / L] or [the Number buttons] Auto recording mode select... to enter the start and end time, then When “Auto” is selected as a recording mode, the unit press [B]. calculates how much time is available on the disc and determines the appropriate recording mode to Timer Programming complete recording the program.
- Page 30 TIMER RECORDING Checking, canceling, or correcting the timer If the timer program did not complete correctly, programming information the error number appears in the timer pro- gramming list. 1) Press [STANDBY-ON y y ]. 2) Press [TIMER]. Timer Programming 3) Check the information on the list you will need. TUE JAN/02 11:00AM Date Start...
-
Page 31: Hints For Timer Recording
TIMER RECORDING Hints for Timer Recording • If there is a power failure or this unit has been unplugged for more than 30 seconds, the clock setting and all timer programming will be lost. • If a disc is not inserted, flashes and timer recording cannot be performed. -
Page 32: Overwriting Unnecessary Title
OVERWRITING UNNECESSARY TITLE Overwriting from the Beginning of Overwriting in the Middle of the Title the Title You can overwrite the existing title from the selected You can overwrite the existing title from the beginning. position. 1) Press [STANDBY-ON y y ]. 1) Follow the steps 1, 2 and 4 on the left. -
Page 33: Hints For Overwriting
OVERWRITING UNNECESSARY TITLE Hints for Overwriting When you overwrite on the unnecessary title, there were various circumstances such as follows. Please note that following cases only describe the overwriting without any recording mode discrepancy. To avoid accidental deletion please check if there is no important title after the overwriting point. When overwriting title is shorter than the existing title: (overwriting from the beginning of the title) overwrite... -
Page 34: External Device Recording
EXTERNAL DEVICE RECORDING Connection to an External Device Connect the external device properly to either E2 (front) or E1 (rear) input jacks of this unit by using S-video or RCA audio / video cables. If you are connecting a DV-camcorder, connect it to E3 (front) by using DV cable. S-VIDEO VIDEO AUDIO OUT... -
Page 35: Recording From An External Device
EXTERNAL DEVICE RECORDING Recording from an External Device Before recording from an external device, refer to the instructions for the connection on page 34. Turn on the TV and press [STANDBY-ON y y ], and be sure to select the input of the TV to which the unit is connected. -
Page 36: Dv Dubbing
DV DUBBING Guide to DV and On-Screen Display This function helps you to easily dub the contents of the DVC (digital video camcorder) to DVD. You can control basic operations of the DVC from the remote control of this unit such as playback, fast forward or reverse and stop all operations if the DVC is in video mode. -
Page 37: Dvc To Dvd Dubbing
DV DUBBING DVC to DVD Dubbing Before recording from DVC, see page 34 for connection Insert a recordable media and make sure your DV instructions. camcorder is in video mode. Use [SOURCE] to select “E3 (DV-IN)”. E3 (DV-IN) AB-1234 0:00:00 Press [REC MODE] to select a recording mode. - Page 38 DV DUBBING Press [PLAY B] to find the point where you wish to start dubbing. Then, press [STOP C] where you wish to start dubbing. Use [K / L] to select “Start Rec”, then press [OK]. The dubbing will start. To stop dubbing;...
-
Page 39: Setting A Disc To Protect
SETTING A DISC TO PROTECT To prevent accidental recording, editing or erasing the titles, you can protect them from “Disc Edit” menu. Press [SETUP]. Use [K / ] to select “Disc Edit”, then press [OK]. Use [K / L] to select “Disc Protect OFF ON”, then press [OK]. -
Page 40: Playing The Discs In Other Dvd Players
PLAYING THE DISCS ON OTHER DVD PLAYERS Finalizing a Disc Press [SETUP]. You will need to finalize DVD+R, DVD-RW or DVD-R to play them back on other DVD players. Finalizing may take several minutes up to an hour. A shorter recording period on the disc will require a Use [K / L] to select “Disc Edit”, then longer time period for finalization. -
Page 41: Auto Finalizing
PLAYING THE DISCS IN OTHER DVD PLAYERS Auto Finalizing Press [SETUP] and use [K / L] to select “General Setting”, then press You can finalize discs automatically using this function. You can use this function to finalize discs after finishing [OK]. -
Page 42: Information On Playback
INFORMATION ON PLAYBACK Before you play back DVD, read the following information. DivX, DivX Certified, and associated logos Playable Discs and Files are trademarks of DivX, Inc. and are used This unit is compatible to play back the following discs. under license. - Page 43 INFORMATION ON PLAYBACK PBC (playback control) for Video CD Hint for DVD Playback The contents of DVD are generally divided into titles. You can select images or information on the menu Titles may be further subdivided into chapters. screen by activating the PBC (playback control) function of the video CD.
-
Page 44: Basic Playback
BASIC PLAYBACK Direct Playback Press [STANDBY-ON y y ]. Turn on the TV and be sure to select the input to which the unit is connected. Press [OPEN/CLOSE A] to open the disc tray and insert your disc with its label facing up. -
Page 45: Playback From The Title List
BASIC PLAYBACK Playback from the Title List Press [STANDBY-ON y y ]. Turn on the TV and be sure to select the input to which the unit is connected. Press [OPEN/CLOSE A] to open the disc tray and insert your disc with its label facing up. - Page 46 BASIC PLAYBACK Use [K / L] to select a desired title, Use [K / L] to select “Play”, then then press [OK]. press [OK]. SP (2Hr) SP (2Hr) P l a y E d i t NOV/21/07 11:00AM E1 SP NOV/21/07 11:00AM E1 SP O v e r w r i t e NOV/21/07...
-
Page 47: Playing Back An Audio Cd And A Cd-Rw/-R With Mp3/Windows Media™ Audio/Jpeg Files
BASIC PLAYBACK Playing Back an Audio CD and a CD-RW/-R with MP3/Windows Media™ Audio/JPEG Files Use [K / L] to select a desired folder or track/file, then press [OK]. e.g.) File list File List DISC NAME 1 JPEG file1 2 JPEG file2 3 MP3 file1 4 MP3 file2 5 WMA file1... -
Page 48: Playing Back A Divx
BASIC PLAYBACK Playing Back a DivX® Follow steps 1 to 2 in “Direct Playback” on page 44. Press [OPEN/CLOSE A] to close the disc tray. It may take a while to load the disc completely. File list will appear automatically. •... - Page 49 BASIC PLAYBACK It is recommended that files to be played back in this • Some DivX® VOD files are unit are recorded under the following specifications: restricted with the limited playable times (you cannot Official DivX® Certified product DivX ® VOD Rental play them back beyond the This rental has...
-
Page 50: Using The Title / Disc Menu
BASIC PLAYBACK Using the Title / Disc Menu Pause 1) During playback, press [PAUSE F]. Playback will be paused and sound will be muted. DVD or video CD with PBC function may contain a title list, which describes the contents of the disc, or a disc menu, which guides you through the available functions in the disc. -
Page 51: Special Playback
SPECIAL PLAYBACK Resume Playback Note • Forward/reverse speed will be indicated with icons You can play back from where you stopped playing back as follows. the disc last. forward (approx. speed) 1) During playback, press [STOP C]. 20x: The resume message will appear. 40x: reverse (approx. -
Page 52: Rapid Playback
SPECIAL PLAYBACK Rapid Playback Slow Forward / Slow Reverse Playback Rapid playback function is available only during playback. 1) During playback, press [PAUSE F]. Then press This function is available only on discs recorded in the [FFW D] or [REW E]. Dolby Digital format, and plays back in a slightly faster/ Every time you press [FFW D] or [REW E], slower speed while keeping the sound quality just as... -
Page 53: Zoom
SPECIAL PLAYBACK Zoom Marker Setting This feature allows you to assign a specific point on a disc 1) During playback, press [INFO] or [ZOOM]. to be called back later. 2) Use [{ / B] to select , then press [OK] within 1 1) During playback, press [INFO]. -
Page 54: Search
SEARCH Title / Chapter Search Track Search Using [PREV ] / [NEXT ] Using [PREV ] / [NEXT ] 1) During playback, press [NEXT ] to skip the current 1) During playback, press [NEXT ] to skip the current track/file and move to the next. title or chapter and move to the next. -
Page 55: Time Search
SEARCH Time Search 1) During playback, press [INFO]. 2) Use [{ / B] to select , then press [OK]. e.g.) DVD-video 1/ 5 1/ 5 0:01:00 / 1:23:45 DVD Video e.g.) audio CD 1/ 5 0:00:15 / 0:05:00 The number next to will be highlighted. -
Page 56: Slide Show
REPEAT / RANDOM / PROGRAM PLAYBACK / SLIDE SHOW Repeat Playback Note • Point B for the repeat A-B playback should be set Available repeat function may vary depending the discs. within the same title or track as point A. 1) During playback press [INFO], then proceed to •... -
Page 57: Program Playback
REPEAT / RANDOM / PROGRAM PLAYBACK / SLIDE SHOW Program Playback Slide Show You can program the disc to play back in your desired You can select the display time between 5 seconds and order. 10 seconds. 1) Press [SETUP]. 1) Follow steps 1 and 2 in “Random Playback”... -
Page 58: Selecting The Format Of Audio And Video
SELECTING THE FORMAT OF AUDIO AND VIDEO You can select the format of audio and video as you prefer depending on the contents of the disc you are playing back. Switching Subtitles Switching Audio Soundtrack DVD-video may have subtitles in 1 or more languages. When playing back a DVD-video recorded with 2 or more Available subtitle languages can be found on the disc soundtracks (these are often in different languages), you... -
Page 59: Switching Virtual Surround System
SELECTING THE FORMAT OF AUDIO AND VIDEO Switching Virtual Surround System Switching Camera Angles Some DVD-video have scenes shot from 2 or more angles. Angle information should be on the disc case if You can enjoy stereophonic virtual space through your the disc contains multi-angle scenes. -
Page 60: Information On Disc Editing
INFORMATION ON DISC EDITING Guide to a Title List Editing Discs Title list allows you to check the titles recorded on the You can edit discs for the following items. Be sure that disc easily. You can choose a title to play back from this once you edit titles, they will not remain as original. -
Page 61: Editing Discs
EDITING DISCS Deleting Titles You can delete titles which you do not need anymore. Use [K / L] to select “Edit”, then Please be advised that the titles once deleted cannot be press [OK]. brought back to the disc. For DVD+RW/DVD-RW, when the last recorded title in the title list is deleted, the available disc space to record on SP (2Hr) P l a y... -
Page 62: Putting Names On Titles
EDITING DISCS Putting Names on Titles You can put title names on the titles and change the names from this menu. Use [K / L] to select “Yes”, then press [OK]. Edit - Edit Title Name MY FAVORITE 0:00:59 The name you entered will be activated for the title. After this operation is completed, press [BACK ] to exit. -
Page 63: Setting Chapter Marks
EDITING DISCS Setting Chapter Marks You can put chapter marks in each title. Once a chapter is Follow steps 1 to 3 in “Deleting marked, you can use it for the chapter search feature. Titles” on page 61 to display “Edit” menu.
Need help?
Do you have a question about the DVDR3475 and is the answer not in the manual?
Questions and answers