
Related Manuals for Haier QFD15ESMNWW


Summary of Contents for Haier QFD15ESMNWW
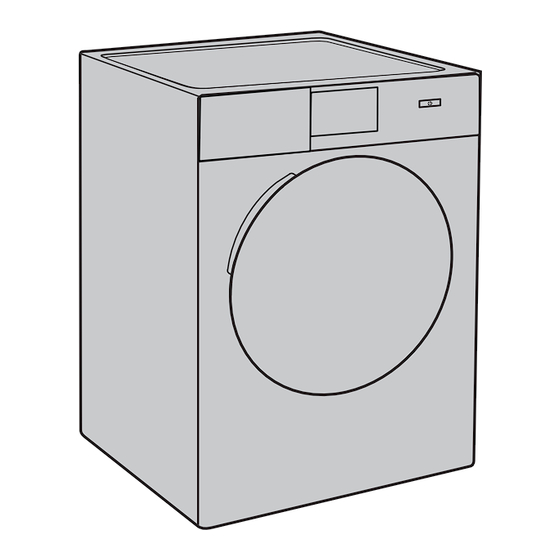
- Page 1 Owner's Manual & Installation Instructions Manuel d'utilisation et Instruction d'installation QFD15 Series/Séries/Serie Dryers Sécheuses 49-3000195 06-19 GEA...
-
Page 2: Table Of Contents
CONSUMER SUPPORT ................... 32 RECORD KEEPING ____________________________________________________ Thank you for purchasing this Haier Appliances product. This Model number Owner's Manual will help you get the best performance from your new dryer. -
Page 3: Important Safety Information
SAFETY INFORMATION IMPORTANT SAFETY INFORMATION READ ALL INSTRUCTIONS BEFORE USING THE APPLIANCE To reduce the risk of fire, explosion, electric shock, or injury to persons when using your appliance, WARNING follow basic precautions, including the following: Read all instructions before using the appliance. DO NOT dry articles that have been previously cleaned in, washed in, soaked in, or spotted with gasoline, dry-cleaning solvents, or other flammable or explosive substances, as they give off vapors that could ignite or explode. -
Page 4: Using The Dryer
USING THE DRYER To reduce the risk of fire, electric shock, or injury to persons, read the IMPORTANT SAFETY WARNING INFORMATION before operating this appliance. Throughout this manual, features and appearance may vary from your model. Step 1* Step 2* Step 3* Step 4* •... -
Page 5: Dry Cycles
USING THE DRYER Display and Status Lights The display shows the approximate time remaining until the end of the cycle. In addition, this display will show the dryer status: Status Damp Cool Controls lock feature. Clean Filter Time to clean the filter. See the Care and Cleaning section. Damp Alert When Damp Alert option is selected and clothes have dried to a damp dryness level, indicator will appear and dryer will beep. -
Page 6: Temp (Temperature)
USING THE DRYER Temp (Temperature) You can change the temperature of your dry cycle. High For regular to heavy cottons. Medium For synthetics, blends and items labeled Permanent Press. For delicates, synthetics and items labeled Tumble Dry Low. No Heat This option may only be used with Air Fluff and Timed Dry, in which items are tumbled without heat. - Page 7 USING THE DRYER My Cycle My Cycle Set up your favorite combination of settings for each cycle and save them here for one touch recall. These custom settings can be set while a cycle is in progress. NOTE: you can store one My Cycle combination of settings for each cycle.
-
Page 8: Loading
LOADING Always follow fabric manufacturer’s care label when laundering. Fabric Care Labels Below are fabric care label “symbols” that affect the clothing you will be laundering. Dry Labels Tumble Do not dry Normal Permanent Press/ Gentle/ Do not tumble dry (used with wrinkle resistant delicate... -
Page 9: Care And Cleaning
Remove the cleaner residue and then dry with a clean cloth. The stainless steel used to make the dryer drum provides the highest reliability available in a Haier Appliances dryer. If the dryer drum should be scratched or dented during normal use, the drum will not rust or corrode. These surface blemishes will not affect the function or durability of the drum. - Page 10 CARE AND CLEANING Drum Lamp NOTE: The drum lamp is not consumer replaceable on models where there is a flat cover over an LED bulb. If this light should ever stop working, contact us for service. For models that have a domed cover over the bulb secured by a screw: Before replacing the light bulb, be sure to unplug the dryer power cord or disconnect the dryer at the household distribution panel by removing the fuse or switching off the circuit breaker.
-
Page 11: Installation Instructions
DRYER INSTALLATION INSTRUCTIONS If you have questions, visit our website at haierappliances.com or in Canada visit haiercanada.ca. BEFORE YOU BEGIN WARNING Read these instructions completely and carefully. IMPORTANT - Risk of Fire • – Save these instructions for local electrical inspector’s use. •... -
Page 12: Dryer Dimensions
With leveling legs fully extended: 33-5/8 (85.4 cm) Stacked: 66-1/2” (168.9 cm) ELECTRICAL CONNECTION POWER CORDS DIMENSIONS Haier Appliances strongly recommends the use of factory 20-1/2” specified parts. Select the power cord to fit your installation (52.1 cm) requirements. Part Number... - Page 13 INSTALLATION INSTRUCTIONS REQUIREMENTS FOR ALCOVE OR MINIMUM CLEARANCE OTHER THAN CLOSET INSTALLATION ALCOVE OR CLOSET INSTALLATION WARNING - Explosion Hazard Minimum clearance to combustible surfaces and for air opening are: 0” both sides, 1” rear and 1” top. Keep flammable materials and vapors, such as gasoline, away from dryer.
-
Page 14: Undercounter Installation
INSTALLATION INSTRUCTIONS UNDERCOUNTER INSTALLATION BATHROOM OR BEDROOM INSTALLATION If an undercounter installation is desired: • No special dryer installation kit is required. The installation must conform with local codes or, in the absence of local codes, with the NATIONAL • If the dryer is installed alone, a minimum of 60 ELECTRICAL CODE, ANSI/NFPA NO. -
Page 15: Tools You Will Need
INSTALLATION INSTRUCTIONS CONNECTING AN ELECTRIC DRYER TOOLS YOU WILL NEED Before making the electrical connection, turn off the circuit breaker(s) or remove the dryer’s circuit fuse(s) at Slip-joint pliers Phillips the electrical box. Be sure the dryer cord is unplugged screwdriver from the wall. -
Page 16: Grounding Instructions
INSTALLATION INSTRUCTIONS ELECTRICAL CONNECTION ELECTRICAL CONNECTION INFORMATION FOR ELECTRIC INFORMATION FOR ELECTRIC DRYERS DRYERS For direct wire connections: For electrical connections using a power cord: WARNING - Fire Hazard WARNING - Fire Hazard Use 10 gauge copper wire. Use a new UL-listed 240V 30 amp dryer power supply cord Use a UL-listed strain relief. - Page 17 INSTALLATION INSTRUCTIONS CONNECTION If required, by local code, install external ground (not provided) to grounded metal, cold water pipe, or other established ground determined by a qualified electrician. NOTE: Since January 1, 1996, the National Electrical Black or Red Wire Code requires that new constructions use a 4-wire connection to an electric dryer.
- Page 18 • If rigid metal cannot be used, then UL-listed flexible duct, or within the dryer. metal clothes dryer transition duct (Haier Appliances DO NOT use flexible metal or metal foil ducting part – PM08X10085) can be used.
- Page 19 INSTALLATION INSTRUCTIONS EXHAUSTING THE DRYER (cont.) • DO use elbows when • DO cut duct as short turns are necessary. as possible and install straight into wall. Elbows • DO NOT bend • DO NOT use • DO NOT • DO NOT or collapse excessive crush duct...
-
Page 20: Before You Begin
INSTALLATION INSTRUCTIONS EXHAUSTING THE DRYER (cont.) EXHAUST SYSTEM CHECKLIST STANDARD REAR EXHAUST HOOD OR WALL CAP We recommend that you install your dryer before installing your washer. This will permit direct access • Terminate in a manner to prevent back drafts or entry of for easier exhaust connection. - Page 21 INSTALLATION INSTRUCTIONS EXHAUSTING THE DRYER (cont.) SIDE OR BOTTOM VENTING SIDE OR BOTTOM VENTING (cont.) ADDING A NEW DUCT WARNING - Fire Hazard Portion “A” Fixing hole Disconnect dryer from electrical supply. Wear gloves and arm guards. Right Close the back opening with cover plate (Kit Right or left WE49X22606).
- Page 22 INSTALLATION INSTRUCTIONS EXHAUSTING THE DRYER (cont.) SIDE OR BOTTOM VENTING (cont.) SIDE OR BOTTOM VENTING (cont.) ADDING ELBOW AND DUCT FOR EXHAUST ADDING COVER PLATE TO REAR OF TO LEFT OR RIGHT SIDE OF CABINET (cont.) CABINET • Apply duct tape as shown DUCT on the joint between the TAPE...
-
Page 23: Final Setup
INSTALLATION INSTRUCTIONS FINAL SETUP LEVEL THE DRYER DRYER START-UP Press and hold the power button. Stand the dryer upright near the final location and adjust the four leveling legs at the corners to ensure that the dryer is level from side to side and front to rear. NOTE: If the dryer has been exposed to temperatures below freezing for an extended period of time, allow it to warm up before pressing Power. -
Page 24: Installation Preparation
• Proper installation is the responsibility of the installer. • The rear of the dryer should face a wall. • Consideration must be given to provide adequate HAIER APPLIANCES STACK KIT clearance for installation and service. • Closet doors must be louvered or otherwise Visit our website at haierappliances.com/parts or in... -
Page 25: Finalize The Installation
INSTALLATION INSTRUCTIONS INSTALLING THE STACK BRACKET KIT INSTALL BRACKET TO WASHER INSTALL DRYER AND BRACKET ON DRYER (CONT.) A. Remove washer top cap screw from the rear left. Align left bracket holes with top cap screw hole on C. Tighten the dryer bracket screws; then tighten all rear left of the unit and replace screw. -
Page 26: Reversing The Door Swing (Optional)
INSTALLATION INSTRUCTIONS REVERSING THE DOOR SWING (Optional) IMPORTANT NOTES • Before you start, unplug the dryer from its electrical • Once you begin, do not move the cabinet until door- outlet. swing reversal is completed. • Handle parts carefully to avoid scratching paint. •... - Page 27 NOTES 49-3000195...
-
Page 28: Troubleshooting Tips
TROUBLESHOOTING TIPS Problem Possible Cause What To Do Dryer shakes or Some shaking/noise is normal. Move dryer to an even floor space, or adjust leveling legs as necessary makes noise Dryer may be sitting unevenly. until even. Clothes take too Improper or obstructed Check the Installation Instructions to make sure the dryer venting is long to dry... - Page 29 TROUBLESHOOTING TIPS Problem Possible Causes What To Do Time Remaining The estimated time may This is normal. jumped to a change when a smaller load lower number than usual is drying Cannot make The dryness Level, Temp or This is normal. a selection and option that you are trying to the dryer beeps...
- Page 30 No fabric softener was used Try a fabric softener. Bounce Fabric Conditioner Dryer Sheets have been approved for ® use in all Haier Appliances dryers when used in accordance with the manufacturer’s instructions. Overdrying Try a fabric softener. Adjust setting to or Damp.
-
Page 31: Limited Warranty
This limited warranty is extended to the original purchaser and any succeeding owner for products purchased for home use within the USA. If the product is located in an area where service by a Haier Appliances Authorized Servicer is not available, you may be responsible for a trip charge or you may be required to bring the product to an Authorized Haier Appliances Service location for service. -
Page 32: Consumer Support
Haier Appliances Website Have a question or need assistance with your appliance? Try the Haier Appliances Website 24 hours a day, any day of the year! You can also shop for more great Haier Appliances products and take advantage of all our on-line support services designed for your convenience.
Need help?
Do you have a question about the QFD15ESMNWW and is the answer not in the manual?
Questions and answers