
Subscribe to Our Youtube Channel
Related Manuals for Potec PACP-7000


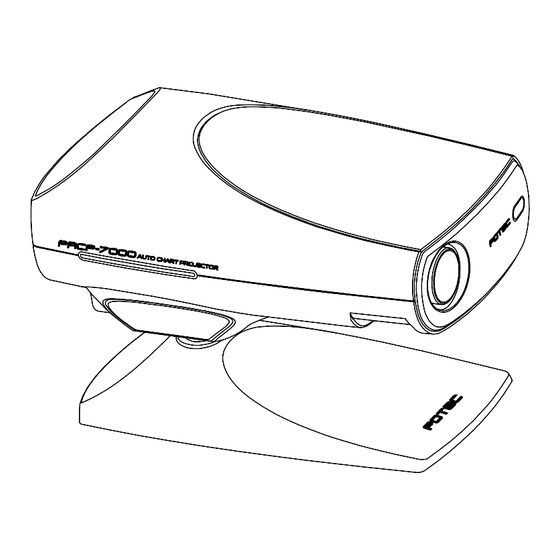
Summary of Contents for Potec PACP-7000
- Page 1 Operation Manual ㅋ Auto Chart Projector PACP-7000 / PACP-7000L Revision 0.5e www.potec.biz Before use, read this manual carefully. - 1 -...
-
Page 2: Important Notice
POTEC reserves the right to make changes in its products or product specifications at any time and without prior notice, and is not required to update this documentation to reflect such changes. -
Page 3: General Safety Information
Safety Information Symbols marked on the Instrument Symbol Description Protective earth (ground) Attention, consult ACCOMPANYING DOCUMENTS I and O on the power switch represent ON and OFF respectively Disposal of your old appliance l When this crossed-out wheeled bin symbol is attached to a product it means the product is covered by the European Directive 2002/96/EC. - Page 4 Features l Can measure, Astigmatism, Binocular balance tests, Fixation disparity tests, Fusion tests, stereo test with only one equipment l Specification chart that is reflected on the 2.5m~8m by Optical and mechanical structures can make efficient eyesight measurement without changing position of handler l Can adjust angle when reflection chart on the screen l RS-232 connection to the external device and can connect to the terminal.
-
Page 5: Notes For Using The Instrument
Don’t use organic solution such as alcohol, thinner, benzene, etc. to clean the surface of this instrument. It may damage the instrument. l If you leave the PACP-7000 without using it for long periods, disconnect the power supply and protect the unit with dust cover. - Page 6 Configurations Name Function ① Projection Lens Chart is the image projection lens ② IR Receive window Display chart to receive the infrared windows from remote controller ③ Lamp The lamp and turned off the motor rotation ④ Stand Holds the console support ⑤...
-
Page 7: Installation
Installation Position of Chart Projector l Set up chart project after due consideration indoor space, because it can be adjust reflection distance in 2.5m~8m range l Can set up like as follows, and it needs high quality mirror - 7 -... -
Page 8: Screen Position
Screen Position l Set the screen after due consideration patient and indoor space. l This screen is specially coated for image that chart projector reflect. How to correct projection l Install chart projector at desired position of 2.5~8m (8~26 feet) l Set the projection angle of chart processor based on Screen l Project 0.05(20/400, 6/120) “C”... -
Page 9: Input And Use Of Program
Input and Use of Program How to input user's program How to input user's program 1 l When you press “LIGHT” button one time, the lamp will be turn off with "Beep, Beep" sound. l When you press “PGM1” button one time, the lamp is on with "Beep, Beep" sound and “C” chart appears. - Page 10 Change the channel of remote controller Basic Setup l There is “A~E” channels on the remote control and on the time of delivery, the entire channel is set on channel “A” The method to check a channel between the remote control and a machine l (Regardless of a channel which is set on remote control or a machine) if a machine recognizes a signal of “①”...
-
Page 11: Types Of Chart
Types of Chart A Type C Type - 11 -... - Page 12 D Type R Type - 12 -...
-
Page 13: Maintenance And Repair
Maintenance and Repair Lamp Replacement Turn off power and disconnect the power cord Allow the projector to cool down for about 5minutes before replacing the lamp. Using the 2.5mm T wrench remove the three screws from the bottom front of the projector cover Open the cover remove and replace the lamp. -
Page 14: Replacement The Battery Of Remote Controller
A detailed technical If you can’t contact with your local distributor, you can directly get in touch with the service department of the POTEC using the phone number and the address written in the below table. Manufacturer: POTEC Co., Ltd. -
Page 15: Specifications
202(W) ´ 364(D) ´ 172(H) mm Body (Stand included): 202(W) ´ 364(D) ´ 240(H) mm Remote Controller: 64(W) ´ 196(D) ´ 20(H) mm Weight PACP-7000(Stand except): 4.9 kg PACP-7000L (Stand included): 4.7 kg Remote controller: 160 g (Battery included) Environment... - Page 16 Components Product Body (PACP-7000 or PACP-7000L) Screen Remote Controller Table Stand Dust Cover Power Cable T wrench Lamp (PACP-7000) Battery Optional accessories Red/Green glasses Polarization glasses - 16 -...
Need help?
Do you have a question about the PACP-7000 and is the answer not in the manual?
Questions and answers