Table of Contents
Advertisement
Quick Links
Advertisement
Table of Contents

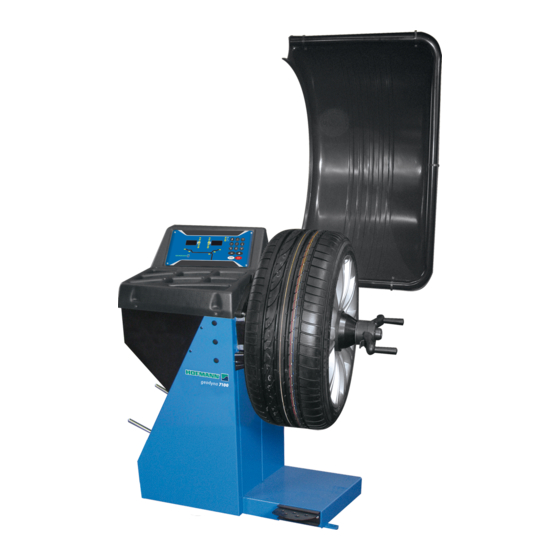
Related Manuals for Hofmann geodyna 7100


Summary of Contents for Hofmann geodyna 7100
- Page 1 7100 Service Manual...
- Page 2 BLANK PAGE__________________________________________________________________________ SM HOF GEODYNA 7100 Rel.E...
-
Page 3: Table Of Contents
4.14 CHECK AND REPLACEMENT OF THE MOTOR PAG. 29 4.15 CHECK AND REPLACEMENT OF THE BELT PAG. 29 4.16 REPLACEMENT OF MECHANICAL BRAKE BOAWDEN CABLE PAG. 30 4.17 REPLACEMENT OF SHAFT BRAKE BAND PAG. 31 SM HOF GEODYNA 7100 Rel.E... - Page 4 6.3 ENTERING SERVICE “C” CODES AND OPTION PAG. 64 6.4 SAVING SETTINGS FOR MODES OF OPERATION AND CAL. DATA PAG. 64 6.5 USER “C” CODES REFERENCE PAG. 64 6.6 SERVICE “C” CODES REFERENCE PAG. 68 UPDATING GUIDE PAG. 92 SM HOF GEODYNA 7100 Rel.E...
- Page 5 SM HOF GEODYNA 7100 Rel.E...
-
Page 6: Chapter 1 Introduction
Replacement of the Integrated Display. Ø A complete loss of the confi guration data. Ø Control of the balancers calibration. Spacer # EAA0470G84A. Use this spacer to adjust the spring plates preloading of both tranducers SM HOF GEODYNA 7100 Rel.E... - Page 7 Snap-on QDRIVER 4NM / 2.95lbsft Use this torque wrench on ALLOY vibratory system only to proper tighten transducers screws. Electronic inclinometer and spirit level SM HOF GEODYNA 7100 Rel.E...
-
Page 8: Important Safety Instruction
NOT safety glasses. Balancer is for indoor use only. 1.4 ELECTRICAL SAFETY PRECAUTIONS Make sure the balancer is unplugged before disconnecting any wires in preparation for replacing any boards, cables or other items within the unit. SM HOF GEODYNA 7100 Rel.E... -
Page 9: Chapter 2 Ac/Dc Power Distribution
The motor also utilizes a capacitor to generate a suffi cient amount of torque during clamping, on wheel clamp machines, acceleration and braking SM HOF GEODYNA 7100 Rel.E... -
Page 10: Dc Theory Of Operation
The Processor section gathers the information generated from the encoder and transducer via a ribbon cable. This board is powered with 5VDC received from the Power Supply section of the Integrated Display. Calculated imbalance values are then shown on the screen after a spin cycle. SM HOF GEODYNA 7100 Rel.E... -
Page 11: Installation Precautions (Floor Level)
1. Put the level on the vibratory system (Fig.1). The value must be 0° ±1º. 2. Put the level vertically on the fl ange (Fig.2). The value must be in the range 90º± 1 °. Fig.1 Fig.2 SM HOF GEODYNA 7100 Rel.E... -
Page 12: Chapter 3 Balancer Components
The Integrated Panel contains a processor and the memory on which is running the Kernel or BK. The Kernel is the group of instructions that allow to the wheel balancer to perform the balancing operations SM HOF GEODYNA 7100 Rel.E... -
Page 13: Power Entry Module
3.3 POWER ENTRY MODULE (PEM) The present Power Entry Module (PEM) is applied to a steel bracket bolted to the plastic abinet and consists in a single unit includings switch, fuses, suppresses noise and power supply inlet. SM HOF GEODYNA 7100 Rel.E... -
Page 14: Integrated Display Board
The drive system is then propelling and stopping the main shaft. The incremental encoder B8 is acquiring rotational travels, direction of rotation and absolute angular position of the SM HOF GEODYNA 7100 Rel.E... -
Page 15: Transducers
(6-aclock position). To disconnect the wires, the two plugs have to be removed using a pointed device like a scriber. Insert the scriber in the SM HOF GEODYNA 7100 Rel.E... -
Page 16: Temperature Sensor
Checking the incremental encoder is via service code C74. The surface of the ring has to be clean and shiny. If the ring is not clean, the machine will not work correctly. SM HOF GEODYNA 7100 Rel.E... -
Page 17: Motor Drive System
With more than 150 RPM of main shaft speed, the torque capacitor CT is switched off by relay under program control. With increasing speed, the effect of CT on torque drops and reactive current increases. SM HOF GEODYNA 7100 Rel.E... -
Page 18: Belt Tension
The distance from the balancer to the wheel is generated from the voltage output and the diameter of the wheel is generated from the amount of voltage output when the arm is moved up. Adjustment are made using the C80/C81 service code, this procedure can be found later in this manual. SM HOF GEODYNA 7100 Rel.E... -
Page 19: Chapter 4 Service
: Big and Medium Phillips screwdriver, scissors, : 30’ Ø Disconnect the power supply from the balancer. Ø Remove the screws that secure the display panel to the weight tray. Ø Unplug the cables from the display panel. SM HOF GEODYNA 7100 Rel.E... -
Page 20: Check Power To Integrated Board
Ø Remove the weight tray to access to the PEM. Ø Disconnect the wires from PEM. Ø Make sure that the switch is “OFF” position. Ø Take a multimeter and select it Ohm. Ø Position the multimeter terminals on Phase-Neutral, Phase-Ground and Neutral-Ground. SM HOF GEODYNA 7100 Rel.E... -
Page 21: Check And Replacement Power Entry Module 6.3A Fuses
: Defective fuses may cause the following malfunctions: Turning the machine on, the machine does not show anything. TO CHECK AND REPLACE THE FUSES Ø Turn the balancer off. Ø Unplug the power supply cable. SM HOF GEODYNA 7100 Rel.E... - Page 22 : Incorrect power supply may cause the following malfunctions: 1. After turning the machine on, the machine shows error C10810 2. After turning the machine on, the machine shows error C10811 3. Turning the machine on, the display does not show anything. SM HOF GEODYNA 7100 Rel.E...
-
Page 23: Check And Replacement Of The Integrated Display
Ø Check the signals to and from the component that is also involved in this trouble shooting search (if relevant) Ø Check the component that is also involved in this trouble shooting search (if relevant) SM HOF GEODYNA 7100 Rel.E... -
Page 24: Check The Vibratory System
Ø Install the 4 remaining hex bolts tighten to 25Nm / 18.4lbfts and make sure that the vibratory assy is properly levelled following 2.6. Ø Install the rear transducer following 4.12 Ø Install all the cables. SM HOF GEODYNA 7100 Rel.E... -
Page 25: Check And Replacement Of Transducers On Alloy Vpm
TO REPLACE THE TRANSDUCERS: Ø Disconnect the power from the rear of the machine. Ø Remove the weight tray. Ø Using a 2.5mm hex key remove the preloading plate. SM HOF GEODYNA 7100 Rel.E... - Page 26 Ø Tighten the screws (orange arrows) at at 0.50 ± 0,05 Nm (4,4 ± 0,4 lbs-in), then remove the spacer, making the backward movements. Remark: The tightening torque is necessary to ensure the correct preload to the spring plate. SM HOF GEODYNA 7100 Rel.E...
- Page 27 Ø Disconnect power supply. Ø Remove the weight tray. Ø Disconnect the 10 Pin ribbon cable from the encoder PCB. Ø Remove all dirt from the region where the Optoencoder is positioned, preferably with a moisturized cloth. SM HOF GEODYNA 7100 Rel.E...
-
Page 28: Check And Replacement Of The Motor
: Defective motor may cause the following malfunctions: 1. The balancer is noisy. 2. The balancer shows E22. 3. The balancer shows E23 4. The balancer shows E24 5. The balancer shows E25 6. The balancer shows E26 TO CHECK THE MOTOR SM HOF GEODYNA 7100 Rel.E... -
Page 29: Check And Replacement Of The Belt
Ø Proceed with the installation, mount the motor and adjust the tension of the belt. Ø Connect the power to the machine Ø Turn on the machine Ø Mount the weight tray Ø Mount the display panel, when available. SM HOF GEODYNA 7100 Rel.E... -
Page 30: Replacement Of Mechanical Brake Boawden Cable
Pull out the pedal assy with the Bowden cable from the cabinet. Ø Dismount the screws to separate the pedal from the pedal bracket. Ø Pull out the Bowden cable from the pedal Ø Install the new Bowden cable on the pedal. SM HOF GEODYNA 7100 Rel.E... - Page 31 2. The brake pads touch the motor pulley during the balancing cycle. Ø Disconnect power supply from the machine. Ø Remove weight tray. Ø Using 10mm wrench remove the two nuts. Ø With 13mm wrench remove the brake bands from the support. SM HOF GEODYNA 7100 Rel.E...
-
Page 32: Check And Replacement Of Distance Potentiometer
Remove the 10mm nut holding the SAPE wheel to the frame. Ø Remove the plastic wheel carefully in order to avoid the uncoil of the return spring. Ø Remove the conical bushing. Ø Remove the 13mm nut holding the potentiometer to the frame. SM HOF GEODYNA 7100 Rel.E... -
Page 33: Check And Replacement Of Diameter Potentiometer
Ø Check with service code C75, C80 and C92 TO REPLACE THE POTENTIOMETER Ø Disconnect the power from the rear of the machine. Ø Remove the Display panel, when available. Ø Remove the weight tray. SM HOF GEODYNA 7100 Rel.E... -
Page 34: Check And Replacement Hood Switch
1. Lowering the wheel guard the wheel does not start. 2. The balancer shows E2 3. Turning the machine on the display shows E89. TO CHECK THE SWITCH Ø Check with service code C56. When the wheel guard is lowered it should show 100. SM HOF GEODYNA 7100 Rel.E... - Page 35 The cam should be adjusted to activate the switch within a range of 1 ° to 4 °, considering the wheel guard in fully closed position. Ø The cam setscrew must be tightened with a toque wrench at 4Nm / 33 lbs-in. SM HOF GEODYNA 7100 Rel.E...
-
Page 36: Chapter 5 Trouble Shooting
IMPORTANT! DO NOT TURN OFF THE BALANCER BEFORE THE END OF THE OPERATION BECAUSE THE SOFTWARE UPDATE PROCESS WILL BE INTERRUPTED AND,TURNING IT ON, THE DISPLAY WILL NOT SHOW ANYTHING. SM HOF GEODYNA 7100 Rel.E... -
Page 37: In The Field Reprogramming Of Balancer
- Check Voltages of SAPE potentiometers (AD8, AD9, AD10) or perform STEP 1 of C80 and C82 • C110 - Check VCC Voltage PEDAL SWITCHES • - Check the pedal switches. The switches and the Function-Code to lock the power clamp should be checked if the power clamp does not work SM HOF GEODYNA 7100 Rel.E... - Page 38 - Measure the angular deviation of the vibratory system • - Check Voltages of piezo transducers (AeD1, AeD2). C103 - Test of transpindence and unbalance signal amplifi ers. • • C104 - Test of transducers. SM HOF GEODYNA 7100 Rel.E...
-
Page 39: Selftest During Startup
Replace SAPE gauge arm in home position and press STOP or ESC key to continue. Replace the weight tray. Calibrate the distance potentiometer. Actions to do Re-connect the distance potentiometer to the Integrated Display. Replace the distance potentiometer Replace the Integrated Display. SM HOF GEODYNA 7100 Rel.E... - Page 40 Complaint At the end of the C115/C83 calaibration the balancer shows E15 Root cause Corrective terms for readjustment are out of range Service Code C115, C83, C90 Actions to do Repeat the C115 or C83 SM HOF GEODYNA 7100 Rel.E...
- Page 41 Key contact or pedal switch closed Complaint After switching on the balancer, the display shows E89 Pedal switch closed. Root cause Key board button glued Service Code Check and replace the switch. Actions to do Check and replace the keypad. SM HOF GEODYNA 7100 Rel.E...
- Page 42 Integrated Display or Optoencoder have been replaced Service Code C74, C85, C86 Make sure about the proper communication with C74 Actions to do Perform the C85 if Optoencoder has been replaced Perform C86 if Integrated Display has been replaced. SM HOF GEODYNA 7100 Rel.E...
- Page 43 Check the Integrated Display. E901 Check calibration Complaint Turning the balancer on the screen shows E901. Root cause Machine was not calibrated Service Code C80, C81, C115, C84, C88, C90 Actions to do Perform the calibration as above SM HOF GEODYNA 7100 Rel.E...
-
Page 44: H" Error Codes
Make sure that the shaft with clamped wheel can rotate freely: Repeat the measuring run Sape 1 Defective Check if the distance and diameter potentiometer are fi ne and connected. Check the distance and diameter potentiometers with C92 SM HOF GEODYNA 7100 Rel.E... - Page 45 Turn off and back on the machine. If the problem still persists: Load the software. If the problem still persists: Replace the IBP2 box. If the problem still persists: Call Snap On C Codes C74, C75, C86, C115, C84, C88, C90 SM HOF GEODYNA 7100 Rel.E...
-
Page 46: Keyboard Display
Check the plugs, connectors and cable wiring from power interface board to the key board. May have to replace the integrated panel assembly if you can not fi nd anything wrong in wiring system. C codes SM HOF GEODYNA 7100 Rel.E... - Page 47 Check the speed with C60. If the problem still persists: Check Optoencoder with C54. If the problem still persists: Check the capacitor If the problem still persists: Call Snap On C Codes C28, C54, C60 SM HOF GEODYNA 7100 Rel.E...
-
Page 48: Power Fail
C57, C85, C86, C115, C84, C88, C90 0X001032 VCC ABOVE LIMIT OF 5.2VDC Check the power supply with C110. If the problem still persists: Check the IBP box C Codes C110, C86, C115, C84, C88, C90 SM HOF GEODYNA 7100 Rel.E... - Page 49 Check the main power supply cord and plug. If the problem still persists: Check the main switch. If the problem still persists: Check power supply cable and connectors inside of the machine. If the problem still persists: Call Snap On C Codes SM HOF GEODYNA 7100 Rel.E...
- Page 50 If the problem still persists: Check the Distance potentiometer If the problem still persists: Check the Integrated Display. If the problem still persists: Call Snap On C Codes C80, C81, C92, C115, C84, C88, C90 SM HOF GEODYNA 7100 Rel.E...
- Page 51 If the problem still persists: Call Snap On C Codes C64, C115, C84, C88, C90 0X001051 SIDE CAL USER Perform the User calibration with weight in the correct side. If the problem still persists: Call Snap On C Codes SM HOF GEODYNA 7100 Rel.E...
- Page 52 If the problem still persists: Check the transducers adjustment. If the problem still persists: Check the IBP box. If the problem still persists: Call Snap On C Codes C66, C75, C103, C104, C115, C84, C88, C90. SM HOF GEODYNA 7100 Rel.E...
- Page 53 If the problem still persists: Check the transducers. If the problem still persists: Check the IBP box. If the problem still persists: Call Snap On C Codes C66, C75, C103, C104, C115, C84, C88, C90 SM HOF GEODYNA 7100 Rel.E...
- Page 54 If the problem still persists: Check the main shaft Optoencoder. If the problem still persists: Check the IBP box If the problem still persists: Call Snap On C Codes C74, C54, C115, C84, C88, C90 SM HOF GEODYNA 7100 Rel.E...
- Page 55 If the problem still persists: Check the main shaft Optoencoder. If the problem still persists: Check the IBP box If the problem still persists: Call Snap On C Codes C60, C74, C54, C115, C84, C88, C90 SM HOF GEODYNA 7100 Rel.E...
- Page 56 If the problem still persists: Check the main shaft Optoencoder. If the problem still persists: Check the IBP box If the problem still persists: Call Snap On C Codes C60, C74, C54, C115, C84, C88, C90 SM HOF GEODYNA 7100 Rel.E...
-
Page 57: X" Error Codes
This diagnostic can occur after a measuring run, if the incremental encoder of EXPLANATION the power clamp is not able to detect the reference mark (810F17). ACTION Check main shaft and power clamp encoders. May need replacement. C CODE C54, C74 SM HOF GEODYNA 7100 Rel.E... - Page 58 Use C64 to check the outputs ACTION of transducers. In most case should re-torque the transducers. Or transducer(s) is bad, need replace the transducer(s). C CODE C64, C115, C84, C88 SM HOF GEODYNA 7100 Rel.E...
- Page 59 The 5 VDC source is used to power electronics circuits. If it is too low, the EXPLANATION electronics will fail to properly operate Check the DC voltage. Check the connectors, plugs and wires. If necessary ACTION replace the Integrated Dispaly C CODE C55, C110 SM HOF GEODYNA 7100 Rel.E...
- Page 60 Check the cable and connector on the encoder board. Go to C74, C75. Cle- ACTION an the encoder band. If the balancer will spin, balance a wheel and stop, the encoder is ok. C CODE C74, C75 SM HOF GEODYNA 7100 Rel.E...
-
Page 61: Beep Codes
Encoder board of main shaft External AD converter S S P1 Internal AD converter Temperature sensor measurement Data conditioning Extensions, based on Pos: S S S P1 Keyboard/display, SAPE, brake, motor 44, 45, 46, 47, 48 Drive system SM HOF GEODYNA 7100 Rel.E... -
Page 62: C- Beeps Of The Module/Object
One short beep and a 5 short beeps 3 seconds pause NEXT cycle ... second pause after one second pause Ø Error during initialisation of the persistent objects. e.g. the Optoencoder board is not connected. SM HOF GEODYNA 7100 Rel.E... -
Page 63: Chapter 6 Service Codes
Saving the adjustments data in the PO’s Display of actual distance and diameter of inner SAPE/geodata Performing a measuring run and indication of harmonic contents of the unbalance signals Test of the transimpedance and unbalance signal amplifi ers SM HOF GEODYNA 7100 Rel.E... -
Page 64: Entering Service "C" Codes And Option
Automatic braking on lifting the wheel guard Number of revolutions for measurement 10-25 Threshold for unbalance suppression in grams/ounces 3.5 -20 g / 0.12 - 0.71 oz Start of measurement by closing wheel guard Comments: None SM HOF GEODYNA 7100 Rel.E... - Page 65 Set code C4, close the wheel guard and start an extended measuring run by lowering the wheel guard. After the measuring run state switches automatically to 1, the adaptor symbol comes up and the mode is quit. Resetting the state to 0 cancels compensation of adaptor unbalance. SM HOF GEODYNA 7100 Rel.E...
- Page 66 The threshold value can be transferred to the permanent memory. Comments: The unit of measurement is chosen according to the one set with C3. SM HOF GEODYNA 7100 Rel.E...
- Page 67 The following is displayed after the run: 2. and the symbol of the START key. Insert the calibration weight in the adaptor fl ange and press the START key to initiate the second Remove calibration weight and place in storage location. Comments: None SM HOF GEODYNA 7100 Rel.E...
-
Page 68: Service C Codes Reference
Automatic braking on lifting the wheel guard Number of revolutions for measurement 10-25 Threshold for unbalance suppression in grams/ounces 3.5 -20 g / 0.12 - 0.71 oz Start of measurement by closing wheel guard Comments: None SM HOF GEODYNA 7100 Rel.E... - Page 69 Number of measuring runs in service mode • Number of measuring runs since the last calibration The error memory which can be called up using C28 will not be reset. To this end please use C28. Comments: None SM HOF GEODYNA 7100 Rel.E...
- Page 70 Rotate the fl ange or scroll the digital slider to choice the balancer model. Confi rm the balancer model by pressing Acknowledgment key. Comments: No further action is required. Display test Options : None Special function : None Description: All segments of the display come up. Comments: None SM HOF GEODYNA 7100 Rel.E...
- Page 71 Not analyzed 8.-A Not analyzed 8.-A Not analyzed 8.-A 8.-A 8.-B Not analyzed 8.-B Not analyzed 8.-B Table legend: “XXX”, “YYY“: Number different from 256; 0 has the special meaning: 2 zero mark was not SM HOF GEODYNA 7100 Rel.E...
- Page 72 None Description: Indication of temperature in centigrade (°C) Comments: Please refer to error ID 580, 581, 585, 586 for the limits. Indication of the residual unbalance of main shaft compensated for using C84 Options: None SM HOF GEODYNA 7100 Rel.E...
- Page 73 fl oating point format. After the fi rst measuring run the amounts of unbalance plus angular locations in degrees of both correction planes are read out in a single line on the screen as follows: SM HOF GEODYNA 7100 Rel.E...
- Page 74 1. Field : Rear transducer: 262 - 272 2. Field : Front transducer: -1500 to -10000 Comments: The shown values are those calculated in the latest calibration performed, not those saved from the latest C90. SM HOF GEODYNA 7100 Rel.E...
- Page 75 With p variants fi t the spacer bushing, the medium centering cone and the clamping sleeve without clamping head onto the bushing and carry out clamping operation. Set code C72. Press START key in order to initiate temporary compensation of unbalance. SM HOF GEODYNA 7100 Rel.E...
- Page 76 2 turns in each direction à A and B channel signals are OK, but synchronisation was made in forward direction only after 2 turns backward à A and B channel signals are OK, synchronisation in backward direction is OK as well SM HOF GEODYNA 7100 Rel.E...
- Page 77 * via multiplexer on the power interface Free: 0.0V will be displayed Reading with SCREEN machine: 1. Field 2. Field 3. Field AD input Channel Voltage. Comments: Voltage Range is: 0.0 - 3.3V for ELECTRONIC BOX SM HOF GEODYNA 7100 Rel.E...
- Page 78 Place the arm to fl ange edge. The reading must 2.60 – 2.63V Move gauge arm to calibration position 1 and adjust extraction potentiometer mechanically. Press acknowledge key to confi rm step 1. Gauge arm fully returned to home position. SM HOF GEODYNA 7100 Rel.E...
- Page 79 Move gauge head to calibration position 4. Press acknowledge key to confi rm and quit the calibration. Position 2 of calibration template, or tip (screw) of calibration weight Comments: Save calibration data in the permanent memory using C90 code SM HOF GEODYNA 7100 Rel.E...
- Page 80 After acknowledgement/setting of weight size in step 2 a beep signal is heard (in addition to the beep made by the key). In step 6 the ambient transducer temperature will be read out for 1 second. Mount the calibration tool or the wheel on the balancer shaft: Set the calibration tool or wheel data. SM HOF GEODYNA 7100 Rel.E...
- Page 81 Press the “START” button to begin the measuring run. Step 4: Remove the 100 gram calibration weight and insert it into the right hand plane of the Pruefrotor / wheel. Press the “START” key to begin the measuring run. SM HOF GEODYNA 7100 Rel.E...
- Page 82 “ENTER” key to advance to the procedure. Step 6: The ambient transducer temperature is displayed for 1 second. Step 7: Remove the 100 gram weight, lower the hood and press the “START” button to begin a measuring run. SM HOF GEODYNA 7100 Rel.E...
- Page 83 3. Close the wheel guard and start the measurement run by pressing the START key The residual unbalance of the main shaft is determined in an extended measuring run. Comments: Complete this calibration with C88 SM HOF GEODYNA 7100 Rel.E...
- Page 84 If the angular deviation is more than +/- 5 degrees the reading will be “---”. Mount the Pruefrotor on the balancer shaft and enter in the parameters of the Pruefrotor using the balance screen. Step 1: Press the “START” button to begin the measurement run. SM HOF GEODYNA 7100 Rel.E...
- Page 85 Display of actual distance and diameter of inner SAPE Options: None Special function: None Description: 1. Field / left display : diameter (408-410) 2. Field / right display : distance (From machine to calibration rotor edge). Comments: SM HOF GEODYNA 7100 Rel.E...
- Page 86 Options: None. Special function: None. Description: Indication of the operating voltage, 5.0 VDC, supplied by the power supply module for the controller board Comments: Please refer to error ID 810 and 811 for the limits. SM HOF GEODYNA 7100 Rel.E...
- Page 87 BALANCER MUST BE SWITCHED BACK INTO THE PREFERRED OPERATING MODE. ALSO CHECK THE VCC VOLTAGE “C110” IF NECESSARY BEFORE ANY CALIBRATION IS DONE. Mount the calibration tool on the balancer shaft . Set the calibration tool data. SM HOF GEODYNA 7100 Rel.E...
- Page 88 Press the “START” button to begin the measuring run. Step 4: Remove the 100 gram calibration weight and insert it into the right hand plane of the Pruefrotor. Press the “START” key to begin the measuring run. SM HOF GEODYNA 7100 Rel.E...
- Page 89 Step 6: The ambient transducer temperature is displayed for 1 second. Step 7: Remove the 100 gram weight, lower the hood and press the “START” button to begin a measuring run. SM HOF GEODYNA 7100 Rel.E...
-
Page 90: Calibration Complete
. Insert the calibration weight that is supplied with the balancer on the left side of the backing plate. Press the “START” button to begin a measuring run. CALIBRATION COMPLETE Comments: Complete this calibration with C84, C88 and save with C90 SM HOF GEODYNA 7100 Rel.E... -
Page 91: Updating Guide
The information and specifi cations in this manual are based on the latest information available at the time of publication. We reserve the right to change the specifi cations at any time without notice. SM HOF GEODYNA 7100 Rel.E... - Page 92 SM HOF GEODYNA 7100 Rel.E...
- Page 93 Notice: The information contained in this document is subject to change without notice. Hofmann makes no warranty with regard to present documentation. Hofmann shall not be liable for errors contained here- in or for incidental consequential damages in connection with furnishings, performance, or use of this material.
Need help?
Do you have a question about the geodyna 7100 and is the answer not in the manual?
Questions and answers