Olympus IR-500 Reference Manual
Olympus ir-500: reference manual
Hide thumbs
Also See for IR-500:
- Basic manual (116 pages) ,
- Quick start manual (2 pages) ,
- Manuel de référence (259 pages)
Table of Contents
Advertisement
Quick Links
Advertisement
Table of Contents

Related Manuals for Olympus IR-500


Summary of Contents for Olympus IR-500
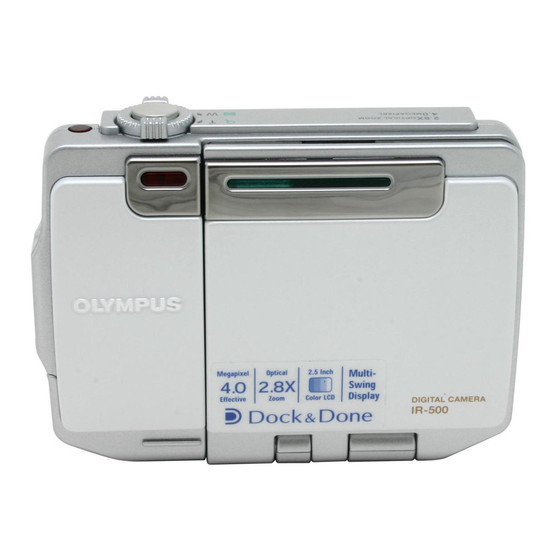
- Page 1 REFERENCE MANUAL Digital Camera IR-500...
- Page 2 - Connect the equipment to an outlet on a circuit different from that to which the receiver is connected. Consult your dealer or an experienced radio/TV technician for help. Only the OLYMPUS-supplied cables should be used to connect this product to other products.
-
Page 3: Introduction
ENGLISH Digital Camera Appareil photo numérique FRANÇAIS Cámara digital IR-500 ESPAÑOL We recommend first-time users read this manual first. Reference Manual (CD-ROM Edition) (this manual) Contains descriptions of all the camera functions. Use this manual to get detailed information on all the features and functions... - Page 4 • The contents of this manual may not be reproduced in whole or in part except for personal use. It may not be transferred without permission. • Olympus accepts no responsibility for losses suffered by the customer or a third party as a result of improper use of this product.
-
Page 5: What Can I Do With The Camera
What can I do with the camera? What can I do with the camera? When shooting Retracting display for LCD and lens protection and easy portability Easy self-shooting with the multi- swing display (in self-portrait mode g page 61) Shoot subjects from high or low angles, adjusting the angle of the multi-swing display. -
Page 6: How To Use This Instruction Manual
How to use this instruction manual How to use this instruction manual How to read the instructions Controls necessary for operations are shown using illustrations. Screens show the results of the operations. This sample page is only for your reference. It may differ from the actual page in this manual. -
Page 7: Table Of Contents
Table of contents Table of contents Introduction ..............3 What can I do with the camera? . - Page 8 Table of contents Chapter 4: Setting according to shooting conditions Zooming in (Telephoto) or out (Wide angle) (W/T) ........50 Using the flash u ! # $ .
- Page 9 Table of contents Editing still pictures (EDIT) ........... . 115 Recording sound to pictures (postrecording) .
- Page 10 Table of contents Setting the operation sound (BEEP) ..........162 Checking the picture you have just taken (REC VIEW) .
- Page 11 Using the supplied OLYMPUS Master software ........
-
Page 12: Chapter 1: Read This First
For safe use of this product Chapter 1: Read this first For safe use of this product Be sure to read this section for correct and safe use of the product before you start using the product. Various symbols are used to warn of hazards to yourself and others and prevent damage to property through misuse of the camera. - Page 13 Remove the battery taking care to avoid burns, and contact your nearest dealer or Olympus service center. Failure to do so could result in fire or burns. (Remove the battery outdoors, away from anything combustible, and avoid touching it with your bare hands.) •...
- Page 14 • Do not damage the power cord. Do not pull the power cord nor attempt to extend it. Always disconnect the AC adapter by pulling the plug not the cable. Discontinue use of the AC adapter immediately in the event of the following, and contact your nearest dealer or Olympus service center.
- Page 15 For safe use of this product Conditions for use of the product • This camera contains precision electronic parts. Avoid using or leaving the camera for long periods of time in the following places as this could result in failure or malfunction. - Places of high temperature and high humidity or where the temperature and humidity fluctuate greatly, such as in direct sunlight, on the beach in summer, in a car with the windows closed, or next to air conditioning equipment or a humidifier...
- Page 16 For safe use of this product Precautions regarding the monitor • Do not apply excessive pressure to the monitor. This may cause smears, prevent pictures from being played back properly, or damage the monitor. Should the monitor break, avoid getting any of the liquid crystal in your mouth.
-
Page 17: About The Ac Adapter
Danger • Be sure to use a dedicated Olympus lithium ion battery. Always charge the battery according to the specified method. Failure to do so may result in fire or injury. Thoroughly read the instruction manual of the battery and use the battery correctly. - Page 18 Caution • The battery is exclusively for use in Olympus digital cameras. Do not use in any other equipment. • Dirt on the plus or minus terminals may cause contact failure. Wipe with a dry cloth.
- Page 19 • Be sure to format a card using this camera if the card has been formatted on a computer or another camera. • Olympus is not responsible for any damage to data saved in other media or loss of data stored on the card.
-
Page 20: Unpacking The Box Contents
Lithium ion battery AC adapter Cradle (LI-12B) (A511) CD-ROMs Power cord* USB cable (OLYMPUS Master) AV cable (Manual CD) • Basic Manual • Authorized Distributors List • Quick Start Guide • Registration card* • Warranty card The shape of the plug differs from country to country. -
Page 21: Names Of Parts
Names of parts Names of parts Digital camera The illustrations below show the camera with the multi-swing display turned 360 degrees. Q U IC K V IE W O P E N O P E N... -
Page 22: Cradle
Names of parts Cradle Bottom view A/V OUT (MONO) DC IN 5V Number Name of part Number Name of part Shutter button Mode dial Self-timer lamp Speaker Zoom lever (W/T) (G/U) Strap eyelect Menu button p Lens Arrow pad a(Y)/b(&)/c(z)/ Flash d(#) OK button 9... -
Page 23: Monitor Indications
Names of parts Monitor indications Shooting mode +2.0 +2.0 When shooting still images +2.0 +2.0 When shooting movies... - Page 24 Names of parts Ref. Item Indication Number page e, f Battery level P.27 P, L, K, m, 8, H, y, S, I, o, Shooting mode P.57 G, d, J, F, U, e, v, 7, N P.243 Camera movement warning P.52 # (Lights) Flash standby P.53...
- Page 25 Names of parts Playback mode You can change the information display to either the standard mode or detail mode. Below are the displays when “INFO” is set to “DETAIL” For more information, see “Switching the information display mode (INFO)” (g page 110). 10 10 10 10 100 00 - 0009...
- Page 26 Names of parts Ref. Item Indication Number page e, f Battery level P.27 t (Calendar mode) Playback mode P.132 g (Album mode) P.132 1 100-0009 File number Still image: P.131 1 100-0013 Movie: Movie P.46 2 (When “NOT STORE” is selected/ Storage status P.129 After the image data is stored to the...
- Page 27 Names of parts About the battery level You can check the battery level as follows when you turn on the camera or while you are using the camera. “BATTERY EMPTY” appears. Lights (green) Blinks (red) Pictures can be taken. The battery is running low. Charge the The battery is empty.
- Page 28 Names of parts About the memory gauge The memory gauge is lit while the still image is being stored onto the card. The indication of the memory gauge changes as follows according to the shooting conditions. When the memory gauge is fully lit, wait until the gauge goes off before you resume shooting. Memory gauge Shoot Shoot...
-
Page 29: Chapter 2: Preparation
• Do not swing the camera around by the strap or pull the strap with excessive force. This may cause the strap to break. • Attach the strap correctly following the steps above. Olympus is not responsible for any damages if the strap is attached incorrectly and the camera is dropped. -
Page 30: About The Battery And Card
Note This camera may not recognize a non-Olympus card or a card that was formatted on another device such as a computer. Before use, be sure to format the card on this camera. For details on how to format the card, see... -
Page 31: Inserting The Battery And Card
About the battery and card Inserting the battery and card Open the battery/card cover. Grasp the cover on both sides and lift it up. Insert the battery and card as shown below. Inserting the battery Inserting the card Battery lock lever Press up the battery lock lever with the corner of Push the card in until it clicks. -
Page 32: To Remove The Battery
About the battery and card Close the battery/card cover. Notes • The camera does not work if the battery/card cover is not closed properly. • Do not open the battery/card cover, disconnect the AC adapter, or remove the camera from the cradle while the camera is operating or communicating with a computer. -
Page 33: Charging The Battery
Charging the battery To remove the card Push the card in. The card springs up so you can pull the card out. Note If you release your finger quickly after pushing the card in or flick the card to remove it, the card may jump out. - Page 34 Charging the battery Connect the AC adapter to the cradle. Cradle To a wall outlet A / V OUT (MONO) DC IN 5V To DC input terminal AC adapter (A511) Power cord* * The shape of the plug differs from country to country. Set the camera on the cradle.
- Page 35 Charging the battery Charging begins. The power lamp slowly blinks during charging. The lamp goes off when charging is complete. Notes • You can also charge the battery using the separately sold battery charger (LI-10C). Use only the specified charger. •...
-
Page 36: Power On/Off
Power on/off Power on/off Opening the multi-swing display The camera automatically turns on when the multi-swing display is opened. The camera turns off when the display is closed. Multi-swing display Pressing the power switch When the camera is off with the multi-swing display opened, press the power switch to turn on the camera. -
Page 37: How To Use The Multi-Swing Display
How to use the multi-swing display How to use the multi-swing display You can shoot at various angles by turning the multi-swing display. Determine the desired angle of the multi-swing display while watching the monitor, then take a picture. P-A UTO P-A UTO P-A UTO QUIC K... -
Page 38: Setting The Date And Time
Setting the date and time Setting the date and time The date and time are not preset. If you set the date and time, it will be stored with shot images and available for printing images. If the date and time are not set, “Y/M/D” appears every time you turn on the camera. Turn the mode dial to q. - Page 39 Setting the date and time Select the date format. While “o” is selected, press a/c to select the date format from among “_Y_M_D,” “_M_D_Y,” and “_D_M_Y.” The following steps show the procedure used when the date format is set to “_Y_M_D.” 2004 .
- Page 40 The date and time settings will be canceled if the camera is left with the battery removed for more than one day (under the standard Olympus testing conditions). If this occurs, set the date and time again. The date and...
-
Page 41: Chapter 3: Basic Shooting And Playback
Holding the camera correctly Chapter 3: Basic shooting and playback Holding the camera correctly Hold the camera firmly with both hands, bracing your elbows against your side to prevent camera movement while taking a picture. Extending your arms may cause camera movement, which can cause blurred images. -
Page 42: Easy Shooting With P-Auto (Program Auto) Mode
Easy shooting with P-AUTO (Program Auto) mode Easy shooting with P-AUTO (Program Auto) mode Taking a picture using the P-AUTO (Program Auto) mode is easy because the camera will make the most suitable settings automatically. Composing the image and taking a shot Turn the mode dial to j. - Page 43 Easy shooting with P-AUTO (Program Auto) mode Press the shutter button gently. This is the half-press position of the shutter button. The green indicator lights up when the focus and exposure are locked. The green indicator blinks if the subject is not in focus. Recompose the picture, and hold down the shutter button until the green indicator lights up.
-
Page 44: Subjects That Are Difficult To Focus On Using The Af (Auto Focus)
Easy shooting with P-AUTO (Program Auto) mode Subjects that are difficult to focus on using the AF (Auto Focus) This camera’s auto focus feature brings the subject into focus automatically. However, under certain conditions, the auto focus may not function effectively. Try the following methods if the subject is difficult to focus on. -
Page 45: Recomposing The Shot After Locking The Focus (Focus Lock)
Easy shooting with P-AUTO (Program Auto) mode Recomposing the shot after locking the focus (Focus Lock) When the subject you want to focus on is out of the AF target mark (not in the center of the monitor), lock the focus and take the picture as explained below. This is called Focus Lock. Position the AF target mark on the subject you want to focus on. -
Page 46: Recording Movies
Recording movies Recording movies You can record movies as well as still images with this camera. To record a movie, set the shooting mode to n (movie). View the monitor while shooting. Tips • The focus and optical zoom are locked while you are shooting a movie with sound. •... - Page 47 Recording movies Press the shutter button halfway (half-press). The green indicator lights up when the focus and exposure are locked. Green indicator (Lights up) It is possible to keep auto focusing without locking the focus even while shooting a movie. For details, see “Setting the Auto Focus while shooting movies (FULLTIME AF)”...
-
Page 48: Viewing/Erasing The Shot Images
Viewing/Erasing the shot images Viewing/Erasing the shot images Easy playback with the h button Press h after shooting. The still image or movie you have just taken appears. QU IC K VI EW h button Displays the 9 button 100 00 - 0009 0009 previous image. - Page 49 Viewing/Erasing the shot images Erasing an image using the S button Display the image you want to erase, then press S. The “ERASE” screen appears. abcd QU IC K VI EW buttons Press a/c to select “YES.” 9 button ERASE OP EN OP EN S button...
-
Page 50: Chapter 4: Setting According To Shooting Conditions
Zooming in (Telephoto) or out (Wide angle) (W/T) Chapter 4: Setting according to shooting conditions Zooming in (Telephoto) or out (Wide angle) (W/T) This camera has an optical zoom up to 2.8 × (40 to 112 mm (1.6" to 4.4"), 35mm film format equivalent.) With the combined optical and digital zoom functions, images can be zoomed up to an approximate factor of 30. -
Page 51: Using The Flash U
Using the flash u ! # $ Using the flash u ! # $ The camera is initially set to “AUTO” (auto-flash), but you can select from the following five flash modes according to the shooting conditions. AUTO (default setting) The flash fires automatically in low light or backlight conditions. -
Page 52: Flash Off
Using the flash u ! # $ $ (flash off) The flash does not fire even in low-light conditions. Use this flash mode when you do not want to fire the flash even in a dark place. Also use this flash mode when you shoot night or sunset scenes where the flash is not effective. - Page 53 Using the flash u ! # $ Press a/c to select the flash mode, then press 9. Shooting mode resumes with the chosen flash mode. The flash mode indication is displayed on the screen when a flash mode other than “AUTO” is set. Flash standby icon (Lights up when the flash is ready to fire.)
-
Page 54: Taking Close-Up Pictures (Macro/Super Macro)
Taking close-up pictures (macro/super macro) & % Taking close-up pictures (macro/super macro) & % Use the macro mode when you want to shoot close to the subject, for example when taking a picture of a flower. The camera takes longer than usual for focusing when taking close-ups. In such cases, select the macro mode so that you can obtain faster focusing. -
Page 55: Using The Self-Timer Y
Using the self-timer Y Press a/c to select the macro setting, then press 9. Shooting mode resumes with the chosen macro mode setting. When macro mode is set, & appears in the monitor. When super macro mode is set, % appears. SELECT Notes •... - Page 56 Using the self-timer Y Press c to select “ON,” then press 9. The self-timer is set and shooting mode resumes. “Y” appears when self-timer mode is set. SELECT Press the shutter button. The picture will be taken approximately 12 seconds after the shutter button is pressed. Tips •...
-
Page 57: Selecting A Scene Mode According To The Subject (Scene Select)
Selecting a scene mode according to the subject (SCENE SELECT) Selecting a scene mode according to the subject (SCENE SELECT) This camera is preset with 17 types of scene mode selections. Settings such as tone, brightness, and shutter speed are pre-determined for each type of scene, which allows for easy shooting with just one press of the shutter button. - Page 58 Selecting a scene mode according to the subject (SCENE SELECT) Press d to enter the scene mode settings, then press a/c to select the scene mode. The sample image of the selected scene mode appears. 17 VIVID 17 VIVID Vividly reproduce colors. Uses different way from program auto.
- Page 59 Selecting a scene mode according to the subject (SCENE SELECT) LANDSCAPE (L) For shooting landscapes. Vivid reproduction of blues and greens. LANDSCAPE+PORTRAIT (K) For shooting both main subject and background. Vivid reproduction of blues and greens. NIGHT SCENE (m) (Can also be selected by turning the mode dial to n.) For shooting illuminated scenes in evening or at night.
- Page 60 Selecting a scene mode according to the subject (SCENE SELECT) NIGHT+PORTRAIT (8) For shooting both main subject and illuminated background in evening or at night. Uses a slower shutter speed than in normal shooting. The shutter speed will be slower. Take care to avoid camera shaking. INDOOR (H) For shooting both main subject and background indoors.
- Page 61 Selecting a scene mode according to the subject (SCENE SELECT) SUNSET (S) For shooting setting/rising sun. Vivid reproduction of reds and yellows. A flash cannot be used. Take care to avoid camera shaking. PORTRAIT (I) (Can also be selected by turning the mode dial to i.) For taking a portrait-style shot.
- Page 62 Selecting a scene mode according to the subject (SCENE SELECT) CUISINE (G) For still life photography. Vividly reproduces colors of fruit, vegetables, flowers, etc. DOCUMENTS (d) For shooting documents, etc. Increases contrast between letters and background. A flash cannot be used. Take care to avoid camera shaking. SPORT (J) Captures fast-moving action without blurring.
- Page 63 Selecting a scene mode according to the subject (SCENE SELECT) BEACH & SNOW (F) For shooting snow-capped mountains, landscapes, white sand sea-scapes, etc. CANDLE (U) For shooting under candlelight. Warm colors are reproduced. A flash cannot be used. Take care to avoid camera shaking. AVAILABLE LIGHT PORTRAIT (e) For shooting sensitive subjects in low light conditions without a flash.
- Page 64 Selecting a scene mode according to the subject (SCENE SELECT) BEHIND GLASS (v) For shooting a subject through glass. VIVID (7) (Can also be selected by turning the mode dial to k.) Vividly reproduce colors. Uses different way from P- AUTO (Program Auto.)
-
Page 65: Selecting The Record Mode (D)
Selecting the record mode (D) Selecting the record mode (D) Your choice to store the image to the card in a particular record mode should be determined according to its purpose. (Still image Number of storable Resolution images without Record mode Usage examples (image size) sound... - Page 66 Selecting the record mode (D) Resolution (image size) This refers to the number of pixels (horizontal × vertical) used when saving an image. If the image will be printed, higher resolutions (larger numbers) are recommended so that the image will be clearer. However, higher resolutions make the file size (amount of data) larger, so the number of pictures that can be saved will be fewer.
- Page 67 Selecting the record mode (D) (Movie (maximum continuous recording time) The maximum continuous recording time per movie varies depending on the record mode. Resolution Max. continuous Max. continuous (image size) recording time with recording time Record mode (Frames per sound (with a 16 MB without sound (with a second) card)
- Page 68 Selecting the record mode (D) Press p to select the shooting menu, then press a/c to select “D.” Press d to enter the record mode settings, then press a/c to select the record mode. SUPER HIGH 4M HIGH 2M BASIC 1M DIGITAL ZOOM E-MAIL VGA The still image shooting menu is displayed.
-
Page 69: Sequential Shooting (J)
Sequential shooting (j) Sequential shooting (j) This function allows you to take pictures in rapid succession by keeping the shutter button pressed. (You can shoot approx. 7 frames continuously when the record mode is set to “SUPER HIGH 4M.”) As you can choose the best picture from a series of sequential shots, this mode is useful when photographing a moving subject. - Page 70 Sequential shooting (j) Press p to select the shooting menu, then press a/c to select “j.” Press d to enter the sequential shooting mode settings, then press a/c to select “ON.” DIGITAL ZOOM Press 9. The camera enters the sequential shooting mode. To exit the setting screen and resume shooting mode, press p.
-
Page 71: Adjusting The Settings To Suit A Bright/Dark Subject (F)
Adjusting the settings to suit a bright/dark subject (F) Adjusting the settings to suit a bright/dark subject (F) If your subject is extremely bright or dark, or if there is a considerable difference between the brightness of the subject and the brightness of the background, you can adjust the brightness using the exposure compensation feature. - Page 72 Adjusting the settings to suit a bright/dark subject (F) Press d to enter the exposure compensation settings, then press a/ c to select the exposure compensation value. The gauge for adjusting exposure compensation appears on the monitor. Adjusts towards “+” to give a brighter image.
-
Page 73: Enabling The Digital Zoom (Digital Zoom)
Enabling the digital zoom (DIGITAL ZOOM) Enabling the digital zoom (DIGITAL ZOOM) This camera is equipped with two zooms, a normal zoom (optical zoom) and a digital zoom. The optical zoom is operated simply by turning the zoom lever, but to use the digital zoom, “DIGITAL ZOOM”... - Page 74 Enabling the digital zoom (DIGITAL ZOOM) Press p to display the shooting menu. Press a/c to select “DIGITAL ZOOM.” SUPER HIGH 4M 0 . 0 DIGITAL ZOOM AUTO The still image shooting menu is displayed. Press d to enter the digital zoom settings, then press a/c to select “ON.”...
- Page 75 Enabling the digital zoom (DIGITAL ZOOM) Press 9. The digital zoom function turns on. To exit the setting screen and resume shooting mode, press p. Optical zoom Digital zoom Turn the zoom lever Amount of image magnification When the digital zoom is further towards T (U).
-
Page 76: Selecting The White Balance According To The Surrounding Lighting (Wb) 5 3 1
Selecting the white balance according to the surrounding lighting (WB) 5 3 1 > Selecting the white balance according to the surrounding lighting (WB) 5 3 1 > Different types of light (such as full daylight, sunset/sunrise, and artificial lighting) produce different shades of white when reflected on white paper. - Page 77 Selecting the white balance according to the surrounding lighting (WB) 5 3 1 > Press p to display the shooting menu. Press a/c to select “WB.” SUPER HIGH 4M 0 . 0 DIGITAL ZOOM AUTO The still image shooting menu is displayed. Press d to enter the white balance settings, then press a/c to select the white balance.
- Page 78 Selecting the white balance according to the surrounding lighting (WB) 5 3 1 > Notes on white balance • The white balance feature may not be effective under some special lighting conditions, such as when multiple lights are used. • If you set a white balance mode other than “AUTO,” play back the picture and check the colors on the monitor.
-
Page 79: When The Brightness Of The Subject And Background Differ (Metering) 5
When the brightness of the subject and background differ (METERING) 5 When the brightness of the subject and background differ (METERING) 5 Taking backlit pictures may result in darkened foreground objects and faces. Using SPOT metering in such situations will ensure that the subject is clear regardless of the background light. AUTO: Meters the center of the screen and the area around it separately to obtain the optimum exposure. - Page 80 When the brightness of the subject and background differ (METERING) 5 Press p to select the shooting menu, then press a/c to select “METERING.” Press d to enter the “METERING” settings, then press a/c to select “SPOT.” AUTO METERING AF MODE SPOT PANORAMA 2 IN 1...
-
Page 81: Changing The Focus Range (Af Mode)
Changing the focus range (AF MODE) Changing the focus range (AF MODE) If the subject is out of focus even when you shoot with the auto focus, you can narrow the auto- focusing area only to the AF target mark. AUTO SPOT Even if the subject is out of the AF target... - Page 82 Changing the focus range (AF MODE) Press p to select the shooting menu, then press a/c to select “AF MODE.” Press d to enter the “AF MODE” settings, then press a/c to select “SPOT.” METERING AF MODE AUTO PANORAMA SPOT 2 IN 1 Press 9.
-
Page 83: Panorama Shooting (Panorama)
Panorama shooting (PANORAMA) Panorama shooting (PANORAMA) You can take advantage of the panorama shooting feature with the supplied Olympus xD-Picture Card. Panorama shooting lets you connect pictures with overlapping edges into a single panoramic picture on a computer using the OLYMPUS Master software contained on the supplied CD- ROM. - Page 84 Panorama shooting (PANORAMA) Press p to select the shooting menu, then press a/c to select “PANORAMA.” Press d to enter the panorama settings. AUTO METERING AUTO AF MODE PANORAMA 2 IN 1 On the monitor, use the arrow pad to choose the direction you want to take the pictures in.
- Page 85 Panorama shooting (PANORAMA) Take the first picture. Focus and exposure are set by the first picture. Do not select an extremely bright subject (such as the sun) for the first picture. Make sure that the edges of the pictures overlap, then take your pictures.
- Page 86 When you have finished taking pictures, press 9 to exit panorama shooting. The composite photograph is created by combining the images on a computer using the OLYMPUS Master software contained on the supplied CD-ROM. Sound cannot be recorded during panorama shooting.
-
Page 87: Stitching Together Two Images (2 In 1)
Stitching together two images (2 IN 1) Stitching together two images (2 IN 1) This function allows you to position two pictures taken in succession next to each other and store them as a single picture. You can combine two different subjects in one picture. First picture Second picture 4M 4M... - Page 88 Stitching together two images (2 IN 1) Press p to select the shooting menu, then press a/c to select “2 IN 1.” Press d to enter the “2 IN 1” settings. AUTO METERING AUTO AF MODE PANORAMA 2 IN 1 Take the first shot using the monitor.
- Page 89 Stitching together two images (2 IN 1) Take the second shot. The first shot and second shot are combined and stored onto the card as a single picture. After storing is complete, the screen returns to the normal shooting screen. 4M 4M Sound cannot be recorded during 2 IN 1 mode.
-
Page 90: Recording Sound With Still Pictures (R)
Recording sound with still pictures (R) Recording sound with still pictures (R) This function lets you record sound when taking a picture. Recording begins about 0.5 seconds after pressing the shutter button and lasts for about 4 seconds. When this function is enabled, sound is automatically recorded after a picture is taken. - Page 91 Recording sound with still pictures (R) Press 9. Recording sound with still pictures is set. To exit the setting screen and resume shooting mode, press p. “R” appears when the recording While recording sound sound with still pictures is set. “H”...
-
Page 92: Compensating For Camera Movement (Image Stabilizer)
Compensating for camera movement (IMAGE STABILIZER) Compensating for camera movement (IMAGE STABILIZER) The image stabilizer function reduces blurry images from camera movement. This works by changing the image capturing area on the CCD according to the movement of the subject before recording the image. -
Page 93: Setting The Auto Focus While Shooting Movies (Fulltime Af)
Setting the Auto Focus while shooting movies (FULLTIME AF) Tips • To save the IMAGE STABILIZER setting for the next time you use the camera, set “ALL RESET” to “OFF.” For details, see “Saving the settings (ALL RESET)” (g page 148). •... -
Page 94: Recording Sound With Movies (R)
Recording sound with movies (R) Press p to select the shooting menu, then press a/c to select “FULLTIME AF.” Press d to enter the “FULLTIME AF” settings, then press a/c to select “ON.” FULLTIME AF FORMAT Press 9. The FULLTIME AF feature is enabled. Press p to start shooting a movie with the new settings. - Page 95 Recording sound with movies (R) Press p to select the shooting menu, then press a/c to select “R.” Press d to enter the recording sound with movies settings, then press a/c to select “ON.” FULLTIME AF FORMAT Press 9. Recording sound with movies is set. Press p to start shooting a movie with the new settings.
-
Page 96: Chapter 5: Playing/Editing Images
Playing back still images Chapter 5: Playing/Editing images Playing back still images Still pictures recorded on the card can be played back. Turn the mode dial to q. The last picture taken appears on the monitor. Mode dial QU IC K VI EW abcd buttons OP EN... -
Page 97: Playing Back Movies
Playing back movies How to play back the recorded sound When a picture with sound is displayed, the sound is reproduced by pressing 9. Turns up the volume. Turns down the volume. You can play back the picture you have just taken by pressing h. For details, see “Easy playback with the h button”... - Page 98 Playing back movies Press b/d to select the movie you want to play back. Displays the previous picture. 100 00 - 001 0013 SIZE:320 SIZE:320 240 +2.0 +2.0 Displays the next picture. WB AUTO WB AUTO '04. '04.12.03.14:50 12.03.14:50 13 13 Press 9.
- Page 99 Playing back movies Operations while playing back a movie Volume up 100 00 - 001 0013 SIZE:320 SIZE:320 240 +2.0 +2.0 WB AUTO WB AUTO '04. '04.12.03.14:50 12.03.14:50 Volume down 13 13 Hold down this button for 2× speed playback. Hold down during 2× speed playback for 20×...
- Page 100 Playing back movies To play back movies frame by frame This function lets you play the movie one frame at a time. Press 9 during movie playback. The movie is paused. Select the desired frame. Displays the top frame. 100 00 - 001 0013 SIZE:320 SIZE:320 240...
-
Page 101: Enlarging Pictures (Close-Up Playback)
Enlarging pictures (Close-up playback) Enlarging pictures (Close-up playback) A picture displayed on the monitor can be enlarged up to four times its original size. Select a picture. Zoom lever See “Playing back still images” (g page 96). QU IC K VI EW See “Playing back movies”... -
Page 102: Displaying Several Images At Once (Index Playback)
Displaying several images at once (Index playback) Press a/b/c/d to scroll the enlarged picture up, left, down, and right (scroll function). If you press 9, the movie is played while the picture is in close-up (only for movies). 2.5 .5 Displaying several images at once (Index playback) You can display several pictures at once. - Page 103 Displaying several images at once (Index playback) Turn the zoom lever to W (G). The index display (four pictures at once) appears. Select the image you want to play back by pressing a/b/c/d. 30 30 31 31 32 32 33 33 Returns to the previous image frame by frame.
- Page 104 Displaying several images at once (Index playback) To change the number of frames in the index display Turn the zoom lever to W (G) during playback. 4 frames appear in the index display. 30 30 31 31 Zoom lever 32 32 33 33 4 frame index display 30 30...
-
Page 105: Playback Of The Pictures As A Slide Show (M)
Playback of the pictures as a slide show (m) Playback of the pictures as a slide show This function displays the images in order frame by frame. You can select from among the following 9 types of slide show playback effects. NORMAL CHECKERBOARD Pictures on the card are played back one... - Page 106 Playback of the pictures as a slide show (m) Turn the mode dial to q. Mode dial QU IC K VI EW p button abcd buttons OP EN OP EN 9 button Press p to display the playback menu. Press a/c to select “m.” Press d to enter the slide show settings, then press a/c to select the desired slide show effect.
- Page 107 Playback of the pictures as a slide show (m) Press 9. The slide show with the selected effect begins. During playback, if you want to view the previous frame or next frame, press b/d. Displays the previous frame. Displays the next frame. The b and d buttons do not operate while a slide show is running in the index display.
-
Page 108: Rotating Pictures (Y)
Rotating pictures (y) Rotating pictures (y) Pictures taken when the camera is held vertically are played horizontally. This function lets you rotate images so that they are played back with the correct orientation. You can rotate an image 90 degrees clockwise or counterclockwise. 100-0046 100-0046 100-0046... - Page 109 Rotating pictures (y) Press p to display the playback menu, then press a/c to select “y.” Press d to enter the picture rotation settings, then press a/c to select “+ 90°” or “– 90°.” INFO Notes • Movies cannot be rotated. •...
-
Page 110: Switching The Information Display Mode (Info)
Switching the information display mode (INFO) Switching the information display mode (INFO) You can choose how much shooting information is displayed on the monitor. DETAIL STANDARD NO INFO 10 10 10 10 100 00 - 0009 100 00 - 0009 0009 0009 SIZE:2288... - Page 111 Switching the information display mode (INFO) Press p to display the playback menu, then press a/c to select “INFO.” Press d to enter the information display settings, then press a/c to select “STANDARD,” “DETAIL,” or “NO INFO.” NO INFO INFO STANDARD DETAIL Press 9.
-
Page 112: Playing Back On A Tv
Playing back on a TV Playing back on a TV You can play back images on a TV. To play back on a TV, set the camera on the cradle and connect the supplied AV cable to the TV. Connecting to a TV Turn off the camera and TV, then connect the cradle and TV. -
Page 113: Choosing A Starting Frame For Movie Playback (Index Play)
Choosing a starting frame for movie playback (INDEX PLAY) Turn the mode dial to q, then turn on the camera. Turn on the TV and set the TV to the video input to which the cradle is connected. For information on how to set the TV’s video input, refer to your TV’s instruction manual. Tips •... - Page 114 Choosing a starting frame for movie playback (INDEX PLAY) Play back a movie, or pause the movie. “Playing back movies” (g page 97). Press p to display the playback menu, then press a/c to select “INDEX PLAY.” Press d to enter the “INDEX PLAY” settings. The movie being played is displayed in time frames in the index display.
-
Page 115: Editing Still Pictures (Edit)
Editing still pictures (EDIT) Editing still pictures (EDIT) This function allows you to edit still pictures, such as changing pictures into monochrome (black and white) or sepia color, or changing the picture size. The edited picture is stored as a new picture separate from the original picture. - Page 116 Editing still pictures (EDIT) Press d to enter the picture edit settings. Press a/c to select the edit mode from among “BLACK & WHITE,” “SEPIA,” or “Q” (resizing), then press 9. BLACK & WHITE EDIT SEPIA ERASE FORMAT ALBUM ENTRY When “BLACK &...
-
Page 117: Recording Sound To Pictures (Postrecording)
Editing still pictures (EDIT) When “Q” is selected Press a/c to select “640 × 480” or “320 × 240,” then press 9. Resizing of the picture begins. When the resizing is complete, the resized picture appears. CANCEL SELECT Tips • When you resize a picture, you cannot select a size larger than the original picture. Select a smaller size. •... - Page 118 Editing still pictures (EDIT) Press p to display the playback menu, then press a/c to select “R.” Press d to enter the recording sound settings. INFO START Press 9. Sound recording begins. When recording ends, the screen returns to the playback menu. Press p to return to playback mode.
-
Page 119: Editing Movies
Editing movies Editing movies Editing movie images (EDIT) You can edit movie images which have been shot. This function allows you to cut a portion of the movie images and save the cut movie to the card as a new file. You can also overwrite the original movie image. - Page 120 Editing movies Select the frame you want as the first frame and press 9. The selected frame is set as the first frame. Jumps to the first frame. Displays the next frame. While pressed, the movie is fast-forwarded. Jumps to the last frame. 00:00:00/12:56:34 00:00:00/12:56:34 00:00:00/12:56:34...
-
Page 121: Capturing A Movie Frame As A Still Picture (Capture)
Editing movies Press a/c to select “YES,” “RESET,” or “CANCEL,” then press 9. YES: Records the edited content to the card. When recording ends, the EDIT screen returns to the playback screen for the edited movie. RESET: Resets the editing settings. Return to step 5. RESET CANCEL: Cancels the edited contents and returns to the playback CANCEL... - Page 122 Editing movies Press p to display the playback menu. Press a/c to select “CAPTURE.” STANDARD INFO INDEX PLAY EDIT CAPTURE Press d to enter the “CAPTURE” settings. The selected movie image is displayed as a single frame. Select the desired frame by pressing a/b/c/d.
-
Page 123: Creating An Index (Index)
Editing movies Press a/c to select “YES,” “RESET,” or “CANCEL,” then press 9. YES: Records the captured image onto the card. When recording ends, CAPTURE the still picture you created is played back. RESET: Resets the “CAPTURE” settings. Return to step 4. RESET CANCEL: Cancels the captured image and returns to the playback CANCEL... - Page 124 Editing movies Press p to display the playback menu. Press a/c to select “INDEX.” INDEX ERASE FORMAT ALBUM ENTRY Press d to enter the index creation settings. The selected movie is indexed into 9 frames with the first frame selected. The frame in this position is selected as the first index frame.
- Page 125 Editing movies Press 9. The last frame is selected. 7:36:23/12:56:34 7:36:23/12:56:34 7:36:23/12:56:34 The frame in this position is selected as the last index frame. To change and set the content of the last index frame, press and hold b to rewind the movie until your desired frame appears. Press 9.
-
Page 126: Protecting Pictures (0)
Protecting pictures (0) Protecting pictures (0) You can protect important pictures to avoid accidentally erasing them. Protected pictures cannot be erased by the single-frame/all-frame erase function. Turn the mode dial to q. Mode dial QU IC K VI EW p button abcd buttons OP EN OP EN... -
Page 127: Erasing Pictures (Erase/All Erase)
Erasing pictures (ERASE/ALL ERASE) Press 9. The selected picture is protected and the screen returns to playback mode. “9” appears when the picture is protected. 100 00 - 0009 0009 '04. '04.12.03.14:03 12.03.14:03 Note Formatting erases both unprotected and protected pictures. Erasing pictures (ERASE/ALL ERASE) Pictures recorded on the card can be erased. - Page 128 Erasing pictures (ERASE/ALL ERASE) Erasing one frame/all frames Turn the mode dial to q. Mode dial QU IC K VI EW p button abcd buttons OP EN OP EN 9 button Play back the picture you want to erase. Press p to display the playback menu, then press a/c to select “ERASE.”...
-
Page 129: Setting Images To Store On A Qdock&Done-Compatible Storage Unit (Store)
Setting images to store on a QDock&Done-compatible storage unit (STORE) Press 9. When “ERASE” is selected, only the selected picture is erased. When “ALL ERASE” is selected, all the images on the card are erased (except protected images and images registered to albums.) BUSY You can also erase pictures using the S button. - Page 130 Setting images to store on a QDock&Done-compatible storage unit (STORE) Press d to enter the storage settings. Press a/c to select “STORE.” Press 9. The setting of whether or not to store all the pictures on the card onto a Dock&Done-compatible storage unit is set.
-
Page 131: Chapter 6: Viewing Images In A Calendar Or Album
Displaying pictures in a calendar Chapter 6: Viewing images in a calendar or album Displaying pictures in a calendar This camera allows you to display pictures in a calendar. When still pictures and movies are shot, the camera automatically sets the pictures to calendar according to the shooting date. The calendar can be displayed in three ways: as a one-month display, 12-month display, or multi-year display. -
Page 132: Playing Back Pictures From The Calendar Display
Playing back pictures from the calendar display Change the calendar display. Turn the zoom lever to change the calendar display. Turn the zoom lever to W (G). 2003 2003 10 11 2004 2004 2004 2004 12 13 14 15 16 17 18 12 12 2004 2004... - Page 133 Playing back pictures from the calendar display In the case of one-month calendar display Moves to the preceding day. If the first Moves to the same day date of the current month is selected, of the preceding week. the preceding month is displayed. Moves to the next day.
- Page 134 Playing back pictures from the calendar display In the case of multi-year display Moves to the preceding year. Moves to the next year. 2003 2003 2003 2003 2003 2003 2004 2004 2004 2004 2004 2004 2005 2005 2005 2005 2005 2005...
- Page 135 Playing back pictures from the calendar display Press 9 to display the selected picture in a single frame. To return to the calendar display, turn the zoom lever to W (G). 100 00 - 0004 0004 10 11 2004 2004 12 13 14 15 16 17 18 12 12...
-
Page 136: Registering Pictures Into An Album (Album Entry)
The pictures which you have taken can be grouped and organized into albums on the card. There are 12 albums and each album can store up to 100 pictures. Moreover, using the OLYMPUS Master software contained within the supplied CD-ROM, you can store pictures into the albums on the card from a computer. - Page 137 Registering pictures into an album (ALBUM ENTRY) Press b/d to select the album where you want to store the picture. The first frame of the pictures entered in the album is displayed to represent this album. Nothing will be displayed for albums in which no pictures are entered. Album number SEL.
- Page 138 Registering pictures into an album (ALBUM ENTRY) Press 9. Registration of the picture begins. When the picture is registered to the album, the screen returns to normal playback mode. BUSY When “SEL. IMAGE” is selected Press b/d to select the pictures you want to store into the album, then press 9.
-
Page 139: Viewing The Pictures In The Albums
Viewing the pictures in the albums After selecting all of the pictures you want to store into the album, press p. Press a/c to select “YES,” then press 9. Registration of the pictures begins. When the pictures are registered to the album, the screen returns to normal playback mode. -
Page 140: Reordering The Pictures In An Album (Rearrange)
Reordering the pictures in an album (REARRANGE) Press 9. The first picture in the selected album is played back. Displays the preceding picture 10 10 in the album. 100 00 - 0011 0011 Displays the next picture in the album. '04. - Page 141 Reordering the pictures in an album (REARRANGE) Press p to display the album menu. Press a/c to select “REARRANGE.” Press d to enter the “REARRANGE” settings. A Press b/d to select the picture REARRANGE you want to move. Selected picture The frame number of the selected picture CANCEL...
-
Page 142: Releasing Pictures From The Albums (Undo Entry)
Releasing pictures from the albums (UNDO ENTRY) Releasing pictures from the albums (UNDO ENTRY) This section explains how to release pictures from the albums. The pictures released from the albums remain on the card. The protected pictures are also released from the album. However, the picture remains on the card. Turn the mode dial to g. - Page 143 Releasing pictures from the albums (UNDO ENTRY) Press d to enter the picture release settings. The picture selection screen appears. Select “THIS IMAGE” or “SEL. IMAGE,” then press 9. THIS IMAGE: You can release the currently displayed picture. Go to UNDO ENTRY “When “THIS IMAGE”...
- Page 144 Releasing pictures from the albums (UNDO ENTRY) When “SEL. IMAGE” is selected Press b/d to select a picture you want to release, then press 9. To select other pictures, repeat this step. SEL. IMAGE 10/100 The selected picture is shown by “0.” CANCEL To cancel the picture, press 9 again.
-
Page 145: Releasing All The Pictures From The Selected Album (Undo All)
Releasing all the pictures from the selected album (UNDO ALL) Releasing all the pictures from the selected album (UNDO ALL) This section explains how to release all the pictures from the selected album. The pictures released from the album remain on the card. If there are any protected pictures in the album, it is also released from the album. -
Page 146: Selecting And Erasing A Picture From An Album (Erase)
Selecting and erasing a picture from an album (ERASE) Press a/c to select “YES,” then press 9. All the pictures are released from the album. When the process is complete, the screen returns to album playback mode. Selecting and erasing a picture from an album (ERASE) You can erase a picture from a selected album. - Page 147 Selecting and erasing a picture from an album (ERASE) Press a/c to select “YES,” then press 9. The selected picture is erased. Then the screen returns to album playback mode. Tips • You can erase pictures and play slide shows from the album menu. For the features you can perform using the album menu, see “Album menu”...
-
Page 148: Chapter 7: Customizing Your Camera
Saving the settings (ALL RESET) Chapter 7: Customizing your camera Saving the settings (ALL RESET) You can let the camera keep the changed settings even after you turn off the camera. For the settings of the functions this feature is applied to, see “Functions that resume their default settings when “ALL RESET”... - Page 149 Saving the settings (ALL RESET) Press a/c to select “OFF” or “ON,” then press 9. “ALL RESET” is set to “OFF” or “ON,” then the screen returns to the setup menu. ALL RESET SCREEN SLEEP CUSTOM BUTTON...
- Page 150 Saving the settings (ALL RESET) Functions that resume their default settings when “ALL RESET” is set to “ON” Function Default setting Ref. page FLASH MODE AUTO P.51 & (macro)/% (super macro) P.54 Y (self-timer) P.55 D (record mode) Still picture: SUPER HIGH 4M P.65 Movie: STANDARD j (sequential shooting)
-
Page 151: Selecting Your Language For On-Screen Display (W)
FRANCAIS ESPAÑOL PORTUGUES CANCEL SELECT Tips • The available display languages differ depending on the region where the camera is sold. • The available display languages can be added by updating the firmware. For details, refer to the Olympus website. -
Page 152: Changing The Startup Screen (Screen)
Changing the startup screen (SCREEN) Press a/c to select the desired language. Press 9. The selected language is set and the screen returns to the setup menu. Changing the startup screen (SCREEN) You can change the startup screen which appears on the monitor when the power is turned on. Choose from among the following three types of screens. -
Page 153: Changing The Sleep Timer Duration (Sleep)
Changing the sleep timer duration (SLEEP) Press a/c to select “SCREEN.” Press d to enter the startup screen settings. ALL RESET SCREEN SLEEP CUSTOM BUTTON CLOCK Press a/c to select the desired startup screen. Select “OFF” if no startup screen is needed. Press 9. - Page 154 Changing the sleep timer duration (SLEEP) Press a/c to select “SLEEP.” Press d to enter the sleep timer settings. 30SEC ALL RESET 1MIN 3MIN SCREEN 5MIN SLEEP CUSTOM BUTTON 10MIN Press a/c to select the length of time before the camera enters sleep mode.
-
Page 155: Setting Regularly Used Functions To The Custom Button (Z Custom Button)
Setting regularly used functions to the custom button (z CUSTOM BUTTON) Setting regularly used functions to the custom button (z CUSTOM BUTTON) You can select a desired function from among the functions listed below and set it to the custom button. - Page 156 Setting regularly used functions to the custom button (z CUSTOM BUTTON) Turn the mode dial to q. The setup menu appears. Mode dial QU IC K VI EW abcd buttons OP EN OP EN 9 button Press a/c to select “CUSTOM BUTTON.” Press d to enter the custom button settings.
-
Page 157: Erasing The Image Data Automatically After Storing Them Onto The Storage Unit (Erase Stored Image)
Erasing the image data automatically after storing them onto the storage unit (ERASE STORED IMAGE) Using the custom button Turn the mode dial to j, k, i, n, o, l, or n. Mode dial QU IC K VI EW abcd button OP EN OP EN 9 button... - Page 158 Erasing the image data automatically after storing them onto the storage unit (ERASE STORED IMAGE) Press a/c to select “ERASE STORED IMAGE.” ERASE STORED IMAGE SHUTTER SOUND BEEP REC VIEW Press d to enter the “ERASE STORED IMAGE” settings. Press a/c to select “ON.” ERASE STORED IMAGE SHUTTER SOUND BEEP...
-
Page 159: Setting The Warning Sound (8)
Setting the warning sound (8) Setting the warning sound (8) You can adjust the volume of, or turn off, the warning sound. Turn the mode dial to q. The setup menu appears. Mode dial QU IC K VI EW abcd buttons OP EN OP EN 9 button... -
Page 160: Setting The Shutter Sound (Shutter Sound)
Setting the shutter sound (SHUTTER SOUND) Press d to select the warning sound volume “LOW” or “HIGH.” The warning sound at the selected volume level sounds. Press 9. The volume level is set, and the screen returns to the setup menu. Even when “8”... - Page 161 Setting the shutter sound (SHUTTER SOUND) Press d to enter the shutter sound settings. SHUTTER SOUND HIGH CANCEL SELECT Press a/c to select “1” or “2.” The selected shutter sound is reproduced. The shutter sound does not sound when “OFF” is selected. Press d to select the shutter sound volume “LOW”...
-
Page 162: Setting The Operation Sound (Beep)
Setting the operation sound (BEEP) Setting the operation sound (BEEP) You can select from two different sounds when you operate the camera. You can also set the volume of each sound to “HIGH” or “LOW.” To disable the operation sound, select “OFF.” Turn the mode dial to q. -
Page 163: Checking The Picture You Have Just Taken (Rec View)
Checking the picture you have just taken (REC VIEW) Press a/c to select “1” or “2.” The selected operation sound is reproduced. The operation sound does not sound when “OFF” is selected. Press d to select the operation sound volume “LOW” or “HIGH.” The operation sound at the selected volume level sounds. -
Page 164: Setting Serial Numbers For File Names (File Name)
Setting serial numbers for file names (FILE NAME) Press a/c to select “REC VIEW.” Press d to enter the Rec View settings. ERASE STORED IMAGE SHUTTER SOUND BEEP REC VIEW Press a/c to select “ON” or “OFF,” then press 9. Rec View is enabled or disabled and the screen returns to the setup menu. - Page 165 Setting serial numbers for file names (FILE NAME) This function can be set to “RESET” or “AUTO” to determine how to assign file and folder numbers. Select the more convenient setting to transfer images to a computer. RESET: This resets the file and folder numbers each time a picture card is inserted into the camera.
-
Page 166: Adjusting The Ccd And Image Processing Functions (Pixel Mapping)
Adjusting the CCD and image processing functions (PIXEL MAPPING) Press a/c to select “FILE NAME.” Press d to enter the file name settings. FILE NAME RESET PIXEL MAPPING AUTO VOLUME Press a/c to select “AUTO.” Press 9. The file naming method is set to “AUTO” and the screen returns to the setup menu. Adjusting the CCD and image processing functions (PIXEL MAPPING) Pixel Mapping checks and adjusts the CCD and image processing function at the same time. -
Page 167: Adjusting The Brightness Of The Monitor (S)
Adjusting the brightness of the monitor (s) Press a/c to select “PIXEL MAPPING.” Press d to enter Pixel Mapping mode. FILE NAME PIXEL MAPPING START VOLUME Press 9 to begin Pixel Mapping. Pixel Mapping starts. When Pixel Mapping is complete, the screen returns to the setup menu. -
Page 168: Setting The Playback Sound Volume (Volume)
Setting the playback sound volume (VOLUME) Press a/c to select “s.” RESET FILE NAME PIXEL MAPPING , 04.12.03 10:20 VOLUME Press d to enter the monitor brightness adjustment settings. Brightens Darkens SELECT Press 9. The adjusted monitor brightness is confirmed and the screen returns to the setup menu. Setting the playback sound volume (VOLUME) You can adjust the volume of the sound recorded with still pictures or movies when playing back... - Page 169 Setting the playback sound volume (VOLUME) Press a/c to select “VOLUME.” RESET FILE NAME PIXEL MAPPING , 04.12.03 10:20 VOLUME Press d to enter the playback volume settings. Press a/c to select the volume level. 7: Maximum volume level FILE NAME PIXEL MAPPING VOLUME 6: Playback sound is muted.
-
Page 170: Selecting The Video Signal Type (Video Out)
Selecting the video signal type (VIDEO OUT) Selecting the video signal type (VIDEO OUT) Select NTSC or PAL according to your TV video signal type. When you use the camera with a TV overseas, set the correct video signal type in accordance with the local system before connecting to the TV. -
Page 171: Resetting The Settings To Default (Mode Reset)
Resetting the settings to default (MODE RESET) Resetting the settings to default (MODE RESET) You can reset the settings changed for shooting and playback to default (the settings at the time of purchase). Note If you perform “MODE RESET,” all the settings including the saved settings after setting “ALL RESET” to “OFF”... -
Page 172: Formatting A Card (Format)
Formatting a card (FORMAT) Formatting a card (FORMAT) A card can be prepared for optimal storing conditions for this camera by formatting. Cards not supplied with this camera or formatted on a computer or another camera must be formatted with this camera. - Page 173 Formatting a card (FORMAT) Press p. Press a/c to select “FORMAT.” EDIT ERASE FORMAT ALBUM ENTRY The still image playback menu is displayed. Press d to enter the format settings. Press a/c to select “YES.” FORMAT CAUTION ERASING ALL SELECT Press 9.
-
Page 174: Using Various Clock Functions From The Clock Menu
Using various clock functions from the clock menu Using various clock functions from the clock menu This camera allows you to set the alarm and to select the style of the clock which is displayed in the monitor. The clock related functions can be set using the clock menu. The date and time can also be set using the clock menu rather than using the setup menu. - Page 175 Using various clock functions from the clock menu Press p to display the clock menu, then press a/c to select “CLOCK STYLE.” Press d to enter the “CLOCK STYLE” settings. CLOCK STYLE DESIGNER'S ALARM SET DIGITAL ALARM SOUND Press a/c to select “DESIGNER’S” or “DIGITAL.” Press 9.
-
Page 176: Setting The Alarm (Alarm Set)
Using various clock functions from the clock menu Setting the alarm (ALARM SET) This function allows you to set the alarm. When the alarm is set, even if the camera’s power is Off, the power will automatically turn on at the time set for the alarm to go off. If you want to cancel the alarm, set the alarm to “OFF.”... - Page 177 Using various clock functions from the clock menu Press d to enter the alarm settings. Press a/c to select “ON,” then press d to set the alarm. ALARM SET ONE TIME DAILY CANCEL SELECT Press a/c to select “ONE TIME” or “DAILY,” then press 9. When “ONE TIME”...
- Page 178 Using various clock functions from the clock menu Press 9. The selected alarm is set. Press p to return to clock mode. “%” appears when the alarm is set. Note If you want to let the alarm go off while the camera’s power is on, turn the mode dial to r to enter the clock mode.
-
Page 179: Setting The Type Of Alarm Sound And Sound Level (Alarm Sound)
Using various clock functions from the clock menu Setting the type of alarm sound and sound level (ALARM SOUND) This function allows you to set the type of alarm sound and sound level. You can select from three types of alarm sounds. You can also set the volume of each sound to “LOW,” “MID,” “HIGH,” or “GRADUAL”... - Page 180 Using various clock functions from the clock menu Press d to enter the volume level settings. Press a/c to select the desired volume level. ALARM SOUND HIGH GRADUAL CANCEL SELECT Press 9. The selected alarm sound and volume level are set. Press p to return to clock mode.
-
Page 181: Chapter 8: Printing Images
You can print pictures on a printer connected to the computer. You can transfer pictures from the card to the computer and print them. Printing is easy if you use OLYMPUS Master software. See “Using the supplied OLYMPUS Master software” (g page 204). -
Page 182: Making Print Reservations (Dpof)
Making print reservations (DPOF) Using the printing service offered by camera shops You can have the images on the card printed at a camera shop. If you make print reservations in advance with the camera, you can get pictures printed according to the print reservation data. -
Page 183: Making A Single-Frame Reservation (<)/All-Frame Reservation (U)
Making print reservations (DPOF) What is DPOF? DPOF is short for Digital Print Order Format. DPOF is the format used to record information relating to which frames have been selected, how many prints are required, and whether the date and time are to be included. The DPOF print reservation data is stored on the card. Notes •... - Page 184 Making print reservations (DPOF) Turn the mode dial to q. Mode dial QU IC K VI EW p button abcd buttons OP EN OP EN 9 button Press p to display the playback menu, then press a/c to select “<.” Press d to enter the print reservation settings.
- Page 185 Making print reservations (DPOF) Press 9. • When entered from single-frame playback A picture appears as a single frame. • When entered from index playback Pictures appear in the index display. Select the picture you want to reserve for printing and press 9.
- Page 186 Making print reservations (DPOF) Press 9. Press a/c to select “SET,” then press 9. The selected pictures are reserved for printing and the print reservation data is stored on the card. When making an all-frame reservation (U) Press a/c to select “U.” PRINT ORDER ALBUM CHECK / CANCEL...
-
Page 187: Making Print Reservations From An Album (Album)
Making print reservations (DPOF) Making print reservations from an album (ALBUM) This function allows you to select an album and make print reservations. There are two methods of reservation: single-frame reservation (<)—single frames can be selected from an album; and, all-frame reservation (U)—all pictures in an album can be selected. - Page 188 Making print reservations (DPOF) Press d to enter the print reservation settings. Press a/c to select “ALBUM.” PRINT ORDER ALBUM CHECK / CANCEL CANCEL SELECT Tips • When you enter the print reservation settings from the playback menu, “ALBUM” is not displayed.
-
Page 189: Canceling Print Reservations
Making print reservations (DPOF) Press a/c to select “< or “U” then press 9. • When “<” (single-frame reservation) is selected Print reservations are made for the selected pictures only. To make single-frame reservations, follow the procedure in “When making single-frame reservations (<)” (g page 184) from step 5. - Page 190 Making print reservations (DPOF) Press d to enter the print reservation settings. Press a/c to select “CHECK / CANCEL.” PRINT ORDER ALBUM CHECK / CANCEL CANCEL SELECT When print reservation settings are selected from the album menu, “CHECK / CANCEL” cannot be selected.
-
Page 191: Checking The Print Reservations
Making print reservations (DPOF) Press 9. • When “CANCEL” is selected The print reservation for the selected picture is canceled. If pictures with print reservations are still remaining, the screen will return to step 4. To quit, select “EXIT” and press 9. •... -
Page 192: Printing With A Pictbridge-Compatible Printer
Printing with a PictBridge-compatible printer Press 9. A picture with a print reservation appears. Press b/d to display the picture you want to check. CHECK / CANCEL 100-0041 “<” and a number of prints appear on [ DATE ] CANCEL a picture with a print reservation. -
Page 193: Connecting The Camera To A Printer
Printing with a PictBridge-compatible printer Standard settings All printers that support PictBridge have standard print settings. By selecting “STANDARD” (g page 199) on the settings screens, images are printed according to these settings. Refer to the instruction manual of your printer for its standard settings or inquire with the printer’s manufacturer. - Page 194 Printing with a PictBridge-compatible printer Connect the AC adapter to the cradle. Cradle To a wall outlet A / V OUT (MONO) DC IN 5V To DC input terminal AC adapter (A511) Power cord * The shape of the plug differs from country to country.
- Page 195 Printing with a PictBridge-compatible printer Connect the supplied USB cable to the cradle’s USB terminal, then set the camera on the cradle with the multi-swing display opened. Camera connector dial A / V OUT (MONO) Turn the dial to select this mark. DC IN 5V The camera turns on and the “PC / PRINTER”...
-
Page 196: Procedures For Printing
Printing with a PictBridge-compatible printer Procedures for printing After you connect the camera to the printer correctly, you can make print reservations for the images to be printed or print pictures one by one by letting the camera display the picture. Check the camera’s monitor while following this procedure. - Page 197 Printing with a PictBridge-compatible printer c Select the frame(s) you want to print. Display the picture you want to print. You can print 100-0009 100-0009 100-0009 the currently displayed picture or make print reservation(s). See “Printing/Making print reservations” (g page 199). SELECT PRINT SINGLE PRINT...
- Page 198 Printing with a PictBridge-compatible printer When you want to select the pictures you want to print from the albums You can select and print pictures from the selected album. You can also print all the pictures in the album. a Select “ALBUM” and press 9, then the album selection PRINT MODE SELECT screen appears.
- Page 199 Printing with a PictBridge-compatible printer b Choosing the paper size and layout The available options vary depending on your printer. If your printer only has its standard settings available, you cannot change the printer’s settings. PRINTPAPER PRINTPAPER SIZE BORDERLESS SIZE PICS/SHEET STANDARD STANDARD...
- Page 200 Printing with a PictBridge-compatible printer d Choosing the number of prints and print information You can specify the number of prints and whether or not to print each picture’s information such as the date and file name. < ×: Sets the number of prints. PRINT INFO DATE: Prints the date recorded with each picture at the same time.
-
Page 201: Exiting Direct Printing
Printing with a PictBridge-compatible printer Exiting direct printing When printing is finished, the monitor returns to the “PRINT MODE SELECT” screen. Press b while “PRINT MODE SELECT” is displayed. PRINT MODE SELECT PRINT ALL PRINT MULTI PRINT ALL INDEX EXIT SELECT Press a/c to select “EXIT”... -
Page 202: Chapter 9: Using Images With Your Computer
HTML album, and using an image as your desktop wallpaper. Operational sequence You can transfer images from the card in the camera to your computer with the OLYMPUS Master software on one of the supplied CD-ROM by connecting the camera and computer. - Page 203 If the image data cannot be transferred from the card in the camera connected using the USB cable Use an xD-Picture Card adapter (sold separately) depending the operating system for transferring the image data from the xD-Picture card to a computer. For details, refer to the OLYMPUS website.
-
Page 204: Using The Supplied Olympus Master Software
What is OLYMPUS Master? OLYMPUS Master is for use on computers to view, edit, and organize the pictures taken with the digital camera. When this software is installed, the following operations can be performed. -
Page 205: Installing Olympus Master
Using the supplied OLYMPUS Master software Installing OLYMPUS Master Check the operating system of your computer before installing OLYMPUS Master. For the compatibility of a new operating system, see the Olympus website. System requirements Windows Operating System Windows 98SE/Me/2000 Professional/XP... - Page 206 Using the supplied OLYMPUS Master software Macintosh Operating System Mac OS X v10.2 or later Power PC G3 500MHz or greater 128MB or greater (256MB or greater recommended) Hard disk space 300MB or greater Connector USB port Monitor 1024 × 768 dots or higher, 32,000 colors or higher Notes •...
- Page 207 Using the supplied OLYMPUS Master software Windows Insert the CD-ROM into the CD-ROM drive. The OLYMPUS Master installation window is displayed. If the installation window does not display automatically, double click the [My Computer] icon on your desktop and then click the CD-ROM icon.
- Page 208 [Yes]. When the user information window is displayed, type in [Name] and [OLYMPUS Master Serial Number]. Then, select your resident country and click [Next]. The serial number is shown on the label pasted on the CD-ROM package.
- Page 209 Using the supplied OLYMPUS Master software Operate according to the window messages. The installation completion window appears. Click [Finish]. The display returns to the initial window. Select the option to restart the computer immediately and click [Finish]. Remove the CD-ROM from the CD-ROM drive and store it.
-
Page 210: Connecting The Camera To Your Computer
Connecting the camera to your computer Connecting the camera to your computer Connect the cradle and your computer using the supplied USB cable, and then set the camera on the cradle. Connect the supplied USB cable to the USB port of your computer. For the location of the USB port on your computer, see the manual for the computer. - Page 211 Connecting the camera to your computer Set the camera on the cradle with the multi-swing display opened. Camera connector dial Turn the dial to select this mark. When the “PC / PRINTER” screen appears on the camera’s monitor, select “PC,” then press 9. If the screen disappears, turn off the camera and turn it on again, or remove the camera from the cradle and repeat from step 2.
- Page 212 When the computer has been connected to the camera, a window is displayed, prompting you to select the operation for the image files. Click [CANCEL] because the images will be transferred using OLYMPUS Master. • Mac OS X The image files are usually controlled by an iPhoto application. When the camera is connected for the first time, the iPhoto application is activated, so terminate it.
-
Page 213: Launching Olympus Master
Double click the (OLYMPUS Master) icon in the [OLYMPUS Master] folder. The main menu window appears automatically. The first time when the software is activated, the user information window appears, input [Name] and [OLYMPUS Master Serial Number], then select your resident country. - Page 214 OLYMPUS Master Plus. Use to display the print menus. C [Browse Images] button G [Close] button Use to display the browse image. Use to close the OLYMPUS Master software. Closing OLYMPUS Master Click the (close) button on the main menu.
-
Page 215: Displaying Camera Images On Computer
Displaying camera images on computer Displaying camera images on computer Transferring and storing the camera images on a computer Storing camera images on a computer. In the OLYMPUS Master main menu, click the (Transfer Images) button. The transferring source selection window appears. -
Page 216: Disconnecting The Camera
Displaying camera images on computer Click the [Browse images now] button. The image transferred into the browse window is displayed. To return to the main menu, click [Menu] in the browse window. Note Never open the battery/card cover or disconnect/connect the AC adapter while the card access lamp is blinking. -
Page 217: For Macintosh
Displaying camera images on computer For Windows Me/2000/XP A Click the [Eject Hardware] icon displayed on the control strip. B Click the displayed message. C When the [Safe to Remove Hardware] message is displayed, click [OK]. For Macintosh A Drag and drop the [NO_NAME] (or [Untitled]) icon on the desktop to [TRASH]. -
Page 218: Viewing Still Images/Movies
Viewing still images/movies Viewing still images/movies In the OLYMPUS Master main menu, click the (Browse Images) button. The Browse Window is displayed. Double click the thumbnail of the still picture you want to view. Thumbnail The display switches to view mode and the picture is enlarged. -
Page 219: Viewing Movies
Viewing still images/movies Viewing movies In the Browse Window, double click the thumbnail of the movie you want to view. The display switches to view mode and the first frame of the movie is displayed. Click the playback button at the bottom of the movie display to start the movie. -
Page 220: Printing Images
Printing images There are many printing menus for the photos, indexes, postcards, calendars, etc. This section describes how to print photos. In the OLYMPUS Master main menu, click the [Print Images] button. The Print Menu window is displayed. Click the (Photo) button. - Page 221 Printing images Select the thumbnail of the picture you want to print and click [Add]. The selected picture is displayed on the layout as a preview. Set the number of prints. Click [Print]. To return to the main menu, click [Menu] in the photo print window.
-
Page 222: Transferring And Storing Camera Images To A Computer Without Using Olympus Master
This camera is supported by USB Mass Storage Class Device Standards. Therefore, you can transfer and store images by connecting the camera to a computer with the supplied USB cable without using OLYMPUS Master. The connection environment of the USB cable is as follows: Windows:... -
Page 223: Chapter 10: Others
Error message list Chapter 10: Others Error message list Error message Corrective action Insert a card. Or remove the card and reinsert it correctly (g page 31). Wipe the gold contacts with a commercially available cleaning paper and insert the card again. If the problem NO CARD persists, format the card (g page 172). - Page 224 Error message list Error message Corrective action Replace the card or erase unwanted pictures. Transfer the important images to your computer before erasing the image data on the card. CARD FULL The card contains no pictures. Record pictures before playing back. NO PICTURE Use image processing software to view the pictures on a computer.
- Page 225 Error message list Error message Corrective action Close the battery/card cover (g page 32). CARD-COVER OPEN Set the date/time (g page 38). Y/M/D The battery is empty. Charge the battery by setting the camera on the cradle or replace the battery with a fully charged battery.
- Page 226 Error message list Error message Corrective action The camera is not connected to the printer or computer correctly. Disconnect the camera and connect it again correctly. NO CONNECTION CANCEL There is no paper in the printer. Load some paper in the printer.
- Page 227 Error message list Error message Corrective action The printer’s paper tray has been removed or a similar action has been taken. Do not operate the printer while configuring the printer settings. SETTINGS CHANGED CANCEL There is a problem with the printer. Turn off the camera and printer, check the printer, and then turn on both devices.
-
Page 228: If A Problem Arises
If a problem arises If a problem arises Ref. Possible cause Corrective action page ( The camera does not operate./The camera's buttons do not operate. The power is off. The camera automatically turns off if you leave the camera for some time. Turn on the camera by opening the P.36 multi-swing display or pressing the... - Page 229 If a problem arises Ref. Possible cause Corrective action page The card is full. Erase unnecessary images or replace the card with a new one. If you do not want to erase any image, transfer the P.127 P.215 images on the card to your computer before erasing the image data on the card.
- Page 230 If a problem arises Ref. Possible cause Corrective action page The subject is bright enough. If you want the flash to fire every time you shoot, set “FLASH MODE” to P.51 “#” (fill-in flash). The mode dial is set to n (movie The flash cannot be used while the mode dial is set to n.
- Page 231 If a problem arises Ref. Possible cause Corrective action page The monitor is exposed to direct Block the sunlight with something such — sunlight. as your hand. ( The date recorded in the image data is wrong. The date and time are not set. Set the date and time with the “W”...
- Page 232 If a problem arises Ref. Possible cause Corrective action page Set the mode dial to q. The camera is in shooting mode. P.96 The brightness of the monitor is not Adjust the monitor’s brightness with adjusted properly. the “s” (monitor brightness P.167 adjustment) settings of the setup menu.
- Page 233 If a problem arises Ref. Possible cause Corrective action page The subject was out of the working Shoot within the flash working range. P.53 range of the flash. “FLASH MODE” was set to “$”(flash Set “FLASH MODE” to other than P.51 off).
- Page 234 If a problem arises Ref. Possible cause Corrective action page ( The image not focused on is played back. The subject that are difficult to focus on Use focus lock to obtain an accurate P.45 was shot. focus. “FLASH MODE” is set to “$” (flash Set “FLASH MODE”...
- Page 235 If a problem arises When connected to a computer or printer Ref. Possible cause Corrective action page ( The camera is not recognized by the computer. The USB driver has not been installed. It is necessary to install the USB driver P.222 for Windows 98/98SE.
-
Page 236: Menu List
Menu list Menu list Shooting menu (still image) Ref. Item Y Settings Y page SCENE SELECT LANDSCAPE/LANDSCAPE+PORTRAIT/ P.57 NIGHT SCENE/NIGHT+PORTRAIT/ INDOOR/FIREWORKS/SUNSET/PORTRAIT/SELF PORTRAIT/CUISINE/DOCUMENTS/SPORT/ BEACH & SNOW/CANDLE/AVAILABLE LIGHT PORTRAIT/BEHIND GLASS/VIVID D (record mode) SUPER HIGH 4M/HIGH 2M/BASIC 1M/ P.65 E-MAIL VGA j (sequential shooting) OFF/ON P.69 F (exposure compensation) - Page 237 Menu list Shooting menu (movie) Ref. Item Y Settings Y page D (record mode) FINE/STANDARD/EXTENDED/SUPER FINE CLIP P.67 IMAGE STABILIZER OFF/ON P.92 F (exposure compensation) P.71 DIGITAL ZOOM OFF/ON P.73 WB (White Balance) AUTO/5/3/1/> P.76 FULLTIME AF OFF/ON P.93 R (recording sound with OFF/ON P.94 movies)
- Page 238 Menu list Playback menu (still image) Ref. Item Y Settings Y page INFO NO INFO/STANDARD/DETAIL P.110 < (print order) P.182 m (slide show) NORMAL/SCROLL/FADER/ZOOM DOWN/ZOOM UP/ P.105 CHECKERBOARD/BLINDS/SWIVEL/RANDOM y (image rotation) + 90° / 0° / – 90° P.108 R (recording) START P.117 EDIT...
- Page 239 Menu list Playback menu (movie) Ref. Item Y Settings Y page INFO NO INFO/STANDARD/DETAIL P.110 m (slide show) NORMAL/SCROLL/FADER/ZOOM DOWN/ZOOM UP/ P.105 CHECKERBOARD/BLINDS/SWIVEL/RANDOM STOP P.98 INDEX PLAY P.113 EDIT P.119 CAPTURE P.121 INDEX P.123 0 (protect) OFF/ON P.126 ERASE ERASE (one movie erase): YES/NO P.127 ALL ERASE: YES/NO FORMAT...
-
Page 240: Setup Menu
Menu list Setup menu Ref. Item Y Settings Y page ALL RESET OFF/ON P.148 W (language) ENGLISH/ FRANCAIS/ ESPAÑOL/ PORTUGUES P.151 (Settings differ according to the region where the camera is sold.) SCREEN (startup screen) OFF/ /2/CLOCK P.152 3MIN/ SLEEP 30SEC/1MIN/ 5MIN/10MIN P.153... - Page 241 Menu list Album menu Still Ref. Item Y Settings Y Movie image page SEL. ALBUM P.139 INFO NO INFO/STANDARD P.110 m (slide show) NORMAL/SCROLL/FADER/ P.105 ZOOM DOWN/ZOOM UP/ CHECKERBOARD/BLINDS/ SWIVEL/RANDOM STOP P.98 — INDEX PLAY P.113 — < (print order) P.182 —...
-
Page 242: Clock Menu
Menu list Calendar menu Ref. Item Y Settings Y page INFO NO INFO/STANDARD P.110 m (slide show) NORMAL/SCROLL/FADER/ZOOM DOWN/ZOOM UP/ P.105 CHECKERBOARD/BLINDS/SWIVEL/RANDOM STOP P.98 INDEX PLAY P.113 0 (protect) OFF/ON P.126 ERASE ERASE: YES/NO P.127 ALL ERASE: YES/NO FORMAT YES/NO P.172 The items in boldface type are default settings. -
Page 243: List Of Functions By Shooting Mode
List of functions by shooting mode List of functions by shooting mode Some settings may not be available depending on the shooting mode. For details, refer to the table below. Shooting mode Function FLASH MODE — & (macro mode) — % (super macro —... - Page 244 List of functions by shooting mode Shooting mode Function FLASH MODE — — — — & (macro mode) % (super macro mode) Y (self-timer) D (record mode) j (sequential — — — shooting) F (exposure compensation) DIGITAL ZOOM WB (White Balance) —...
-
Page 245: Green Indicator/Flash Mark/Flash Standby Indication
Green indicator/flash mark/flash standby indication Green indicator/flash mark/flash standby indication The green indicator and flash mark appearing on the monitor indicate the following depending on whether they are on, off, or blinking. Indication Indication Camera status Possible/Impossible action status Green Lights steadily The subject is in focus Pictures can be taken. -
Page 246: Camera Maintenance
Camera maintenance Camera maintenance Cleaning the camera Exterior Wipe gently with a soft cloth. If the camera is very dirty, soak the cloth in mild soapy water and wring well. Wipe the camera with the damp cloth and then dry it with a dry cloth. If you used the camera at the beach, clean it with a cloth that has been soaked in clean water and well wrung. -
Page 247: Storing The Camera
Camera maintenance Storing the camera • If you do not intend to use the camera for a long time, remove the card and battery, and store the camera in a cool, dry, well-ventilated place. • You are recommended to occasionally load the battery and operate the camera to keep it in working order. -
Page 248: Camera Specifications
Camera specifications Camera specifications Product type Digital camera (for shooting and displaying) Recording system Still image Digital recording (in accordance with DCF) Compatible Exif 2.21, DPOF, PRINT Image Matching II, standards PictBridge Movie QuickTime Motion JPEG support Memory xD-Picture Card (16 to 512 MB) Number of storable still Image quality Resolution... - Page 249 Image pickup device 1/2.7" CCD (primary color filter) Lens Olympus lens 6.2 to 17.3 mm (equivalent to 40 to 112 mm lens on a 35mm film format), F2.9 to 4.8 Photometric system Digital ESP metering by image pickup device, Spot metering system Shutter speed 1/2 to 1/1000 sec.
-
Page 250: Specifications Of Accessories
Camera specifications Specifications of accessories xD-Picture Card Product type xD-Picture Card for digital cameras Memory type NAND flash EEP-ROM Memory capacity 16 MB Operating voltage 3 V (3.3 V) Operating temperature 0 to 55 °C (32 to 131 °F) (operation) / – 20 to 65 °C (– 4 to 149 °F) (storage) Operating humidity Less than 95 % (operation and storage) - Page 251 Camera specifications Lithium ion rechargeable battery (LI-12B) Product type Rechargeable lithium ion battery Nominal voltage DC 3.7 V Nominal capacity 1230 mAh Number of chargings Approx. 300 (Varies according to conditions of use.) Operating temperature 0 to 40 °C (32 to 104 °F) (charge) / – 10 to 60 °C (14 to 140 °F) (operation) / 0 to 30 °C (32 to 86 °F) (storage) Dimensions Approx.
-
Page 252: Glossary
Glossary Glossary Number of Pixels Pixels are the smallest units which comprise a digital image. Images consisting of greater numbers of pixels are more suitable for creating larger images. Resolution (Image size) This is the size of an image expressed by the number of points (pixels) comprising the image. For example, when the computer monitor setting is set to 640 ×... - Page 253 Glossary DCF (Design rule for Camera File system) The standards for camera file systems stipulated by the Japan Electronics and Information Technology Industries Association (JEITA). DPOF (Digital Print Order Format) This is a format for storing automatic print out information for digital cameras. Which images and the number of copies you want to print can be specified and stored onto the card where the image has been stored.
-
Page 254: Index
Index Index h button ..... . . 22, 48 BEHIND GLASS ..... 64 12-month calendar display. - Page 255 Index DIGITAL ZOOM ..... 73 Full-press ......43 Dock&Done connector .
- Page 256 OK button ......22 OLYMPUS Master ....213 One-month calendar display .
- Page 257 Index Shutter button..... . 22, 43 SHUTTER SOUND....160 VIDEO OUT .
-
Page 258: Before You Contact Us
(Windows) Settings on Control Panel/System/Device Manager (Mac OS) Settings on Control Panel and System Extension • Other peripheral devices connected: • Name and version of the application software related to your problem: • Name and version of the OLYMPUS software product related to your problem:... - Page 259 Our phone customer support is available from 8 am to 10 pm (Monday to Friday) ET E-Mail: distec@olympus.com Olympus software updates can be obtained at: http://www.olympus.com/digital Premises: Wendenstrasse 14-18, 20097 Hamburg, Germany Tel: +49 40-23 77 3-0 / Fax: +49 40-23 07 61...
Need help?
Do you have a question about the IR-500 and is the answer not in the manual?
Questions and answers