Advertisement
Available languages
Available languages
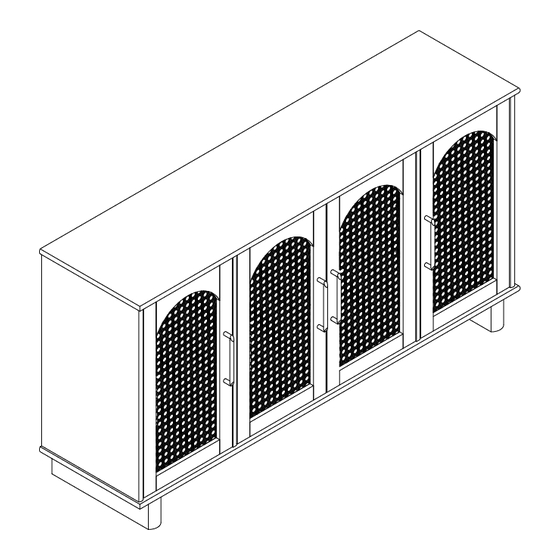
8316911COM Black Oak
8316926COM White Oak
Multi Use Console for 65"
Date of Purchase ___ / ___ / ___
Lot Number:
THIS INSTRUCTION BOOKLET CONTAINS IMPORTANT SAFETY INFORMATION. PLEASE READ AND KEEP FOR FUTURE REFERENCE.
Do Not Return This Product!
Contact our customer service team for help first.
Call: 1-800-489-3351 (toll free)
Visit: www.ameriwoodhome.com
WARNING
- Unit can tip over causing severe injury or death.
- Anchor unit to stud in wall (if instructed to).
- Do Not allow children to climb on unit.
- Put heavy items on lower shelves or drawers.
B348316XXXCOM00SF
Easy
Assembly Difficulty Meter
People needed for assembly: 2
Follow Ameriwood Home
You
Tube
Tough
Advertisement
Table of Contents

Related Manuals for Ameriwood HOME 8316911COM


Summary of Contents for Ameriwood HOME 8316911COM
- Page 1 8316911COM Black Oak 8316926COM White Oak Multi Use Console for 65" B348316XXXCOM00SF Date of Purchase ___ / ___ / ___ Lot Number: THIS INSTRUCTION BOOKLET CONTAINS IMPORTANT SAFETY INFORMATION. PLEASE READ AND KEEP FOR FUTURE REFERENCE. Do Not Return This Product! Contact our customer service team for help first.
-
Page 2: Helpful Hints
Contact Us! Do NOT return this product! Contact our friendly customer service team first for help. Call us! 1-800-489-3351 Visit ameriwoodhome.com Helpful Hints PEOPLE NEEDED FOR ASSEMBLY: 2 - Open your item in the area you plan to keep it to avoid excessive heavy lifting. - Identify, sort and count the parts before attempting assembly. -
Page 3: Before You Start
Before You Start Read through each step carefully and follow the proper order Separate and count all your parts and hardware Give yourself enough room for the assembly process Have the following tools: #2 Phillips Head Screwdriver and Hammer Caution: If using a power drill or power screwdriver for screwing, please be aware to slow down and stop when screw is tight. - Page 4 Before You Start Please Note: You may need to lightly tap the wood dowels with a hammer into the holes during your assembly process. Wood Dowel Insertion: Insert wood dowel completely into the hole. Not Actual Size Wood dowel will extend out approximately 3/8".
-
Page 5: Board Identification
Board Identification Not Actual Size Left Side Panel Top Panel Right Side Panel Left Partition Right Partition Back Panel Bottom Panel Support Rail Right Leg Left Leg Small Adj Shelf Large Adj Shelf 2PCS ameriwoodhome.com Tube... - Page 6 Board Identification Not Actual Size For any replacement part, see page 8. Letf Door Right Door 2PCS 2PCS ameriwoodhome.com Tube...
- Page 7 Board Identification Not Actual Size ameriwoodhome.com Tube...
-
Page 8: Part Number Reference
Part List Part Number Reference Each part has a unique part number. Please refer to the appropriate part number when contacting customer service for replacement parts. Before throwing any packaging, please verify all contents and make sure you have received all the parts listed above. - Page 9 Part List Part List Actual Size For any replacement hardware, see page 11. (x17) (x17) Cam Bolt Cam Lock Ø7x34 mm Ø15x12 mm (x26) (x8) (x48) (x8) Wood Dowel Bolt Screw Screw Ø8x30 mm Ø5/32"x20 mm Ø3.5x14 mm Ø4x50 mm (x12) (x28) (x6)
- Page 10 Part List Part List Not Actual Size (x8) (x12) (x4) Hinge Shelf Support Handle WARNING ADVERTENCIA AVERTISSEMENT (x1) (x8) (x1) Warning Cam Cover Glue Label ameriwoodhome.com Tube...
- Page 11 Each part has a unique part number. Please refer to the appropriate part number when contacting customer service for replacement parts. Before throwing any packaging, please verify all contents and make sure you have received all the parts listed above. 8316911COM 8316926COM MODEL# (Black Oak)
- Page 12 STEP · Attach eight Cam Bolts (1) to Top Panel (A) as illustrated. Do NOT over-tighten. · Attach Door Stopper (7) to Top Panel (A) with two Screws (8) as illustrated. ameriwoodhome.com Tube...
- Page 13 STEP Wooden Dowel Dowels extend out 3/8". For Hole for more details, please see wooden dowel page 4 Use one drop of glue in dowel hole. · Insert four Wood Dowels (3) into Left Side Panel (B) and four Wood Dowel (3) into Right Side Panel (C) as illustrated.
- Page 14 STEP Dowels extend out 3/8". For more details, please see page 4 Insert four Wood Dowels (3) into Left Partition (D) as illustrated. · Attach two Door Stoppers (7) to Left Partition (D) with four Screws (8) · Wooden Dowel as illustrated.
- Page 15 STEP Dowels extend out 3/8". For more details, please see page 4 · Insert four Wood Dowels (3) into Right Partition (E) as illustrated. Wooden · Attach two Door Stoppers (7) to Right Partition (E) with four Screws Dowel (8) as illustrated. Hole for wooden dowel...
- Page 16 STEP · Attach Door Stopper (7) to Bottom Panel (G) with two Screws (8) as illustrated. Unfinished ameriwoodhome.com Tube...
- Page 17 STEP · Flip board (G) over from Step 5. · Attach seven Cam Bolts (1) to Bottom Panel (G) as illustrated. Do NOT over-tighten. ameriwoodhome.com Tube...
- Page 18 STEP Dowels extend out 3/8". For more details, please see page 4 x 10 Wooden · Insert six Wood Dowels (3) into Support Rail (H) as illustrated. Dowel · Insert two Wood Dowels (3) into Left Leg (J) and two Wood Dowels (3) Hole for into Right Leg (I) as illustrated.
- Page 19 STEP Wooden Dowel Hole for wooden dowel Use one drop of glue in Attach Support Rail (H) to Right Leg (I) and Left Leg (J) using two · dowel hole. Cam Locks (2) as illustrated. Unfinished Unfinished ameriwoodhome.com Tube...
- Page 20 STEP · Attach boards (H), (J) and (I) to Bottom Panel (G) using seven Cam Locks (2) as illustrated. Unfinished Unfinished ameriwoodhome.com Tube...
- Page 21 STEP Wooden Dowel Hole for wooden dowel Use one drop of glue in dowel hole. · Attach boards (B), (D) and (E), (C) to Bottom Panel (G) using eight Screws (6) as illustrated. Finished Finished Unfinished ameriwoodhome.com Tube...
- Page 22 STEP · With the assistance of a second person, carefully turn the unit upright. · Attach Top Panel (A) to boards (B), (D), (E) and (C) using eight Cam lock (2) and eight Cam Cover (14) as illustrated. Unfinished Unfinished ameriwoodhome.com Tube...
- Page 23 STEP 12 Warning facing outward. (x28) With the assistance of a second person, Unfinished carefully turn the unit over so that the back is accessible. Attach the Back Panel (F) to boards (A), (B),(C), (D), (E) and (G) as shown.Verify that the unit is square before connecting with 28 Screws (9).
- Page 24 STEP x 12 · Insert 12 Shelf Supports (11) into the Unit at the desired shelf heights. · Put the Adj Shelf (K) & (L) onto the Shelf Supports (11) as illustrated. ameriwoodhome.com Tube...
- Page 25 STEP x 16 · Attach two Hinges (10) to the Left Door (M) with four Screws (5) x 2 as illustrated. · Attach two Hinges (10) to the Right Door (N) with four Screws (5) x 2 as illustrated. · Attach Handle (12) to the Left Door (M) with two Bolts (4) x 2 as illustrated.
- Page 26 STEP x 16 · Attach two Right Doors (N) to Right Side Panel (C) and Right Partition (E) using 16 Screws (5) as illustrated. ameriwoodhome.com Tube...
- Page 27 STEP x 16 · Attach two Left Doors (M) to Left Side Panel (B) and Left Partition (D) using 16 Screws (5) as illustrated. ameriwoodhome.com Tube...
- Page 28 STEP To adjust the vertical height. Loosen the four screws "A" on both hinges. Two of them are usually in slotted holes which allows you to adjust up of down by a few mm and then tighten back Para ajustar la altura vertical Afloje los cuatro tornillos "A"...
-
Page 29: Warning Label
STEP WARNING ADVERTENCIA AVERTISSEMENT (x1) Apply Warning Label (15) to the center of Top Panel (A) as shown, ensuring that the TV covers the label. Please note that the label is permanent. Once affixed to your item, it will not come off and will damage the surface if removal is attempted. - Page 30 Maximum Loads This unit has been designed to support the maximum loads shown. Exceeding these load limits could cause sagging, instability, product collapse, and/or serious injury. WARNING ADVERTENCIA AVERTISSEMENT Certificate of Conformity 1. This certificate applies to the Dorel Home Furnishings, Inc. product identified by this instruction manual. 2.
- Page 31 Visit your local retailer's website, rate your purchased product and leave us some feedback! We would like to extend a big "Thank You" to all of our customers for taking the time to assemble this Ameriwood Home product, and to give us your valuable feedback. ameriwoodhome.com Tube...
- Page 32 Español Cubierta Delantera Este libro de instrucciones contiene información IMPORTANTE de seguridad. Por favor lea y manténgalo para referencia en el futuro. No Regrese este producto! Comuniquese con nuestro amistoso equipo de servicio al cliente para obtener ayuda. Llamenos al: 1-800-489-3351 (Gratis) Visitar: www.ameriwoodhome.com PRECAUCION Este mueble puede volcarse y causar graves heridas y/o muerte.
- Page 33 Español Identificación de los Paneles (Página 5-6) Lista de Piezas (Página 9-10) Tamaño real Este no es el tamaño real Este no es el tamaño real (A) PANEL SUPERIOR Tornillo de rosca (10) Bisagra Tornillo de cerradura (11) Soporte de repisa PANEL IZQUIERDO Clavija de madera (12)
- Page 34 Español Página 19 Conecte el riel de soporte (H) a la pata derecha (I) y a la pata izquierda (J) usando dos trabas de leva (2) como s e ilustra. Página 20 Conecte las barras (H), (J) y (I) al panel inferior (G) usando siete cerraduras de leva (2) como se ilustra. Página 21 Fije las barras (B), (D) y (E), (C) al panel inferior (G) usando ocho tornillos (6) como se ilustra.
- Page 35 Español Página 28 Ajuste de la bisagra de la puerta. Página 29 Aplique la etiqueta de advertencia (15) al centro del panel superior (A) como se muestra, asegurándose de que el televisor cubra la etiqueta. Tenga en cuenta que la etiqueta es permanente. Una vez fijado a su artículo, no se desprenderá...
- Page 36 Français Couverture Avant CE LIVRET D'INSTRUCTION CONTIENT DES INFORMATIONS IMPORTANTES SUR LA SÉCURITÉ. VEUILLEZ LIRE ET GARDER POUR UNE RÉFÉRENCE FUTURE Ne retournez pas ce produit! Contactez notre équipe de service à la clientèle amicale d'abord pour obtenir de l'aide. Appelez-nous: 1-800-489-3351 (sans frais) Visitez: www.ameriwoodhome.com ATTENTION...
- Page 37 Français Liste des pièces (Page 9-10) Identification des matériaux (Page 5-6) Pas de taille réelle Taille réelle Pas de taille réelle PANNEAU SUPÉRIEUR (10) Charnière Boulon de came PANNEAU GAUCHE (11) Support de tablette PANNEAU DROIT Serrure de came Goujon en bois (12) Poignée CLOISON GAUCHE Boulon...
- Page 38 Français Page 19 Fixez le rail de support (H) à la jambe droite (I) et à la jambe gauche (J) à l'aide de deux verrous à came (2), comme illustré. Page 20 Fixez les barres (H), (J) et (I) au panneau inférieur (G) à l'aide de sept verrous à came (2), comme illustré Page 21 Fixez les barres (B), (D) et (E), (C) au panneau inférieur (G) à...
- Page 39 Visitez le site Web de votre détaillant local, évaluez le produit que vous avez acheté et laissez-nous vos commentaires ! Nous tenons à offrir un grand "Merci" à tous nos clients pour avoir pris le temps d'assembler ce produit "Ameriwood Home", et de nous donner vos commentaires précieux. Merci ameriwoodhome.com...
Need help?
Do you have a question about the 8316911COM and is the answer not in the manual?
Questions and answers