
Related Manuals for Oilon RE 07 EasyAce


Summary of Contents for Oilon RE 07 EasyAce
- Page 1 M8013 2441EN 22 October 2024 Installation and commissioning manual Models: Oilon RE 07 Equipment: EasyAce...
-
Page 3: Table Of Contents
Contents Introduction Heat pumps covered in this manual..............5 Instructions and diagrams.................. 5 Safety notice and warnings................5 Transportation and storage................7 Scope of delivery....................11 Accessories.......................13 Decommissioning....................14 Disposal of refrigerant..................15 Installation Installation site....................16 Noise mitigation....................17 Water quality recommendations...............17 Dimensions, connections, and components.............19 Outdoor temperature sensor................ - Page 4 Connecting the customer side Modbus cable to EasyAce hub’s WAN port..60 3.10 Activating Master–Slave control............... 60 Operation Control panel....................63 System tab......................64 Circuits tab......................68 Run permissions menu..................72 Viewing compressors, pumps, and valves............73 How to change the language................74 Alarms and alarm history................. 75 Alarm list......................76 Technical data Heat pump technical data................
-
Page 5: Introduction
1 Introduction 1.1 Heat pumps covered in this manual Heat pump models with EasyAce Item code Refrigerant control RE 28 07 EasyAce RE2807E R-410A RE 33 07 EasyAce RE3307E R-410A RE 38 07 EasyAce RE3807E R-410A RE 42 07 EasyAce RE4207E R-410A RE 48 07 EasyAce... -
Page 6: Electrical Safety
Use special caution. The WARNING symbol indicates a hazard that may result in serious injury or death. Use caution. The CAUTION symbol indicates a hazard that may result in an injury. Pay attention. The NOTICE symbol indicates a risk of damage to the equipment, components, or surroundings. -
Page 7: Other Considerations
Safety devices Do not bypass, disable, or damage any of the unit’s pressure switches or other safeguards with tools, by accessing the system’s software, or by any other means. Bypassing the unit’s safeguards may lead to equipment failure, damage to property or injury to people. - Page 8 Do not tilt the unit. If the unit is tilted beyond 45 degrees, the compressor may not receive proper lubrication at startup. As a result, the compressor may become damaged. ● If the unit has been accidentally tilted beyond 45 degrees, leave the unit in vertical position for at least three hours before starting the compressor.
- Page 9 Correct lifting positions RE 28–48 RE 56–96 M8013 2441EN 9 (94)
- Page 10 RE 28–48 RE 56–96 Incorrect lifting positions RE 28–48 RE 56–96 10 (94) M8013 2441EN...
-
Page 11: Scope Of Delivery
1.5 Scope of delivery Equipment and components Item Item code Description Installation and 34793629* This manual commissioning manual Electrical drawing RE 28–48: 1 RE 28–96: 111008 RE 56–96: 1 of each ● In 56–96, master unit (upper unit) RE 56–96: 111009, slave unit (lower unit) Outdoor temperature 36217543... - Page 12 Position Description Domestic hot water TE265 tank temperature Domestic hot water tank TE266 temperature, bottom Change-over valve (space FV202 heating/DHW heating) Outdoor temperature Common heating TE202 flow temperature HEATING CIRCUIT 1 Heating circuit 1 TE212 supply temperature P211 Heating circuit 1 pump FV212 Heating circuit 1 mixing valve TE213...
-
Page 13: Accessories
Position Description Modbus RTU Modbus TCP/IP S: Standard equipment O: Optional accessory, can be connected to the heat pump’s automation system and enabled without additional equipment. OC: Optional equipment that requires an auxiliary controller (available as an option). 1.6 Accessories For a full list of available accessories, please refer to brochures and price lists. -
Page 14: Decommissioning
Accessory Actuator for Belimo DN32–DN50 change-over valves Item code 36962268 Description Belimo SRD230A. AC 100–240 V, open/closed, 3-point, 20 s Purpose Actuator for Belimo change-over valves Valve 34034600, 34034601, 34034602 1.7 Decommissioning Heat pump systems must be decommissioned in accordance with applicable laws and regulations. -
Page 15: Disposal Of Refrigerant
1.8 Disposal of refrigerant The refrigerant used in the heat pump may be charged or recovered by qualified personnel only. Before disposal of refrigerant, determine the refrigerant type and consult the refrigerant's Material Safety Data Sheet for safety information. Refrigerants should be recycled, or disposed if recycling is not possible, by a service provider duly authorized to do so pursuant to local laws and regulations. -
Page 16: Installation
2 Installation 2.1 Installation site Site planning and selection ● Install the unit and the associated equipment in a warm, dry place. ● The installation site’s ambient temperature must be within +5...+40 °C (non- condensing). ● No condensate should accumulate onto the unit’s components from ambient air (non-condensing atmosphere). -
Page 17: Noise Mitigation
2.2 Noise mitigation If the installation space is next to living spaces, it is advisable to consult an acoustic engineer. Below are some suggestions for mitigating noise. Positioning ● Install the heat pump next to an outer wall. ● Make sure that only the feet of the heat pump touch its surroundings. ●... - Page 18 Water is is used as the heat transfer fluid between the condenser and any storage tanks. In space heating, water circulates in heating circuits, and in domestic hot water heating, it is supplied for consumption. Brine is often mixed on-site using household water and ethanol concentrate.
-
Page 19: Dimensions, Connections, And Components
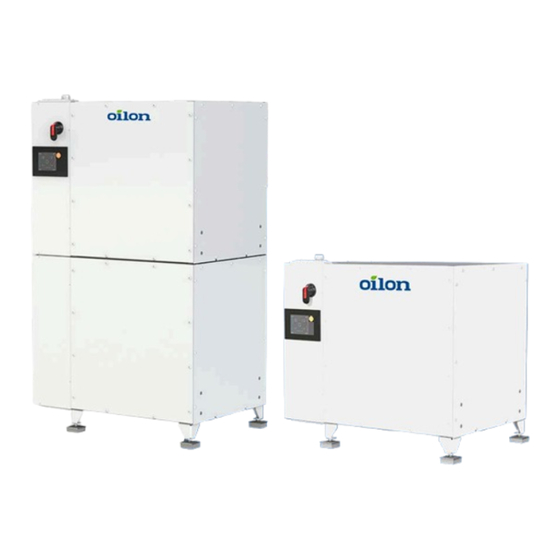
● Free chlorine concentration should be less than 1 ppm, as it is highly corrosive to stainless steel. ● At high temperatures, chloride in the water may cause corrosion in stainless steel. Temperature Recommended chloride concentration <60 °C <50 ppm <80 °C <25 ppm <120 °C... - Page 20 Components, RE 28–48 RE EasyAce, single unit ver. 1 RE 28–48, single-unit configuration. Pos. Item Electrical cabinet User interface Main switch, ON/OFF Adjustable feet Brine circuit in (evaporator circuit in) Brine circuit out (evaporator circuit out) Condenser circuit out, heating water flow Condenser circuit in, heating water return 20 (94) M8013 2441EN...
- Page 21 Components, RE 56–96 RE EasyAce, two units ver. 1 RE 56–96, two-unit configuration. 1: master unit, 2: slave unit. Pos. Item Electrical cabinet User interface Main switch, ON/OFF Adjustable feet Brine circuit in (evaporator circuit in) Brine circuit out (evaporator circuit out) Condenser circuit out, heating water flow Condenser circuit in, heating water return Transit bolts in compressor unit bottom plates...
- Page 22 Dimensions, RE, single-unit configuration D088082 RE 28-48 EasyAce ver. 1 22 (94) M8013 2441EN...
-
Page 23: Outdoor Temperature Sensor
Dimensions, RE, two-unit configuration D087882 RE 56-96 EasyAce ver. 1 Heat pump RE 28-48 RE 56-96 Heat pump RE 28-48 – – – – RE 56-96 1736 1696 1588 1545 1069 Heat pump Ø BI/BO Ø WI/WO RE 28-48 ISO228/1-G2 B ISO228/1-G1 1/4 B 70X70 RE 56-96... -
Page 24: Outdoor Installation
● Use a regular insulated copper twin cable for connecting the cable and extending the cable. ● Select the cross-sectional area of the wires by consulting the table below. ● Join or splice the cable ends in a way that causes no additional electrical resistance in the wires. -
Page 25: Buffer Tank Sensor
● To ensure that the sensor probe remains firmly seated at the bottom of the sensor pocket, secure the sensor cable with a cable gland. The cable can be extended if required. Use a regular insulated copper twin cable for connecting the cable and extending the cable (0.5 mm , length <... -
Page 26: Flow Temperature Sensor For Heating Circuit 1
into the interior of the tank, and the sensor pocket’s internal diameter must be suitable for the sensor probe’s diameter. ● Use only metallic sensor pockets that won't corrode to any significant degree (from the outside or the inside) over time. ●... -
Page 27: Sensor Cable
● Attach the sensor firmly and securely against the pipe surface along the entire length of the metal sleeve covering the sensor probe. ● Finish by adding thermal insulation to insulate the sensor from ambient air temperature. ● If necessary, use thermal paste between the sensor probe and the pipe surface. ●... -
Page 28: Commissioning
3 Commissioning 3.1 Signing in as a service level user To gain access to all settings, sign in as a service-level user. 1. Open the main menu from the top left corner 2. From the menu, select App settings. or by swiping right from the left edge of the screen. -
Page 29: Initial Setup Settings
During first start-up, the initial setup settings icon is displayed in the top menu row. The Initial setup settings menu contains the basic settings required during the commissioning process. Go through the settings during installation. Once the settings are complete, hide the Initial You can choose to display this menu again setup menu by tapping the option at the bottom anytime from the Settings menu. - Page 30 Nominal heating power: Set automatically. Heating target: Select what does the compressor unit generate (space heating, domestic hot water, or both). ● In two-unit heat pumps, if one unit produces only domestic hot water, set the other unit to space heating. Priorization: Change the setting if the compressor unit is set to produce both space heating and domestic hot water.
- Page 31 One typical setup is where compressor unit 1 produces only space heating and unit 2 produces both space heating and domestic hot water. In such case, use these settings: ● Unit 1 diverting valve: Not connected ● Unit 1 hot water pump: Not connected ●...
-
Page 32: Configuring Control Circuits For Space Heating
● Warm curve: At this outdoor temperature point, flow temperature is at its highest. ● Cool curve: At this outdoor temperature point, flow temperature is at its highest (free cooling only). Max. writable setpoint from UI, control circuits Set the maximum temperature setpoint value that the user can enter for heating (or cooling) circuits using the EasyAce app. - Page 33 Default heating curve. X axis: outdoor temperature. The curve shows the flow temperature setpoints for each outdoor temperature point. Editing heating curves through the Initial setup menu 1. Open the Initial setup tab. 2. Scroll down until Circuit 1, Circuit 2, and Circuit 3 are shown. 3.
-
Page 34: Additional Heating, Space Heating
Recommended heating curve adjustments Curve values should be tuned in during the first few heating seasons. 1. If the room temperature is too cold when the outdoor temperature is 0 °C, slightly increase the flow setpoint at outdoor temperature points −2 °C and +8 °C. 2. -
Page 35: Additional Heating, Hot Water
Selecting where the heater is located 1. Open the System tab. 2. Select Settings at the bottom of the view. 3. Select Additional heating. 4. Under Additional heater, heating, select Settings. 5. Select Location. The location can be after condenser (before buffer tank, if the tank is present), buffer tank, or after buffer tank. -
Page 36: Commissioning Free Cooling (Optional)
Additional heating, hot water Freezing protection only The electric heater will switch on only when DHW tank temperature falls below +5 °C (freezing protection). Once the temperature in the DHW tank exceeds +10 °C, the heater will switch off. ● If this option is selected, the electric heater won’t be switched on during a fault unless the temperature falls below the Freezing protection limit. -
Page 37: Finishing The Setup Process
Control circuit → Circuit used: Set the type of circuit, either Cooling or Cooling and Heating. Min. and max. cooling curve temperature: Set the max. cooling curve temperature first. If required, adjust the min. temperature. Finish by scrolling down and selecting Preset cooling curve. -
Page 38: Curing Concrete Floors With A Heat Pump
3.4 Curing concrete floors with a heat pump It is not advisable to use the heat pump to cure floor structures. ● Keep the temperature considerably lower than usual (maximum: +20 °C) before the concrete slab has cured and after the floor has been tiled. ●... -
Page 39: Easyace Hub
Password ● Password for the heat pump and its own Wi-Fi network Connection ID ● Unique identifier for the heat pump’s connection to Oilon’s EasyAce database Wi-Fi SSID ● The name of the heat pump’s own Wi-Fi network 3.5.2 EasyAce Hub The heat pump has a built-in connection device: EasyAce Hub. -
Page 40: Setting Up A Local Connection
Pos. Item Wi-Fi indicator* Internet connection indicator* Power indicator* Wi-Fi ON/OFF switch Reset switch WAN port ● For a wired internet connection (optional) LAN port ● Connection for the heat pump controller, do not remove Power connection *Green = active 3.5.3 Setting up a local connection A Local connection means that there is a direct wireless connection between your... - Page 41 Android 2. Read and accept the Terms of Service. Once you have entered the Unit ID, the app will load the heat pump’s settings onto your mobile device. When the download is complete, the internet connection is no longer needed. Connect your mobile device to the heat pump’s Wi-Fi network –...
- Page 42 3. Select EasyAce network. 4. Enter EasyAce network password and confirm by pressing Connect. ● The password is on a label delivered loose with the heat pump. 5. Check that the connection has been established. Connect your mobile device to the heat pump’s Wi-Fi network – iOS (3/4) The following instructions apply to iOS devices.
- Page 43 3. Select EasyAce network. 4. Enter EasyAce network password and confirm by pressing Connect. ● The password is on a label delivered loose with the heat pump. 5. Check that the connection has been established. Finish setting up the local connection in the EasyAce app (4/4) 1.
- Page 44 5. Name your heat pump. At the end of the process, your mobile device will be connected to the heat pump’s Wi- Fi network, which does not provide internet service for your smarphone. See Using the heat pump locally in Local or Local & Cloud mode. In case of a connection problem Check that your mobile device is connected to the heat pump’s Wi-Fi network and not another Wi-Fi network.
-
Page 45: Setting Up An Internet Connection For Cloud Operation
Keeping the Wi-Fi connection, Samsung android When connecting to the network, your device will Settings ask you whether to keep the connection. Select The phone will automatically switch to using mobile Keep Wi-Fi connection. data. Change the setting from the device’s menu. Settings >... - Page 46 ● If necessary, switch off the data hub’s Wi-Fi from the Wi-Fi switch (pos. 2). ● The connection is ready when the internet connection indicator (pos. 3) shows green. Connect your heat pump to the internet option 2: Wi-Fi connection (2/3) Skip this phase if the heat pump is already connected to the internet.
- Page 47 4. From the menu, select EasyAce Hub. Android 5. Select the EasyAce Hub shown in the menu. Android 6. Select Wi-Fi settings. Android 7. Connect to a Wi-Fi network. Android: Select Connect as Wi-Fi Client. iOS: select Status. M8013 2441EN 47 (94)
- Page 48 8. Select the appropriate local network. In the figure below, the network is “Home network”. 9. Enter the network password and tap OK. 10. Keep tapping the left arrow on the upper edge of the screen until you reach the Home view.
-
Page 49: Local & Cloud Mode
● To scan the QR code, tap on the QR code icon (marked in red). 2. Read and accept the Terms of Service. 3. Set Cloud as the Connection type. ● iOS: give the password on the same screen. The password is on a label delivered loose with the heat pump. -
Page 50: Using The Heat Pump Locally
● Follow the process indicated above, but instead of selecting Cloud as the connection method, select Local & Cloud. 2. Connect the heat pump to the internet, see Setting up an internet connection for cloud operation. At the end of the process, your mobile device will be connected to the heat pump’s Wi- Fi network. -
Page 51: Changing The Connection Method
Connecting your smartphone to the heat pump’s Wi-Fi network 3. After the steps above, tap on the EasyAce 4. Check that the connection has been network. established. You can now access the heat pump with the EasyAce app. Switching back to another Wi-Fi network 1. - Page 52 2. From the menu, select app settings. Android 3. Tap Connection. Android 4. Tap EasyAce. 5. Select Connection. 6. Select Change. 52 (94) M8013 2441EN...
-
Page 53: Changing The Password For Your Connection
7. Select the connection method and proceed into the setup process. Android 3.5.8 Changing the password for your connection 1. Tap the three bar menu icon. 2. From the menu, select app settings. Android 3. Tap Connection. Android M8013 2441EN 53 (94) -
Page 54: Adding A New Heat Pump
4. Tap EasyAce. 5. Tap Connection password. Android 6. Enter the current password and tap OK. If you haven’t changed your password yet, the current password is the password supplied with the unit. 7. Enter a new password and tap OK. 8. -
Page 55: Commissioning A Modbus Tcp/Ip Connection
2. Press the down arrow and from the menu, select Manage user interfaces. Android 3. Select Add new. Configure the connection 4. Once you have added the new heat pump, using the instructions provided earlier in this you can switch between heat pumps from the guide. -
Page 56: Change Teltonika Gateway Ip Settings
3.7 Change Teltonika gateway IP settings Teltonika TRB140 ver. 1 The IP settings in the Teltonika gateway unit need to be changed to enable certain types of remote connectivity, such as Master–slave operation. Accessing the Teltonika unit 1. Change the IP for your laptop to 192.168.2.xxx. 2. -
Page 57: Changing The Easyace Hub Wan Ip Address
Setting Value Start IP 10.20.30.200 End IP 10.20.30.254 Lease time 12 hours 4. Press Next until the wizard is complete. Press FINISH. The Teltonika unit will restart. After this, heat pumps with an address in the 10.20.30.1 range will be able to access the unit. 3.8 Changing the EasyAce hub WAN IP address Connecting to the hub’s Wi-Fi network Connect to the EasyAce hub’s Wi-Fi network. - Page 58 1. Tap the three bar menu icon. 2. Press the down arrow and from the menu, select Manage user interfaces. Android 3. Open the menu from the top right corner. 4. From the menu, select EasyAce Hub. Android 58 (94) M8013 2441EN...
- Page 59 5. Select the EasyAce Hub shown in the menu. Android 6. Select the EasyAce Hub shown in the menu. 7. Select Set static IP Parameters. Android: Select Set static IP Parameters. iOS: Select Ethernet WAN or Wi-Fi WAN 8. Set the applicable WAN IP settings. Android Finish by pressing OK.
-
Page 60: Connecting The Customer Side Modbus Cable To Easyace Hub's Wan Port
Example of WAN IP settings (Android) Example of WAN IP settings (iOS). Check that the Static IP toggle is in its right position (right=ON). Finish by pressing OK. If the change was successful, you will see the text Success, connection changed. 3.9 Connecting the customer side Modbus cable to EasyAce hub’s WAN port Pos. - Page 61 3. Set slave heat pumps under remote control. 4. Activate Master–Slave control in the master heat pump. Connections Connection example – heat pumps connected in series TELTONIKA: gateway unit, SW2: network switch, Hub WAN: EasyAce Hub WAN port. Each heat pump’s EasyAce hub is connected to a network switch (SW2). The heat pumps can be connected in series or in a star configuration, as long as they are in the same network.
- Page 62 3. Press the Operating mode button. 4. Select Auto. Activating Master–Slave operation in the master heat pump Access the master heat pump either through its control panel or remotely with the EasyAce app. 1. Open the System tab. 2. Scroll to the bottom and tap Settings. 3.
-
Page 63: Operation
4 Operation 4.1 Control panel The heat pump can be operated using the EasyAce app either from the heat pump's internal touch panel, a mobile device, or a desktop application. There can be minor differences in the appearance of the user interface. Top menu Top menu row ver. -
Page 64: System Tab
Item Description Contact us An online contact form for reporting bugs, requesting assistance, and for other contacts. Opening menus and setpoints in menus Pressing titles with arrows will open associated menus and settings. The end bracket next to a setting opens a window for adjusting the setting. How to start the heat pump 1. - Page 65 Symbols Compressor Pump Valve Additional Heating circuit heating Space heating DHW heating Free cooling Manual mode Error condition Operating mode button Give the heat pump the permission to run by pressing the Operating mode button in the top right corner. Compressors, pumps, and valves Any compressors, pumps, or valves connected the heat pump and enabled in the system are displayed in the system view.
-
Page 66: Component Status
Pos. Item Operating mode ● SP: setpoint ● Hand icon: manual Setpoint value Setpoint unit. In power-controlled pumps, the value is in °C. Current component status: pump speed or valve position. Component status The status of components and heating circuits is indicated with color codes. Color Status Grey... - Page 67 Buffer tanks If installed, the domestic hot water tank is shown on top and the space heating buffer tank on the bottom. The hottest measured temperature in a storage tank is shown inside the tank, and the tank’s setpoint above the tank. ●...
-
Page 68: Circuits Tab
Pos. Item Pos. Item Outlet (flow) setpoint Return temperature measurement Outlet (flow) measurement Run permissions, Settings, and Hardware IO The buttons at the bottom of the screen provide access to additional settings. Settings provides access to all settings of the unit. Hardware IO provides access to input and output options. -
Page 69: Status Symbols
Pos. Item Pos. Item Circuit number and link to the circuit’s Warm side process values; see below settings Current operating mode Compressors and their current output Heat pump status Expansion valve values; see below Cold side process values; see below Current pump speed Status symbols The heat pump’s status is indicated with icons. - Page 70 Cold and warm side The setpoints marked in orange can be changed by tapping them. Cold side Warm side Pos. Text Description Pos. Text Description Evaporator inlet Discharge temperature temperature Discharge pressure Setpoint Condensing Measurement used for temperature control (see below) Condenser outlet Process value temperature...
- Page 71 Cold side Warm side Icon Description Icon Description Cold circuit temperature Hot circuit temperature Cold side inlet temperature Warm side inlet temperature Cold side flow temperature Warm side flow temperature Evaporation temperature Condensing temperature Buffer tank Compressors Each compressor's current power is expressed as a percentage (shown as a number inside the compressor's icon).
-
Page 72: Expansion Valve
Expansion valve Pos. Item Superheating Expansion valve position The circuit’s current delay in degree minutes. ● Shown if the operating mode is Heating and hot water. 4.4 Run permissions menu Access the menu by tapping Run permissions in the System tab. Sections The Run permissions menu is organized into sections. -
Page 73: Viewing Compressors, Pumps, And Valves
Run permissions Give the heat pump the permission to run from the Operating mode setting. Device status shows if the heat pump is off and what its current task is. Sections Heating and Cooling Out: The hot or cold side’s outlet (flow) temperature. In: The hot or cold side’s inlet (return) temperature. -
Page 74: How To Change The Language
Manual mode Accessing components through settings In the Settings view, you can alter how a component is used. ● Circuit: the component is used only in a specific circuit. ● Shared: the component is shared by two or more circuits. 1. -
Page 75: Alarms And Alarm History
Screen texts in different languages 4.7 Alarms and alarm history Error conditions and other alarms are indicated with the error condition icon in the Circuits tab. Viewing active alarms If an alarm is active, access the Alarms view by tapping the error condition icon in the Circuits tab. -
Page 76: Alarm List
When viewing active alarms, check the cause of the alarms and reset from the bottom right corner. 4.8 Alarm list Alarm levels Level Icon Behavior Warning A warning is acknowledged automatically or turns into an alarm in certain circumstances (such as repeated warning). Alarm Alarms must be acknowledged manually. - Page 77 General warnings and alarms Warning/alarm Possible cause Corrective action Inverter startup in progress Inverter is restarting. No action required. Condenser hot Too high condenser inlet temperature. Increase flow. Condenser cold Too low condenser inlet temperature. Decrease flow. Expansion valve fault or the compressor Superheat low does not start.
-
Page 78: General Errors
General errors Error Possible cause Corrective action Discharge pressure Too high condenser temperature. high, pressure switch Increase flow. ● Either too low flow or too high inlet Inverter discharge temperature. pressure switch active Suction pressure Refrigerant leak, flow missing, or too low low, pressure switch water temperature in the evaporator. -
Page 79: Technical Data
5 Technical data 5.1 Heat pump technical data The performance between different units may vary. This variation is due to a wide number of factors, such as the properties of the fluids used in the circuits, fouling of the heat transfer surfaces in the condenser and evaporator circuit, flow rates, individual differences between compressors (standard EN 12900) as well as refrigerant circuit charge and adjustments made to the refrigerant circuit during installation. -
Page 80: Compressor Units
MODEL/RATED CAPACITY (kW) 3~, 400 V, 50 Hz, PE Evaporator connections ISO 228 outer thread (G) Maximum permissible operating pressure, bar RE 28–48, fuse MODEL/RATED CAPACITY (kW) 3~, 400 V, 50 Hz, PE Fuse, 3x 25 A 32 A 40 A 40 A 40 A RE 56–96, fuse... -
Page 81: Performance Data
*Always check the refrigerant charge from the name plate primarily. Pay attention to any changes made to the refrigerant charge after installation. 5.3 Performance data To view performance data in other conditions, please use the Oilon Selection Tool (www.oilon.com). Performance data, B0/–3 (brine in: 0, brine out: –3) - Page 82 Water Water in, °C out, °C B0/−3, W47/55 17.9 21.6 24.3 27.3 31.9 35.9 43.1 48.7 54.6 63.8 Heating capacity, kW B0/−3, W30/35 26.8 31.2 35.4 40.2 46.3 53.5 62.3 70.9 80.4 92.7 B0/−3, W47/55 26.3 32.0 35.6 39.7 46.2 52.6 64.1 71.3 79.5 92.3 COP, heating B0/−3, W30/35 B0/−3, W47/55...
- Page 83 Seasonal performance. RE 48 RE 48 Technical data sheet 1 ver. 2 M8013 2441EN 83 (94)
-
Page 84: Operating Conditions
RE 48 Technical data sheet 2 ver. 1 5.4 Operating conditions The unit’s operating condition range is provided below. The unit has been designed for use within the specified conditions. The unit’s performance cannot be guaranteed outside the recommended conditions. Brine temperature may exceed the maximum values momentarily during the start-up phase. -
Page 85: Operating Envelope
Operating envelope In the diagram, the bold continuous line indicates the unit’s recommended operating envelope. The dashed line indicates the operating range where the unit can operate for a short period – during start-up, for example. Operating range RE 28-96 ver. 1 X-axis: brine to evaporator (°C), Y-axis: water from condenser (°C). -
Page 86: Condenser And Evaporator Pressure Loss
Weather zone (in Design outdoor Finland) temperature, °C −26 −29 −32 −38 Weather Zones Finland ver. 1 5.6 Condenser and evaporator pressure loss Condenser pressure loss Condenser pressure loss, RE ver. 1 Y-axis: pressure loss, kPa, X-axis: flow rate, m Water: 30/35 °C. -
Page 87: Pumps
Evaporator pressure loss Evaporator pressure loss (RE) ver. 1 Y-axis: pressure loss, kPa, X-axis: flow rate, m Water and ethanol solution, 30 mass-% @ 0/−3 °C 5.7 Pumps Condenser pumps Condenser pumps are included in the heat pump delivery. Designation Pump Description 1–phase, wet-motor, G 1 1/2 outer thread, installation Wilo Stratos PARA-C 25-180-12... - Page 88 Designation Pump Description 1-phase, wet motor, DN 40 flange, distance between flanges 250 mm, manual control, with accessory card: 34023070 Wilo-Stratos 40/1-12 0–10 V, bus control, etc.; 25–550 W (0.20–2.40 A), motor protection 1.6–2.5 1-phase, wet motor, DN 40 flange, distance between 34023082 Wilo-Yonos MAXO 40/0.5-16 flanges 250 mm, manual control, 30–800 W (0.27–3.5...
- Page 89 Wilo-Stratos Para 1–12, external control mode via analog input (0–10 V) Wilo-Yonos MAXO 40/0.5-12 M8013 2441EN 89 (94)
- Page 90 Wilo-Stratos 40/1-12 Wilo-Yonos MAXO 40/0.5-16 90 (94) M8013 2441EN...
- Page 91 Wilo-Yonos MAXO 50/0.5-16 Wilo-VeroLine-IPL 40/115-0.55/2 Wilo-VeroLine-IPL 50/105-0.75/2 M8013 2441EN 91 (94)
- Page 92 Wilo-VeroLine-IPL 50/120-1.5/2 Wilo-VeroLine-IPL 50/130-2.2/2 92 (94) M8013 2441EN...
- Page 93 M8013 2441EN 93 (94)
- Page 94 Contact information of Oilon dealer: OILON GROUP P.O. Box 5 FI-15801 LAHTI FINLAND Tel: +358 3 85 761 Fax: +358 3 857 6239 Email: info@oilon.com www.oilon.com Date of installation:...
Need help?
Do you have a question about the RE 07 EasyAce and is the answer not in the manual?
Questions and answers