Table of Contents
Advertisement
Quick Links
USER MANUAL
Electric Vehicle AC Charger For Socket
Copyright
Any part of this manual, including text, pictures, graphics, etc., belongs to Hangzhou
Livoltek Power Co., Ltd. Without written permission, no unit or individual may extract,
copy, translate or modify all or part of this manual in any way.
V.02
Advertisement
Table of Contents

Related Manuals for LIVOLTEK A0070230E1SH/Y


Summary of Contents for LIVOLTEK A0070230E1SH/Y
- Page 1 Copyright Any part of this manual, including text, pictures, graphics, etc., belongs to Hangzhou Livoltek Power Co., Ltd. Without written permission, no unit or individual may extract, copy, translate or modify all or part of this manual in any way.
-
Page 2: Table Of Contents
Catalogue About this manual ............................1 Applicable chargers ........................1 Applicable readers ........................1 Sign description ........................... 1 Manual preservation ........................1 Safety statements ............................2 Packing list ..............................4 Product introduction ............................ 5 Product appearance ........................5 Technical parameter ........................6 Safety protection ......................... -
Page 3: About This Manual
1 About this manual Applicable chargers LIVOLTEK A0070230E1SH / A0070230E1SY LIVOLTEK A0110400E1SH / A0110400E1SY LIVOLTEK A0220400E1SH / A0220400E1SY Applicable readers Charger user Charger installer Charger maintenance personnel Sign description Sign Description Description text, indicating supplementary description and interpretation INDICATE of the text. -
Page 4: Safety Statements
WARNING Persons not authorized by LIVOLTEK are not allowed to open the charger. Do not disassemble, repair or refit the charger and relevant ancillary facilities without permission. Improper operation may cause damage, water leakage, electric leakage and... - Page 5 Please start and stop the charging according to the user manual and relevant prompts provided by LIVOLTEK. When plugging in and out the vehicle connector, pay attention to the appropriate force and press the unlock button (Type 1).
-
Page 6: Packing List
Cord extension sets are not allowed to be used. 3 Packing list Item Model Quantity A0070230E1SH / A0070230E1SY / A0110400E1SH / AC charger 1 PCS A0110400E1SY / A0220400E1SH / A0220400E1SY Expansion pipe Φ6X28 mm 4 PCS Tapping screw ST3.9X27 4 PCS E6012 (A0070230E1SH / Y) 4 PCS Insulated terminal... -
Page 7: Product Introduction
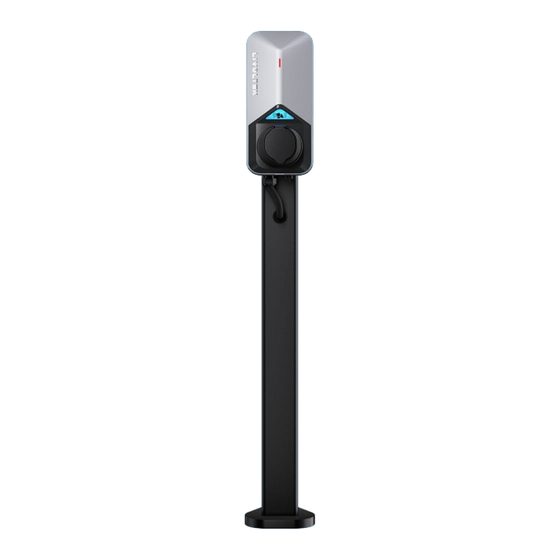
4 Product introduction LIVOLTEK charger supports wall mounted and column mounted installation, and the installation site is flexible; With overvoltage, undervoltage, overcurrent and other protection, IP degree reaches IP54, safe and reliable use; In addition, a variety of communication interfaces are reserved in the charger, which can be interconnected with electricity meters, inverters and other communication, so as to realize richer scene applications. -
Page 8: Technical Parameter
Electricity Measurement Support External Communication RS485/CAN Communication Protocol OCPP 1.6J or LIVOLTEK Private Protocol Residual Current Protection 30mA Type A and 6mA DC RCD Internal With Over Voltage Protection, Under Voltage Protection, Overcurrent Protection, Grounding Protection, Surge Protection, Multiple Protection Short Circuit Protection, Fault Self-check and Other Multiple Protection Functions. -
Page 9: Safety Protection
Safety protection Electrical protection The LIVOLTEK charger has the functions of overvoltage protection, undervoltage protection, overcurrent protection, short circuit protection, leakage protection and grounding protection. Emergency stop protection In case of power failure in case of emergency during charging, press the emergency stop button to stop charging immediately. - Page 10 Plug in complete and wait for B Slow Flashing charging B Fast Flashing Starting charging B Always On Charging R → B Repeating CP status abnormal R → R → R → B Repeating Leakage current fault R → R → R → R → B Repeating Overvoltage fault R →...
-
Page 11: Charging Modes (Residential Application)
In this mode, the vehicle will be charged at fixed restricted charging power. This power can come from a renewable energy source or simply from the grid. If you don’t have solar panels, the LIVOLTEK EV charger will charge just like an ordinary Mode 3 charger. -
Page 12: Charging Modes (Commercial Application)
Charger In this mode, it is a mixture of green energy and energy imported from the grid and LIVOLTEK battery pack. ECO mode minimises the use of grid power and can charge using 100% green energy. If the surplus generation drops below 1.4kW, extra power will be drawn from LIVOLTEK battery pack or the grid to top it back up to protect your car. - Page 13 In this mode, you need to have a Dynamic Charging Management (DCM) to use with your device. This mode can be selected when the power capacity of your operation site is insufficient to ensure that the total power of the equipment does not exceed the power capacity.
-
Page 14: Installation & Wiring
Tools preparation Installation environment requirements It is recommended that the charger be installed by an authorized service provider of LIVOLTEK. The installation position of charger shall not be close to dangerous positions such as water pipe, gas pipe and steam pipe. -
Page 15: Installation Of Charger
The installation position of charger should not be set in low-lying places where it is easy to accumulate water or drip. The charger shall be installed vertically, and the center of gravity shall not be too high to prevent overturning or tilting. The installation position shall be convenient for charging, and the wiring length shall be shortened during line laying to reduce cable energy consumption. - Page 16 2. Drill 4 mouting holes(Φ6X35 mm) and insert the 4 expansion pipes (Φ6 X28 mm) into the holes. 3. Lock 4 ST3.9x27 tapping screws into the upper expansion pipe. 4. Hook the charger to the bracket via the included bracket.
- Page 17 5. After hanging the charger on the bracket, you need to tighten the left and right knobs in a clockwise direction Column mounted installation 1. After determining the installation position of the charger and cable alignment, make sure the cable in the center of charger bracket according to the column mounting holes diagram, and drill 3 mounting holes (Φ12 X120 mm) on the concrete base.
- Page 18 2. Install three M8x100 expansion bolts into the mounting holes and fasten the expansion bolts to ensure that the exposed height of the expansion bolts is between 15 ~ 25mm. 3. Loosen the 5 screws on the hook and take down the hook, pass the cable of the cement base through the inside of the column and lead out from the cable outlet of the column.
-
Page 19: Grid Architecture Wiring
6. Refer to the above steps “3, 4 and 5” of “Wall mounted installation” to complete the installation of the bottom shell and column. Grid architecture wiring A0070230E1SH/Y TN-S Note: MCB is mandatory. The three-phase AC charger is additionally connected to L1 and... - Page 20 TN -C-S Earth Rod Note: RCBO and earth rod are mandatory. The three-phase AC charger is additionally connected to L1 and L2. Earth Rod Note: MCB and earth rod are mandatory. The three-phase AC charger is additionally connected to L1 and L2. A0110400E1SH/Y OR A0220400E1SH/Y Note: MCB is mandatory.
-
Page 21: Input Cable Preparation
TN -C-S Earth Rod Note: MCB and earth rod are mandatory. The three-phase AC charger is additionally connected to L1 and L2. Note: MCB and earth rod are mandatory. The three-phase AC charger is additionally connected to L1 and L2. Input cable preparation A0070230E1SH/ Y It is recommended that the specification of AC incoming cable is 3x6mm², the specific... - Page 22 Φ19.1 Heat Shrinkable Tube Unit: mm A0110400E1SH/ Y It is recommended that the specification of AC incoming cable is 5x2.5mm², the specific treatment method of incoming cable is shown in the figure below: A0220400E1SH/ Y It is recommended that the specification of AC incoming cable is 5x6mm², the specific treatment method of incoming cable is shown in the figure below:...
-
Page 23: Communication Network Cable Preparation
Communication network cable preparation If the charger needs RS485 communication, it is recommended to adopt EIA /TIA 568B standard network cable. The specific treatment method of network cable is shown in the figure below: RJ45 E0510 PIN 3 E0510 PIN 4 Definition CANH CANL... - Page 24 1. First, the panel of the charging pile will be disassembled according to the following illustration, first, the two screws at the bottom of the charger will be unscrewed in the counterclockwise direction, and the top cover can be removed, and then the two screws of the middle cover will be unscrewed in the counterclockwise direction, and the middle cover can be removed.
- Page 25 3. According to the “L1”,”L2”,”L3”,”N”,”PE” (”L”,”N”,”PE” for A0070230E1SH/Y) wires of the access cable, respectively access the corresponding “L1”,”L2”,”L3”,”N”,”PE” (”L”,”N”,”PE” for A0070230E1SH/Y) terminals on the control board, insert the cable into the hole before locking, adjust the position of the cable and then tighten the terminals.
-
Page 26: External Communication Wiring Of Charger
6. After completing the wiring of the charger is shown in the picture on the right. External communication wiring of charger When the charger is used with the electricity meter or inverter, the charger and the electricity meter or inverter need to connect a network cable for RS485 communication. The wiring of the charger is shown in the figure. -
Page 27: Operating Instructions
6 Operating instructions Plug and charge The charger supports plug and charge. When the charger is in standby, the user first inserts the vehicle connector into the vehicle inlet. After the car recognizes that the vehicle connector is inserted, the charger starts charging. - Page 28 1. Access the charger via Bluetooth. Step 1: Open LIVOLTEK APP, enter “Local Mode > Bluetooth Mode” on the login page, and select the charger for access. Note: The name of charger is AC-{SN last 8 digits}. Step 2: Turn on the mobile phone Bluetooth, search the charger, enter the initial password 111111 or last 6 digits of AC Charger’s serial number to pair with the charger.
- Page 29 2. Complete the charger configurations. After entering the home page, access the charger setting items through the “ ” icon, enter “Settings” and complete the charger configurations. Configure “Date & Time”. Enter “Settings > General Settings”. When “Sync With Phone” is turned on, the time will be synchronized automatically or you can set the time manually.
- Page 30 Note: Only 1 mode can be enable at the same time. “Dynamic Mode” needs to be used with the electricity meter, and “ECO Mode” needs to be used with the LIVOLTEK inverter and energy storage system. 3. Start-up charging.
- Page 31 Step 2: And when it is “Ready to Charge”, you can touch the “START UP” to charge.
- Page 32 Step 3: Select a charging strategy, enter cut-o_ condition through the “Start” button, and then start charging. Note: If you have a LIVOLTEK solar ESS system, you can choose whether to enable “Charging With ESS”. When enabled, energy can be taken from the ESS battery to EV.
- Page 33 Step 1: Touch schedule list hot zone as shown in the home page to enter Schedule page, and press the “ ” icon to enter the new schedule page to create a charging schedule. Step 2: Set the charging “Start Up” time and “End Up” time and “Repeater” rules, and then confirm to create the charging schedule.
-
Page 34: Start Up With Ocpp Platform (Commercial Application)
6.3.2 Start up with OCPP platform (Commercial Application) Notice:Once OCPP protocol is applied, charger will not answer charging instruction by myLivoltekApp anymore. 1. Access the charger via Bluetooth. Step 1: Open Intelligent Assistant APP, choose “Bluetooth Devices” on the page, and You can select your device for Bluetooth connection. - Page 35 Step 2: Choose the device that you want to config, enter the initial password 111111 or last 6 digits of AC Charger’s serial number to pair with the charger. 2. Configuring the ocpp protocol...
- Page 36 Step 1: After entering the config page, click on the “Central System” to go to the page. Step 2: After entering the Central System, please select ocpp1.6 for ev charger configuration.
- Page 37 On this page, you need to fill in the IP or domain name for the server you want to connect to. And ocpp path, charge point ID. We provide three kinds of Encryption methods for your convenience, please choose according to your needs and fill in the corresponding information. Fill in all the information and click save to see the link status.
-
Page 38: Troubleshooting
7 Troubleshooting Fault Possible cause Recommended measure Check whether the input cable is reliably connected The status indicator is not on No power input. and whether the front circuit breaker is closed. Measure the input voltage with a multimeter. If it R →... -
Page 39: Disclaimer
8 Disclaimer There are clear requirements and conditions for the transportation, storage, installation and use of electric vehicle charger. LIVOLTEK is not responsible for providing free relevant services, technical support or compensation, including but not limited to: The charger has expired the warranty period and has not purchased extended warranty service. - Page 40 Dear customer, thank you for choosing LIVOLTEK product. For registering product warranty, please prepare everything ready and register on https://www.livoltek.com/registration.html. Product Information Product Model Product S/N Installation Date Installation Company Personal Information Your Name Your Contact Number Your Email Address...
- Page 41 Manufacturer: Hangzhou LIVOLTEK Power Co., Ltd. Add: 1418-35 Moganshan Road, Hangzhou City, China E-mail: info@livoltek.com Web: www.livoltek.com...
Need help?
Do you have a question about the A0070230E1SH/Y and is the answer not in the manual?
Questions and answers