Table of Contents
Advertisement
• Updated information (the latest Instruction Manual, etc.) is available from
<https://www.kenwood.com/cs/ce/>.
For your records
Record the serial number, found on the back of the unit in the spaces designated on the
warranty card, and in the space provided below. Refer to the model and serial numbers
whenever you can upon your KENWOOD dealer for information or service on the product.
Model DRV-A610W
Serial Number______________
US Residents Only
Register your KENWOOD product at www.kenwood.com/usa
© 2024 JVCKENWOOD Corporation
DRV-A610W
GPS Integrated Dashboard Camera
INSTRUCTION MANUAL
Register Online
610-V2.0.J.A-EN
Advertisement
Table of Contents

Related Manuals for Kenwood DRV-A610W


Summary of Contents for Kenwood DRV-A610W
- Page 1 Record the serial number, found on the back of the unit in the spaces designated on the warranty card, and in the space provided below. Refer to the model and serial numbers whenever you can upon your KENWOOD dealer for information or service on the product. Model DRV-A610W...
-
Page 2: Table Of Contents
TABLE OF CONTENT Before Use........................Dashboard Camera Function Guide................Precautions for Use....................... Accessories........................Key Features........................Parts Name and Functions.................... Installation and Connection..................On Screen Notifications....................Video Mode........................Video Menu........................Setup Menu........................Playback Mode......................Using the Desktop Software..................Using the Smartphone App................... Connection with Computer................... -
Page 3: Before Use
Before Use The screen images and operation examples in this document were created for explaining the • operating procedures. There may be screen images that differ from the actual screens or examples of operations not • actually performed. Disclaimer Please note that JVCKENWOOD shall not be responsible for any damages suffered by the customer •... -
Page 4: Precautions For Use
Precautions for Use Precautions and notices Warning! Do not operate the device while driving. Using this product does not change the requirement for a driver to take full responsibility for his or her behavior. This responsibility includes observing all traffic rules and regulations in order to avoid accidents, personal injury or property damage. - Page 5 • Do not store or carry flammable liquids, gases or explosive materials in the same compartment as your device, its parts or accessories. • To discourage theft, do not leave the device and accessories in plain view in an unattended vehicle. •...
- Page 6 Information on Disposal of Old Electrical and Electronic Equipment and Batteries (applicable for countries that have adopted separate waste collection systems) Products and batteries with the symbol (crossed-out wheeled bin) cannot be disposed of as household waste. Old electrical and electronic equipment and batteries should be recycled at a facility capable of handling these items and their waste by products.
- Page 7 Direttiva 2014/53/UE. Il testo integrale della dichiarazione di conformità UE è disponibile al seguente indirizzo internet: Español Por la presente, JVCKENWOOD declara que el equipo de radio DRV-A610W cumple la Directiva 2014/53/EU. El texto completo de la declaración de conformidad con la UE está disponible en la siguiente dirección de internet: Português...
- Page 8 JVCKENWOOD julistaa täten, että radiolaite DRV-A610W on direktiivin 2014/53/EU mukainen. EU-vaatimustenmukaisuusvakuutus löytyy kokonaisuudessaan seuraavasta internet-osoitteesta: Slovensko S tem JVCKENWOOD izjavlja, da je radijska oprema DRV-A610W v skladu z Direktivo 2014/53/EU. Celotno besedilo direktive EU o skladnosti je dostopno na tem spletnem naslovu: Slovensky Spoločnosť...
- Page 9 First Floor, Gleneagles, the Belfry, Colonial Way, Watford, Hertfordshire WD24 4WH, UNITED KINGDOM Hereby, JVCKENWOOD declares that the radio equipment “DRV-A610W” is in compliance with the relevant statutory requirements. The full text of the declaration of conformity is available at the following internet address:...
- Page 10 FCC CAUTION Changes or modifications not expressly approved by the party responsible for compliance could void the user’s authority to operate the equipment. FCC NOTE • This equipment has been tested and found to comply with the limits for a Class B digital device, pursuant to Part 15 of the FCC Rules.
- Page 11 Supplier’s Declaration of Conformity Trade Name: KENWOOD Products: Dashboard Camera Model Name: DRV-A610W Responsible Party: JVCKENWOOD USA CORPORATION 4001 Worsham Avenue, Long Beach, CA 90808, U.S.A. PHONE : 1-800-252-5722 THIS DEVICE COMPLIES WITH PART 15 OF THE FCC RULES. OPERATION IS SUBJECT TO THE...
- Page 12 Para cumplimiento de la IFT “La operación de este equipo esta sujeta a las siguientes dos condiciones: (1) es posible que este equipo o dispositivo no cause interferencia perjudicial y (2) este equipo o dispositivo debe aceptar cualquier interferencia, incluyendo la que pueda causar su operación no deseada.”...
-
Page 13: Accessories
If you wish to view videos, please remove the memory card and read it on a computer, or use the KENWOOD DASH CAM MANAGER APP on your mobile to view via wireless link, or use a third-party USB-A to USB-C cable with data transfer capabilities to connect and view on a computer. -
Page 14: Parts Name And Functions
This feature requires hardwire kit CA-DR1031(optional accessory) to permanent power. 2K Rear Camera Recording (Optional) DRV-A610W supports the rear camera recording. You can purchase the rear camera as a front and rear 4K+2K dual-camera recording. (sold separately, please see KENWOOD website for more detail). - Page 15 • Menu / Mute Button Menu Press this button to open the Video or Setup menu. Mute Press and hold the button for 2 seconds to turn on or off the audio recording function while in video mode. • Record / Screenshot Button Record In Video mode, press to start or stop recording.
- Page 16 Insert your microSD card here. Push your memory card into the slot until you hear a click. (microSD card is inserted into microSD Card Slot at the factory shipment condition) DC-IN/Data transfer Port By connecting DRV-A610W with the supplied car power cable, you are able to charge the camera. Note: The provided Type-C car power cable in the package does not have data transfer functionality and is only for power supply purposes.
-
Page 17: Installation And Connection
Installation and Connection For the first installation, follow the instructions below : Insert Your microSD Card Into The Device The device is designed to allow a standard microSD card to record your footage. Before installing, make sure the gold end of the card is facing the LCD screen. Once it’s aligned with the slot, push the card in and listen for the CLICK that will confirm it is secure. - Page 18 KENWOOD USB car charger provides a 2.6A output current. We recommend using the USB car charger provided by us. Please do not use other USB ports in the car to connect the KENWOOD dash cam, as most car USB ports deliver less than 1A output, while the KENWOOD dash cam requires a 2A current for normal operation.
- Page 19 USB power cable but please notice that your USB power output port should provide 2A current to make sure the device work properly. DO NOT wire DRV-A610W directly to the car cigarette outlet or any 12V outlet. Doing so will result in permanent damage to the camera.
- Page 20 ATTACH THE STATIC SIDE FILM AND MOUNT TO THE WINDSHIELD Select a location on the windshield where it won’t distract you. We recommend you place the mount behind the rearview mirror on the passenger side, within the windshield wiping area. CAM clearly needs to view through CAM clearly needs to view through Left-hand Drive...
- Page 21 Remember to place the mount within the area of the vehicle’s windshield wipers. HIDE AND TRIM THE CABLE Unplug DRV-A610W first to hide and trim the car power cable into the roof and panel. The provided cable clips can help you keep the power cable neat.
- Page 22 KENWOOD USB car charger provides a 2.6A output current. We recommend using the USB car charger provided by us. Please do not use other USB ports in the car to connect the KENWOOD dash cam, as most car USB ports deliver less than 1A output, while the KENWOOD dash cam requires a 2A current for normal operation.
- Page 23 (1) SELECT A LOCATION ON THE REAR WINDSHIELD Select a location on the rear windshield, attach the adhesive mount, and place the rear camera in place. The rear camera mount is designed for sloping windows or vertical / flat windows. Note: It is recommended to place the rear windshield camera within the windshield wiping area at the top of the rear windshield to record as clear an image as...
- Page 25 (2) CONNECT THE REAR CAMERA CABLE Use the CAM IN port on the side of the front dash cam and plug in the rear camera cable. (3) ROUTE THE REAR CAMERA CABLE Route the rear camera cable through the vehicle to the rear windshield and tuck the cable away.
- Page 26 Note: For hatch back trunk opening, leave about 3-5 inches of extra cable at the vehicle’s end to ensure adequate cable connections, and comfortably open the trunk without moving the rear camera. Check all airbags locations on the vehicle owner’s manual. DO NOT route cable over the airbags to avoid potential interference with airbag deployment and posing a problem with proper airbag operation.
- Page 27 (4) CONNECT THE REAR CAMERA CABLE TO THE REAR CAMERA When all the cable is in place, connect the rear camera cable to the rear camera, line up cable pins to secure the cable connection. Check the front dash cam to ensure the rear camera is working correctly.
- Page 28 Note: You can also connect the dash cam to your mobile device and download KENWOOD DASH CAM MANAGER on App Store / Google Play. Use its Live View function to adjust the rear camera. If you still find it too much trouble or don't want to do it yourself. It is recommended to find your local reliable Auto Dealer Service Department,...
-
Page 29: On Screen Notifications
On Screen Notifications The following information will help you better understand the On Screen Notifications when corresponding alert is detected. • First Time Use SD Card Format: when the SD card is inserted into the device for the first time, the device will ask you to format the card. Press OK button to format and LEAVE button to cancel. - Page 30 • Protected Files Over Written: When the protected space of SD card is full, the device will ask you to reformat the card, otherwise the first protected file will be overwritten when the protected space is full. Press OK button to format and LEAVE button to cancel.
- Page 31 • Insert SD card: This is a notification to remind you to insert the SD card. 00:00:00 Please insert SD card 11:17:01 04/25/2024 • Access Menu During Recording: When pressing MENU button during recording, you may need to press Record button to stop recording first then you can press MENU button to access Menu.
- Page 32 • Screen Saver: When screen saver is turned on, the device will automatically turn off the screen after 30 seconds or 2 minutes of inactivity, and 5 seconds before the screen is turned off The display will indicate that the device is about to turn off the screen.
-
Page 33: Video Mode
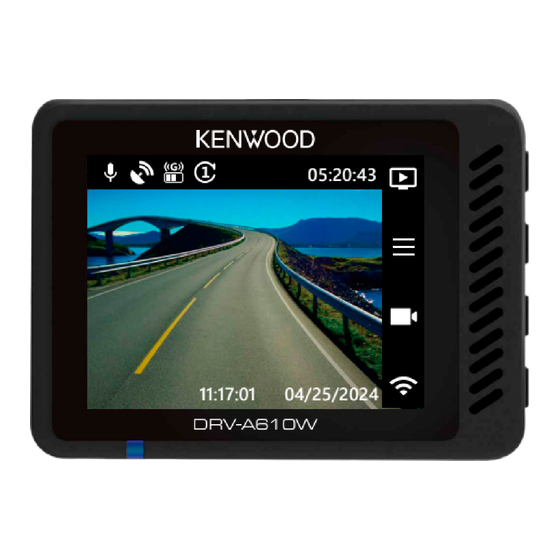
Microphone: When the audio recording function is off, there will be a red line across the icon. GPS: If this icon flashes, it indicates DRV-A610W is locating GPS signal. When the GPS signal is found, the icon will stop flashing and remain stable on the screen. -
Page 34: Video Menu
Video Menu DRV-A610W’s default settings have been set for you to use the camera without needing to change the settings. If you need to make adjustments to the settings, the following instructions will help you. Press the MENU button and select Video Menu while in VIDEO MODE while DRV-A610W is not recording. - Page 35 Data Privacy: Stores up to 4 sets of latest video files when Data Privacy set to ON. OPTIONS: On / Off (default) • Screen Saver: DRV-A610W has a function to let the screen dim or shut down after a period of inactivity. Press any button to re-activate the display. OPTIONS:...
-
Page 36: Setup Menu
KENWOOD Stamp: Turn the KENWOOD logo stamp ON or OFF on the recorded files. • OPTIONS: On (default) / Off Time & Date Stamp: Turn ON or OFF the date stamp mark on the recorded files. • OPTIONS: On (default) / Off •... - Page 37 System Info: Displays the current firmware version and the FCC ID and IC ID. Card Info: Displays the memory card information. Satellite Signal: The count of how many satellite signals DRV-A610W is receiving. App Pairing PIN: This is the PIN used for connecting with the App. If you forget you...
-
Page 38: Playback Mode
Playback Mode Use MODE button to access PLAYBACK MODE while DRV-A610W is not recording. In PLAYBACK MODE, you are able to review the videos you have stored. DIRECTORIES Press the UP or DOWN buttons to navigate through the menu. - Page 39 VIDEO FILES Video Video 2 02 4 /04 / 2 5 11 :1 7: 0 1 Play 20240425_111701_F Protect 20240425_111801_F Delete 20240425_111901_F 20240425_111901_F Use the UP and DOWN buttons to select the video file and press the OK button to select play this video.
- Page 40 KENWOOD Stamp: Logo, can be turned on / off in VIDEO MENU. Time & Date Stamp: Date, Time, can be turned on / off in VIDEO MENU. Information Stamp: Accelerator Data, Speed, Latitude & Longitude, can be turned on / off in VIDEO MENU.
- Page 41 Photo 11:17:01 04/25/2024 1. File Type: Indicates the file type is photo. 2. Playback Controls: Use DRV-A610W buttons as instructed below. 3. Date & Time: Indicates the date and time of the shoot file. Previous. Next.
- Page 42 DELETE FILE Use the UP and DOWN buttons to select the video file and press the OK button to select delete this video. Note: PROTECTED FILES CANNOT BE DELETED. You will have the following options: Video Play Protect Delete 20240425_111901_F Once selected, follow the on screen instructions to delete the current file.
- Page 43 PROTECT / UNPROTECT FILE Use the UP and DOWN buttons to select the video file and press the OK button to select protect / unprotect this video. You will have the following options: Video Protected Video Play Play Protect Unprotect Delete Delete this Video 20240425_111901_F...
-
Page 44: Using The Desktop Software
Using the Desktop Software “KENWOOD VIDEO PLAYER” is a desktop software for displaying video recorded with the device. System Requirements for “KENWOOD VIDEO PLAYER” OS: Microsoft Windows 11, Windows 10* *Microsoft Visual C++ must be installed. *DirectX XAudio2 must be installed. - Page 45 Video time line : Chart of G-sensor data : Drag the Video time line bar to Rewind or Display the G-data of the vehicle in the Forward to cue Video, Speed and G-Sensor video when it was recorded. date. Video shot on : Video play control buttons : Display date and time of the video when it Available options from left to right are stop,...
- Page 46 How to Edit the Video: KENWOOD VIDEO PLAYER JVC VIDEO PLAYER File Edit Setup Share Help Edit Mode Cancel 00:27 01:00 Remove Group Ungroup Cut Time : 00:07 ~ 00:37 File Date Size Duration Resolution 171129_191823_016 11/29/2017 96MB 01:00 1920*1080...
- Page 47 Image processing: Proceed with image processing once the image export options are setup. Export status (1): The image file export progress is presented as a percentage symbol "%" and is synced with item 3. Export status (2): The image file export progress is presented by a frame being filled with layered colors ink and synced with item 2.
- Page 48 Share Mode KENWOOD VIDEO PLAYER 00:27 Click Share → Share Videos in the software system bar at the top of the window or the community sharing icon in the interface to display the sharing window. To share the current video: When two files are playing, the one with the active speaker icon will be shared.
- Page 49 Upload title: The title item will define the name of the video when you upload the video, you can select the Auto: “DD/MM/YYYY (default) – Dash Cam – KENWOOD VIDEO PLAYER” or define the title by yourselves. Last step: Click to go back to the last step.
- Page 50 KENWOOD VIDEO PLAYER JVC VIDEO PLAYER File Edit Setup Share Help 00:27 File upload failure: This page displays if an upload failed or there is a server connection timeout. Last step: Click to go back to the last step.
- Page 51 KENWOOD VIDEO PLAYER 00:27 Connect to community platform: The message "Connecting to Social Media…… Please Wait." displays when a connection is being initiated. Your default browser will display and connect to the selected community platform. You are required to bundle your account ID with the platform for connection the first time only (no longer needed once bundled).
- Page 52 KENWOOD VIDEO PLAYER Upload status (1): The file upload progress is presented as a percentage symbol "%" and synced with item 2. Upload status (2): The file upload progress is presented by a frame being filled with layered colors ink and synced with item 1.
- Page 53 KENWOOD VIDEO PLAYER Confirm: Click to go back to play mode information.
-
Page 54: Using The Smartphone App
Using the Smartphone App Connect DRV-A610W with your mobile devices by using wireless link function. DOWNLOAD KENWOOD DASH CAM MANAGER KENWOOD DASH CAM MANAGER is a completely free set of video playback application. Which can be used to remote control and live stream preview in a short distance or download and review videos from DRV-A610W. - Page 55 OPEN KENWOOD DASH CAM MANAGER APP ON YOUR MOBILE DEVICE The first time you open the app, two notifications will pop up. 1. You will need to allow "KENWOOD DASH CAM MANAGER" to access photos and videos on this device "Allow all".. (Android users only) 2.
- Page 56 Please select the MKII image to enter the MKII dedicated app © 2024 JVCKENWOOD Corporation Please select your dashcam. Press PEN icon on DASHBOARD page and then press + icon to enter ADD DEVICE page. Dashboard All Dash Cams (7) All Dash Cams (0) Default (0) Dashboard...
- Page 57 The phone will start scanning for nearby devices. If any are found, they will be displayed in the list below. Next, please select the device you want to add and press the ADD button. Note: Please ensure that your dash cam is currently powered on and not in Menu or Playback mode.
- Page 58 READY TO GO Congratulations on successfully adding and pairing the device. Please press the Complete COMPLETE button to return to the DASHBOARD page. Add Device Pairing completed! You can now connect to the dashcam via Wireless Link. Complete...
- Page 59 All Dash Cams (7) All Dash Cams (1) App Pairing PIN Default Default 671514 DRV-A610W ba7 DRV-A610W ba7 Ready to Connect Ready to Connect Please enter the App pairing PIN. The default pairing PIN is 671514, but if you have set your own PIN on your dash cam, please enter the PIN you have set.
- Page 60 Wireless Link Wireless Link 00:22 Device Disconnect Device Connected SSID: DRV-A610W ba7 SSID: DRV-A610W ba7 Please open the KENWOOD Please open the KENWOOD DASHCAM MANAGER App and DASHCAM MANAGER App and...
- Page 61 All Dash Cams (7) All Dash Cams (1) Group name Default Signal status indicator Green light: Device name DRV-A610W ba7 Within the connection range Ready to Connect Connection status Red light: Outside the connection range Edit devices menu Downloads page...
- Page 62 CONTROL AND OPERATE (DASH CAM PAGE) Control the LIVE STREAM / VIDEO RECORD / AUDIO RECORD / PROTECT FILE function on your mobile device. Back to Dashboard page DRV-A610W ba7 Start / Stop live stream Full screen Screenshot Audio record / mute...
- Page 63 ACCESS VIDEO AND SETUP MENU (MENU PAGE) ADJUST SETTINGS on your mobile device. These settings will be synced with the dash cam. Back to Dashboard page DRV-A610W ba7 Setup menu Video menu VIDEO SETUP EXPOSURE Front Camera Menu settings Rear Camera...
- Page 64 PLAYBACK AND DOWNLOAD FILES (PLAYBACK PAGE) PLAYBACK (PROTECT / UNPROTECT / DELETE) or DOWNLOAD the videos from the connected DRV-A610W on your mobile device. Back to Dashboard page DRV-A610W ba7 Playback photo files Playback video files VIDEO PHOTO The date you have 04/25/2024 video files...
- Page 65 Back to previous page DRV-A610W ba7 Play / Stop the selected video Full screen Timeline of the selected video 00: 00 01: 00 04/25/2024 11: 00 Download files 11: 17 11: 17 11: 18 The video you select Delete files...
- Page 66 Back to previous page File name 20240425_111701_F Play / Stop the selected video Timeline of the Full screen selected video 00: 00 01: 00 Edit the selected file Speed Speed : 56 MPH Share files Google Maps tracking logs Share files to phone's Photos(iOS) (Note : After downloading your video, please disconnect the device and...
- Page 67 2. Click on the file you want to edit. Dashboard Downloads All Dash Cams (7) All Dash Cams (1) VIDEO PHOTO Default 04/25/2024 11: 00 DRV-A610W ba7 Ready to Connect 11: 17 11: 17 Dashboard Downloads About Dashboard Downloads About 3.
- Page 68 5. Click on the Edit icon. 6. Drag the time sliders on both sides to determine the range of the clip. 20240425_111701_F Downloads 00: 00 01: 00 00: 00 01: 00 20240426_111501_E Speed : 56 MPH 00: 31 00: 00 01: 00 04/25/2024 11: 00 11: 17...
- Page 69 English Unit Imperial Unit Date Format DD/MM/YYYY Connected device’s DASH CAM INFORMATION information Model DRV-A610W ba7 Firmware Ver. Update firmware Firmware Update through the mobile app Clear the cache of Clear Downloads Cache 0.00B unfinished video First time use tutorial...
-
Page 70: Connection With Computer
files. Note: DRV-A610W is a “Read Only” device If you want to copy / delete / edit the files, remove the Micro SD Card and use another card reader to connect your computer. REMEMBER: Turn your DRV-A610W off before you disconnect it from your computer. -
Page 71: Firmware Update Instruction
Firmware Update Instruction Team KENWOOD will keep update the firmware to improve the better user experience for our valued customers. Once you register your product on KENWOOD website, we will send you information about our new firmware update. Or you can visit the link below once for a while to check if there is any new firmware update:... - Page 72 Imperial Unit Unit Imperial Unit Date Format MM/DD/YYYY Date Format MM/DD/YYYY DASH CAM INFORMATION DASH CAM INFORMATION Model DRV-A610W ba7 Model DRV-A610W ba7 Firmware Ver. Firmware Ver. Firmware Update Firmware Update Clear Downloads Cache Clear Downloads Cache First Time Use Tutorial...
- Page 73 4. At this point, the phone will transmit the downloaded firmware to the device using the wireless link function. Firmware Update Firmware Update Downloading… Downloading… 100% Please wait Please press the "Next" button below for the next step. The firmware will be transmitted to the device through the Wireless Link function.
- Page 74 Firmware updating... Do not disconnect power! 7. It may take a while for updating. Once it finishes the update, DRV-A610W will turn off the device automatically. 8. Turn on the dash cam and reset the first time settings. Press MENU button twice to entry SETUP MENU and select the System Info and select Firmware Version to check if the Version is the latest one [V1.0_ABCDEF_A] as shown on...
- Page 75 file name to KWDFAZFW.BIN 2. Insert the SD card into the dashcam. 3. Connect DRV-A610W to your PC or Mac with the 3rd party USB A to USB C cable, and make sure the dashcam is charging.
- Page 76 Firmware updating... Do not disconnect power! 6. It may take a while for updating. Once it finishes the update, DRV-A610W will turn off the device automatically. 7. Turn on the dash cam and reset the first time settings. Press MENU button twice to entry SETUP MENU and select the System Info and select Firmware Version to check if the Version is the latest one [V1.0_ABCDEF_A] as shown on...
-
Page 77: Troubleshooting
Troubleshooting Troubleshooting DRV-A610W comes with a protective lens cover for the camera's lens, be sure to remove it. Wipe the lens with a soft cloth until any debris / stains Blurred Image (Video) are removed. Clean your vehicle's windshield where the camera is placed. - Page 78 This indicates that the Micro SD card is not properly formatted to your A “Card Error” message DRV-A610W. Please remove the files you would like to keep on to your PC, and perform a “Format SD Card” procedure to allow your memory card to appears on my DRV-A610W function properly with DRV-A610W.
-
Page 79: Appendix
If you continue to have problems with your device, please reset your device to default settings in the setup menu and begin the process over again. If Unresolved Issues these problems remain, Please contact your store of purchase or a service center. -
Page 80: Specifications
Specifications Product Name / Model Number Dash Cam / DRV-A610W 5V / 1.5A ; 12-24V DC Power Requirements Input: 12-24V DC Power Supply Output: 5V DC (Car power cable) Fuse Type: SMD/4A Power Input(Car power cable) Built-in super capacitor Front Sensor Resolution... - Page 81 DO NOT USE the other USB ports in the car Please to connect the KENWOOD dash cam, as most car USB ports deliver less than 1A output, while the KENWOOD dash cam requires a 2A current for normal operation. •...
Need help?
Do you have a question about the DRV-A610W and is the answer not in the manual?
Questions and answers
I am trying to connect my iPhone. Getting to PIN number and getting a message saying pin is incorrect even though it’s the one the unit tells me
To resolve the incorrect PIN issue when connecting your iPhone to the Kenwood DRV-A610W:
1. Make sure the dash cam is powered on and in Video mode or Wireless Link mode (not in Menu or Playback mode).
2. When the app asks for a PIN, use the default PIN: 671514.
3. If you previously set a custom PIN, enter the one you set instead of the default.
4. If the PIN is still incorrect, reset the settings through the SETUP MENU or restore defaults to return to the default PIN.
This should allow you to connect successfully.
This answer is automatically generated
What button do I push to lock in something that I want to save or find later
To lock or save a recording on the Kenwood DRV-A610W, press the File Protect button while recording to protect the current video file from being overwritten.
This answer is automatically generated