
Related Manuals for Fox ESS H3 Pro Series

Summary of Contents for Fox ESS H3 Pro Series
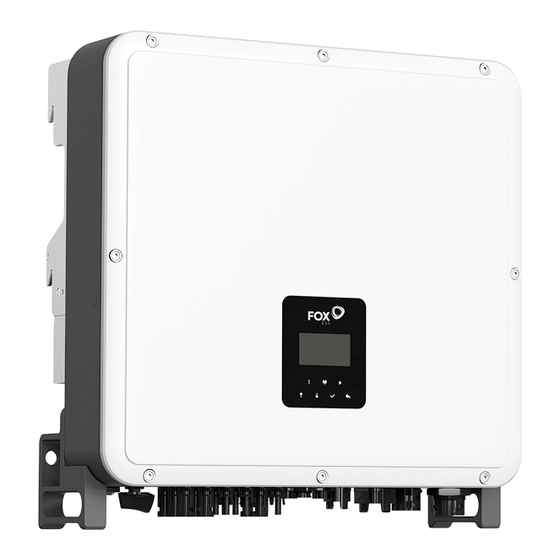
- Page 1 User Manual H3 Pro SERIES In order to prevent improper operation before use, please carefully read this manual.
-
Page 2: Table Of Contents
Table of Contents 1. Notes on This Manual ..........................1 1.1 Scope of Validity .......................... 1 1.2 Target Group ..........................1 1.3 Symbols Used ..........................1 2. Safety ..............................2 2.1 Appropriate Usage ........................2 2.2 PE Connection and Leakage Current ..................3 3. -
Page 3: Notes On This Manual
Notes on This Manual 1.1 Scope of Validity This manual describes the assembly, installation, commissioning, maintenance and troubleshooting of the following model(s) of Fox ESS products: H3-Pro-10.0 H3-Pro-12.0 H3-Pro-15.0 H3-Pro-20.0 H3-Pro-22.0 H3-Pro-24.9 H3-Pro-25.0 H3-Pro-29.9 H3-Pro-30.0 AC3-Pro-10.0 AC3-Pro-12.0 AC3-Pro-15.0 AC3-Pro-20.0 AC3-Pro-22.0 AC3-Pro-24.9 AC3-Pro-25.0... -
Page 4: Safety
Beware of hot surface. The inverter can become hot during operation. Avoid contact during operation. Danger of high voltages. Danger to life due to high voltages in the inverter! Danger. Risk of electric shock! Danger to life due to high voltage. There is residual voltage in the inverter which needs 5 min to discharge. -
Page 5: Pe Connection And Leakage Current
PV array, cables or inverter (DC). The RCMU in the Fox ESS inverter can detect leakage on the DC side. There are 2 trip thresholds for the RCMU as required by the DIN VDE 0126-1-1 standard. A low threshold is used to protect against rapid changes in leakage typical of direct contact by people. -
Page 6: Introduction
In installations where the local electric code requires an RCD with a lower leakage setting, the discharge current might result in nuisance tripping of the external RCD. The following steps are recommended to avoid nuisance tripping of the external RCD: Selecting the appropriate RCD is important for correct operation of the installation. - Page 7 This diagram is an example for an application in which neutral is separated from the PE in the distribution box. For countries such as China, Germany, the Czech Republic, Italy, etc, please follow local wiring regulations.
- Page 8 After installation, you can check the battery voltage of the system through the screen, if the battery voltage is lower than 120V, the battery will not work, and Fox ESS will not be responsible for the damage to the system.
- Page 9 Fox ESS only provides one electricity meter. The address of one of the meter is 1, which is used to measure the power consumption in the home to achieve spontaneous self-use. The address of the other meter is 2, which is used to measure the power generated by another power generation device in the home.
-
Page 10: Dimensions
The system can be set to provide a peak shaving function. A Peak Shaving limit must be set by adjusting “Import Limit” to the desired value. We can increase the peak shaving support uptime by setting the “Threshold SOC”. When the battery is above the “Threshold SOC” the system will work in “Self-Use mode. -
Page 11: Terminals Of Inverter
3.3 Terminals of inverter Item Description Item Description DC Switch BMS1 BMS2 Waterproof Lock Valve BAT1 BAT2 GRID USB/WIFI/PRS/LAN Grounding Screw METER/CT/RS485 Note: Only authorized personnel are permitted to set the connection. 4. Technical Data 4.1 PV Input (For H3-Pro Only) H3-Pro H3-Pro H3-Pro... -
Page 12: Battery
MPPT voltage 150-850 150-850 150-850 150-850 150-850 150-850 150-850 150-850 150-850 range [V] MPPT voltage range (full load) 230-850 270-850 170-850 230-850 250-850 280-850 280-850 340-850 340-850 Start-up voltage No. of MPP trackers Strings per MPP 1/1/1 1/1/1 2/2/2 2/2/2 2/2/2 2/2/2 2/2/2... -
Page 13: Eps Output
power [VA] Max. apparent 11000 13200 16500 22000 24200 24900 27500 29900 33000 AC power [VA] Rated grid voltage 400V/230VAC;380V/220VAC,3L/N/PE (AC voltage range) [V] Rated grid 50/60Hz , ±5Hz frequency [Hz] Max. AC current 16.7 20.0 25.0 33.3 36.7 37.7 41.7 45.4 50.0... -
Page 14: Efficiency And Protection
AC Power [VA] Peak apparent 12000 14400 18000 24000 26400 30000 30000 36000 36000 Power [VA] (60s) Rated output 400V/230VAC;380V/220VAC,3L/N/PE voltage [V] Rated grid 50/60 Frequency [Hz] EPS Max current [A](Per 15.2 18.2 22.7 30.3 33.3 37.9 37.9 45.5 45.5 phase) Power Factor 1(Adjustable from 0.8 leading to 0.8 lagging) -
Page 15: General Data
Reverse connect protection Over-current protection /Over-temperature protection AC/DC surge TypeIII/Type II protection AFCI protection ※ optional DC switch optional String monitoring optional function ※ Note: '※' is under development. 4.6 General Data DIMENSION AND WEIGHT Dimensions (W*H*D) [mm] 600*560*225 Dimensions of packing (W*H*D) [mm] 720*680*370 Net Weight [kg] 52.5kg... -
Page 16: Installation
5. Installation 5.1 Check for Physical Damage Make sure the inverter is intact during transportation. If there is any visible damage, such as cracks, please contact your dealer immediately. 5.2 Packing List Open the package and take out the product, please check the accessories first. The packing list shown as below. -
Page 17: Mounting
5.3 Mounting • Installation Precaution Make sure the installation site meets the following conditions: Not in direct sunlight. Not in areas where highly flammable materials are stored. Not in potential explosive areas. Not in the cool air directly. Not near the television antenna or antenna cable. Not higher than altitude of about 2000m above sea level. - Page 18 • Mounting Steps Tools required for installation: Manual wrench; Electric drill (drill bit set 8mm); Crimping pliers; Stripping pliers; Screwdriver. Installation angle requirements: ● Do not tilt the energy storage forward, horizontally, upside down, backward and sideways. Installation space requirements: When installing energy storage, ensure that there are no other equipment and flammable and explosive materials around, and reserve enough space to ensure the installation heat dissipation and safety isolation requirements.
- Page 19 Please select solid brick-concrete structure and concrete wall for installation location. If other types of wall are selected, the wall must be made of fire-retardant materials and meet the load bearing requirements of the equipment. Insert the M6 expansion bolt into the installation hole and then tighten the mounting bracket with nuts.
-
Page 20: Electrical Connection
6. Electrical Connection 6.1 circuit overview system overview... -
Page 21: Pv Connection (For H3-Pro Only)
6.2 PV Connection (For H3-Pro Only) Step 1: PV String Connection H3-Pro series 5-6kw inverters can be connected with 1 -string of PV modules. Please select suitable PV modules with high reliability and quality. Open circuit voltage of module array connected should be less than 1000V, and operating voltage should be within the MPPT voltage range. - Page 22 Step 2: PV Wiring • Turn off the DC switch. • Choose 4mm wire to connect the PV module. • Trim 6mm of insulation from the wire end. • Separate the DC connector (PV) as below. NOTICE When making PV terminals, please make sure that the copper cores of PV positive and PV negative terminals and the copper cores on the inverter can be inserted, and use a multimeter to measure whether the positive and negative terminals are correct, otherwise the machine may not work normally or individual strings may not work.
-
Page 23: Battery Connection
• Separate the DC connector (battery) as below. NOTICE Fox ESS provides matching battery power harness and communication harness. Please use matching harness. The matched battery power harness and communication harness are in the battery packaging box. • Insert striped cable into pin contact and ensure all conductor strands are captured in the pin contact. -
Page 24: Grid Connection
• Insert pin contact through the cable nut to assemble into back of the male or female plug. When you feel or hear a “click” the pin contact assembly is seated correctly. Note: • Unlock the DC connector DANGER Before disconnecting the DC connector, make sure that there is no current on the DC connector. You can use the current clamp to measure or disconnect the battery switch, otherwise serious safety accidents may occur. - Page 25 WARNING WARNING! A micro-breaker for max output overcurrent protection device shall be installed between inverter and grid, and the current of the protection device is referred to the table above, any load SHOULD NOT be connected with the inverter directly. Step 2: Grid Wiring •...
- Page 26 • Install the copper wire into the plug terminal and lock the screw. • Lock the sleeve and the plug (3~4N·M). EPS Wiring Slip the cable into the body assembly and lock the screws with a hex wrench. (Recommended locking torque for M5 screws 1.5~2.0N.m). •...
- Page 27 • Put the sealing body and yarn trapper into the main body, screw the lock nut into the main body, and the torque is (2.5 + / - 0.5N·m). • The female end of the wire is inserted into the male end of the line and accompanied by a click sound, and the installation is complete.
-
Page 28: Earth Connection
• Slide the cable nut and then Install the back shell onto the cable. • Push the threaded sleeve into the socket, tighten up the cap on the terminal and the torque is (4-5N.m). • Push the threaded sleeve to connection terminal until both are locked tightly on the inverter. •... -
Page 29: Electrical Connection
• Insert striped cable into earth terminal and ensure all conductor strands are captured in the earth terminal. • Crimp earth terminal by using a crimping plier. Put the earth terminal with striped cable into the corresponding crimping pliers and crimp the contact. Use the crimping pliers to press the ground cable into the ground terminal, screw the ground screw with screwdriver as shown below: 6.6 Electrical Connection... -
Page 30: Connection Steps
WiFi/GPRS port under the bottom (underside) of the inverter. Tighten the nut clockwise as following. Step 2: Power on the inverter (in accordance with the start-up procedure detailed in the inverter installation manual). APP Installation: Scan the QR Code below to download and install the Fox ESS Cloud APP on your smartphone. - Page 31 Configuration: Note: The module is powered on and started, please wait for one minute to start the WiFi Config. Web Configuration. Step 1: Connect your mobile device with Smart WiFi. The SSID of the Smart WiFi is ‘W-xxxxx’ and the password is ‘mtmt2020’.
- Page 32 APP Configuration: Step 1: Open the APP, click "Local Distribution Network" on the login page. Then click “Wifi Config”. Or sign in app, click on the “me” page. Then click “WiFi Config”.
- Page 33 Step 2: Please scan the "SN" on the collector. Step 3: Connect your mobile device with Smart WiFi. The SSID of the Smart WiFi is ‘W-xxxxx’ and the password is ‘mtmt2020’.
- Page 34 • Meter/RS485 The PIN definitions of Meter/485 interface are as below. METER/CT/RS485 interface(20pin terminals) DRY RLY2- DRY RLY2+ DRY RLY1- DRY RLY1+ Meter 485+ Meter 485- GND TVS GND COM +12V SELV RY Ctrl EMS 485A EMS 485B...
- Page 35 COM interface(24pin terminals) ARM 485- ARM 485+ GND COM E STOP DRM1 DRM2 DRM3 DRM4 DRM0 GND COM GND COM RJ45_1(24pin terminals) CAN H1 CAN L1 CAN H2 CAN L2 485A 485B GND COM RJ45_2(24pin terminals) CAN H1 CAN L1 CAN H2 CAN L2 485A...
- Page 36 In the old version of the machine, the signal of pin 5 and pin 6 is suspended, not GND, which will affect the wiring mode of the offline parallel function. Please check the wiring on the offline parallel side. Note: •...
- Page 37 The electricity meter is connected as follows:...
-
Page 38: Meter Connection
Meter connection: Meter Connection Diagram Insert L1/L2/L3/N wires and RS485A/B cable into the meter.Please refer to the meter wiring diagram on side of meter itself. Connect RS485A to the 24 pins of the meter port and RS485B to the 25 pins of the meter port. Please use twisted pair cable. - Page 39 Insert L1/L2/L3/N wires ,CT and RS485A/B cable into the meter.Please refer to the meter wiring diagram on side of meter itself. Notes: The 2,5,8 of the CT meter are connected to the three live wires L1, L2, and L3 respectively.
- Page 40 Connect RS485A to the 24 pins of the meter port and RS485B to the 25 pins of the meter port. Please use twisted pair cable. The definition of the meter port refers to the METER/CT/RS485 interface(20pin terminals)in page 32. The transformation ratio setting of a CT meter needs to be consistent with the transformation ratio of a CT meter.
- Page 41 NOTICE Fox ESS only provides one meter. If you need a second meter, please consult your local installer or Fox ESS distributor. The address of the second meter is 2. Please ensure that the address is 2, otherwise the communication of the first meter will be affected, and the output and monitoring data of the inverter will be affected.
- Page 42 Note: Currently only supports DRM0 function, other functions are under development. DRM PIN Definition DRM1 DRM2 DRM3 DRM4 +3.3V DRM0 Definition Model Socket asserted by shorting pins Function DRM0 Operate the disconnection device. The DRM function replicates the German ripple control function. The prerequisite for the use of this function is the selection of the German grid connection regulation VDE 4105 and the use of the DRM function.
- Page 43 Connection steps: Step 1: Open the lid cover. Step 2: Prepare a standard network cable and cable connector, then insert the network cable through the cable connector. Step 3: Crimp the cable with a Rj45 plug which is inside of the cable connector. Step 4: Insert the cable connector into COM port at the bottom of inverter and screw it tightly.
- Page 44 Parallel 1 or Parallel 2 to Parallel 2. This will lead to inaccurate communication of SOC. Because of the machine damage, battery damage and other losses caused by the connection error, Fox ESS will not bear the relevant responsibility.
- Page 45 Off-network and parallel operation requires the off-network and parallel operation box developed by Fox ESS. This box is called EPS 3PH-4Unit. Fox ESS does not assume any responsibility for machine damage or safety accidents caused by non-use of the equipment for offline and parallel operation.
- Page 46 If it is found that the load port of the off-grid parallel box has no voltage during the use process, please use a multimeter to check whether pin 5 and pin 6 of the meter terminal are short-circuited. If pin 5 and pin 6 are not short-circuited, it means that pin 5.6 is not GND, and GND needs to be led from other interfaces to pin 6.
- Page 47 Step2: Set the DIP switch (No need to set all inverter's DIP switch). - Find the inverter with meter cable plugged. - Push the white DIP switch to "ON" position (from down to up) by a suitable tweezers. - DIP switches need to be set on the master and the last slave. Step3: Find the inverter connected with the meter, then enter setting page of the inverter LCD display, then click parallel, and choose "Master Mode".
- Page 48 How to exit from parallel system If one inverter wants to exit from this parallel system, please follow the steps below: Step1: Disconnect all the network cables on the CAN port. Step2: Enter setting page and click parallel setting, and choose "Free". Note! - If a slaver inverter is set to "Free"...
- Page 49 NOTICE The maximum capacity of balanced load is 1/3 of the rated power, that is, the maximum output capacity of 12kW machine per phase is 4kW. The same is true for unbalanced load of off-grid function. If the single-phase load exceeds 1/3 of the output capacity under off-grid condition, the machine will report an error.
-
Page 50: Eps Connection (Non-Parallel State)
6.7 EPS Connection (Non-parallel State) Common loads description Under EPS mode, if need to connect the inductive load on EPS port, please ensure that the instantaneous power of the load at startup is lower than the maximum power of the EPS mode. Below table shows some conventional and reasonable loads for you reference. -
Page 51: Inverter Start-Up
6.9 Inverter Start-Up Please refer to the following steps to start up the inverter. Ensure the inverter fixed well. Make sure all wirings are completed. Make sure the meter is connected well. Make sure the battery is connected well. Make sure the external EPS contactor is connected well (if needed). Make sure the BMS buttons and battery switches are off. -
Page 52: Firmware Upgrading
7. Firmware Upgrading User can upgrade inverter's firmware via a U-disk. • Safety check Please ensure the inverter is steadily powered on. Inverter must keep the battery on through whole procedure of upgrading. Please prepare a PC and make sure the size of U-disk is under 32G, and the format is fat 16 or fat 32. CAUTION Caution! Please DO NOT apply USB3.0 U-disk on inverter USB port, the inverter USB port only support for... - Page 53 • local upgrading: USB Upgrade Operation Guide(Apply to H3-Pro) Introduction: The inverter is a high-tech integrated system with a CPU controller, which requires maintenance and upgrade. The upgrade is easy to operate with by end user or installer ,upgrade files will be provided by manufacturer ,please prepare everything ready before performing this upgrade.
- Page 54 2) Install the USB disk on your laptop, open it and create a folder named‘update’ 3) Create another three separate subfolders named ‘manager’ ‘master’ ‘slave’under ‘update’ folder. 4) Put the upgrade file into corresponding folder as shownbelow * Formate fo the file name: Model_Firmware type_Vx_xx File names example: U:\update\master\H3-Pro_Master_Vx_xx...
- Page 55 4.Only turn on DC breaker (make sure PV voltage is above 120V) wait for 10 seconds, the inverter screen will show as below : 5. If you want to upgrade the inverter firmware , click “up” or “down” to choose the targeted firmware , then click “enter”...
- Page 56 6. Remove the USB disk after upgrade completed. Follow the procedure blew and click the option to view the version: Menu -> About -> Inv Ver 7. Turn on AC &DC breaker. If you updated the HMI, long press the “enter” and click “set” to turn on the inverter.
-
Page 57: Operation
8. Operation 8.1 Control Panel Object Name Function LCD screen Display the information of the inverter. Red: The inverter is in fault mode. Indicator LED Blue: The inverter is normally connected to the battery. Green: The inverter is in normal state. Up button: Move cursor to upside or increase value. -
Page 58: Function Tree
8.2 Function Tree... -
Page 59: Maintenance
9. Maintenance This section contains information and procedures for solving possible problems with the Fox ESS inverters and provides you with troubleshooting tips to identify and solve most problems that can occur. 9.1 Alarm List Fault Code Solution Grid is lost. - Page 60 Battery current high detected by software. SW Bat Cur Fault • Disconnect PV, grid and battery, then reconnect. • Or seek help from us, if not go back to normal state. The isolation is failed. • Please check if the insulation of electric wires is damaged. Iso Fault •...
- Page 61 Battery current high detected by hardware. HW Bat Cur Fault • Disconnect PV, grid and battery, then reconnect. • Or seek help from us, if not go back to normal state. The communication between master and manager is fail. SCI Fault •...
- Page 62 The grid relay keeps open or close. Grid Relay Fault • Disconnect PV, grid and battery, then reconnect. • Or seek help from us, if not go back to normal state. The communication between master and slave is fail. RDSP SPI Fault •...
- Page 63 The capacities of cells are different. BmsCellImbalance • Please contact battery supplier. Battery hardware under protection. Bms HW Protect • Please contact battery supplier. Bms hardware circuit fault. BmsCircuit Fault • Please contact battery supplier. Battery insulation fault. Bms Insul Fault •...
-
Page 64: Troubleshooting And Routine Maintenance
Are the display panel and the communications cable properly connected and undamaged? Contact Fox ESS Customer Service for further assistance. Please be prepared to describe details of your system installation and provide the model and serial number of the unit. -
Page 65: Decommissioning
10. Decommissioning 10.1 Dismantling the Inverter Disconnect the inverter from DC (for H3-Pro only) Input and AC output. Wait for 5 minutes for the inverter to fully de-energize. Disconnect communication and optional connection wirings. Remove the inverter from the bracket. Remove the bracket if necessary. - Page 66 The copyright of this manual belongs to FOXESS CO., LTD. Any corporation or individual should not plagiarize, partially or fully copy (including software, etc.), and no reproduction or distribution of it in any form or by any means is permitted. All rights reserved. FOXESS CO., LTD.
Need help?
Do you have a question about the H3 Pro Series and is the answer not in the manual?
Questions and answers