Table of Contents
Advertisement
Quick Links
Advertisement
Table of Contents
Troubleshooting

Related Manuals for Mio DigiWalker C720T


Summary of Contents for Mio DigiWalker C720T
- Page 1 User’s Manual...
- Page 2 Disclaimer Specifications and manuals are subject to change without notice. Mio Technology assumes no liability for damage incurred directly or indirectly from errors, omissions, or discrepancies between the device and the manuals.
-
Page 3: Table Of Contents
Table of Contents Precautions and Notices ..............vii Getting Started..................1 1.1 Understanding Hardware Components..........1 Front Components ................1 Back Components................2 Left-Side Components ................. 3 Top Components.................. 3 Bottom Components ................4 1.2 Performing the Initial Start Up .............. 4 1.3 Connecting to AC Power and Charging the Battery...... - Page 4 3.3 Playing Audio Files................21 3.4 Playback Controls ................22 3.5 Displaying Lyrics ................23 Preparing the Lyrics Files for your Device ......... 23 Playing Songs with Lyrics ..............23 3.6 Using the Play Lists................24 Creating a Play List ................24 Opening a Play List ................
- Page 5 Deleting a Contact................57 Bluetooth ..................59 7.1 About Bluetooth Profiles..............59 7.2 Connecting a Bluetooth Mobile Phone..........60 Connecting a Mobile Phone for the First Time........60 Connecting a Different Mobile Phone ..........63 Using the Mobile Phone Shortcut............63 Disconnecting the Mobile Phone............
- Page 6 11.2 Backlight..................... 94 11.3 Volume ....................95 11.4 Screen ....................96 11.5 Power ....................97 11.6 Date/Time................... 98 11.7 Language ..................100 11.8 Bluetooth ..................101 BT Preferences ................102 Auto-answer Preferences..............102 Delete Preferences ................103 11.9 Restore..................... 103 12 MioTransfer ...................105 12.1 Installing MioTransfer...............
- Page 7 14.3 Importing POIs ................. 126 Using the Imported POIs with Your Device........128 15 Troubleshooting and Maintenance ..........129 15.1 Restart and Shut Down ..............129 Restarting Your Device ..............129 Shutting Down Your Device ............. 129 15.2 Troubleshooting ................130 Power Problems ................
-
Page 9: Precautions And Notices
Precautions and Notices For your own safety, do not operate the controls of the product while driving. Use this product prudently. The product is intended for use solely as a navigation aid. It is not for precise measurement of direction, distance, location or topography. - Page 10 A device holder is needed when using the device in a car. Be sure that you place the device in an appropriate place, so as not to obstruct the driver’s view, or deployment of airbags. Do not mount where the driver’s Do not place unsecured field of vision is blocked.
-
Page 11: Getting Started
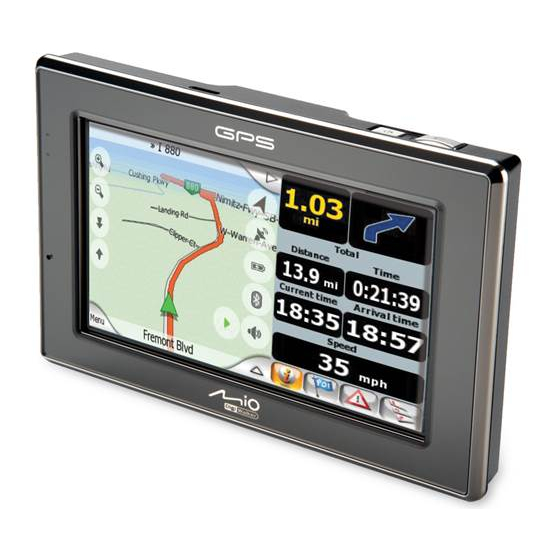
Getting Started 1.1 Understanding Hardware Components NOTE: Depending upon the specific model purchased, the color of your device may not exactly match the device shown in this manual. Front Components Component Description GPS Antenna Receives signals from the GPS satellites overhead. Bluetooth Flashes in blue to indicate that Bluetooth is on. -
Page 12: Back Components
Back Components Ref Component Description External GPS This connector (under rubber dust cover) allows use of an Antenna optional external GPS antenna with magnetic mount, which may Connector be positioned on top of the car for better signal reception in areas with poor reception. -
Page 13: Left-Side Components
Left-Side Components Component Description SD/SDHC/MMC Accepts a SD (Secure Digital), SDHC (Secure Digital High Slot Capacity), or MMC (MultiMediaCard) card for accessing data such as MP3 music. Headphone Connects to 2.5mm stereo headphones. Connector Top Components Ref Component Description Power Button Turns on and off the device. -
Page 14: Bottom Components
Bottom Components Component Description Mini-USB Connector Connects to the charger or USB cable. Cradle Connector Connects to the cradle. 1.2 Performing the Initial Start Up 1. For the initial start up, press the power button for 5 seconds to turn on your device. - Page 15 4. The “Date/Time” screen appears. Tap the appropriate arrow button to select the time zone, date, and time. Then, tap the button. 5. The Home screen appears. You can now use your device.
-
Page 16: Connecting To Ac Power And Charging The Battery
1.3 Connecting to AC Power and Charging the Battery When charging the battery for the very first time, you should charge it for at least 8 hours. 1. Slide and click the connector converter onto the AC adapter. 2. Connect the adapter cable to the bottom of your device. 3. -
Page 17: Charging The Battery Via The Usb Cable
1.4 Charging the Battery via the USB Cable 1. Turn on the computer. 2. Connect the mini-USB end of the USB cable to the bottom of your device and the other end to a USB port on your computer. 3. If your device is on, the screen as shown below appears. Whenever your device is connected to a computer, you will not be able to use it. -
Page 18: Using Your Device In A Vehicle
1.5 Using Your Device in a Vehicle CAUTION: Select an appropriate location for mounting the device in a vehicle. Never place the device where the driver’s field of vision is blocked. Make sure that the GPS antenna has a clear view of the sky. -
Page 19: Connecting The Tmc Antenna
1. Connect one end of the car charger to the power connector of the cradle. 2. Connect the other end to the cigarette lighter in the car to power and charge your device. Connecting the TMC Antenna A TMC antenna is provided with your cradle. You must attach the antenna to the back of the TMC cradle in order to receive real-time driving traffic information. -
Page 20: Operating Basics
1.6 Operating Basics Turning On and Off For normal operation, turn off the device by briefly pressing the power button. The device enters a suspended state. When you next briefly press the power button, the system resumes. You will either be back to where you left off or see the Home screen. NOTE: The screen you see after resuming depends on the program you were using when you suspended the device. -
Page 21: Home Screen
Touch the screen once with your fingertip to open items or select onscreen buttons or options. Drag Hold your fingertip on the screen and drag up/down/left/right or across the screen. (Not all programs support this operation.) Tap and hold Tap and hold your fingertip until an action is complete, or a result or menu is shown. -
Page 22: Using The Soft Keyboard
Button For Detailed Description Name Information Mobile Searches for Bluetooth mobile phones for a Chapter 7 Phone connection. Stereo Searches for Bluetooth headsets or car stereos for Chapter 7 a connection. Tools Card Scanner allows you to scan and recognize Chapter 8 business cards for storing contacts information. - Page 23 Number/symbol Keypad Switch to the alphabet keypad. When you tap to enable umlaut, you can tap a vowel letter repeatedly to input a different form of the letter. Alternatively, you can tap the letter in the pop-up window as shown below. “Umlaut”...
-
Page 24: Inserting A Sd/Sdhc/Mmc Card
1.7 Inserting a SD/SDHC/MMC Card Your device has a storage card slot where you can insert an SD, SDHC, or MMC storage card. To use a storage card, insert it into the slot, with the connector pointing to the slot and its label facing the front of the device. -
Page 25: Videos
Videos 2.1 Starting and Exiting Videos CAUTION: DO NOT view videos while driving. It may be illegal in your state for a display showing a video to be in view of the driver. Videos allows you to watch the video clips on your device. (See later section for the formats that your device supports.) on the Home screen and then tap to start the program. -
Page 26: Preparing The Video Files For Your Device
Use Video ToolBox supplied with your device to convert video files to the format supported by your device. (See Chapter 13 for information.) A tool called Mio Transfer is supplied for you to easily copy the files from your computer to the correct location. (See Section 12.3 for information.) -
Page 27: Playing Video Clips
2.3 Playing Video Clips 1. If your files are in a storage card, insert the card into your device. 2. Tap on the Home screen and then tap to start the program. MioPlayer Pro Videos 3. The program will search the matching files in the specific folder on your device and in all folders on a storage card. -
Page 28: Video Playback Controls
2.4 Video Playback Controls During the playback, tap anywhere on the screen to open or close the onscreen control buttons. When the control buttons are closed, the video shows in full screen. Back You can drag the knob or tap a point in the track bar to move to a different location for the playback. -
Page 29: Audio
Audio 3.1 Starting and Exiting Audio Audio features: Playback of MP3/WAV/WMA files Basic playback controls such as play, pause, stop, next and previous Playback includes single selection playback, repeat, single repeat, sampling playback, normal sequence and random sequence. 11 preset equalizer audio profiles Play list support Background playback Lyrics display... -
Page 30: Preparing The Audio Files For Your Device
The control panel appears on the screen where you can easily control the player by tapping the control buttons. To exit the program, tap 3.2 Preparing the Audio Files for Your Device Before using the program, have the files (.mp3, .wav, or .wma) ready on either your device’s My Flash Disk\My Audio folder or on a storage card. -
Page 31: Playing Audio Files
3.3 Playing Audio Files 1. If your files are in a storage card, insert the card into your device. 2. Tap on the Home screen to start the program. Audio 3. The program will search for the supported audio files in your device and in the storage card. -
Page 32: Playback Controls
3.4 Playback Controls Control Button Name Description Play/Pause Plays or pauses the playback. Stop Stops the playback. Previous/ Plays the previous or next file. Next Volume Increase or decrease the volume. The indicator on the panel shows the current volume level. Track Bar You can tap on a point along the track bar to move directly to a different location for the playback. -
Page 33: Displaying Lyrics
3.5 Displaying Lyrics The program allows you to display the real-time lyrics on the screen while playing songs. This feature is especially handy for you to sing along with the songs. Preparing the Lyrics Files for your Device To display the lyrics, you need to have the lyrics files (.lrc) ready on your device’s \My Flash Disk\My Audio\Lyric\ folder or the \My Audio\Lyric\ folder on your storage card. -
Page 34: Using The Play Lists
To close the lyrics screen and go back to the control panel, tap anywhere on the screen. 3.6 Using the Play Lists You can create your own play lists for future use. Creating a Play List 1. Tap on the control panel to open the play list screen. The screen shows the current play list. -
Page 35: Opening A Play List
Back Add the selected song(s) Add all songs to the to the play list. play list. 4. To save the play list, tap 5. The keyboard screen appears where you can change the default name of the play list. Rename the play list if you want. Tap when finished. -
Page 36: Equalizer
3. Tap the play list you want to open and tap Back Rename the selected play list. Open the selected play list. Delete the selected play list. Delete all play lists. 4. To return to the control panel, tap 3.7 Equalizer The program provides 11 preset audio profiles. -
Page 37: Settings
to save your selection and return to the control panel. To select the Default profile, tap 3.8 Settings on the control panel. The Settings screen appears. Help NOTE: To know the function of each button, you can tap . Then tap the button on the list to display a description line on the right side of the screen. -
Page 39: Pictures
Pictures 4.1 Starting and Exiting Pictures Pictures allows you to view pictures in JPG, JPEG, and BMP formats and view the slideshow of the pictures on your device. on the Home screen and then tap to start the program. MioPlayer Pro Pictures ↓... -
Page 40: Preparing The Pictures For Your Device
4.2 Preparing the Pictures for Your Device Before using the program, have the files (.jpg, .jpeg, or .bmp) ready on either your device’s My Flash Disk\My Pictures folder or on a storage card. NOTE: The Pictures program does not support the display of BMP files in 32-bit and above color depth formats. -
Page 41: Viewing A Picture In Full Screen
4.4 Viewing a Picture in Full Screen When you tap a picture twice in the thumbnail view, the picture is displayed in full screen. Previous Next To go back to the thumbnail view, tap anywhere on the screen to display the control buttons and then tap 4.5 On-Screen Control Buttons On-screen control buttons provide various functions and settings. - Page 42 Control Name Description Button Slideshow Starts the slideshow. (See section 4.6 for detailed information.) Rotate Rotate clockwise by 90 degrees. Information Enables or disables the displaying of the name and date of the file. Delete Deletes the current picture. Brightness Tap the button to adjust the brightness of the picture.
-
Page 43: Viewing The Slideshow
4.6 Viewing the Slideshow To view the slideshow of all your pictures, use one of the following ways: When in the thumbnail view, tap to start the slideshow. When in full screen, tap anywhere on the picture to display the on-screen control buttons. -
Page 45: Camera
Camera 5.1 Starting and Exiting Camera Camera allows you to take photos or record videos. You can view your photos and videos in the program. There are two ways to start the Camera program: on the Home screen. Camera Press the Camera button on the top of the device. (This will close the current program.) NOTE: When using the MioMap navigation program, the Camera button is disabled. -
Page 46: Taking A Photo
To exit the program, tap 5.2 Taking a Photo 1. Insert a storage card if you want to store your photos to it. Make sure that the correct storage location is specified. (See Section 5.4 for information.) 2. Start the Camera program (as described in 5.1). The program will be in the Camera mode by default. - Page 47 Status Bar Control Panel NOTE: The red focus bracket will blink in red to indicate that the program cannot focus on the current target. 6. After taking a photo, the program saves it with the filename DSCxxxxx.JPG (where xxxxx is a sequential number, e.g. DSC00001.JPG). If you have already inserted a storage card and specified it as the storage location, the photo will be saved to the card in the \My Pictures\ folder.
-
Page 48: Camera Screen Elements
Camera Screen Elements Camera Status Icons Several icons appear at the top of the screen to indicate the current status: Icon Name Description Resolution The number indicates the resolution is set to 320 x 240, 336 x 252, 400 x 300, 640 x 480, 800 x 600, 1280 x 960 or 1600 x 1200. - Page 49 Camera Control Panel The control panel to the right of the screen provides these buttons: Control Name Description Button Zoom In/ to zoom in the camera lens; when zoomed in, Zoom Out to zoom out. The available zoom settings are 1x, 1.25x, and 2x.
-
Page 50: Using The Special Camera Functions
5.3 Using the Special Camera Functions Using the Continuous Shot Function The program offers a Continuous Shot function so each release of the shutter takes four photos in a row. 1. Tap on the control panel. 2. The icon will appear in the top right corner of the screen to indicate that the Continuous Shot function is enabled. -
Page 51: Storing Geographic Coordinates
Storing Geographic Coordinates Apart from taking photos, the Camera program also offers GPS Stamp function. This will store the geographic coordinates of your location as you take a photo. In the future you can use the MioMap navigation program to directly navigate to the shooting location of the photo. -
Page 52: Camera Settings
5.4 Camera Settings on the control panel while in Camera mode and the Camera Settings screen as shown below appears. Tap the set value for an item to open the sub-menu (except for the Reset item). In the sub-menu, select the desired value. A check indicates the current value. Item Name Description... -
Page 53: Recording Videos
Item Name Description Reset Restore the Camera settings to their factory defaults. To leave the Settings screen, tap . Any changes that you have made will be stored and retained until you change them again. 5.5 Recording Videos 1. Insert a storage card if you want to store your videos to it. Make sure that the correct storage location is specified. -
Page 54: Video Screen Elements
7. After recording, he program will save it with the filename MOVxxxxx.MP4 (where xxxxx is a sequential number, e.g.MOVC00001.MP4). NOTE: If you have deleted all video files in the storage device, the numbering of the file names will restart from 00001. By default the file format is MP4. -
Page 55: Video Settings
Video Control Panel The control panel to the right of the screen provides these buttons: Control Name Description Button Change Switch to the Camera mode. Function Zoom In/ to zoom in the camera lens; when zoomed in, tap Zoom Out to zoom out. -
Page 56: View Mode
Item Name Description Resolution Sets the video resolution to 128 x 96 or 176 x 144. Recording Sets the maximum length of video to record. Options are Limit 10 seconds, 15 seconds (default), and off. Record Enables (default) or disables the sound recording Sound function. - Page 57 When viewing a video: The control buttons in View mode are: Control Name Description Button Zoom * Zooms in or out on the image. When zoomed in, you can drag on the screen to view other parts of the image. Delete Deletes the current file.
-
Page 58: Editing Photos
Editing Photos You can use the paintbrush tool to touch up the photos and create special effects. 1. When viewing the photo in View mode, tap 2. Select the size of the photo that you wish to save. 3. Tap to enable the Paintbrush function. - Page 59 5. Tap to save the edited photo as a different file. To leave without saving, . You will return to the View screen.
-
Page 61: Contacts
Contacts 6.1 Starting and Exiting Contacts Contacts allows you to keep a list of names, addresses, and phone numbers. NOTE: If you have created Microsoft Outlook Contacts information on your computer, you can copy the information to your device. (See Section 12.4 for information.) on the Home screen to start the program. -
Page 62: Using The Contacts List
6.2 Using the Contacts List After starting Contacts, the contacts list appears. It shows the names and phone numbers (mobile phone numbers by default) of your contacts. You can use the various buttons on the screen to search a contact, navigate to the address of a contact, call a contact, and so on. -
Page 63: Using The Summary Screen
6.3 Using the Summary Screen In the contact list, tapping a contact twice displays the summary screen of the contact. Tap to scroll through the entry fields. Back 6.4 Navigating to a Contact’s Address You can set a contact’s address as your GPS navigation destination. NOTE: For the navigation software to navigate to an address in Contacts, there should be no Suite #, Apartment # or other additional information on the Street Address line, as these may prevent correct navigation. -
Page 64: Making A Phone Call To A Contact
4. The navigation program starts. (See the document supplied with the navigation software for more information.) 6.5 Making a Phone Call to a Contact 1. Connect your device with a Bluetooth mobile phone as described in Section 7.2. 2. Tap the button on the Home screen to start the program. -
Page 65: Managing Contacts
6.6 Managing Contacts Adding a Contact 1. Tap the button on the Home screen to start the program. Contacts 2. Tap 3. Tap an entry field twice Or, tap a field and then tap .The soft keyboard appears. - Page 66 4. Use the soft keyboard to enter the information in the field and tap 5. Enter the information in other fields such as address and phone number fields. You will need to scroll down to see all available fields. NOTE: When entering the address, the soft keyboard guides you through different parts of the address including country, city, street, and house number.
-
Page 67: Editing A Contact
6. Tap save the contact’s information and return to the contact list. Editing a Contact To modify a contact’s information: 1. In the contact list, tap the contact twice to open the summary screen. - or - In the contact list, tap the contact and then tap 2. -
Page 69: Bluetooth
Bluetooth 7.1 About Bluetooth Profiles Your device incorporates Bluetooth wireless communications technology. Devices with Bluetooth capabilities can exchange information over a distance of about 10 meters (30 feet) without requiring a physical connection. Your device supports Bluetooth profiles as below: Hands-free Profile (HFP) Allows your device to serve as a hands-free device for a Bluetooth mobile phone. -
Page 70: Connecting A Bluetooth Mobile Phone
7.2 Connecting a Bluetooth Mobile Phone Connecting a Mobile Phone for the First Time NOTE: This chapter tells you how to initiate the Bluetooth connection from your device. If you want to initiate the Bluetooth connection from a Bluetooth mobile phone, make sure that your device is in discoverable mode. - Page 71 NOTE: If no device is detected, the screen shows the shortcut menu. (See the shortcut descriptions later in this section.) 4. The search result will show on the screen. Tap the mobile phone you want to connect. 5. Tap the soft keyboard to enter the passkey (within 16 characters). 6.
- Page 72 9. In the Mobile Phone main menu, you can place phone calls by tapping buttons on the screen. (See Section 7.3 for information.) 10. You can tap to minimize the screen and use other functions of the device. Back...
-
Page 73: Connecting A Different Mobile Phone
Connecting a Different Mobile Phone To connect a mobile phone that is not already in the shortcut list: 1. If you are in the Mobile Phone main menu, tap Connect to Phone 2. In the shortcut menu, tap Find Others Using the Mobile Phone Shortcut Once a Bluetooth connection has been established, the shortcut will be saved. -
Page 74: Disconnecting The Mobile Phone
Delete the selected shortcut. NOTE: All shortcuts will be cleared if you shut down the device. The program can save up to 15 shortcuts. A 16th shortcut will replace the oldest one. Disconnecting the Mobile Phone Tap the connected device in the shortcut menu and tap when the Disconnect message appears asking you to select your operation. -
Page 75: Phone Book
Dial By tapping the button in the Mobile Phone main menu, you can enter the Dial telephone number with the onscreen keypad. After entering the telephone number, to place the call. NOTE: International calls require a country code to be included in the phone number. On your device, the country code is separated from the rest of the number sequence by a plus (+) sign. -
Page 76: Call History
NOTE: When a mobile phone different from the previous one is connected, a message will appear asking if you want to replace the previous remote phone book with the current remote phone book. If you need to refresh the remote phone book, tap Get Phone Number to download the phonebook from the mobile phone again. -
Page 77: Receiving A Call
Save the selected phone number to the Contacts program. By default, the list shows the incoming, outgoing, and missed calls. You can filter the calls by tapping Options NOTE: To clear the call history, use Bluetooth settings as described in Section 11.8. Receiving a Call After pairing with a mobile phone (as described in Section 7.2), your device will ring and display the incoming call screen when there is an incoming call. -
Page 78: Operations During A Call
Operations during a Call During a phone call: If you need to input other numbers, such as an extension number, tap Keyboard to open the keypad and tap the digits. to mute your sound so that the other party cannot hear you. To end Mute the mute mode, tap the button again. -
Page 79: Connecting A Bluetooth Headset
7.4 Connecting a Bluetooth Headset Connecting a Headset for the First Time 1. Make sure that the headset to connect is a stereo Bluetooth headset. 2. Tap on the Home screen. Stereo If the Bluetooth radio is currently off, a message will pop up asking you to turn on the Bluetooth radio. - Page 80 4. The search result will show on the screen. Tap the headset you want to connect. 5. Tap the soft keyboard to enter the passkey. (Check the headset manual for the passkey.) 6. When the connection is completed, a message will appear on the screen. Tap 7.
-
Page 81: Connecting A Different Headset
8. You can tap to go back to the Home screen. Back Connecting a Different Headset To connect a headset that is not already in the shortcut list, tap in the Find Others shortcut menu. Using the Headset Shortcut Once a Bluetooth connection has been established, the shortcut will be saved. When you next tap the button on the Home screen, the program Connect to Headset... -
Page 82: Disconnecting The Headset
Disconnecting the Headset Tap the connected device in the shortcut menu and tap when the Disconnect message appears asking you to select your operation. -
Page 83: Card Scanner
Card Scanner 8.1 Starting and Exiting Card Scanner Card Scanner allows you to photograph a business card, recognize its contents, and then store the information to your Contacts database. on the Home screen and then tap to start the program. Tools Card Scanner ↓... -
Page 84: Using The Card Scanner
To exit the program, tap 8.2 Using the Card Scanner 1. Tap on the Home screen and then tap to start the program. Tools Card Scanner 2. Tap . You will see the Camera screen (with limited functions). 3. Aim the camera lens at the business card. When ready, press lightly (halfway down) on the Camera button and hold. - Page 85 Rotate counter-clockwise by 90 degrees Rotate clockwise by 90 degrees Zoom In Zoom out Reset Back Language Camera Recognize 5. Tap to choose the language. 6. Tap to scan the text and numbers on the business card. 7. The program tries to recognize the text and numbers. When succeeded, it displays the output screen with data falling into different categories.
- Page 86 9. If any text or number is not recognized correctly in a field on the right, you can edit it by tapping the field and then entering the correct content in the input area. When the input is completed, tap 10.
-
Page 87: Manually Scanning A Specific Area
Important Notes Due to a variety of business card formats, font styles and sizes, the way some addresses are broken up on the card, or background artwork, the Card Scanner program may not always recognize business cards perfectly. After scanning your card and saving the data, it is important that you open Contacts and use the edit function to make sure that the various address fields contain the correct data. -
Page 88: Adding Card Information
Zoom in Zoom out Reset Back Crop Language 8.4 Adding Card Information You can also manually enter information not provided on the card. 1. In the output screen, tap . A list of available categories appears. 2. Select the category you wish to add and tap 3. - Page 89 4. Once input is complete, tap to save your input and return to the output screen. The category and data that you have entered will appear in the list.
-
Page 91: Calculator
Calculator 9.1 Starting and Exiting Calculator Calculator provides three modes: Calculator, Currency, and Conversion. You can use these modes to perform basic arithmetic, currency conversion, and measure conversion functions. on the Home screen and then tap to start the program. Tools Calculator ↓... -
Page 92: Using The Calculator Mode
Switch to Calculator mode. Switch to Currency mode. Switch to Conversion mode. Exit To exit the program, tap 9.2 Using the Calculator Mode The Calculator mode allows you to perform any of the standard operations for which you would normally use a handheld calculator. If you are currently not in the Calculator mode, tap the button. -
Page 93: Calculator Memory
Calculator Memory Memory indicator Memory buttons Button Name Description Memory Cancel Clears the value in memory. Memory Recall Shows the value in memory. Memory Plus Adds the current value to the value in memory. Memory Minus Subtracts the current value from the value in memory. 9.3 Using the Currency Mode Use the Currency mode to perform the currency conversion. - Page 94 3. Tap the down arrow next to the input field to display a list of currencies and select the currency to convert from. When a currency is selected, the abbreviation of the currency will be displayed on the upper left corner of the input field.
-
Page 95: Editing Exchange Rate
Output field Currency indicator Currency scroll list Scroll bar 5. Enter the currency value in the input field by tapping the number buttons on the numeric keypad. You can also perform basic arithmetic in the input field. The converted currency immediately appears in the output field. Input value Output value NOTE: The program uses the default exchange rates unless you change them. -
Page 96: Using The Conversion Mode
4. Enter the exchange rate and tap to save the changes and go back to the previous screen. 9.4 Using the Conversion Mode The Conversion mode allows you to convert measures from one unit to another. 1. Start the Calculator program as described in Section 9.1. 2. - Page 97 4. Tap the down arrow next to the input field to display a list of units and select the unit to convert from. When a unit is selected, the abbreviation of the unit will be displayed on the upper left corner of the input field. Input field Unit indicator Unit scroll list...
- Page 98 Output field Unit indicator Unit scroll list 6. Enter the value in the input field by tapping the number buttons on the numeric keypad. You can also perform basic arithmetic in the input field. The converted value immediately appears in the output field. Input value Output value...
-
Page 99: File Manager
File Manager 10.1 Starting and Exiting File Manager File Manager allows you to transfer multimedia files between your device and a storage card. NOTE: To transfer multimedia files between your device and a computer, please install the provided MioTransfer program. (See Chapter 12.) on the Home screen and then tap to start the program. -
Page 100: Transferring Files
The File Manager screen shows specific folders of your device in the left column and the folder(s)/file(s) of the storage card, if inserted, in the right column. NOTE: The left column shows only “specific” folders in the My Flash Disk of your device. “Specific”... - Page 101 3. To select the target folder, tap twice the folder in the left column to open it. Or, tap the folder and then tap to open the folder. 4. If the source file is in a folder of the storage card, tap twice the folder in the right column to open the folder.
-
Page 102: From Your Device To The Storage Card
NOTE: To go up one level, tap 6. Tap to copy the selected file to the target folder. From Your Device to the Storage Card Use the same method as described in the previous sub-section to copy files from your device to the storage card except that the direction is from the left column to ) the right column. -
Page 103: Settings
Settings 11.1 Starting and Exiting Settings You can customize the system settings such as backlight brightness, volume, and language. Once you change the settings, the new settings will remain until you change them again. Tap the button on the Home screen. The Settings menu appears as shown Settings below. -
Page 104: Backlight
To exit Settings, tap The following sections describe the various buttons and their functions. 11.2 Backlight 1. Tap the button on the Home screen. Settings 2. Tap the button. Backlight 3. Move the knob along the track bar to adjust the brightness of the backlight. To darken the backlight, move the knob to the left. -
Page 105: Volume
11.3 Volume 1. Tap the button on the Home screen. Settings 2. Tap the button. Volume 3. Move the knob along the track bar to adjust the volume. To decrease the volume, move the knob to the left. To increase the volume, move the knob to the right. -
Page 106: Screen
11.4 Screen You can calibrate the touch screen if it is not responding accurately to your taps. 1. Tap the button on the Home screen. Settings 2. Tap the button. Screen 3. Tap to start the calibration. 4. Tap and hold the centre of the target. -
Page 107: Power
5. When the target moves to another position, tap and hold the centre of the new target. Repeat each time to complete the calibration process. 6. When completed, tap 11.5 Power To check the remaining power level of your battery and/or set up the power saving feature: 1. -
Page 108: Date/Time
4. Tap to save the changes. 11.6 Date/Time 1. Tap the button on the Home screen. Settings 2. Tap the button. Date/Time 3. To change the time zone, tap the arrow in the “Time Zone” item. - Page 109 4. To change the date, tap the down arrow in the “Date” item. A calendar pops up. Tap the left arrow on the calendar to go to the earlier month and year or the right arrow to the later month and year. Alternatively, you can tap the month or year on top of the calendar to directly change the month or year.
-
Page 110: Language
11.7 Language 1. Tap the button on the Home screen. Settings 2. Tap the button. Language 3. Tap the up/down arrow button to select the desired language. 4. Tap to save the changes. -
Page 111: Bluetooth
11.8 Bluetooth 1. Tap the button on the Home screen. Settings 2. Tap the button. Bluetooth 3. The “Bluetooth Settings” screen contains 3 buttons as described below. 4. After you complete your settings in a screen, tap Done 5. Tap to go back to the Settings screen. -
Page 112: Bt Preferences
BT Preferences The setting items in the “BT preferences” screen are: Name Tap twice this field if you want to rename the Bluetooth device name. A soft keyboard appears for you to enter the new name. Enable Bluetooth The Bluetooth radio is on when this item is checked. Uncheck this item if you want to turn off the Bluetooth radio. -
Page 113: Delete Preferences
You can specify how soon your device automatically answers an incoming call. If you want to manually answer a call, select Never Delete Preferences Whenever you want to delete particular data as listed below, check the corresponding item(s) in the “Delete preferences” screen. Phonebook (phone number) Empty call history A message will appear on the screen asking if you want to permanently delete the... - Page 114 3. Tap...
-
Page 115: Miotransfer
MioTransfer 12.1 Installing MioTransfer MioTransfer allows you to easily transfer data such as MP3 and photos between your device and a computer. To install MioTransfer to your computer: 1. Turn on your computer and insert the supplied CD/DVD into the CD/DVD-ROM drive of your computer. -
Page 116: Starting And Exiting Miotransfer
12.2 Starting and Exiting MioTransfer Click icon on the Windows Desktop to start the program. The MioTransfer MioTransfer screen appears. It provides the following tools: Audio Allows you to transfer the audio files between your device and your computer. (See section 12.3 for details.) Videos Allows you to transfer video files between your device and your computer. -
Page 117: Copying Multimedia Files To Your Device
Mio Online Provides link to the Mio website. To exit MioTransfer, click at the bottom right corner of the screen. Exit CAUTION: Before disconnecting the cable, you must click the device icon in the task bar and click “Safely remove xxx” (where xxx is the name of your device). If you are transferring data, disconnecting the cable without following the correct removal procedure can result in data loss. - Page 118 To copy video files, click on the top menu bar. Videos To copy photos or pictures, click on the top menu bar. Pictures The left column shows the drives of your computer and the right column shows the files in the appropriate folder of the target device (either Target Device 6.
-
Page 119: Managing Files
Managing Files Various buttons are available for you to manage the files: Rename Changes the name of the selected file. Delete Removes the selected file. Cancel Aborts the ongoing action of file transfer. New Folder Creates a new folder in the selected drive or folder. 12.4 Copying Contacts Information to Your Device You can copy the Microsoft Outlook Contacts information from your computer to your device using MioTransfer. - Page 120 3. Start MioTransfer by clicking icon on the Windows Desktop. The MioTransfer MioTransfer screen appears. 4. Click on the top menu bar. Contacts 5. Select your option and click Apply...
-
Page 121: Video Toolbox
Video ToolBox 13.1 About Video ToolBox Video ToolBox allows you to import media in a variety of sources and save it in a specific file format so you can watch the video on your device. You can also use the editing tools such as trimming the clip and adding special effects to create a customized project. -
Page 122: User Interface
13.3 User Interface Name Description File menu Select to open a menu where you can save your project file and set project preferences. Options Panel Displays controls, buttons, and other information that you can use to customize the project. The contents of this panel change depending on the step you are in and the selected project element. -
Page 123: Four Steps To Create A Video File
13.4 Four Steps to Create a Video File Step 1: Determine Video Output Setting 1. On Windows desktop, click Start Programs Ulead Video ToolBox Ulead Video ToolBox 2. On the first screen, click Next Step 2: Add/Edit Media Clip 3. Click one of the Add Media buttons depending on your media source. To add a video file, click To add an image file, click Locate the file and click... -
Page 124: Step 3: Choose Style
4. Click to continue. Next Step 3: Choose Style 5. If you want, you can choose a movie style from the available themes and edit movie style elements. If you do not want to apply a style for your project, select the default white theme. -
Page 125: Step 4: Create Video File
6. Click to continue. Next Step 4: Create Video File 7. Click to save your video file in the selected output video format. Create 8. In the dialog box, enter the filename and click Save... -
Page 126: Editing Video Clips
13.5 Editing Video Clips Editing tools Media Clip List When video clip(s) are added, the editing tools include: Multi-trim Video Allows you to choose desired segments from a video file and extract them. Split Video Cuts the selected clip into two. Auto-enhance Select to automatically adjust the hue, saturation, brightness and the contrast of the clip. -
Page 127: Trimming A Clip
Trimming a Clip To split a video clip: 1. Select the clip you want to split on the Media Clip List. 2. Drag the Jog Bar to the point where you want to cut the clip. 3. Click to cut the clip into two clips. Split Video To remove one of these clips, select the unwanted clip and click To trim a video clip with the Trim Bar:... -
Page 128: Trimming A Video Into Multiple Clips
3. Drag the Jog Bar to the point in the clip that you want to set as the start/end of the clip then click (Mark-in/Mark-out). Trimming a Video into Multiple Clips 1. Click on the Options Panel. Multi-trim Video 2. In the Multi-trim Video dialog box, view the whole clip first by clicking to determine how you want to mark segments. - Page 129 4. Repeat step 3 as required until you have marked all the segments you want kept or removed. 5. Click when finished. The video segments that you kept are then inserted onto the Media Clip List. Multi-Trim Video Control Control Button Description Reverses or advances through the video in fixed increments.
-
Page 130: Creating An Image Slideshow
13.6 Creating an Image Slideshow You can create a video slideshow using your images. To create, click (Insert Image) and, in the dialog box, select the images (press to select Ctrl Shift multiple files) you want to include in the slideshow and click . -
Page 131: Choosing A Style
13.7 Choosing a Style A style refers to a set of attributes including beginning/ending clips, transition effects, and background music. Select a style. Style elements are added Select background to the Media Clip List. music. Selecting a Movie Style In the Options Panel, click the style you want to use. A beginning clip and an ending clip in the selected style will be added to your project. -
Page 132: Changing The Transition Effect
Changing the Transition Effect With multiple video clips or image files in the Media Clip List, default transition effects are applied to the project according to the style selected. To change the transition effect 1. In the Media Clip List, click the transition effect you want to change. 2. -
Page 133: Change The Background Music
3. Adjust the text attributes using the settings in the Options Panel. Font face Select your desired font style. Font size Set your desired font size. Vertical text Make the orientation of the title vertical. Font style Set the text as bold, italic and/or underlined. -
Page 135: Poi Loader
POI Loader 14.1 Installing POI Loader POI Loader allows you to import additional POI (Point of Interest) data to an SD card for the MioMap program to use. When MioMap starts, it will load the POI data from the SD card and show the additional locations in the category of My POI function. -
Page 136: Excel File Format Example
In the “Name” field, give the location a name. If it is a location of speed camera, use the format Name@Speed, where Speed is the speed limit. Note that the unit of speed limit must be the same as the default unit of MioMap. Excel File Format Example Enter longitude in the first column, latitude in the second column, and name in the third column. - Page 137 Make sure that you select the correct one. You should not select , which means the Mio Device internal memory of your device. In case you connect the device or card reader after POI Loader starts, you can click to refresh the list.
-
Page 138: Using The Imported Pois With Your Device
7. Click Next 8. When completed, a message appears telling you the total number of files that have been imported. Click Finish CAUTION: Before disconnecting the cable, you must click the device icon in the task bar and click “Safely remove xxx” (where xxx is the name of your device). If you are transferring data, disconnecting the cable without following the correct removal procedure can result in data loss. -
Page 139: Troubleshooting And Maintenance
Troubleshooting and Maintenance Troubleshooting and Maintenance 15.1 Restart and Shut Down Occasionally, you may need to reset your device. For example, you should reset your system when it stops responding; or appears to be “frozen” or “locked up.” Restarting Your Device To restart your device, press the power button for 5 seconds until the “Power Off Selection”... -
Page 140: Troubleshooting
15.2 Troubleshooting NOTE: If you encounter a problem you cannot solve, contact an authorized service center for assistance. Power Problems Power does not turn on when using battery power The remaining battery power may be too low to run your device. Charge the battery. -
Page 141: Gps Problems
Reset your device before connecting the cable. Always disconnect your device before you restart your computer. GPS Problems When there are no valid signals available, consider the following: Make sure that the device is facing a clear view of the sky. Note that the GPS reception can be affected by: Bad weather Dense overhead obstacles (e.g. - Page 142 Do not use paper towels to clean the screen. Never attempt to disassemble, repair or make any modifications to your device. Disassembly, modification or any attempt at repair could cause damage to your device and even bodily injury or property damage and will void any warranty.
-
Page 143: Regulatory Information
Regulatory Information NOTE: Marking labels located on the exterior of your device indicate the regulations that your model complies with. Please check the marking labels on your device and refer to the corresponding statements in this chapter. Some notices apply to specific models only. 16.1 Regulations Statements Class B Regulations Federal Communications Commission Radio Frequency Interference... - Page 144 provide reasonable protection against harmful interference in a residential installation. This equipment generates, uses, and can radiate radio frequency energy and, if not installed and used in accordance with the instructions, may cause harmful interference to radio communications. However, there is no guarantee that interference will not occur in a particular installation.
-
Page 145: Bluetooth
Bluetooth Bluetooth QD ID B012565 16.2 Safety Precautions Prolonged listening of music in maximum volume can damage the ears. The use of headphones other than those recommended/supplied can cause hearing impairment due to excessive sound pressure. About Charging Use only the charger supplied with your device. Use of another type will result in malfunction and/or danger. -
Page 146: About The Battery
About the Battery Use a specified battery in the equipment. CAUTION: This unit contains a non-replaceable internal Lithium Ion battery. The battery can burst or explode, releasing hazardous chemicals. To reduce the risk of fire or burns, do not disassemble, crush, puncture, or dispose of in fire or water. Important instructions (for service personnel only) Caution: Risk of explosion if battery is replaced by an incorrect type.
Need help?
Do you have a question about the DigiWalker C720T and is the answer not in the manual?
Questions and answers