
Subscribe to Our Youtube Channel
Related Manuals for TP-Link tapo TCB72


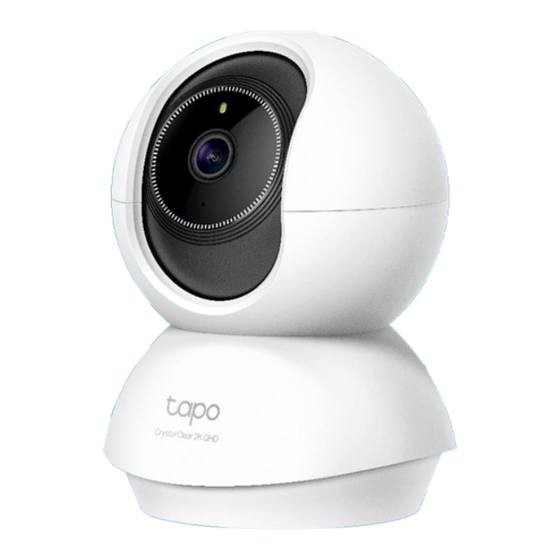
Summary of Contents for TP-Link tapo TCB72
- Page 1 User Guide Pan/Tilt AI Home Security Wi-Fi Camera ©2024 TP-Link 1910013825 REV1.0.0...
-
Page 2: Table Of Contents
Contents About This Guide ··········································································· 1 Introduction ······················································································ 2 Appearance ······················································································ 3 Set Up Your Camera ····································································· 5 Install a microSD Card ································································· 6 Mount Your Camera······································································ 7 How to Reset Your Camera ······················································ 8 Authentication ················································································· 9... -
Page 3: About This Guide
Ignoring this type of note might result in a malfunction or damage to the device. Note: More Info • Specifications can be found on the product page at https://www.tapo.com. • Our Technical Support and troubleshooting information can be found at https://www.tapo.com/support/. • The setup video can be found at https://www.tp-link.com/support/setup-video/#cloud-cameras. -
Page 4: Introduction
Introduction When you are away home, there are always something you care about. This is where the smart camera functions. No matter your child is climbing the kitchen cabinet, or the pet is stealing snacks, the Pan/Tilt AI Home Security Wi-Fi Camera helps you stay with them anytime, anywhere. Receive a notification whenever your camera detects motion and see a video clip of this motion to check everything. -
Page 5: Appearance
Appearance Lens Micro SD RESET Micro SD RESET... - Page 6 System LED Indication Solid red Starting up Blinking red and green Ready for setup Blinking red slowly Connecting to Wi-Fi Solid amber Connected to Wi-Fi Solid green Connected to the cloud Blinking red quickly Camera resetting Blinking green quickly Camera updating...
-
Page 7: Set Up Your Camera
Step 3. Add Your Camera Get the Tapo app from the App Store or Open the app, and log in with your TP-Link ID. Tap the button > Add Device in the app and Google Play, or by scanning the QR code If you don't have an account, create one first. -
Page 8: Install A Microsd Card
Install a microSD Card Follow the steps below to install the microSD card for local recording. You can go to Camera Settings > microSD Card in the Tapo app to check the card status or format your card. Manually rotate the camera downwards and find the microSD card Identify the direction of the microSD card and carefully insert the card slot. -
Page 9: Mount Your Camera
When you finish adding your camera in the Tapo app, you can set it on a table or shelf. You can also mount it on a wall or ceiling with the provided mounting template and screws. Follow the steps below to mount your new camera or follow the setup video at https://www.tp-link.com/support/setup-video/#cloud-cameras. 3. Secure Camera 2. -
Page 10: How To Reset Your Camera
How to Reset Your Camera Follow the steps below to reset your camera via the Reset button. You can also go to Camera Settings in the Tapo app and tap Remove Device at the bottom to factory reset your camera. Manually rotate the camera downwards to find the Reset button. -
Page 11: Authentication
Product Name: Pan/Tilt AI Home Security Wi-Fi Camera Model Number: TCB72 Component Name Model I. T .E. Power Supply T090060-2B1 Responsible Party: TP-Link Systems Inc. Address: 10 Mauchly, Irvine, CA 92618 Website: http://www.tp-link.com/us/ Tel: +1 626 333 0234 Fax: +1 909 527 6804 E-mail: sales.usa@tp-link.com This equipment has been tested and found to comply with the limits for a Class B digital device, pursuant to part 15 of the FCC Rules. - Page 12 We, TP-Link Systems Inc., has determined that the equipment shown as above has been shown to comply with the applicable technical standards, FCC part 15. There is no unauthorized change is made in the equipment and the equipment is properly maintained and operated.
- Page 13 We, TP-Link Systems Inc., has determined that the equipment shown as above has been shown to comply with the applicable technical standards, FCC part 15. There is no unauthorized change is made in the equipment and the equipment is properly maintained and operated.
- Page 14 Safety Information • Keep the device away from water, fire, humidity or hot environments. • Do not use damaged charger or USB cable to charge the device. • Do not use any other chargers than those recommended. • Do not use the device where wireless devices are not allowed. •...
- Page 15 • When you leave the product unused for a long time unplug the product from the power outlet. • This product may interfere with other electronic products such as TV, radios, personal computers, phones or other wireless devices. • Operating Temperature: 0 °C ~ 40°C (32°F ~ 104°F) Please read and follow the above safety information when operating the device.
- Page 16 Explanation of the symbols on the product label Note: The product label is on the bottom of the product and its power supply. Symbols may vary from products. Symbol Explanation Class II equipment Class II equipment with functional earthing Alternating current DC voltage Polarity of output terminals Indoor use only...
- Page 17 Symbol Explanation Functional earthing Caution, hot surface Caution Operator’s manual Stand-by “ON”/”OFF” (push-push) Fuse Fuse is used in neutral N RECYCLING This product bears the selective sorting symbol for Waste electrical and electronic equipment (WEEE). This means that this product must be handled pursuant to European directive 2012/19/EU in order to be recycled or dismantled to minimize its impact on the environment.
- Page 18 Symbol Explanation Switch of mini-gap construction Switch of micro-gap construction (for US version) µ Switch of micro-gap / micro-disconnection construction (for other versions except US) ε Switch without contact gap (Semiconductor switching device)
Need help?
Do you have a question about the tapo TCB72 and is the answer not in the manual?
Questions and answers