Table of Contents
Advertisement
Quick Links
Advertisement
Table of Contents

Related Manuals for FotoFinder medicam 1000


Summary of Contents for FotoFinder medicam 1000
- Page 2 FotoFinder medicam 1000 Original user manual Please read these original operating instructions carefully before using the device and always keep it easily accessible! Copyright © 2024 FotoFinder Systems GmbH for FotoFinder medicams with the serial number MC1000-4 Status: 19.06.2024...
- Page 3 FotoFinder Systems GmbH Industriestraße 12 84364 Bad Birnbach Germany www.fotofinder.de info@fotofinder.de Tel.: +49 (0) 8563 97720-0 Fax: +49 (0) 8563 97720-10...
-
Page 4: Table Of Contents
Presentation of warning labels ....................8 Information on the device label ....................9 Explanation of the symbols....................... 10 2 Components and technical data ..................11 Product variants with the FotoFinder medicam 1000 ............. 11 General ............................12 FotoFinder medicam ........................ 14 ®... - Page 5 4.2.1 The potential equalization plug ..................36 Connecting the camera to the computer ................. 37 Mounting the lens ........................37 5 Settings ........................38 Image Capture Devices ......................38 5.1.1 General ..........................38 5.1.2 medicam ..........................38 6 Operation ........................39 Visual inspection before use .....................
-
Page 6: About These Operating Instructions
This user manual is also valid for the FotoFinder dermoscope desktop (cf. 2.5) version. Fig. 1: medicam application example The development and production of all products of FotoFinder Systems GmbH is carried out in accordance with the current ISO 13485 standards. -
Page 7: Related Documents
Please note the following points when using the product and this user manual: The product can only be used, operated and maintained properly and safely with the help of this user manual. This user manual refers only to the product indicated on the cover sheet. We reserve the right to change this user manual due to further technical developments. -
Page 8: Presentation Of Warning Labels
About these operating instructions 1.3 Presentation of warning labels In the operating instructions, warnings are marked with a signal word panel. Warnings are introduced with signal words expressing the extent of the hazard. Observe all warnings to avoid accidents, personal injury and damages. The following signal words and symbols are used in the operating instructions: This is the general hazard sign. -
Page 9: Information On The Device Label
Unique serial number of the device Input Compatible input voltage Power Nominal power UK Conformity Assessed Responsible Person for UK: FotoFinder Systems Ltd., 100 Addison Road, W148DD London, United Kingdom Tab. 1: Explanations of the type plates, medicam 1000 and docking station... -
Page 10: Explanation Of The Symbols
About these operating instructions 1.5 Explanation of the symbols Equipotential bonding System mode: Operating status of the device Coaxial power connector socket (power connection) Indicates the Swiss representative: Johner Medical Schweiz GmbH, Tafelstattstrasse 13a, 6415 Arth, Switzerland Tab. 2: Further symbols on the device... -
Page 11: Components And Technical Data
FotoFinder ATBM master system trolley with Control unit Linear drive with Canon camera and PolFlash XE Laser Liner Positioning mat Tab. 3: Overview of medicam 1000 variants NOTE *There are separate instructions for use for this FotoFinder product. -
Page 12: General
Components and technical data 2.2 General... -
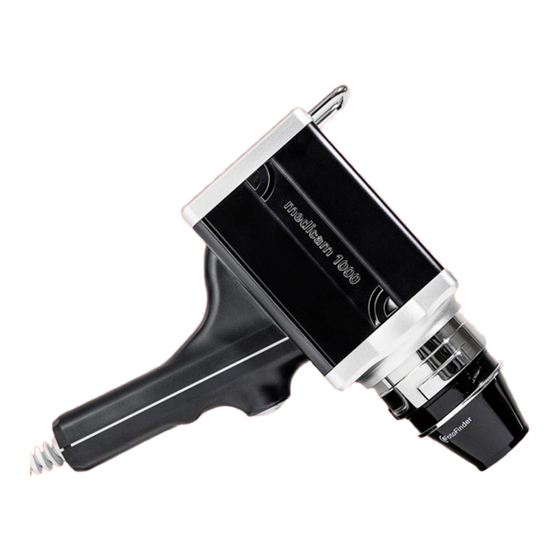
Page 14: Fotofinder Medicam
Components and technical data 2.3 FotoFinder medicam ® Abb. 2: medicam 1000 with the D-Scope IV dermoscopy lens Camera mount Plug in distance holder Bayonet fastener Release button D-Scope-IV Lens* Operating light Back panel *alternatively, other lenses and attachments can also be used, see in the following sections. - Page 15 Abb. 3: For Overview images: medicam 1000 without a microscopic lens LED-Ring light Contact pins for dermoscopy lens optional Distance holder for close-up overview images CAUTION Please pay attention to the following when using the medicam without a lens attached: A small low voltage electrical charge could be transmitted if the contact pins inside the lens bayonet ring are touched by the patient or user.
-
Page 16: Spacers
Components and technical data 2.3.1 Spacers The medicam 1000 can optionally be used with two different spacers for close-up overview images. These two fixed clearance distances enable standardisation of close-up images and make subsequent measuring of the images easier. Fig. 4: Application example for the medicam 1000 with spacer To attach the spacer: Select one of the spacers (28 or 63 mm). -
Page 17: D-Scope Iii
2.3.2 D-Scope III The D-Scope III is an optionally available attachment for your medicam. It allows optical magnifications up to 400x. Fig. 7: D-Scope III Focus ring Colour markings to set an average focus value... - Page 18 Components and technical data 2.3.3 D-Scope IV The D-Scope IV lens for the medicam 1000 can be used for both polarized and non- polarized microimaging. It allows optical magnifications up to 140x. For the D-Scope IV the following attachments are available:...
- Page 19 Fig. 8: Visualization of the medicam 1000 with D- Fig. 9: Visualization of the medicam 1000 with D- Scope IV with removed front cap and active LED Scope IV with removed front cap and active LED light for polarized images.
-
Page 20: Accessories For Medicam
Pack of three FFS912204 D-Scope IV attachment, conical individual FFS000911 FotoFinder Docking Station FFS000840 Power pack for FotoFinder Docking Station DEH000002 USB 3.0 cable for Docking Station TTL000011 USB 3.1 to USB C adapter FFS000301 USB 3.0 cable (for component solution) -
Page 21: Fotofinder Docking Station
: If the docking station is installed in a system (FotoFinder ATBM, FotoFinder vexia, FotoFinder studio), the button for system mode is activated at the factory and the device is set to continuous operation. As a result, the docking station cannot be switched off manually... -
Page 22: Fotofinder Dermoscope Desktop
Components and technical data 2.5 FotoFinder dermoscope desktop The FotoFinder dermoscope desktop is a variant of the FotoFinder component solution (cf. 2.1). Fig. 11: FotoFinder dermoscope desktop Screen Camera stand Silent Medical Server Docking station Keyboard Mouse medicam 1000* Isolating transformer (not in the image) -
Page 23: Safety
3 Safety 3.1 Adherence to the operating instructions NOTE Every person assigned to work with the system must have read and understood these operating Safety instructions and particularly the chapter on The knowledge and observation of the applicable contents is a prerequisite for protecting users and patients from hazards and to prevent user errors. -
Page 24: Intended Use
Safety 3.2 Intended use The FotoFinder medicam 1000 with Docking Station is an electrically operated and software controlled video dermatoscope intended for capturing microscopic and macroscopic images of the patient's intact skin surface by medical professionals. The medicam including its accessories is intended for transient use and has an application time of less than 60 minutes. -
Page 25: User Groups
There are no additional requirements for the social or clinical environment of use. The product is not intended for use by laypersons. NOTE Feel free to contact FotoFinder Systems to discuss the best design for your photography room. Please contact us! NOTE... -
Page 26: Patient Population
The device is designed for clinical images as stated in the chapter Patient target group . For a detailed list of ICD codes, please contact info@fotofinder.de. The following parts of the body are suitable for examination with the FotoFinder dermatoscope: Intact skin surface of the entire body Scalp Nails The device is not designed for capturing images of mucous membranes, eyes or natural or artificial body orifices. -
Page 27: Foreseeable Misuse
Maintenance or servicing that is not performed on time or improperly can endanger operational safety. The magnets used in the FotoFinder dermatoscope can influence sensitive devices, e.g. pacemakers. Use of damaged front caps (e.g. breaks or cracks in the material) can cause skin injuries. -
Page 28: Ambient Conditions
A final production check is carried out on the entire system or, if applicable, the components as per EN 62353 during in-house production. When commissioning is performed by a FotoFinder contact, the operator is encouraged to check and confirm the values of the in-house inspection. -
Page 29: Electric Safety
Do not remove the casing of the device: there is hazardous current inside. The casing must be correctly mounted. All repairs and replacements must be made by a qualified FotoFinder representative. Check the casing and cables before use. Do not use the device and disconnect it completely from the power supply, if the casing is cracked, chipped or broken, or if the casing or the cables are damaged. -
Page 30: Esd
Interference) requirements, an electromagnetic field can cause momentary disturbance of the camera live image. If this occurs often, FotoFinder Systems suggests a review of the environment in which the system is being used, to identify possible sources of interference. These could be from other electrical devices used within the same or a nearby room. -
Page 31: Emc
3.12.4 EMC The testing for EMC (Electromagnetic Compatibility) of this system has been performed according to the international standard for EMC with medical devices (IEC 60601-1-2:2014+A1:2020). This IEC standard complies with the European norm (EN 60601-1-2:2015+A1:2021). European publication Surroundings of professional medical Deviation from basic facilities EMC standards or... -
Page 32: Instructions And Manufacturer's Information On Electromagnetic Radiation
Radiation test Compliance Electromagnetic environment - Directive RF emission Group 1 The FotoFinder device is not likely to cause CISPR 11 interference with other electronic devices in the vicinity. RF emission Class A... -
Page 33: Recommended Minimum Distance Between Portable And Mobile Rf Communication Devices And The Fotofinder Device
3.12.7 Recommended minimum distance between portable and mobile RF communication devices and the FotoFinder device This product is intended for use in an electromagnetic environment where the radiated RF disturbances are controlled. The user of this device can help prevent electromagnetic interference by... -
Page 34: Installation
Do not try to open any electric components of the equipment. ATTENTION The FotoFinder dermoscope component solution must only be operated with a medical isolating transformer as per EN 60601-1. The operator is responsible for adhering to this rule. The isolating transformer can also be purchased from FotoFinder Systems. -
Page 35: Delivery Scope
Power adapter with power cable USB 3.0 cable D-Scope IV (optionally D-Scope III) The list can vary depending on the product variant (cf. chapter 2.5 FotoFinder dermoscope desktop). NOTE Report any damages or defects to your distributor or the manufacturer immediately and in written form. -
Page 36: Connections On The Fotofinder Docking Station
Installation 4.2 Connections on the FotoFinder Docking Station Fig. 12: FotoFinder Docking Station front side Push-Pull round plug: Socket for the medicam 1000 outlet Fig. 13: FotoFinder Docking Station back side USB A 3.0 port: Cable port to connect with the PC... -
Page 37: Connecting The Camera To The Computer
On the front of the Docking Station there is a Push-Pull round plug connection (cf. chapter 4.2 Connections on the FotoFinder Docking Station). Connect the cable of the medicam here. When connecting, make sure that the red dot on the plug is at the top and thus matches the red dot of the round plug connection (see photo). -
Page 38: Settings
Settings 5 Settings You can adjust the settings of your device in the software. Settings button at the top right of the the dashboard in the FotoFinder Universe You will find the software. 5.1 Image Capture Devices Capture devices In the section , you can control different parameters for the connected cameras, for example the white balance. -
Page 39: Operation
6 Operation ATTENTION Never place any product that could leak on your equipment or over the power supply cables. Liquids could cause serious damage. ATTENTION May damage the camera cable. Do not bend the camera cable. Do not step on the camera cable or subject it to any other strain. 6.1 Visual inspection before use Before each use, check the system for visible damage. -
Page 40: Operating The Medicam
With polarised captures, e.g. with the FotoFinder dermatoscope, you do not require any immersion liquid. NOTE The camera casing of the medicam 1000 may become slightly warm if it is used for longer periods. NOTE You will find further information on generating images in the separate user manual for the software. -
Page 41: Control Panel Of The Medicam
6.2.2 Control panel of the medicam Fig. 17: Rear and control panel of the medicam 1000 The camera can largely be operated using the rear control panel or, in part, using the software. You can display an overview of the respective key configuration in the software. Activate this... - Page 42 Operation An overview of the medicam 1000 panel functions relevant for overview images is provided below: medicam 1000 Fig. 18: panel functions for overview images...
- Page 43 An overview of the medicam 1000 panel functions relevant for micro images is provided below: medicam 1000 Fig. 19: panel functions for micro images...
- Page 44 Operation An overview of the medicam 1000 panel functions relevant in the Screening module is provided below: Fig. 20...
-
Page 45: Ending Operations
6.3 Ending operations Close Universe and any open software modules. This will also automatically log you out of the software. Shut down the computer. Press the main switch on the device. Disconnect the power plug from the power supply. -
Page 46: Cleaning And Disinfection
7.1 Cleaning NOTE For cleaning, we recommend the FotoFinder Cleaning Kit (cf. 2.3), consisting of the FotoFinder Cleaning Solution and the FotoFinder Cleaning Wipes. The Cleaning Kit is suitable for all FotoFinder camera models and lenses. -
Page 47: Disinfection
7.2 Disinfection The medicam and its accessories (e.g. front caps, distance holders) must be cleaned and disinfected before each use on a patient. To disinfect the medicam and its accessories, use alcohol-free quick disinfection wipes, e.g. mikrozid® sensitive wipes from Schülke. The disinfection wipes should be suitable for disinfecting ultrasound heads. -
Page 48: Maintenance
Warning! This device must not be modified without the approval of the manufacturer! To ensure your system functions perfectly, subject your device to periodic inspections and repeat checks. At FotoFinder Systems we recommend that you carry out repeat checks as per EN 62353 every 12 months. -
Page 49: Medicam ® Does Not React Or Is Not Recognised
Teamviewer software from the following site: www.fotofinder.de/support. Then inform us of your ID and the password shown in the Teamviewer software during the course of the support call. Please also name your system / license holder. -
Page 50: Disposal
Disposal 10 Disposal ATTENTION Risk of environmental damages caused by improper disposal. For disposal, observe local regulations and legal requirements. By properly disposing of and recycling old equipment and used components, natural resources can be conserved and the environmental impact minimized. Therefore, please note the following points: The operator is responsible for proper disposal. -
Page 51: Appendix
11 Appendix... - Page 52 Appendix...
Need help?
Do you have a question about the medicam 1000 and is the answer not in the manual?
Questions and answers