Table of Contents
Advertisement
Quick Links
Advertisement
Table of Contents

Related Manuals for MIOFIVE S1 Ultra


Summary of Contents for MIOFIVE S1 Ultra
- Page 1 Please read this manual before operating your device and keep it for future reference. Distractions can lead to accidents and the risk of injury or death. Always keep your eyes on the road, and keep aware of your surroundings. www.miofive.com support@miofive.com...
- Page 2 See it,Believe it...
- Page 3 18-month Limted Warranty support@miofive.com If you are having difficulties setting it up, please email us at support@miofive.com. We can swiftly resolve 99% of issues, getting you up and running in no time. Follow Us Join our online community for more tips, deals, and more!
- Page 4 WATCH HOW TO VIDEOS Visit our website https://www.miofive.com/pages/help_center Watch HOW-TO VIDEOS to learn & understand all the features so you can get the maximum benefit out of it.
-
Page 5: Table Of Contents
Table of Introduction-------------------------------01 What’s in the box Contents Product Overview Installation--------------------------------05 Installing Your Miofive Dash Cam Using Your Miofive App Firmware and App Updates Operation and Settings--------------------14 Turning On/Off Your Camera LED Indicator Information Control Menu Home Screen Overview Accessories--------------------------------17... -
Page 6: Table Of Introduction
Introduction What’s in the box S1 Ultra Dash Cam x 1 6M Rear Cam Cable x 1 Memory Card x 1 Car Charger x 1 Data Cable x 1 3.5M USB Type-C Car Charging Cable x 1 Electrostatic Film x 4... -
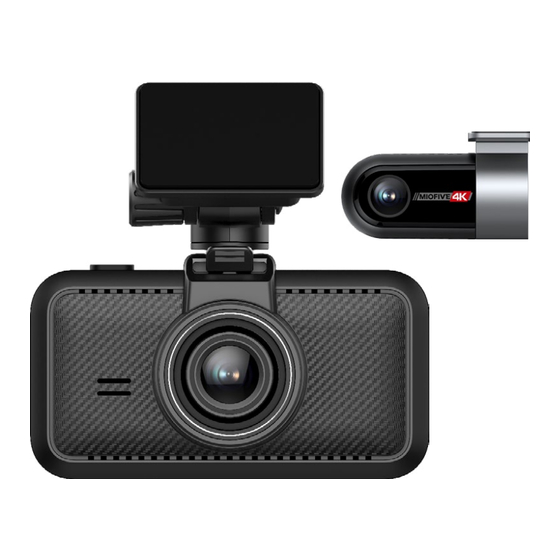
Page 7: Product Diagram
Product Diagram Speaker Camera Lens Vents Mini-USB Connector Memory Card Slot... - Page 8 Adjustment Bolt Album/Previous Button Setting/Back Button Emergency Video /Next Button OK (Confirm) Button Status Indicator LED Screen Power Button Power Port Microphone Vents Reset...
- Page 9 Rear Camera Lens Brackets Power Port...
-
Page 10: Installation
Installation Installing Your Miofive Dash Cam Before Installation: 1. Bracket Setup: Ensure the bracket is inserted into the dash cam as shown below. Slide it into place until you hear a click. 2. The camera is pre-configured with default settings for immediate use. - Page 11 How to Remove the Electrostatic Film: 1. Carefully lift one corner of the film using your fingernail or a plastic card. 2. Slowly peel the film away from the windshield, making sure to pull it off at a steady angle to prevent tearing. 3.
- Page 12 Note Please securely position the car charging cable inside the vehicle. Follow the instructions in the provided diagram to avoid any disruption to the GPS device within the bracket.
- Page 13 Step 3 Attach the Dashcam · Positioning: Start your car to power on the dash cam (do not install while driving). Use the live preview on the dash cam’s screen to find the optimal position and angle for installation. · Mounting: After positioning the camera, remove the protective film from the dash cam bracket.
- Page 14 Step 5 Mount Attachment · Removing: If you need to remove the dash cam, simply pull it upward with light pressure to detach it from the mount. · Mounting: To securely attach the dash cam, gently slide it into the mount following the arrow direction until it clicks into place.
- Page 15 Note Please ensure you align and connect the rear cam cable properly, as in the illustration below. Otherwise, the front cam will not be able to detect it. Step 7 Hiding the Cables · Cable Management: Ensure that the cables from the front and rear cameras do not obstruct your view.
-
Page 16: Using Your Miofive App
Using Your Miofive App Step 1 Search & Install the MIOFIVE APP Please scan the QR code below or search [Miofive] in App Store or Google Play to download the App. Step 2 Connect Your Dashcam We recommend using Bluetooth for a faster and more seamless setup process. - Page 17 2. Enable Wi-Fi: Go to your phone’s Wi-Fi settings and turn Wi-Fi on. 3. Open the Miofive App: Launch the app on your phone and navi- gate to the “Devices”. 4. Choose Your Device: Select your dash cam model from the list.
-
Page 18: Firmware And App Updates
3. Connect to Network: Select your Miofive network name (SSID) from the list (e.g., “Miofive_xxxx”) and enter the default password: 1234567890. 4. Return to App: Once connected, return to the Miofive app. Firmware and App Updates APP Update Once there is a new App version released, your mobile system and the App will send an update notification. -
Page 19: Operation And Settings
To prevent battery drain, you can: 1.Use the Miofive USB Type-C Hardwire Kit (sold separately) to connect your dash cam directly to your vehicle’s fuse box. 2.Change the connection in your fuse box to ensure the 12V outlet only provides power when the car key is turned to ACC or ON position. -
Page 20: Led Indicator Information
LED Indicator Information LED Indicator Dash Cam Status Blue LED light solid on Working, loop recording Blue LED light blinks Stop recording, user operating Blue and red alternating flashes Memory card abnormal Red LED light solid on Emergency recording Red LED light blinks Firmware updating Control Menu By pressing the button on the right side of the LCD panel, you could... -
Page 21: Home Screen Overview
Home Screen Overview... -
Page 22: Accessories
Which Memory Card to Use For optimal performance, it’s crucial to choose the right memory card for your dash cam. The Miofive Dash Cam requires Class 10 U3 mem- ory cards with a capacity between 64GB and 512GB. We strongly recommend using Miofive branded memory cards, avail- able on Miofive.com and Amazon. - Page 23 Inserting the Memory Card · Power off the dashcam. · Insert the memory card with the label facing up into the card slot until it clicks. Removing the Memory Card · Power off the dashcam. · Press the card in gently to release it, then pull it out. Note 1.
-
Page 24: Type-C Hardwire Kit
It provides a stable power connection without relying on your car’s battery, ensuring continuous operation. CPL Filter The Miofive Dash Cam CPL (Circular Polarizing Lens) enhances your driving recordings by reducing glare on the windscreen, ensuring clear footage of the road. It protects the front camera lens from fingerprints and scratches, while also improving color and contrast levels. -
Page 25: Advanced Features
This feature operates for up to 24 hours after the ignition is turned off. Note To use these two functions, a Miofive USB Type-C hardwire kit (NOT included) is required to provide a constant power supply. Emergency Recordings A 60-second video will be captured when the G-Sensor is activated in case of sharp turns or a sudden stop. -
Page 26: Ai Algorithm
AI Algorithm Our AI Algorithm technology enhances driving safety by providing timely voice prompts based on driving behaviors. If you prefer not to receive voice alerts, you can turn this feature off. Steps:Settings - AI - Algorithm Specifications and Compliance Product Specifications Image Resolution Front - 4K UHD (3840x2160) @30fps... -
Page 27: Safety Precautions
Con- tact local authorities to learn about disposal and recycling options available in your area. 2. The correct disposal of your Miofive dash cam will help prevent potential negative consequences for the environment and human health. -
Page 28: Regulatory Certification
Cet équipement doit être installé et utilisé avec une distance mini- male de 20 cm entre le radiateur et votre corps. Hereby, Miofive declares that the radio equipment Miofive Dash Cam is in compliance with Directive 2014/53/EU. RF Exposure Information (MPE) - Page 29 FCC STATEMENT This device complies with Part 15 of the FCC Rules. Operation is subject to the following two conditions: 1.This device may not cause harmful interference, and 2.This device must accept any interference received, including interference that may cause undesired operation. Warning Changes or modification not expressly approved by the party responsible for compliance could void the user’s authority to...
-
Page 30: Troubleshooting And Support
Troubleshooting and Support Troubleshooting Your Miofive Dashcam If you’re experiencing issues with your Miofive dashcam, try the following steps to resolve common problems: Rear Camera Not Working: 1. Check that the rear camera cable is properly connected and se- cured. - Page 31 2. Alternatively, manually set the “Date and Time” under “System Settings.” If you continue to experience issues, you can also visit our Troubleshooting Page by scanning the QR code below or refer to the Miofive Community for additional support and resources.
-
Page 32: Customer Service
If you continue to experience issues, you can also visit our Troubleshooting Page by scanning the QR code below or refer to the Miofive Community for additional support and resources. Customer Service Lifetime Support 18-month Limited Warranty E-mail: support@miofive.com If you are having difficulties setting it up, please email us at... -
Page 33: Miofive Community And Promotions
Miofive has a Community Promotion Program to aid you in extending the warranty by 6 months. Please join Miofive Community ( Scan the QR Code below ) and share videos caught on the Miofive dash cam to extend your warranty period from 18 months to 24 months. - Page 35 www.miofive.com...
- Page 36 us...
Need help?
Do you have a question about the S1 Ultra and is the answer not in the manual?
Questions and answers