Table of Contents
Advertisement
Quick Links
Advertisement
Table of Contents

Related Manuals for MIOFIVE B09HT854VJ


Summary of Contents for MIOFIVE B09HT854VJ
- Page 1 DASH CAM User Manual Please read this manual before operating your device and keep it for future reference. Distractions can lead to accidents, and the risk of injury or death. Always keep your eyes on the road, and keep aware of your surroundings.
-
Page 3: What's In The Box
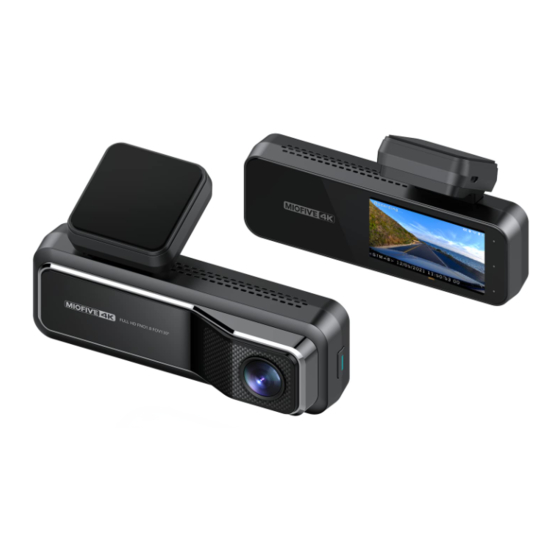
What’s in the box Miofive Dash Cam x 1 Car Charger x 1 Car Charger x 1 Crow Bar x 1 Charging Cable x 1 Charging Cable x 1 Static Sticker x 1 User Manual x 1 User Manual x 1... - Page 4 Camera Lens Power Button Status Indicator LED Speaker Vents Microphone...
- Page 5 Power Port Vents Screen Album/Back Button Setting/Next Button Emergency Video (EMER Video)/Confirm Button...
-
Page 6: Installation
Installation 1. Install the electrostatic sticker Park your car in a safe area, and turn off the car engine. Take out the electrostatic sticker from the packing box and install it in the recommended area on the windshield, as shown in the figure below. - Page 7 3. Camera Calibration You need to find a good position and angle to install the dash cam. Start the car engine (DO NOT install under driving) to power on and start from pressing the Setting Button in the middle on the right side, find System Settings g AI g Camera calibration.
- Page 8 4. Attach the Dash Cam Remove the protective sticker on the Dash Cam bracket and attach the Dash Cam to the center of the electrostatic sticker (the sweet spot in step 3), as shown in the figure below. Press the bracket mount by hand to ensure that the heat resistant adhesive is in close contact with the electrostatic sticker.
-
Page 9: Systems Supported
Miofive Dash Cam App Download Please scan the QR code below or search ‘Miofive’ in App Store or Google Play to download the App. Note: In order to connect to Dash Cam Wi-Fi, please list the APP in your trust application list and make sure the Dash Cam Wi-Fi is on. - Page 10 5. Press “Devices”, and press” Connect to the Dash Cam Wi-Fi”. 6. Choose your Miofive network name (SSID) from the Wi-Fi network list (ex. “Miofive_xxxx”, default password: 1234567890). Input the password to connect. 7. Return to Miofive app once the connection is complete.
-
Page 11: Control Menu
Using Your Miofive Dash Cam LED Indicator Information LED Indicator Dash Cam Status Green LED light blinks Working, loop recording (1 sec) Green LED light blinks Emergency recording (250 ms) Green LED light solid on Stop recording, user operating Red LED light blinks... - Page 12 Features Note: Not all features are listed in this manual. Parking Mode When your car is not running, i.e. the engine is turned off, the Dash Cam will automatically power off in 10 seconds and enter Parking Mode. When a shock or crash is detected, the G-Sensor will activate the Dash Cam and start recording a 16-second and a 60-second video.
-
Page 13: Troubleshooting
Firmware/APP Update APP Update Once there is a new App version released, your mobile system and the App will send an update notification. Follow the prompts to update it. Firmware Update Firmware update can be achieved through OTA (Over The Air) Open APP –... - Page 14 Start up Unable to start 1. Make sure the car charger indicator light is on, if not please reinstall the car charger 2. The built-in battery might be low, please connect the USB cable to a power source 3. Press the power button for 4 secs to shut down.
- Page 15 No sound is 1. Check if the recorded in the “Microphone” is Off in the video Recording settings (The icon on the right upper LCD screen shows mute) 2. Turn the “Microphone” On in the “Recording settings” Video recorded 1. Make sure the lens is blur protector is removed 2.
- Page 16 1. Make sure your phone connects via to dash cam Wi-Fi is turn on (For iOS Wi-Fi user, select Miofive’s Wi-Fi SSID under Wi-Fi settings) 2. Force close and restart the APP 3. Turn OFF the Mobile data. When your...
-
Page 17: Customer Service
“Connect via Wi-Fi” 3. Restore to defaults under “System Settings” Customer Service 18-month Limited Warranty Life-time Support E-mail: support@miofive.com Specifications CPU: Novatek processor Wi-Fi: Wi-Fi 2.4/5GHz G-Sensor: Built-in 3 axis accelerometer, motion locking, adjustable sensitivity Storage: Built-in 64G eMMC high speed flash, loop recording GPS: Built-in GPS Camera: FOV 140˚, F1.8... - Page 18 Precautions Warning: Warning: Do not expose this product to rain, moisture or Do not expose this product to rain, moisture or water under any circumstances, doing so may result in the water under any circumstances, doing so may result in the risk of electric shock or fire.
- Page 19 G Sensor axis. If the Automatic G Sensor protection does NOT trigger during an event, then the EMER Video button should be pressed, in order to protect the file. Protecting the file can also be performed through the Miofive App for applicable Wi-Fi models. GPS: The lines Dataset/s have been simplified in order to reduce the number of track points required for detailed lines.
- Page 20 LAWS AND ORDINANCES. Always mount your Miofive Dash Cam in a location that does not obstruct the driver’s view of the road. Miofive does not assume any responsibility for any fines, penalties, or damages that may be incurred as a result of any state or local law or ordinance relating to the use of your Miofive Dash Cam.
- Page 21 thereof must be adhered to. Such data protection legislation may prohibit the use and dissemination by you of Dash Cam footage or may impose restrictions on it – we recommend that you check the legal requirements with your legal advisor before disseminating any Dash Cam footage.
- Page 22 LAWS AND ORDINANCES. Always mount your Miofive device in a location that does not obstruct the driver’s view of the road. Miofive does not assume any responsibility for any fines, penalties, or damages of your Miofive device. Miofive accepts no responsibility for any damage or injury caused when the...
- Page 23 Please use the car charger and USB cable that comes » with this device to avoid compatibility issues. Miofive is not responsible for any loss caused by the use of non-standard car chargers and USB cables. When not in use, please disconnect the car adaptor from both the 12/24Vdc outlet in your vehicle and the device itself.
- Page 24 Contact local authorities to learn about disposal and recycling options available in your area. The correct disposal of your Miofive dashcam will help prevent potential negative consequences for the environment and human health.
- Page 25 FCC STATEMENT This device complies with Part 15 of the FCC Rules. Operation is subject to the following two conditions: 1. This device may not cause harmful interference, and 2. This device must accept any interference received, including interference that may cause undesired operation. Warning: Changes or modifications not expressly approved by the party responsible for compliance could void...
- Page 28 www.miofive.com...
Need help?
Do you have a question about the B09HT854VJ and is the answer not in the manual?
Questions and answers
why does my miofive switch off after 5 seconds and then repeat