Table of Contents
Advertisement
Quick Links
Advertisement
Table of Contents

Related Manuals for Hitachi 19LE3570U


Summary of Contents for Hitachi 19LE3570U
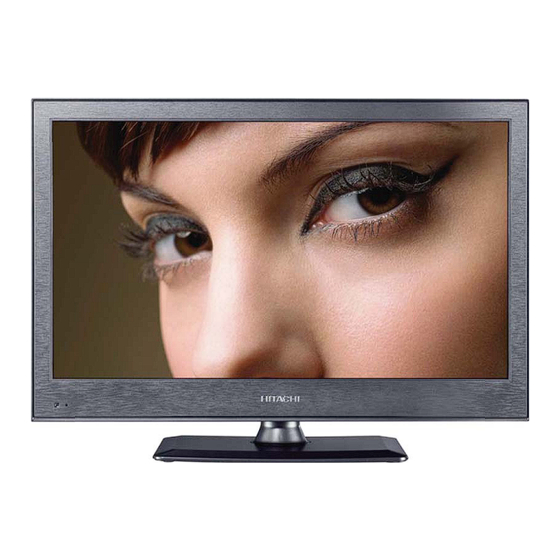
- Page 1 19LE3570U...
-
Page 2: Safety Precautions
SAFETY PRECAUTIONS Before operating the TV, please read this instruction book thoroughly. This instruction manual will guide you in the correct operation of your TV. Keep this instruction manual in a safe place for future reference. Note especially the chapter on SAFETY PRECAUTIONS. When selling or giving away the TV, please also supply this instruction manual. - Page 3 use makeshift stands and • DON'T NEVER according to the instructions. use equipment such as personal stereos or radios so that you are distracted from the • DON'T listen to headphones at high volume, as such use can permanently damage your •...
- Page 4 Cleaning Disconnect the mains supply and use only a lightly dampened soft cloth. Do not use chemical solvents or strong detergents as these may damage the cabinet or screen. Never allow water droplets to remain on the screen as moisture can cause permanent discolouration.
- Page 5 Headphone volume Excessive sound pressure from earphones and headphones can cause hearing loss. Remote control batteries remote. Observe the correct the polarity shown in the following 'Quick start guide' and on the batteries. Remove the batteries when the remote is not to be used for a long time. Batteries left in equipment may cause damage through deterioration and corrosive leakage, invalidating the guarantee.
-
Page 6: Table Of Contents
Contents In the Box ..................2 Quick Start Guide .................3 Detachable stand installation method .........3 Detachable stand uninstallation method......3 Insert the batteries..............4 Connect the set ..............4 Tune the TV................4 Watch digital TV ..............5 Watch analogue TV..............5 Play media ................5 Adjust the sound volume ............5 Turn the power off..............5 Connecting up................6 Examples ................6... -
Page 7: In The Box
Contents - continued Using the Lock Menu............19 Using the Setup Menu ............20 Using the EPG Menu............22 Playing Media................24 Supported File Format............24 Using the Basic Media Controls .........24 Using the Media Menus..............25 Using the Photo Menu ............25 Using the Music Menu ............25 Using the Movie Menu ............25 Using the Text Menu ............25 Problem Solving .................29... -
Page 8: Quick Start Guide
Quick Start Guide Detachable stand installation method Fix the stand to the support column, as below picture indicates. Use the five supplied screws to fasten the stand to the support column, as below picture indicates. Detachable stand uninstallation method Loosen the screws on the stand. Detach the stand from the TV. -
Page 9: Insert The Batteries
Quick Start Guide – continued Insert the batteries • that the polarity is correct, as shown. Connect the set • Connect the aerial plug to the socket on the back of the set. • Connect the mains cable to the mains socket after you have completed all the connections. -
Page 10: Watch Digital Tv
Quick Start Guide – continued Using the Channel Menu Watch digital TV Input Source • Press the button on the remote control. Press the INPUT Media buttons until is highlighted, then press • Press the button on the remote control. Use the Component buttons to select a programme from the electronic programme guide, SCART... -
Page 11: Connecting Up
Connecting up Input Source • Press the button. INPUT Media • Use the buttons to select Component the input that you want to view SCART HDMI1 • Press the button to switch to that HDMI2 RF (TV aerial) input. Audio left Audio right Common Interface Slot Video... -
Page 12: Using The Basic Tv Controls
Using the Basic TV Controls Using the controls on the top of the set Switch the set in and out of standby mode. SOURCE Using Connecting up the TV Setup Menus Display the Setup menus MENU Using the TV Setup Menus menu CH–... -
Page 13: Using The Advanced Tv Controls
Using the Advanced TV Controls To watch Analog TV: • Press the button. INPUT • Use the buttons to select • Press the button to STANDBY MUTE MUTE AUTO AUTO NICAM: Select from a list of audio modes ASPECT Select from the following -/-- aspect ratio settings: ASPECT... -
Page 14: Using Teletext (Analog Tv Only)
Using Teletext (Analog TV only) STANDBY MUTE MUTE AUTO AUTO 0 – 9 number of the page you want to see SUBTITLES -/-- To use Teletext: ASPECT ASPECT NICAM DISPLAY DISPLAY • Press TEXT to select from: Teletext Teletext and TV mixed SUBTITLE Teletext off EXIT... -
Page 15: Using The Digital Tv Controls
Using the Digital TV Controls To watch Digital TV: 0 – 9: Enter the number of the • Press the button. INPUT programme you want to STANDBY • Use the buttons MUTE MUTE AUTO AUTO watch to select • Press the button to Return to the last Digital TV or radio programme... -
Page 16: Using The Tv Setup Menus
Using the TV Setup Menus • Press the button. MENU DISPLAY DISPLAY • Use the buttons to select from: Channel menu buttons: Picture menu Sound menu MENU: EXIT Time menu MENU MENU Lock menu Setup menu INPUT INPUT PMODE PMODE SMODE SMODE SLEEP... -
Page 17: Using The Channel Menu
Using the Channel Menu Auto Tuning ATV Manual Tuning DTV Manual Tuning Programme Edit CHANNEL Signal Information CI Information Software Update(OAD) Move MENU Return Select EXIT Exit Auto Tuning • Press to open the Auto Tuning submenu. ATV + DTV Tune Type •... -
Page 18: Programme Edit
Using the Channel Menu continued Programme Edit Programme Edit 1 S-43 • Press to open the Programme Edit submenu. 2 S-09 3 S-11 • Use the buttons to select a station. 4 S-14 • Press the button to a station directly. Delete •... - Page 19 CAM card user information Note that the CI slot can only be used to insert a CAM card, the Top Up TV program will play via the smart card in the CAM. CAM card installation TV power is switched off. Insert the Top Up TV smart card into the CAM as shown in the illustration at the foot of this page.
-
Page 20: Using The Picture Menu
Using the Picture Menu Picture Mode Standard Contrast Brightness Colour PICTURE Tint Sharpness Colour Temp Normal Noise Reduction Middle Move MENU Return Select EXIT Exit Picture Mode • Press to open the Picture Mode submenu. • Use the buttons to select from (Set this to your Dynamic, Standard Mild... -
Page 21: Auto Adjust
TV Connections Diagram 1 PC Connections Auto Adjust • Press , the Picture will move around the screen until it is centred. • A message informing you that Auto adjusting is taking place will appear. H-Offset • Press , a bar will appear at the bottom of the picture showing the position of the picture in the display area, use the buttons to move the picture horizontally. -
Page 22: Using The Sound Menu
Using the Sound Menu Sound Mode Standard Treble Bass Balance SOUND Auto Volume SPDIF Mode Auto AD Switch Move Return Select Exit MENU EXIT Sound Mode • Press to open the Sound Mode submenu. • Use the buttons to select from Standard Music Movie... -
Page 23: Using The Time Menu
Using the Time Menu Clock 04/Jul 12:00 Time Zone Sleep Timer Auto Standby TIME OSD Timer 10 S Move Return Select Exit MENU EXIT Clock (DTV source only) • This shows the current date and time, which are automatically derived from the Digital TV signal. -
Page 24: Using The Lock Menu
Using the Lock Menu Lock System Set Password Block Program Parental Guidance LOCK Key Lock Move MENU Return Select EXIT Exit • buttons. The default password is 0 0 0 0. You are advised to change this to a 4-digit number known only to yourself. Lock System •... -
Page 25: Using The Setup Menu
Using the Setup Menu OSD Language English Language West English Audio Languages Subtitle Language English SETUP Hearing Impaired Aspect Ratio 16:9 Blue Screen First Time Installation Reset Software Update (USB) Move MENU Return Select EXIT Exit OSD Language • Press •... -
Page 26: First Time Installation
Using the Setup Menu continued First Time Installation • Press Quick Start Guide. Reset • Press the button to reset all the menu settings to their factory setting. • buttons to highlight then press Software Update (USB) • Press the button to update the software by using USB. -
Page 27: Using The Epg Menu
Using the EPG Menu Press the EPG button to display the electronic programme guide. PROGRAMME GUIDE Date, time and description Date and time now 04 Jul 2001 11:00 - 12:00 04 Jul 2001 11:59 Don’t miss today’s great offers at shop! of highlighted programme 04 Jul Selected day... - Page 28 • Reminder mode • Press to store your reminder settings in the schedule. The schedule window will open. Schedule List 09:58 11th Feb Delete Time Date Channel Name Programme Title 19:45 Fri. 11 Feb Doctor Who Confidential 7 BBC THREE 09:25 Sat.
-
Page 29: Playing Media
Playing Media • Before operating Media menu, plug in • Press the button, then use the buttons to select INPUT and press the Media, button directly to enter the main menu. MEDIA USB port • Use the buttons to select the menu including PHOTO, and press the MUSIC, MOVIE... -
Page 30: Using The Media Menus
Using the Media Menus Using the Photo Menu • Use the buttons to select • Use the buttons to select Return PHOTO option to return to the previous menu. then press the button to enter. Select option to enter. Press the but- ton to confirm your selection and access thumbnails view menu. - Page 31 Using the Music Menu • Use the buttons to select • Use the buttons MUSIC then press the button to enter. folder you want to listen in the thumbnails view menu. Press the button to open the folder. • File information will be displayed on screen will be played automatically.
- Page 32 Using the Movie Menu • Press the button to start viewing the • Use the buttons to select MOVIE movie in full screen. then press the button to enter. • Press the button during viewing • Use the buttons DISPLAY the movie.
-
Page 33: Using The Text Menu
Using the Text Menu • Press the button to start viewing the • Use the buttons to select TEXT text in full screen. then press the button to enter. • Press the button during viewing • Use the buttons DISPLAY the text. -
Page 34: Problem Solving
Problem Solving SYMPTOM POSSIBLE CAUSE REMEDY GENERAL No picture, front panel No power Check mains connection (see indicator not lit No picture, front panel Set still in standby Press either the button on the indicator red TV or the red button on the remote PICTURE No TV picture, front panel... - Page 35 ations Frequency Range .......48.25 - 863.25 MHz Aerial Input .........75 ohm coaxial TV System ........PAL BG, DK, I....SECAM BG, DK Video Standard ......PAL/SECAM/NTSC Screen Size ........18.5” (diagonal) LED Active Area......409.8 (H) × 230.4 (V)mm Aspect Ratio .......16:9 Resolution ........1366 x 768 pixels (RGB) Dot Pitch ........0.3mm(H) x 0.3mm(V) Response Time......5 ms Contrast Ratio......1000:1...
-
Page 36: Appendixes
Appendixes Appendix A: PC Input Typical Appendix B: AV and HDMI Signal Display Modes Compatibility (Input Signal Types) The display has a maximum resolution of 1360 x 768. Source Supported Signals Available The following table is an illustration of some of the typical video display modes. -
Page 37: Appendix C: Pin Speci Cations
Appendix C: Pin Speci cations SCART connector pin speci cations Input signal Input signal AUDIO OUT (RIGHT) Not used AUDIO IN (RIGHT) RGB-R GND AUDIO OUT (LEFT/MONO) AUDIO GND RGB-R / S.VHS CHROMINANCE IN RGB-B GND BLANKING SIGNAL AUDIO IN (LEFT/MONO) COMPOSITE VIDEO GND RGB-B IN BLANKING SIGNAL GND... - Page 38 QUICK GUIDE 19LE3570U Please read this quick guide fully before installing or operating because it contains important set up information and keep for future reference. These instructions contain important information which will help you to get the best from television and ensure safe and correct installation and operation.
- Page 40 TFT-LED TV TFT-LED TV...
-
Page 41: Top View
TOP VIEW... - Page 42 When the TV is operated for the first time, installation wizard will Please select an OSD Language guide you through the process. First, language selection screen will be displayed: English Español Italiano Deutsch Français Nederlands Use the o, p, b and a buttons on the remote control to select your language and press OK button to set selected language and continue.
- Page 43 After tuning has taken place, the Target Region Setting menu will be displayed (only when having received many programs on the same frequency, or the program is available in multiple areas). Use the b and a buttons on the remote control to select Country Code then press the OK button.
- Page 44 19LE3570U...
Need help?
Do you have a question about the 19LE3570U and is the answer not in the manual?
Questions and answers