Table of Contents
Advertisement
Quick Links
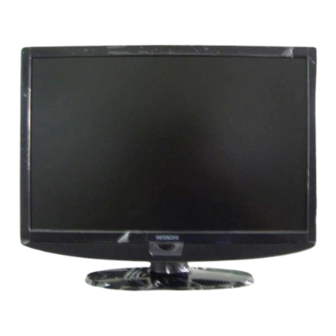
Colour LCD Television
Model Name
19LD4550C
19LD4550U
22LD4550C
22LD4550U
26LD4550C
26LD4550U
32LD4550C
32LD4550U
READ THE INSTRUCTIONS INSIDE CAREFULLY.
KEEP THIS USER'S MANUAL FOR FUTURE REFERENCE
For future reference, record the serial number of your television.
SERIAL NO.
This serial number is located on the rear of the television.
Ver. 1
Get other manuals https://www.bkmanuals.com
USER'S MANUAL
MANUEL UTILISATEUR
BEDIENUNGSANLEITUNG
MANUAL DEL USUARIO
MANUALE D'USO
BRUKSANVISNING
BRUKERHÅNDBOK
BRUGERVEJLEDNING
KÄYTTÖOPAS
ΕΓΧΕΙΡΙΔΙΟ ΧΡΗΣΤΗ
GEBRUIKSAANWIJZING
Advertisement
Table of Contents

Related Manuals for Hitachi 19LD4550C


Summary of Contents for Hitachi 19LD4550C
- Page 1 Colour LCD Television Model Name 19LD4550C USER'S MANUAL 19LD4550U MANUEL UTILISATEUR BEDIENUNGSANLEITUNG 22LD4550C MANUAL DEL USUARIO 22LD4550U MANUALE D'USO BRUKSANVISNING 26LD4550C BRUKERHÅNDBOK 26LD4550U BRUGERVEJLEDNING KÄYTTÖOPAS 32LD4550C ΕΓΧΕΙΡΙΔΙΟ ΧΡΗΣΤΗ 32LD4550U GEBRUIKSAANWIJZING READ THE INSTRUCTIONS INSIDE CAREFULLY. KEEP THIS USER'S MANUAL FOR FUTURE REFERENCE For future reference, record the serial number of your television.
- Page 2 USER'S MANUAL Thank you for purchasing the Hitachi LCD Television.Please read this user’s manual carefully before operating this product. To ensure proper operation, please read and follow ALL the instructions, especially the “IMPORTANT SAFETY INSTRUCTIONS” and “SAFETY PRECAUTIONS”. Please keep this user's manual for future reference.
-
Page 3: Table Of Contents
Contents IMPORTANT SAFETY INSTRUCTIONS ............... 1 INTRODUCTION ....................2 About This Manual ......................2 Trademark Credits ......................2 About Software ........................2 SAFETY PRECAUTIONS ..................3 SOME DOS AND DON'TS ON THE SAFE USE OF EQUIPMENT .........3 Important for United Kingdom ..................4 About the Symbols ......................4 OVERVIEW ...................... - Page 4 WATCHING TV / PROGRAMME CONTROL ............29 Remote Control Key Functions ..................29 Turning On The TV ......................31 Programme Selection ....................31 Volume Adjustment ......................31 Quick Setup ........................32 Menus Selection And Adjustment ..................33 Auto Programme Tuning ....................34 Audio Language Selection (In Digital Mode Only) ............35 Manual Programme Tuning (In Digital Mode) ..............36 Manual Programme Tuning (In Analog Mode) ...............37 Programme Skip ......................38...
- Page 5 OPTION CONTROL ..................... 56 Menu Language Selection .....................56 Time Zone Setup ......................57 Clock Setup ........................58 Auto On/Off Timer Setting ....................59 Sleep Timer Setting .......................60 Diagnostics ........................61 Common Interface(CI) ....................62 PARENTAL CONTROL / RATINGS ..............63 Set Password & Lock System ..................63 Block Programme ......................64 Parental Control (Program Block) ..................65 Key Lock ........................66...
-
Page 6: Important Safety Instructions
IMPORTANT SAFETY INSTRUCTIONS ● Read this instruction thoroughly. ● Retain this instruction for future reference. ● Heed all warnings and cautions to prevent possible danger. ● F ollow all instructions. Improper handling could cause personal injury and/or serious damage to the unit that may shorten its service time. ● Do not block any ventilation openings. ● Install the product in accordance with the manufacture’s instructions. ● B efore calling for the technical support or service technician, read “TROUBLESHOOTING” (70 ~ 71) to determine the symptoms when problems occur during installation or operation of the product. -
Page 7: Introduction
INTRODUCTION Thank you for purchasing the Colour LCD Television. We hope that you will enjoy the great performance of this product. This Colour LCD Television has been designed to meet the international standards. However, it could cause personal injuries and property damage if improperly handled. In order to prevent potential danger and obtain maximum benefit from your set, please observe the following instructions when installing, operating, and cleaning the product.Keep this manual for future reference, and record the serial number of your set in the space provided on the front cover page of this manual. -
Page 8: Safety Precautions
SAFETY PRECAUTIONS SOME DOS AND DON'TS ON THE SAFE USE OF EQUIPMENT This equipment has been designed and manufactured to meet international safety standards but, like any electrical equipment, care must be taken if you are to obtain the best results and safety is to be assured. -
Page 9: Important For United Kingdom
SAFETY PRECAUTIONS For your safety, please read the following precautions carefully before using this product. Improper use would cause serious personal injuries and/or damage to your property or this product. Important for United Kingdom IMPORTANT FOR UNITED KINGDOM WORDING FOR CLASS I EQUIPMENT INSTRUCTION BOOKS AND LABELS The mains lead on this equipment is supplied with a molded plug incorporating a fuse, the value of Should the fuse need to be replaced, an ASTA or BSI approved BS 1362 fuse must be used of the same rating. - Page 10 SAFETY PRECAUTIONS (continued) CAUTION There is a risk of fire, electric shock, or serious injury. ■ Do not insert liquids or any foreign objects (such as metals or flammable items) inside the unit. ● In case it happens, turn off the main power, unplug the Power Cord, and contact your dealer immediately. ● Use special caution when younger children are around the unit. ■ Do not remove cover, or modify the product. ● H igh-voltage components are installed inside of the unit. Removing covers can expose you to high voltage, electrical shock, and other dangerous conditions.
- Page 11 SAFETY PRECAUTIONS (continued) CAUTION ■ Do not place your fingers into the gap at the opened front door of the unit. ● If your fingers are caught in the front door, you may be injured. ● Do not allow children to touch the front door or play near it. ■ Do not place the unit at a dusty place. It could cause malfunction. ■ Do not cover or block any ventilation holes on the product. The unit would overheat, and it could cause fire or damage the product which may shorten its service life.
- Page 12 SAFETY PRECAUTIONS (continued) CAUTION ■ Adjust the headphone volume properly. ● Excessive sound pressure from headphones might cause hearing loss. PRECAUTIONS ■ Do not install areas where it will be subjected to high temperatures. It could damage the cabinet or parts of the product. ● Do not install near any heat sources such as radiators, heat registers, stoves, or other apparatus that produce heat. ● Keep the unit out of direct sunlight. It could increase the temperature of the unit and cause malfunction. ■ Viewing Advice ● T he lighting of the environment in which the product is used should be appropriate. Too bright or dark environments are not good for your eyes.
-
Page 13: Overview
OVERVIEW • Large-screen and high-definition LCD panel. • Improved Digital signal processor. • Good quality sound. • Various functions as Digital Terrestrial Television (More TV channels, EPG, etc). • 3 Scart terminals installed. • Accept more digital input devices with 2 HDMI terminals located on front and rear. • Great diversity of connecting terminals to cover wide range of audio-visual equipments. • Photo Input function with Slide Show. •... -
Page 14: Preparation
PREPARATION Front Panel Controls ■ Image shown may differ from your TV. ■ If your TV has a protection film attached, remove the film and then wipe the TV with a soft cloth. 1 Volume Use these two buttons to adjust volume up/down. In OSD menu, use these two buttons to switch the selection left and right. 2 Program Use these two buttons to select channels In OSD menu, use these two buttons to switch the selection up and down. -
Page 15: Back Panel Information
Back Panel Information OPTICAL AV 1 AV 2 AUDIO IN DIGITAL (RGB/DVI) AUDIO OUT AV IN 3 RGB IN (PC) HDMI IN 1 (DVI) RS-232C IN (SERVICE ONLY) COMPONENT I N 1 Power Cord Socket 7 RS-232C IN (SERVICE ONLY) PORT 8 Component Input This TV operates on an AC power. -
Page 16: Stand Installation
Stand Installation When assembling the desk type stand, check whether the bolt is fully tightened. (If not tightened fully, the product can tilt forward after the product installation.) If you tighten the bolt with excessive force, the bolt can deviate from abrasion of the tightening part of the bolt. -
Page 17: Detaching Stand (Only 26/32)
Detaching Stand (Only 26/32) ■ Image shown may differ from your TV. (Only 26/32) Carefully place the TV screen side down on a cushioned surface to protect the screen from scratches and damages. Loosen the bolts from the bottom of the Base. (3 bolts for 26” TV and 4 bolts for 32”... -
Page 18: Wall Mounting
Wall Mounting Before assembling the wall mounting, make sure the bolts are fully tightened on the wall mount bracket. If not, the TV may tilt after the installation (Only 26/32) Remove the bolts from the back of the Stand. (3 bolts for 26” TV and 4 bolts for 32”... -
Page 19: External Equipment Setup
EXTERNAL EQUIPMENT SETUP ■ To avoid damaging any equipment, never plug in any power cords until you have finished connecting all equipment. HD Receiver Setup Connecting with a component cable COMPONENT I N Connect the video outputs (Y, P ) of the digital set-top box to the COMPONENT IN VIDEO jacks on the TV. Connect the audio output of the digital set-top box to the COMPONENT IN AUDIO jacks on the TV. - Page 20 Connecting a set-top box with an HDMI Connect the HDMI output of the digital set-top HDMI IN 1 box to the HDMI IN1(DVI) or HDMI IN 2 jack (DVI) on the TV. Turn on the digital set-top box. (Refer to the user manual for the digital set-top box.) ...
-
Page 21: Digital Audio Out Setup
Digital Audio Out Setup - S ending the TV’s audio signal to external audio equipment via the Digital Audio Output (Optical) port. Connect one end of an optical cable to OPTICAL AV 1 AV 2 AUDIO IN DIGITAL the TV Digital Audio (Optical) Output (RGB/DVI) AUDIO OUT port. RGB IN (PC) ... -
Page 22: Dvd Setup
DVD Setup When connecting with a component cable Connect the video outputs (Y, Pb, Pr) of the DVD to the COMPONENT IN VIDEO jacks on the TV. Connecting with a component cable. Connect the audio outputs of the DVD to the COMPONENT IN AUDIO jacks on the COMPONENT I N ... - Page 23 Connecting with a Euro Scart cable Connect the Euro scart socket of the DVD to AV 1 AV 2 the AV1 Euro scart socket on the TV. Turn on the DVD player, insert a DVD. Select AV1 input source using the INPUT ...
- Page 24 Connecting the HDMI cable Connect the HDMI output of the DVD to the HDMI IN 1(DVI) or HDMI IN 2 jack on the HDMI IN 1 (DVI) Select HDMI1 or HDMI2 input source using the INPUT button on the remote control. ...
-
Page 25: Vcr Or Dvd Setup
VCR or DVD Setup ■ To avoid picture noise (interference), allow adequate distance between the VCR and TV. ■ I f 4:3 picture format is used for an extended period, the fixed images on the sides of the screen may remain visible. Connecting with a RF cable Wall Jack Antenna Connect the ANT OUT socket of the VCR to the ANT IN socket on the TV. -
Page 26: Connecting With A Euro Scart Cable
Connecting with a Euro Scart cable AV 1 AV 2 Connect the Euro scart socket of the VCR to the AV1 Euro scart socket on the TV. Insert a video tape into the VCR and press PLAY on the VCR. (Refer to the VCR owner’s manual.) ... -
Page 27: Other A/V Source Setup
Other A/V Source Setup Camcorder Connect the AUDIO/VIDEO jacks Video between TV and external equipment. Game Set Match the jack colours. (Video = yellow, Audio Left = white, and Audio Right = red) Select AV3 (CVBS) input source using the INPUT button on the remote control. Operate the corresponding external equipment. Refer to external equipment AV IN 3 operating guide. -
Page 28: Pc Setup
PC Setup This TV provides Plug and Play capability, meaning that the PC adjusts automatically to the TV's settings. Connecting with a D-sub 15 pin cable Connect the RGB output of the PC to AUDIO IN (RGB/DVI) the RGB IN (PC) jack on the TV. RGB IN (PC) ... -
Page 29: Connecting With A Hdmi To Dvi Cable
Connecting with a HDMI to DVI cable AUDIO IN Connect the DVI output of the PC to the (RGB/DVI) HDMI IN 1(DVI) jack on the TV. HDMI IN 1 (DVI) Connect the PC audio output to the AUDIO IN (RGB/DVI) jack on the TV. ... - Page 30 Supported Display Resolution RGB[PC], HDMI[PC] mode HDMI[DTV] mode Horizontal Vertical Horizontal Vertical Resolution Resolution Frequency(kHz) Frequency(Hz) Frequency(kHz) Frequency(Hz) 720x480 31.469 / 31.5 59.94 / 60 720x400 31.468 70.08 720x480 15.734 / 15.6 31.469 59.94 640x480 720x576 31.25 37.684 75.00 720x576 15.625 37.879 60.31 800x600 37.500 46.875...
- Page 31 Auto Configure (RGB [PC] mode only) Automatically adjusts picture position and minimizes image instability. After adjustment, if the image is still not correct, your TV is functioning properly but needs further adjustment. Auto configure This function is for automatic adjustment of the screen position, size, and phase. The displayed image will be unstable for a few seconds while the auto configuration is in progress.
- Page 32 Adjustment for screen Position, Size, Phase If the picture is not clear after auto configure and especially if characters are still trembling, adjust the picture phase manually. This function works in the following mode : RGB [PC]. OPTION Screen Move RETURN Move RETURN Menu Language Auto Config Input List H.Position Screen V.Position Factory Reset Phase Size Resolution MENU Select OPTION. Select Screen. Select H. Position, V. Position, Phase, Size or Resolution Make Appropriate Adjustments.
- Page 33 Selecting Resolution To view a normal picture, match the resolution of RGB mode and selection of PC mode. This function works in the following mode : RGB 「 PC 」 mode. Screen Resolution Move RETURN Move RETURN Auto Config 1024 X 768 H.Position 1280 X 768 V.Position 1360 X 768 Phase Size Resolution MENU Select OPTION. Select Screen. Select Resolution Select desired resolution. • Press the MENU or EXIT button to return to normal TV viewing.
-
Page 34: Watching Tv / Programme Control
WATCHING TV / PROGRAMME CONTROL Remote Control Key Functions When using the remote control, aim it at the remote control sensor on the TV POWER Switches the TV on from standby or off to standby. External input mode rotate in regular sequence. INPUT POWER or Display the Input List. INFO Show the channel information. - Page 35 TELETEXT These buttons are used for teletext. POWER BUTTONS For further details, see the ‘Teletext’ section. INPUT SLEEP Coloured These buttons are used for teletext (on TELETEXT models only). buttons TEXT Show the TELETEXT screen.. GUIDE Recalls your preferred Teletext subtitle page or SUBTITLE display the channel subtitle.
-
Page 36: Turning On The Tv
Turning On The TV - When your TV is turned on, you will be able to use its features. Firstly, connect the power cord correctly. At this stage, the TV switches to standby mode. In standby mode to turn TV on, press the / I, INPUT, P + - or + - button on the TV or press the POWER, INPUT, P + - or + - button on the remote control and the TV will switch on. -
Page 37: Quick Setup
Quick Setup There are few options you need to set up in order to let your TV work properly. The first time you turn on your TV, the WELCOME screen is displayed. Please follow the instructions below to complete the setup. Language Mode Country Please select your Language: English Selecting the environment. Home Select the Country Austria Español... -
Page 38: Menus Selection And Adjustment
Menus Selection And Adjustment Your TV's OSD (On Screen Display) may differ slightly from what is shown in this manual. SETUP PICTURE Move EXIT Move EXIT Country Aspect Ratio 16:9 1st Audio Language Picture Mode User 2nd Audio Language Brightness Auto Tuning Contrast Manual Tuning... -
Page 39: Auto Programme Tuning
Auto Programme Tuning Use this function to find and store all available programmes automatically in both analog and digital mode. When you start channel scan in digital mode, all previously stored service information will be deleted SETUP SETUP Move EXIT Move RETURN Country Country 1st Audio Language 1st Audio Language 2nd Audio Language 2nd Audio Language Auto Tuning Auto Tuning... -
Page 40: Audio Language Selection (In Digital Mode Only)
Audio Language Selection (In Digital Mode Only) The Audio function allows selection of a preferred language. If audio data in a selected language is not broadcast, the default language audio will be played. When the languages you selected as the primary for Audio Language are not supported, you can select language in secondary category. -
Page 41: Manual Programme Tuning (In Digital Mode)
Manual Programme Tuning (In Digital Mode) Manual Tuning lets you manually add a programme to your programme list. SETUP Move RETURN Move RETURN Country Transmitter: Crystal Palace 1st Audio Language Service Number: 2nd Audio Language Service Name: BBC NEWS 24 Auto Tuning VHF/UHF Channel Manual Tuning... -
Page 42: Manual Programme Tuning (In Analog Mode)
Manual Programme Tuning (In Analog Mode) anual Tuning lets you manually tune and arrange the stations in whatever order you desire SETUP Move RETURN Move RETURN Programme Number: Country Programme Name: 1st Audio Language Frequency 45.00 2nd Audio Language Colour System Auto Auto Tuning Sound System... -
Page 43: Programme Skip
Programme Skip When a programme number is skipped, it means that you will be unable to select it using (P + / -) button during TV viewing. This function enables you to skip the stored programmes. SETUP Programme Skip Move RETURN Move RETURN... -
Page 44: Assigning Programme Fine Tune(In Analog Mode)
Assigning Programme Fine Tune(In Analog Mode) Normally fine tuning is only necessary if reception is poor SETUP Programme Fine Tune Move RETURN Move RETURN Country BBC1 175.3 MHz 1st Audio Language 55.8 MHz 2nd Audio Language 209.25 MHz Auto Tuning 223.25 MHz Manual Tuning 572.3 MHz Programme Skip 590.3 MHz Programme Swap 623.25 MHz Programme Fine Tune... -
Page 45: Selecting The Channel List
Selecting The Channel List You can check which programmes are stored in the memory by displaying the programme table. ■ Displaying Channel List • S ome programmes with the channel number shown in the Channel List indicate CH LIST Channel List Display the there is no station name assigned. -
Page 46: Input List
Input List Selects a label for each input source. Input List OPTION Move RETURN Move RETURN Antenna Menu Language Input List Time AV3(CVBS) Subtitle AV3(S-Video) Teletext Language Component Diagnostics RGB-PC Common Interface HDMI 1 Factory Reset HDMI 2 INPUT MENU For the quick input list. -
Page 47: Picture Control
PICTURE CONTROL Picture Size (Aspect Ratio) Control You can watch the screen in various picture formats; 16:9, Original, 4:3, 14:9, ZOOM 1, ZOOM 2 and Just Scan (only 720p, 1080i, 1080p). If a fixed image is displayed on the screen for a long time, that fixed image may become imprinted on the screen and remain visible. PICTURE PICTURE Move RETURN Move RETURN Aspect Ratio 16:9 Aspect Ratio Zoom 1 Picture Mode User Picture Mode... - Page 48 • O riginal • 1 4:9 When your TV receives a wide You can view a picture format of screen signal it will automatically 14:9 or a general TV programme change to the picture format in the 14:9 mode. The 14:9 screen broadcast.
-
Page 49: Preset Picture Settings
Preset Picture Settings Picture Mode-Preset You can adjust the best picture appearance from preset value in picture mode.. • Picture mode adjusts the PICTURE TV for the best picture Move RETURN appearance. Select the Aspect Ratio Zoom 1 Picture Mode Sport preset value in the picture Brightness Contrast mode menu based on the... -
Page 50: Colour Temperature (Normal/Warm/Cool)
Colour Temperature (Normal/Warm/Cool) Choose one of three automatic colour adjustments. PICTURE PICTURE Move RETURN Move RETURN Aspect Ratio Zoom 1 Aspect Ratio Zoom 1 Picture Mode User Picture Mode User Brightness Brightness Contrast Contrast Colour Colour Sharpness Sharpness Colour Temperature Cool Colour Temperature Warm... -
Page 51: Manual Picture Adjustment
Manual Picture Adjustment Picture Mode-User option You can adjust the best picture appearance from preset value in picture mode or adjust by yourself. PICTURE PICTURE Move RETURN Move RETURN Aspect Ratio Zoom 1 Aspect Ratio Zoom 1 Picture Mode User Picture Mode User Brightness... -
Page 52: Picture Improvement Technology
Picture Improvement Technology Flesh Tone Flesh tone will be more natural. Adaptive Luma Control Automatically adjust the brightness and contrast after analyzing the input signal. Noise Reduction Removes interference up to the point where it does not damage the original picture. -
Page 53: Picture Mode
Picture Mode You can select the optimal images and picture when connecting AV devices to external input. User Dynamic Nature Game Sport Cinema Select and set the picture Mode. • I f you select "Cinema" in AV mode, Cinema mode will be selected both for Picture Mode and Sound Mode in PICTURE menu and AUDIO menu respectively. -
Page 54: Sound Control
SOUND CONTROL Sound Setting Adjustment -User Mode Adjusting the audio equalizer. AUDIO AUDIO Move RETURN Move RETURN Sound Mode User Sound Mode User Equalizer 120Hz Equalizer 120Hz Equalizer 500Hz Equalizer 500Hz Equalizer 1.5KHz Equalizer 1.5KHz Equalizer 5KHz Equalizer 5KHz Equalizer 10KHz Equalizer 10KHz Balance Balance Virtual Surround... -
Page 55: Preset Sound Settings-Sound Mode
Preset Sound Settings-Sound Mode You can select your preferred sound setting; Clear Voice, Standard, Music, Cinema, Sport, Game or user. You can also adjust the frequency of the equalizer. Sound Mode lets you enjoy the best sound without any special adjustment as the TV sets the appropriate sound options based on the programme content. AUDIO AUDIO Move RETURN... -
Page 56: Balance
Balance You can adjust the sound balance of the speakers to preferred levels. AUDIO Move RETURN Sound Mode User Equalizer 120Hz Equalizer 500Hz Equalizer 1.5KHz Equalizer 5KHz Equalizer 10KHz Balance Virtual Surround Auto Volume Digital Audio Out MENU Select AUDIO. Select Balance. -
Page 57: Auto Volume Level
Auto Volume Level AVL automatically remains on the same level of volume if you change programmes. AUDIO Move RETURN Sound Mode User Equalizer 120Hz Equalizer 500Hz Equalizer 1.5KHz Equalizer 5KHz Equalizer 10KHz Balance Virtual Surround Auto Volume Digital Audio Out MENU Select AUDIO. -
Page 58: Selecting Digital Audio Out
Selecting Digital Audio Out This function allows you to select your preferred Digital Audio Output. The TV can only output DOLBY Digital if a channel is broadcast with Dolby Digital audio. When Dolby digital is available, selecting Dolby Digital in the Digital Audio Out menu will set SPDIF output to Dolby Digital. -
Page 59: Tv Speakers On/ Off Setup
TV Speakers On/ Off Setup You can adjust the internal speaker status. If you wish to use an external Hi-Fi system, turn off the TV internal speakers. AUDIO Move RETURN TV Speaker Type Audio Description Audio Description Volume Level MENU Select AUDIO. -
Page 60: Audio Description On/Off Setup
Audio Description on/off Setup You can switch the Audio Description on or off. AUDIO AUDIO Audio Description Volum Move RETURN Move RETURN Move RETURN TV Speaker TV Speaker TV Speaker Type Audio Description Type Audio Description Audio Description Volume Level Audio Description Volume Level MENU Select AUDIO. -
Page 61: Option Control
OPTION CONTROL Menu Language Selection Use this function to select your desired language for displaying OSD(On Screen Display) and indications. Menu Language OPTION Move RETURN Move RETURN български Menu Language Česky Input List Dansk Time Deutsch Subtitle Ελληνικά Teletext Language English Diagnostics Español... -
Page 62: Time Zone Setup
TIME SETTING Time Zone Setup When you select a Time Zone city, the TV time is set by the time offset information based on Time Zone and GMT (Greenwich Mean Time) which is received with the broadcast signal and the time is set automatically by a digital signal. Time Time Zone Move RETURN Move... -
Page 63: Clock Setup
Clock Setup The clock is set automatically when receiving a digital signal. (You can set the clock manually only if the TV has no DTV signal.) You must set the time correctly before using on/off timer function. Time Clock Move RETURN Move RETURN... -
Page 64: Auto On/Off Timer Setting
Auto On/Off Timer Setting The Off timer function automatically switches the TV to standby at a preset time. Two hours after the TV is switched on by the on time function it will automatically switch back to standby mode unless a button has been pressed. The Off timer function overrides the On timer function if both are set to the same time. -
Page 65: Sleep Timer Setting
Sleep Timer Setting You do not have to remember to switch the TV off before you go to sleep. The sleep timer automatically switches the TV to standby after the preset time has elapsed. Time Time Move RETURN Move RETURN Time Zone Time Zone Clock... -
Page 66: Diagnostics
Diagnostics This function enables you to view information about Model name, software Version and Serial Number. Diagnostics OPTION RETURN Move RETURN Manufacturer: HITACHI, Ltd. Menu Language Model/Type: H000001 Input List App Verison: XXXXXX_XXX_X Time Software Version: XXXX_XXXXXX_X_XXX_XX Subtitle Teletext Language... -
Page 67: Common Interface(Ci)
Common Interface(CI) This function enables you to watch some encrypted services (pay services). If you remove the CI Module, you cannot watch pay services. When the module is inserted into the CI slot, you can access the module menu. To purchase a module and smart card, contact your dealer. Do not repeatedly insert or remove a CAM module from the TV. -
Page 68: Parental Control / Ratings
PARENTAL CONTROL / RATINGS Set Password & Lock System Enter the password, press ‘0’, ‘0’, ‘0’, ‘0’ on the remote control handset. LOCK LOCK RETURN Move EXIT Password Password MENU Select LOCK. Input a 4-digit password Select Set Password. Input a 4-digit password.Be sure to remember this number!Re-enter new password for confirm. -
Page 69: Block Programme
Block Programme Blocks any programmes that you do not want to watch or that you do not want your children to watch. It is available to use this function in Lock System “On”. LOCK Block Programme Move RETURN Move RETURN Block Programme Analog Parental Guidence... -
Page 70: Parental Control (Program Block)
Parental Control (Program Block) This function operates according to information from the broadcasting station. Therefore if the signal has no this information, this function does not operate. A password is required to gain access to this menu. This TV is programmed to remember which option it was last set to even if you switch the TV off. -
Page 71: Key Lock
Key Lock The key on the front panel can be locked by this function. LOCK Move RETURN Block Programme Parental Guidence Set Password Key Lock MENU Select LOCK. Input a 4-digit password Select Key Lock. Select Yes or No. • Press the MENU or EXIT button to return to normal TV viewing. • P ress the RETURN button to move to the previous menu screen. -
Page 72: Teletext
TELETEXT This feature is not available in all countries. Teletext is a free service broadcast by most TV stations which gives up-to-the-minute information on news, weather, television programmes, share prices and many other topics. The teletext decoder of this TV can support the SIMPLE, TOP system. SIMPLE (standard teletext) consists of a number of pages which are selected by directly entering the corresponding page number. TOP is more modern method allowing quick and easy selection of teletext information. -
Page 73: Special Teletext Functions
Special Teletext Functions ■ REVEAL Select this menu to display concealed information, such as solutions to riddles or puzzles. ■ HOLD Stops the automatic page change which will occur if a teletext page consists of 2 or more sub pages. The number of sub pages and the sub page displayed is, usually, shown on the screen below the time. -
Page 74: Appendix
APPENDIX Initializing (Reset to original factory settings) Reset all the system settings to factory default values Factory Reset OPTION RETURN Move EXIT Password Menu Language Input List Time Subtitle Teletext Language Diagnostics Common Interface Factory Reset MENU Select OPTION. Select Factory Reset. Input Password. -
Page 75: Troubleshooting
Troubleshooting The TV does not operate properly. ■ Check to see if there is any object between the TV and the remote control causing an obstruction. Ensure you are pointing the remote control directly at the TV. ■ The remote control E nsure that the batteries are installed with correct polarity (+ to +, - to -). - Page 76 The audio function does not work. ■ Press the button. ■ Picture OK & No Sound muted? Press MUTE button. sound ■ Try another channel. The problem may be with the broadcast. ■ Are the audio cables installed properly? ■ No output from one Adjust Balance in menu option.
-
Page 77: Warranty
Plasma Television. Also, record where and when you purchased this TV. This information will help any future queries you may have and should be used in all correspondence with Hitachi service centres. SERIAL NUMBER... - Page 78 Hitachi Ltd. Consumer Business Group Shin-Otemachi Bldg 5f, 2-1, Otemachi 2-Chome, Chiyoda-Ku, Tokyo 100-0004 Japan HITACHI EUROPE LTD. HITACHI EUROPE S.A. Consumer Affairs Department GREECE UNITED KINGDOM Te l : 210 6837200 Tel: 0870 405 4405 Fax: 210 6835694 Email: consumer.mail@hitachi-eu.com Email: DMGService.GR@hitachi-eu.com...
Need help?
Do you have a question about the 19LD4550C and is the answer not in the manual?
Questions and answers