Table of Contents
Advertisement
Quick Links
MODEL #TJ02-24V2016WH
USE AND CARE GUIDE
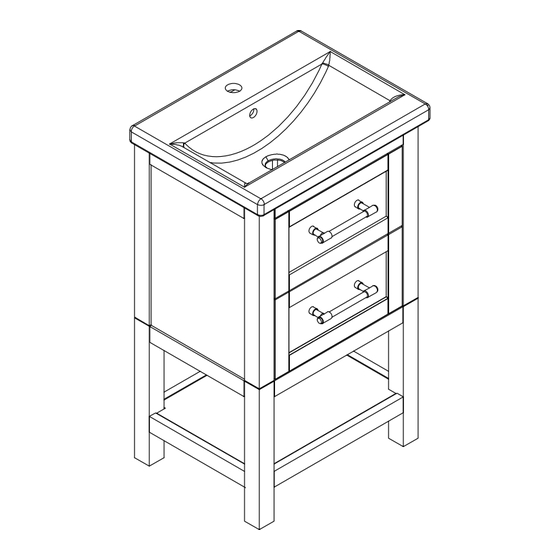
20" VANITY IN WHITE FINISH WITH CERAMIC
TOP
Questions, problems, missing parts?
Before returning, contact us on:
info@tjamerican.com
TJAMERICAN.COM
THANK YOU
We appreciate the trust and confidence you have placed in TJAmerican LLC through the purchase
of this Vanity.
Visit us online to see our full line of products available for your home improvement needs.
1
Advertisement
Table of Contents

Related Manuals for TJAmerican TJ02-24V2016WH


Summary of Contents for TJAmerican TJ02-24V2016WH
- Page 1 Before returning, contact us on: info@tjamerican.com TJAMERICAN.COM THANK YOU We appreciate the trust and confidence you have placed in TJAmerican LLC through the purchase of this Vanity. Visit us online to see our full line of products available for your home improvement needs.
-
Page 2: Table Of Contents
TABLE OF CONTENTS Safety Information......................2 Care and Maintenance........................3 Specification............................4 Replacement Parts List........................5 Package Contents..........................6 Pre-assembly ..........................6 Assembly............................7 Warranty..........................12 SAFETY INFORMATION DANGER: Please read and understand this entire manual before attempting to assemble, operate, or install the product. Keep small parts away from children during assembly. Failure to follow warning and cautions could result in serious injury. -
Page 3: Care And Maintenance
Follow up by cleaning the stone with a mild non-abrasive soap and water. Be sure to check all packing materials carefully for small parts that may have come loose inside the carton during shipment. If parts are missing, contact TJAmerican LLC to obtain any missing parts. -
Page 4: Specification
SPECIFICATION 10,1" 10,1" " thread 5" 6,3" 1,3" 17,7" 1,3" 0,6" 0,6" 5" 20,3" HANDLE TOP VIEW 20,3" 15,3" 15,7" 12,6" 3,1" 14,8" 5" 0,7" 11,9" 15,6"open 19,1" 15" FRONT VIEW SIDE VIEW 5,6" 5,6" 8" 3,1" 3,1" 14,1" (open) BACK VIEW... -
Page 5: Replacement Parts List
REPLACEMENT PARTS LIST For replacement parts, please contact customer service at info@tjamerican.com. PART DESCRIPTION QUANTITY PART CODE Shelf 0224V2016WH-SH 0224V2016WH-LG Flip Box 0224V2016WH-FB Drawer Front 0224V2016WH-DF Bottom Drawer Box 0224V2016WH-BDB Handle With Bolt HD-02600360 European Hinge EH-09011300 Undermount Glide UG-12002300... -
Page 6: Package Contents
PACKAGE CONTENTS PART DESCRIPTION QUANTITY PART CODE Vanity With Top 0224V2016WH-VN Shelf 0224V2016WH-SH 0224V2016WH-LG Touch Up Pen TP-00100000 Screw SC-95060301 Bolt BO-10450010 Spring Washer SW-10400010 Flat Washer FW-10419011 Allen Key AK-00400010 PRE-ASSEMBLY PLANNING ASSEMBLY Estimated Installation Time: 25-35 minutes. Number of people required: Two adults and several steps are more easily handled with two adults. -
Page 7: Assembly
ASSEMBLY 1. Placing the vanity top on protect sheet. 2. Assembling the first 2 legs. Assembly two legs (C) at each corner of the vanity top (A) and secure in place using bolts (HH) with spring washers (II) and flat washers (JJ). - Page 8 ASSEMBLY 3. Assembling the shelf. Assembly the shelf (B) using bolts (HH) with spring washers (II) and flat washers (JJ). 4. Assembling the last 2 legs. Assembly the last two legs (C) and secure in place using bolts (HH) with spring washers (II) and flat washers (JJ).
- Page 9 ASSEMBLY 5. Removing the bottom drawer. Fully extend drawers, and locate plastic levers on the metal glide tracks at left and right sides of the drawer box. Push on plastic levers on both sides at the same time to disengage the drawer box from the glides.
- Page 10 ASSEMBLY 6. Installing vanity to the wall. Note: Clean area where the vanity will be permanently located prior to beginning installation, ensuring the vanity will not interfere with any water supply and drain lines once mounted. With two people, carefully place the vanity against the wall in its final location. Place a level on the unit in both directions, across the front and on both sides to properly adjust the levelers on the unit.
- Page 11 ASSEMBLY 7. Re-installing the bottom drawer. Fully extend the metal glide tracks. Gently lower and slide the drawer box into the rear glide catch. Lower the drawer box down to completely rest on extended glides and push plastic levers to lock the drawer box in place.
-
Page 12: Warranty
TJAmerican LLC products are manufactured to superior quality standards and workmanship, and are backed by our limited lifetime warranty. TJAmerican LLC products are warranted to the original consumer purchaser to be free of defects in materials or workmanship. We will replace FREE OF CHARGE any product or part that proves defective.
Need help?
Do you have a question about the TJ02-24V2016WH and is the answer not in the manual?
Questions and answers